
How to Repair a Torn Car Cover: A Practical DIY Guide

Quick Answer
You can repair most small or medium car cover tears by cleaning and drying the damaged area, trimming loose fibers, reinforcing the back, and applying a compatible fabric patch, repair tape, or flexible adhesive. Repairing the tear early prevents wind from making it larger, but badly weakened or brittle covers are usually better replaced; current car-cover testing and buying guidance can help when replacement makes more sense.
Quick repair steps
- Remove the cover: Never patch it while it is stretched tightly over your vehicle.
- Clean the area: Remove dirt, wax, moisture, and loose fabric around the tear.
- Align the edges: Bring the torn material back into its natural position without stretching it.
- Reinforce underneath: Place a rounded patch behind the damaged area when the cover design allows it.
- Seal the outside: Apply compatible repair tape, patch material, or flexible fabric adhesive.
- Let it cure: Keep the repaired area flat and dry for the time specified by the repair-product manufacturer.
Before putting it back on
- Find the cause: Check for wind movement, sharp mirrors, antennas, rough seams, branches, or an overly tight fit so the same spot does not tear again.
A torn car cover does not always mean you need a new one. Small rips can often be repaired at home with basic materials and a little patience.
I treat the tear and its cause as two separate jobs. Fixing the fabric without finding what damaged it usually means repairing the same area again later.
In This Guide
Can a Torn Car Cover Be Repaired?
Yes. A car cover can usually be repaired when the tear is localized and the surrounding material remains flexible and strong.
The important question is not simply how long the rip is. You also need to inspect the condition of the fabric around it.
Definition: A torn car cover is a protective vehicle cover with a split, puncture, open seam, or damaged fabric section that can expose the vehicle or allow the damage to spread.
Small clean tears are the easiest to repair
A straight tear through otherwise healthy material is usually a good DIY candidate. A puncture from a branch or sharp object can also be manageable.
The repair becomes harder when the material stretches, frays heavily, or separates into layers.
- Under 1 inch: Repair tape or a small fabric patch is often enough.
- About 1 to 3 inches: A reinforced patch on the underside usually gives a stronger repair.
- Over 3 inches: A larger patch may work, but inspect the surrounding cover carefully before investing much effort.
- Failed seam: Repairing or restitching the seam can work if the fabric beside it remains healthy.
- Multiple tears: Several new rips often indicate that the material itself is deteriorating.
Check whether the fabric is still healthy
Gently flex the material a few inches away from the tear. It should bend normally without cracking, powdering, or opening another split.
Sun and weather exposure can weaken synthetic fabric before the damage becomes obvious. As of 2026, outdoor covers still vary widely in material construction, UV resistance, fit, and fastening systems.
That is why I check an older cover beyond the visible hole. A perfect patch cannot save material that is already failing across the entire roof or hood area.
Section Takeaway: Repair a localized tear when the surrounding material remains strong. Widespread brittleness, peeling, or repeated tearing usually points toward replacement.
What Do You Need to Repair a Torn Car Cover?
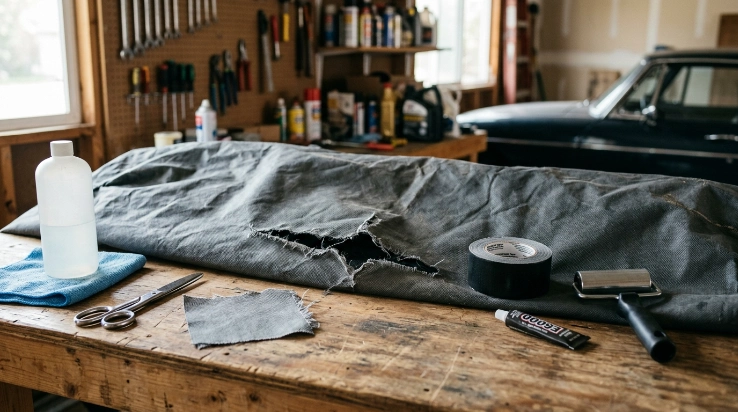
You usually need cleaning supplies, scissors, a compatible patch material, and either repair tape or flexible fabric adhesive. Choose products based on the material of your cover.
Do not assume ordinary household tape will provide a durable outdoor repair. Heat, rain, folding, and wind movement quickly expose weak adhesives.
Basic repair supplies
- Mild cleaner: Use something appropriate for the cover material and follow its care instructions.
- Clean cloth: Remove grime and dry the repair area completely.
- Sharp scissors: Trim loose threads without enlarging the tear.
- Patch material: Use compatible polyester, nylon, vinyl, or manufacturer-supplied material.
- Repair tape: Choose flexible fabric or outdoor repair tape made for the material involved.
- Flexible adhesive: Use only when its label lists compatibility with your cover’s material.
- Small roller or smooth object: This helps press a self-adhesive patch evenly.
Match the repair to the cover material
Car covers are not all constructed the same way. Some use woven polyester, while others combine several synthetic layers or include a soft inner lining.
Check the care label, packaging, or manufacturer’s instructions before applying adhesive. Some solvents and glues can stiffen, discolor, or weaken synthetic material.
If the cover is waterproof or water-resistant, remember that your repair must protect the opening without creating a large rigid spot. A stiff patch can become another stress point when you fold or stretch the cover.
For broader vehicle-care practices, Kelley Blue Book’s car maintenance resources are useful alongside accessory-specific care instructions.
How Do You Repair a Torn Car Cover Step by Step?
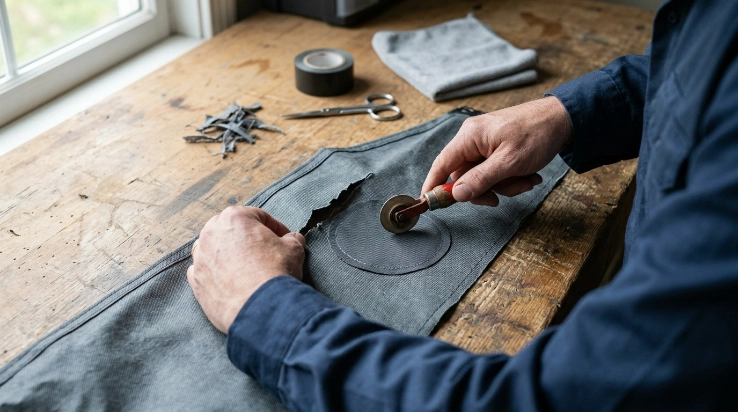
Repair the cover on a clean, flat surface. Do not stretch it across the vehicle while patching because tension can distort the tear.
The process below works for many fabric-style covers, but the patch or adhesive manufacturer’s instructions should take priority.
1. Remove and inspect the cover
Take the cover completely off the vehicle. Lay the damaged section flat with enough room to inspect both sides.
Look beyond the tear for thinning fabric, broken stitching, stretched areas, or another puncture.
2. Clean and dry the damaged area
Dirt prevents tape and adhesive from bonding properly. Clean several inches around the tear rather than cleaning only the exposed edges.
Let the material dry fully. Trapping moisture beneath a patch can weaken adhesion and create odor during storage.
3. Trim loose fibers
Cut only threads or fibers that prevent the torn edges from lying flat. Do not cut away healthy material to create a prettier opening.
Less missing material means a smaller repair.
4. Return the tear to its natural shape
Bring the edges together without overlapping or stretching them. The cover should lie the same way it did before the damage occurred.
If the material keeps pulling apart, hold it temporarily from the front while positioning a reinforcement patch on the back.
5. Apply an underside patch
For a medium tear, cut a patch that extends roughly 1 to 2 inches beyond the damaged area on every side. Round the corners because pointed corners tend to lift more easily.
Press the patch from the center outward. Avoid wrinkles, trapped debris, and folded edges.
6. Reinforce the outside if needed
A narrow compatible repair strip over the outer tear can protect the exposed edges. Avoid creating an oversized stiff panel.
If you are using adhesive, apply only the amount specified by its manufacturer. Excess glue does not automatically make the repair stronger.
7. Allow the repair to cure
Do not reinstall the cover immediately. Adhesives and patches often need undisturbed bonding time before they can handle stretching or weather.
Follow the repair product’s stated cure time instead of guessing.
8. Test the repaired area
Once cured, flex the patch gently by hand. The edges should remain attached while the surrounding fabric bends normally.
Reinstall the cover carefully and make sure the repaired area is not being pulled tightly across a mirror, spoiler, antenna, bumper corner, or roof edge.
Section Takeaway: Cleanliness, alignment, reinforcement, and curing matter more than piling on extra tape. A flexible repair that moves with the cover usually performs better than a thick rigid patch.
Which Car Cover Repair Method Works Best?
The best method depends on the size, location, and material of the tear. No single repair works equally well for every cover.
| Damage | Best Starting Method | Reinforcement | DIY Suitability |
|---|---|---|---|
| Puncture under 1 inch | Compatible repair tape or small patch | Usually light | Good |
| Straight tear, 1–3 inches | Underside patch plus edge reinforcement | Recommended | Good if fabric is healthy |
| Tear over 3 inches | Large flexible patch | Strong reinforcement needed | Moderate |
| Separated seam | Seam repair or stitching | Depends on seam load | Moderate |
| Brittle fabric with several tears | Replacement | Not worthwhile | Poor candidate |
Repair tape vs. fabric patch
Tape is faster for small punctures and clean tears. A larger patch spreads tension over more material and usually makes more sense when the opening has started to grow.
For outdoor use, flexibility matters. Constant folding and wind movement can work against a rigid repair.
Patch vs. sewing
Sewing can restore a failed seam, but stitching directly across weakened waterproof fabric creates additional needle holes. That can be counterproductive if the construction depends on an intact outer barrier.
A patch is often simpler for a puncture away from an original seam.
How Do You Stop a Car Cover From Tearing Again?
Preventing another tear means identifying what stressed the fabric. Wind, sharp vehicle features, dirt, incorrect fit, and rough handling are common suspects.
Check the fit first
A cover that is too tight concentrates stress around mirrors, bumpers, spoilers, antennas, and body edges. One that is too loose can flap repeatedly in wind.
Proper sizing is therefore more than a convenience. It affects both paint protection and cover durability.
- Center the cover: Make sure one end is not stealing material from the other.
- Seat the hems: Front and rear elastic sections should sit where the manufacturer intended.
- Use supplied straps: Secure built-in retention systems instead of improvising with rough rope.
- Check accessories: Antennas, roof racks, spoilers, and mirror edges can create pressure points.
- Avoid dragging: Pulling a cover across concrete can damage both outer fabric and soft lining.
Keep the cover and vehicle clean
Dust and grit trapped under moving fabric can become abrasive. Consumer Reports’ car-cleaning guidance is a useful reference for keeping vehicle surfaces clean before extended covering.
I also avoid putting a dirty cover directly onto freshly cleaned paint. The inside of the cover matters just as much as the outside.
Store the cover dry
Fold or roll the cover only after it has dried. Packing damp material into a tight storage bag can encourage odor and material deterioration.
Section Takeaway: A successful repair should be followed by a fit and handling check. Otherwise, the same wind movement or pressure point can reopen your patch.
Should You Repair or Replace a Torn Car Cover?
Repair the cover when the damage is isolated and the remaining material still performs normally. Replace it when deterioration has spread beyond one repairable area.
Repair usually makes sense when:
- The tear is localized.
- The surrounding fabric still feels flexible.
- The inner lining remains smooth.
- Seams and straps remain secure.
- The cover still fits correctly.
- The damaged area can accept a flexible patch without interfering with installation.
Replacement usually makes more sense when:
- Several tears have appeared within a short period.
- The fabric cracks when flexed.
- The material feels unusually thin or brittle.
- The inner lining is rough, peeling, or contaminated.
- Major seams, straps, elastic hems, and fabric are all failing together.
- The cover no longer fits securely enough to stay stable.
A cover is only one part of protecting a parked vehicle. Consumer Reports also provides broader maintenance and repair guidance for preserving a vehicle over time.
Vehicle accessories should never hide more important safety issues. You can also use NHTSA’s vehicle safety resources to check recalls and other official safety information for your vehicle.
When replacement becomes necessary, prioritize correct fit, suitable indoor or outdoor construction, smooth contact surfaces, dependable retention straps, and material intended for your storage conditions.
Section Takeaway: Patch one healthy damaged area; don’t keep patching a cover that is deteriorating everywhere. Once the base material fails, replacement is the more dependable solution.
Frequently Asked Questions
Can I use duct tape to repair a car cover?
Duct tape can work as a temporary emergency patch, but it is rarely my first choice for a lasting repair. Heat, moisture, folding, and adhesive residue can become problems, so use repair tape designed for outdoor fabric whenever possible.
Can I repair a waterproof car cover?
Yes, if the surrounding waterproof material remains healthy and your patch or adhesive is compatible with it. The repair must seal the opening while remaining flexible, and you should follow the cover and repair-product manufacturers’ instructions.
Can I sew a torn car cover?
You can sew some fabric covers, particularly along a failed original seam. However, needle holes may affect water resistance, so sewing is not automatically the best choice for coated or multi-layer waterproof material.
How large a tear can I patch?
There is no universal maximum size. I generally treat tears around 1 to 3 inches as practical patch candidates when the surrounding fabric is strong, while larger tears deserve a closer inspection for broader material damage.
Should I patch a car cover from the inside or outside?
An underside patch is useful because it reinforces the damaged fabric while keeping the outer surface smoother. For some tears, a smaller outer strip can also protect the exposed edges, provided both materials are compatible.
Why does my repaired car cover keep tearing?
The original cause probably remains. Check for an overly tight fit, wind flapping, sharp vehicle accessories, rough handling, aging fabric, or a patch that is too stiff and concentrates stress around its edges.
Is a torn car cover still safe to use?
A small stable tear may remain usable temporarily, but inspect it before every installation. Stop using the cover if exposed hardware, rough lining, loose patch material, or severe flapping could contact and damage the vehicle’s finish.
Final Takeaway: Repairing a torn car cover is usually straightforward when the damage is small and the material around it remains healthy. Clean the area, reinforce the tear with compatible materials, let the repair cure fully, and correct whatever caused the damage before reinstalling the cover.
If the fabric has become brittle, thin, or covered with multiple failures, stop chasing individual tears. A properly fitting replacement will usually provide more dependable protection than a growing collection of patches.
