
Car Cover Straps Not Working? Causes, Fixes, and Prevention

Quick Answer
If your car cover straps are not working, first check for loose adjustment, twisted webbing, a slipping buckle, stretched material, or damaged attachment points. A cover that is too large can also keep good straps from holding it securely, so compare the fit with current car cover fit and design guidance.
Check these first
- Loose adjuster: Pull excess webbing through the adjuster until the strap is snug.
- Slipping buckle: Inspect the buckle teeth, locking tab, and webbing for wear or contamination.
- Twisted strap: Straighten the webbing before tightening so tension spreads evenly.
- Stretched webbing: Replace straps that stay loose even after the adjuster reaches its limit.
- Wrong cover fit: Excess fabric can billow in wind even when every buckle is closed.
- Broken attachment: Stop tightening if the seam, loop, or grommet is tearing away.
Before replacing anything
- Install the cover correctly, center it over the vehicle, and test each strap separately to identify the actual failure point.
Car cover straps look simple, but several small problems can stop them from holding a cover securely. The buckle may click normally while the webbing still slips as soon as wind loads the cover.
When I troubleshoot this problem, I start with fit and routing before blaming the hardware. That approach usually reveals whether you need an adjustment, a small repair, or a replacement strap.
In This Guide
Why Are My Car Cover Straps Not Working?
Car cover straps usually stop holding because the strap cannot maintain tension. The cause may be adjustment, wear, routing, hardware damage, or the cover itself.
Definition: A car cover strap system is the combination of webbing, buckles, loops, grommets, and adjustment hardware that keeps a fitted cover anchored around or beneath a parked vehicle.
Loose or incorrectly routed webbing
Start with the strap path. Webbing that enters an adjustment buckle at the wrong angle may pull through instead of locking.
- Twisted webbing: Reduces consistent contact inside the adjuster.
- Too much slack: Lets the cover lift before the strap begins resisting movement.
- Uneven adjustment: Pulls one side tight while leaving another side exposed to wind.
- Incorrect routing: Prevents the buckle or slider from gripping as designed.
Worn buckles or adjustment hardware
Plastic buckles can look normal yet lose holding strength. Check for cracked locking tabs, distorted slots, rounded edges, or a buckle that opens with light pressure.
Dirt can also interfere with a buckle. Clean dry hardware before deciding that it needs replacement.
Stretched or frayed straps
Webbing wears where it repeatedly passes through an adjuster. Look for thinning, fuzzy edges, glazing, cuts, or sections that no longer feel firm.
Replace badly frayed material instead of tying a knot over the weak area. A knot can concentrate force on already damaged webbing.
The cover is simply too loose
A strap cannot fully compensate for an oversized cover. Wind entering under a loose hem can inflate the material and load every attachment point at once.
That is why fit matters as much as strap strength. A correctly sized cover should sit evenly before you apply significant strap tension.
| Symptom | Likely Cause | First Check |
|---|---|---|
| Strap becomes loose after tightening | Slider slipping or webbing worn | Pull firmly on the adjusted strap by hand |
| Buckle will not stay closed | Cracked or worn locking tab | Inspect both buckle halves |
| Cover lifts despite tight straps | Loose fit or exposed hem | Check front, rear, and side fit |
| One corner keeps moving | Uneven tension or damaged attachment | Compare tension on both sides |
| Strap cannot tighten further | Webbing stretched or cover oversized | Check adjustment range and cover size |
How Can I Find Which Part of the Strap System Is Failing?
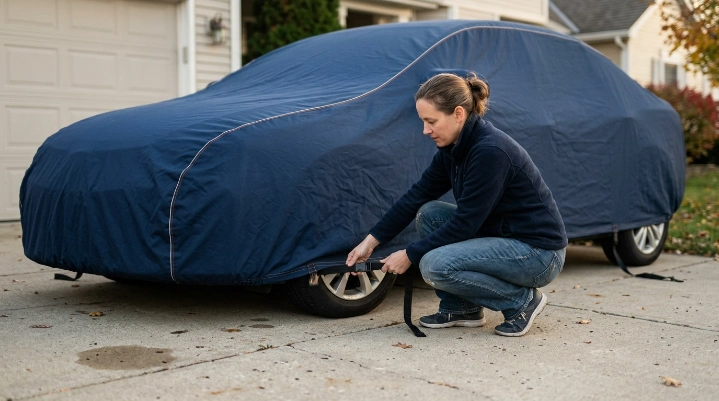
Test the system one component at a time. Do this while the vehicle is parked, cool, and on stable ground.
- Center the cover. Align mirror pockets, seams, and bumper sections before touching the straps.
- Seat the elastic hems. Make sure the front and rear edges sit where the manufacturer intended.
- Straighten every strap. Remove twists before routing the webbing beneath the vehicle.
- Close each buckle. Listen and feel for full engagement.
- Adjust one strap. Pull it snug, then mark its position mentally or with removable tape.
- Apply light hand pressure. If the webbing slides back through the adjuster, you have found a holding problem.
- Inspect the sewn attachment. Stop if stitching separates or fabric begins tearing.
Test the buckle separately
Unclip the buckle and examine both halves. A locking tab should return to its normal position instead of staying bent inward.
Reconnect it and pull on both sides by hand. Replace a buckle that releases unexpectedly or shows visible cracking.
Check the attachment point
The strap may be fine while the cover’s anchor loop fails. Look closely at stitching around webbing loops, reinforced panels, and grommets.
- Loose or missing stitches
- Torn fabric around a loop
- Elongated grommet holes
- Metal grommets pulling from the fabric
- Seams opening when the strap is tightened
Mechanic Alert: If you cannot route a strap safely without lifting the vehicle or crawling beneath an unsupported car, stop. Do not jack up a vehicle just to install a cover strap; use another routing method or get qualified help.
How Do I Fix Car Cover Straps That Keep Coming Loose?
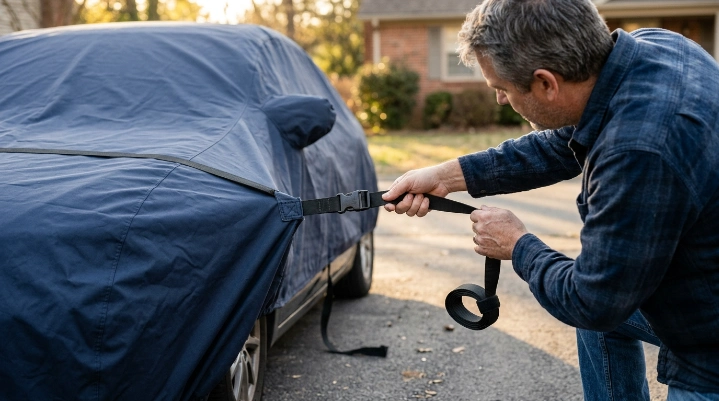
If the hardware is intact, start by resetting the installation. Many apparent strap failures are adjustment problems rather than broken parts.
1. Remove all tension
Loosen every adjustable strap first. This lets the cover return to its natural centered position.
2. Refit the cover before tightening
Pull the cover evenly over the front and rear of the vehicle. Remove large folds and make sure the lower edges sit at similar heights.
3. Route the webbing flat
Feed each strap through its buckle exactly as the cover manufacturer specifies. The webbing should remain flat from the attachment point to the buckle.
4. Tighten gradually
Alternate between straps instead of fully tightening one side first. This keeps the load balanced across the cover.
The goal is to remove slack, not stretch the cover over the body like a drum. Excessive force can damage stitching or pull hardware toward painted panels.
5. Secure excess strap length
Loose strap tails can flap against the vehicle. Roll or secure the extra webbing using the supplied keeper when available.
Avoid improvised metal clips near painted surfaces. Hard objects moving in the wind can mark clear coat.
6. Recheck after several minutes
Walk around the vehicle again after installation. The material may settle and reveal a loose section you missed initially.
For general exterior-care practices, the Kelley Blue Book exterior care guide is a useful reference when protecting painted surfaces.
Can a Broken Car Cover Buckle or Strap Be Repaired?
Minor hardware problems can sometimes be repaired, but structurally damaged webbing or attachment fabric usually deserves replacement. The safest choice depends on where the failure occurred.
When a simple replacement buckle may work
A replaceable buckle can be practical when the webbing and cover attachment remain strong. Match the replacement to the original strap width and buckle style.
- The webbing has no cuts or severe fraying.
- The sewn attachment remains firmly connected.
- Only the removable buckle is damaged.
- The replacement hardware accepts the same webbing width.
When the complete strap should be replaced
Replace the strap if its fibers are torn, stretched, heat damaged, or badly abraded. A new buckle cannot restore weakened webbing.
Do the same when an adjuster reaches its limit but the strap still cannot hold tension. That can indicate permanent stretching or incorrect sizing.
When the whole cover may need replacement
A damaged strap is sometimes the first visible sign of wider deterioration. Inspect the hem, seams, fabric, and other attachment points before repairing one isolated area.
If several straps, seams, or elastic sections are failing together, replacement often makes more sense. Continuing to tighten deteriorated material can accelerate tearing.
For broader vehicle-maintenance habits, Edmunds’ car maintenance resources provide a useful reminder that inspection should come before a problem becomes larger.
How Tight Should Car Cover Straps Be in Windy Weather?
Car cover straps should be snug enough to remove loose movement without placing heavy tension on the fabric. You should not need extreme hand force to secure them.
A useful test is to inspect the cover after tightening. The hem should remain in position and attachment seams should look relaxed rather than distorted.
Signs the straps are too loose
- The cover balloons when wind reaches one side.
- Large sections repeatedly flap against the body.
- The hem lifts above the bumper or rocker area.
- The strap hangs visibly below the vehicle.
- A buckle can move several inches before the strap becomes loaded.
Signs the straps are too tight
- The cover fabric stretches sharply around an anchor point.
- Stitching begins to pucker or separate.
- A grommet tilts or pulls sideways.
- Buckles press against painted bodywork.
- The cover becomes distorted instead of fitting naturally.
Reduce wind load instead of relying on brute force
Straps work best when the cover already fits correctly. A loose universal cover gives wind more material to grab.
Seat the elastic hem first, then use the straps as retention devices. Do not expect them to reshape an oversized cover.
Keep plastic buckles, metal grommets, and loose cords away from paint. Clean bodywork also matters because movement over trapped grit can contribute to surface marks.
NHTSA has addressed car covers as motor-vehicle equipment in an agency interpretation concerning a vehicle-mounted cover system. For ordinary removable covers, your cover manufacturer’s installation and safety instructions should remain your primary guide.
Section Takeaway: Secure the cover by combining correct fit, seated hems, flat webbing, and moderate strap tension. More tension cannot compensate for damaged hardware or a badly fitting cover.
Frequently Asked Questions
Why does my car cover strap loosen by itself?
A strap that loosens after adjustment usually has a slipping slider, worn webbing, incorrect routing, or insufficient friction inside the buckle. Remove the strap tension, route it again, and test it by hand. Replace damaged hardware if it still slips.
Can I tie a knot in a car cover strap?
A temporary knot may stop loose webbing from moving, but it is not an ideal repair for damaged material. Knots can concentrate force in one spot and make adjustment difficult. Replace frayed or structurally weakened straps rather than relying on knots.
Can I use bungee cords instead of car cover straps?
Bungee cords are not a direct substitute unless the cover manufacturer specifically allows them. Hooks and high elastic tension can damage fabric or contact paint. A correctly sized replacement strap or approved wind-strap kit is usually a safer solution.
Why does my car cover still blow around with the straps attached?
The cover may be too large, incorrectly centered, or loose around its hems. Wind can enter beneath excess fabric and make the entire cover billow. Correct the fit first, then adjust the retention straps evenly.
Should the buckle sit underneath the car?
Many underbody strap systems position the buckle or connection below the vehicle, but designs vary. Follow the specific cover instructions. Whatever the layout, keep hard buckle components from resting against doors, rocker panels, bumpers, or other painted surfaces.
How do I know when my car cover straps need replacing?
Replace them when you see deep fraying, cuts, permanent stretching, cracked buckles, failed adjusters, or torn attachment points. A strap that repeatedly loses tension after correct routing is another strong sign that the retention system has reached the end of its useful life.
Bottom Line
If your car cover straps are not working, don’t immediately pull them tighter. First identify whether the problem comes from routing, adjustment, a slipping buckle, worn webbing, damaged stitching, or poor overall cover fit.
Start with the simplest fix: center the cover, seat the hems, straighten every strap, and adjust the tension evenly. Then test whether each buckle and adjuster can hold that setting.
Replace damaged retention hardware before the next windy day. A secure cover should stay controlled without overstressing its seams or putting hard hardware against your vehicle’s paint.