
Winter Car Cover Maintenance: How to Protect Your Cover and Paint

Quick Answer
Winter car cover maintenance means keeping the cover and vehicle clean, preventing moisture from becoming trapped, securing loose fabric against wind, and drying the cover completely before storage. Inspect the cover regularly for ice, grit, tears, and worn seams, and follow the manufacturer’s cleaning instructions for your specific material. For washing and drying guidance, consult this car cover cleaning guide.
Essential winter care steps
- Clean before covering: Remove road salt, loose dirt, and grit from the vehicle’s exterior before fitting the cover.
- Check for moisture: Avoid trapping water between the cover and the vehicle for prolonged periods.
- Secure the fit: Fasten the cover as directed to reduce wind movement and paint abrasion.
- Remove snow carefully: Brush away loose snow gently without scraping frozen fabric against the paint.
- Inspect the material: Look for damaged seams, loose elastic, holes, and worn inner lining.
- Store it dry: Wash when necessary, air-dry according to the care label, and never pack away a damp cover.
One important precaution
- Never force a frozen cover off the car. Let it thaw naturally and release it gently before removal.
Winter car cover maintenance is about more than keeping a protective layer looking clean. Cold weather, road salt, wind, freezing rain, and damp conditions can all affect the cover and the vehicle underneath.
As a car enthusiast who enjoys practical vehicle care, I focus on simple routines that prevent avoidable damage without requiring specialist equipment. This guide explains how to maintain indoor and outdoor car covers, handle snow and ice, clean different materials, and recognize when a cover needs repair or replacement.
In This Guide
- What does winter car cover maintenance involve?
- How should you maintain a car cover during winter?
- How do you handle snow, ice, and moisture?
- How do you clean and dry a winter car cover?
- Which maintenance routine suits your car cover?
- How do you inspect, repair, and store a car cover?
- Frequently asked questions
What Does Winter Car Cover Maintenance Involve?
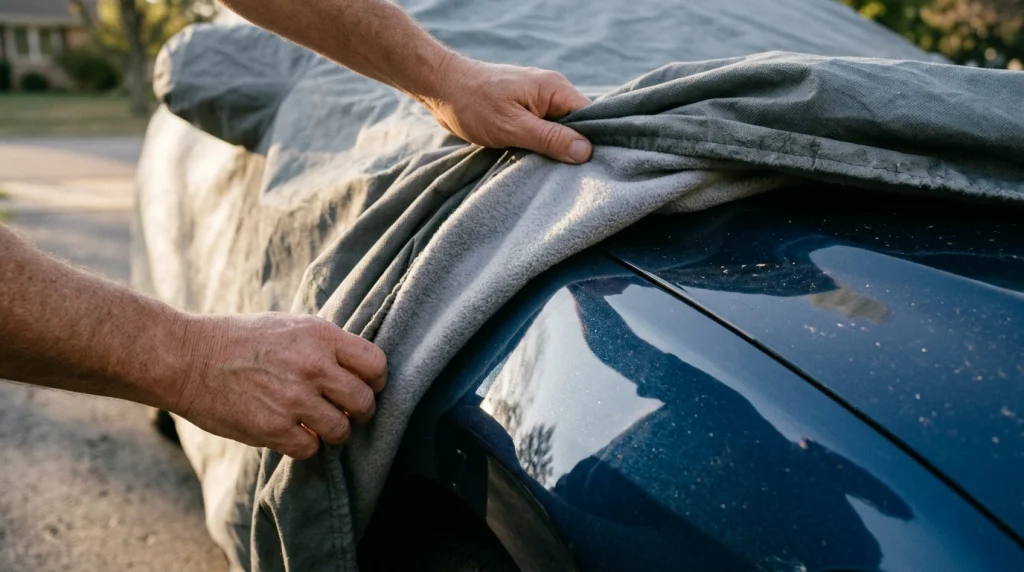
Winter car cover maintenance is the regular cleaning, inspection, fitting, drying, and storage of a vehicle cover during cold or wet weather. The goal is to preserve the cover’s protective qualities while reducing the risk of trapped grit, excess moisture, and fabric movement damaging the vehicle’s finish.
Why does winter require extra attention?
Winter conditions can expose a cover to several problems that are less noticeable during mild weather. The most important are moisture accumulation, abrasive dirt, wind movement, and deterioration caused by repeated freezing and thawing.
- Road salt and grit: Salt residue and fine particles can collect on the vehicle and transfer to the cover’s inner surface.
- Condensation: Temperature changes can cause moisture to collect beneath a cover, especially when ventilation is limited.
- Wind and abrasion: Loose fabric can rub against painted panels when gusts move the cover.
- Ice and snow: Frozen fabric can become stiff and difficult to remove without pulling or scraping.
- Material wear: Repeated exposure to moisture, sunlight, and handling can weaken seams, elastic edges, and coatings.
Does a car cover protect paint in winter?
A properly fitted, clean car cover can help shield a parked vehicle from snow, dust, tree debris, and other environmental contaminants. However, it cannot guarantee protection against every winter hazard, and incorrect use can cause scratches or hold moisture against the finish.
The most important distinction is between a cover that fits securely and one that moves repeatedly over a dirty surface. A clean vehicle and clean cover reduce the chance of abrasive particles causing fine scratches.
Section Takeaway: Winter protection depends on correct fit, cleanliness, and moisture control, not simply on placing a cover over the vehicle.
How Should You Maintain a Car Cover During Winter?
The best winter routine uses brief inspections and careful handling rather than frequent, unnecessary washing. Check the vehicle, the cover’s inner surface, and its fastening points whenever you remove or reinstall it.
1. Clean the vehicle before fitting the cover
Remove loose dirt and grit before covering the car. If the vehicle has road salt, muddy splashes, or other winter residue, clean the affected areas using a suitable automotive wash method and let the exterior dry before fitting the cover whenever conditions permit.
Pay attention to lower doors, wheel arches, bumpers, and rocker panels, where road grime often collects. Avoid rubbing dry grit across the paint with a cloth or the cover itself.
2. Check the cover’s inner surface
Turn back an accessible edge and inspect the material that touches the vehicle. Remove loose leaves, grit, twigs, and other debris before installing the cover again.
Shake out loose dirt away from the car rather than brushing it across the paint. If the inner lining is visibly dirty, clean it according to the cover manufacturer’s directions before reuse.
3. Fit and secure the cover correctly
Center the cover over the vehicle and align its front, rear, mirror pockets, and other fitted sections. Use the supplied straps, tie-downs, or approved securing system as directed.
- Keep elastic hems positioned correctly around the body.
- Fasten the designated straps without overtightening or damaging the fabric.
- Check that the cover does not interfere with antennas or other exterior accessories.
- Recheck the fit after strong winds or substantial weather changes.
A snug, correctly secured cover is less likely to flap against the paint. Avoid improvised restraints that can scratch panels or create concentrated pressure points.
4. Inspect regularly without removing the cover unnecessarily
For a vehicle parked outdoors through winter, check the cover after storms and periodically during ordinary weather. Look for shifted fabric, loose straps, pooled water, visible tears, and signs that moisture is accumulating underneath.
There is no universal inspection interval for every climate and cover material. Check more frequently during heavy rain, freezing weather, strong winds, or prolonged outdoor parking.
5. Watch for signs of trapped moisture
Persistent dampness, a musty smell, or visible condensation beneath the cover suggests that the setup needs attention. Remove the cover when conditions safely allow, inspect the vehicle, and let the surfaces dry before covering them again.
Don’t assume a waterproof outer layer always means a completely dry space underneath. Breathability and ventilation vary by product, so follow the manufacturer’s guidance for your specific cover.
Section Takeaway: Keep both contact surfaces clean, secure the cover properly, and inspect it after harsh weather. Small checks can prevent larger cleaning and paint-care problems.
How Do You Handle Snow, Ice, and Moisture?
Remove winter buildup carefully and avoid forcing fabric that has frozen to the vehicle. Snow, ice, and water require different handling, and the safest approach depends on the cover’s material and the weather conditions.
Removing snow from a covered car
Light, loose snow can often be removed with gentle sweeping movements using a soft brush suitable for the cover’s material. Work carefully so that snow containing grit does not get pushed across the fabric or into the contact area.
- Use a soft tool rather than a metal scraper.
- Avoid pressing heavily against the vehicle’s body panels.
- Don’t pull the cover sideways across the paint to move snow.
- Follow the manufacturer’s instructions if the cover has accumulated a heavy load.
If heavy, wet snow is weighing down the cover, don’t climb onto the vehicle or pull forcefully on the fabric. Remove the load only if you can do so safely from the ground, without risking a fall or damaging the cover.
What should you do if the cover freezes to the car?
Never yank a cover that appears frozen to the vehicle. The frozen fabric may resist movement, and pulling can damage seams, stretch elastic, or drag abrasive material across the paint.
Allow the ice to thaw naturally in suitable conditions, and gently check whether the cover releases without resistance. Don’t use boiling water, open flames, heat guns, or aggressive scraping to speed up the process.
If the cover remains stuck, wait for safer thawing conditions and consult the manufacturer. Avoid driving with a cover fitted, and never leave loose fabric near the exhaust or other hot components.
How can you reduce condensation beneath a winter cover?
Start by choosing a cover designed for your parking conditions. A breathable outdoor cover may suit a vehicle exposed to changing temperatures, while a non-breathable waterproof cover can require specific precautions to manage moisture.
- Cover a clean vehicle with dry surfaces whenever practical.
- Follow the product’s instructions about ventilation and permitted use.
- Inspect for persistent condensation after major temperature changes.
- Allow the vehicle and cover to dry when moisture accumulates.
Don’t assume that adding another tarp or plastic layer will improve protection. Extra layers can alter airflow, trap water, and increase the risk of moisture remaining against the vehicle.
Should you cover a wet car in winter?
It’s better to dry the vehicle before covering it for extended storage. If the car gets wet unexpectedly, remove the cover when conditions allow and give the exterior an opportunity to dry.
Brief exposure to rain or snow does not automatically mean damage has occurred. The bigger concern is prolonged moisture combined with poor airflow, dirt, and repeated temperature changes.
Section Takeaway: Handle snow gently, allow frozen fabric to release naturally, and investigate persistent dampness instead of sealing moisture beneath additional layers.
How Do You Clean and Dry a Winter Car Cover?
Clean a winter car cover when dirt, salt residue, or other buildup warrants it, and always follow the care label. Washing methods differ by fabric, coating, and construction, so a method suitable for one cover may damage another.
Step 1: Identify the cover material
Check the sewn label, product manual, or manufacturer’s website before washing. Covers may use polyester, multilayer synthetic fabrics, fleece-like linings, stretch materials, or specialized water-resistant coatings.
Find out whether the cover permits hand washing, machine washing, or only gentle surface cleaning. If the instructions are missing, contact the manufacturer rather than guessing at a washing temperature or detergent.
Step 2: Remove loose dirt first
Take the cover off carefully and move it to a clean area away from the vehicle. Shake off loose debris, then use a soft brush or cloth if the manufacturer permits it.
A large outdoor cover can be awkward to handle when wet. Use a clean, spacious surface and ask someone to help if necessary, keeping the material away from dirty ground.
Step 3: Wash using the approved method
Choose the method specified for the particular cover. Some covers can be washed in a large front-loading machine, while others require hand washing or gentle cleaning in place.
- For hand washing: Use the recommended amount of mild cleaner and water, then gently wipe or sponge the fabric.
- For machine washing: Use the approved machine size, water temperature, cycle, and detergent.
- For surface cleaning: Remove localized dirt with an approved solution and a soft cloth or sponge.
- For outdoor covers: Make sure the washing method is suitable for their size, seams, and weather-resistant finish.
Never assume that a household washing machine can safely handle a bulky cover. Overloading it can prevent proper cleaning and rinsing or damage the material.
Step 4: Rinse away cleaning residue
Rinse the cover as directed until detergent residue has been removed. Leftover cleaner may affect the fabric’s feel or performance, depending on its construction.
Avoid bleach, fabric softener, solvents, and strong household chemicals unless the manufacturer explicitly approves a particular product. These substances can damage certain coatings, fibers, and water-resistant treatments.
Step 5: Dry the cover completely
Air-drying is a suitable choice for many covers, but the manufacturer’s drying instructions take priority. Spread or hang the material as directed in a clean, well-ventilated location where it can dry thoroughly.
Don’t use a tumble dryer, radiator, or direct high heat unless the product instructions explicitly permit it. Excessive heat can shrink fabric, damage coatings, or change the cover’s fit.
Before folding the cover, check thicker seams, elastic edges, and folded sections for lingering dampness. A cover that feels dry on the outside may still retain moisture in its folds.
Section Takeaway: Identify the material, remove loose debris, use the approved cleaning method, rinse thoroughly, and dry completely before reuse or storage.
Which Maintenance Routine Suits Your Car Cover?
The right winter maintenance routine depends on whether the cover is designed for indoor storage, outdoor weather protection, or a specific vehicle finish. Fabric type and manufacturer instructions matter more than the cover’s appearance alone.
Indoor versus outdoor car covers
An indoor cover mainly protects a parked vehicle from dust and incidental contact. An outdoor cover must also cope with weather exposure, so its fit, construction, and resistance to moisture are especially important.
| Cover type | Main winter concern | Recommended care |
|---|---|---|
| Indoor dust cover | Dust, grit, and damp garage air | Keep the car and lining clean; wash according to the label. |
| Breathable outdoor cover | Wind, moisture, and abrasive debris | Check fit and fasteners; allow moisture to escape as designed. |
| Water-resistant or waterproof cover | Trapped condensation and coating wear | Follow product-specific moisture, cleaning, and drying guidance. |
| Fleece-lined or soft-contact cover | Grit caught in the lining | Inspect the inner surface carefully and avoid dragging it across paint. |
| Custom-fit cover | Loose areas, stretched elastic, or worn seams | Check fitted sections, straps, mirror pockets, and hems. |
This comparison describes typical maintenance priorities, not guaranteed performance. Two covers in the same category can have different care requirements, so check the exact model’s documentation.
What if you park outside every night?
If your vehicle stays outdoors, prioritize a cover designed for the local weather and the length of time the car remains parked. Check the manufacturer’s wind-securing guidance and inspect the cover after storms.
Where freezing rain, prolonged dampness, or heavy snow is common, consider whether a covered parking space would reduce the burden of maintenance. A cover is useful, but it does not remove every risk associated with exposed parking.
What if your car stays in a garage?
Indoor parking reduces direct exposure to snow, wind, and precipitation, but it doesn’t automatically eliminate moisture problems. Damp floors, poor ventilation, and a wet vehicle can still create a humid environment.
Use a clean indoor cover that fits the vehicle and suits the garage conditions. Avoid covering a car immediately after driving if hot components or residual moisture could affect the material.
What about a freshly painted vehicle?
Fresh paint may need a specific curing period before a cover can be installed. Ask the body shop or paint manufacturer how long to wait and which cover materials are appropriate for the finish.
Don’t assume that a soft inner lining makes every cover safe for newly painted surfaces. Premature covering can interfere with the finish’s recommended curing process.
Section Takeaway: Match the cover and cleaning routine to your parking environment, fabric construction, and paint condition. There is no single washing or drying method that suits every winter car cover.
How Do You Inspect, Repair, and Store a Car Cover?
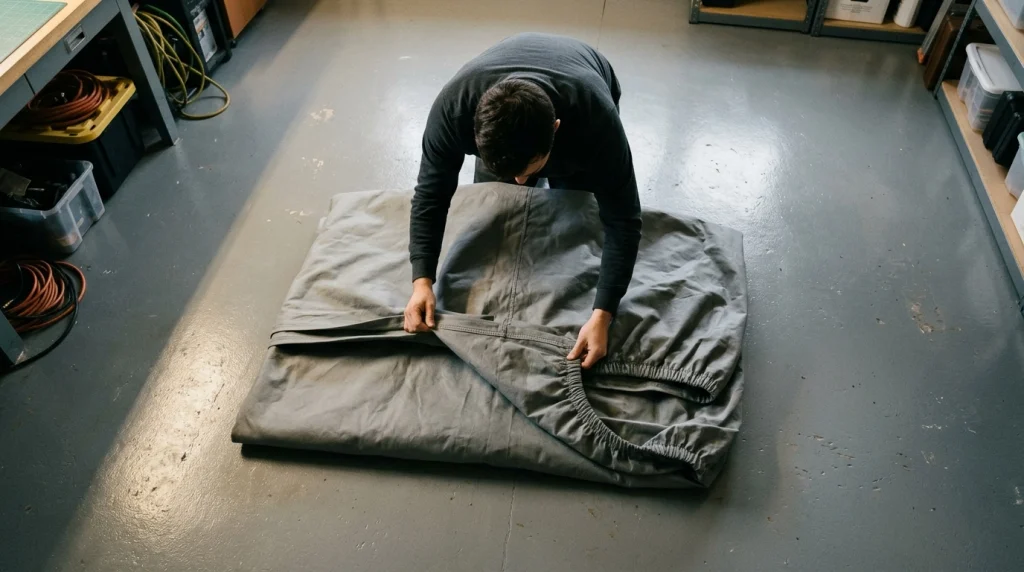
A winter car cover should be checked for wear before damage becomes severe enough to affect fit or protection. Clean, dry storage also helps prevent avoidable deterioration between periods of use.
Inspect the cover for damage
Spread the dry cover out in good light and examine its exterior, inner surface, and attachment points. Look for the following warning signs:
- Small tears or holes: These may allow debris or moisture through and can grow under tension.
- Damaged seams: Loose stitching can cause sections to separate when the cover is fitted.
- Weak elastic: Stretched hems may allow the fabric to shift in wind.
- Worn lining: Flattened, damaged, or contaminated inner material may no longer protect paint as intended.
- Peeling or damaged coatings: Surface deterioration may affect water resistance or other intended properties.
- Persistent odor or staining: These can indicate contamination or moisture that needs further attention.
Can you repair a damaged car cover?
Minor damage may be repairable if the manufacturer approves a compatible patch or repair method. Choose materials intended for the cover’s fabric and coating, and follow the repair instructions carefully.
Avoid ordinary adhesive tape or household glue unless the manufacturer specifically approves it. These products can leave residue, weaken the fabric, or interfere with a water-resistant surface.
Replace the cover if damage is extensive, the fit can no longer be secured, or the material has deteriorated beyond an approved repair. A badly fitting cover may cause more rubbing than a properly fitted replacement.
How should you store a winter car cover?
Store the cover only after it is clean enough for storage and completely dry. Folding damp material into a bag can encourage musty odors, mildew, and material deterioration.
- Remove loose debris and clean the cover if needed.
- Allow it to dry fully using the approved method.
- Inspect the seams, inner lining, and fastening points.
- Fold it loosely on a clean surface without trapping dirt.
- Place it in its storage bag or another clean, dry container.
- Keep it away from sharp objects, chemicals, and excessive heat.
Don’t store the cover on a dirty garage floor or next to products that could leak onto the fabric. If you store it for several months, inspect it again before the next installation.
When should you stop using the cover?
Stop using a cover that has sharp damaged edges, significant inner-surface contamination, or attachment failures that prevent secure fitting. Resolve the problem or replace the cover before putting it back on the vehicle.
If you find scratches, corrosion, or damaged paint beneath the cover, clean the area appropriately and assess the damage. Seek professional advice for exposed metal, spreading corrosion, or paint damage that requires repair.
Section Takeaway: Inspect the whole cover, repair it only with compatible products, and store it clean and dry. Replace it when its condition or fit makes continued use unsuitable.
Frequently Asked Questions About Winter Car Cover Maintenance
How often should I clean my car cover in winter?
Clean your car cover when dirt, salt, or other contamination builds up, rather than following an arbitrary weekly schedule. Outdoor covers exposed to storms may need more frequent attention than indoor covers, but the fabric’s care instructions should determine the washing method.
Can I leave a car cover on during snowfall?
Yes, if the cover is designed for outdoor use and is correctly installed for the expected conditions. Check the manufacturer’s guidance about snow loads, wind, and moisture, and remove accumulated snow carefully when safe. Never assume every cover can withstand heavy or wet snow.
Should I remove my car cover after rain?
Not necessarily after every shower, provided the cover is designed for outdoor use and the setup manages moisture as intended. However, inspect for persistent condensation or trapped water and allow the vehicle and cover to dry when needed.
Can a winter car cover scratch my paint?
Yes, scratches can occur when dirt or grit becomes trapped between the cover and paint, or when loose fabric repeatedly rubs against the vehicle. Keep both surfaces clean, use a suitable fit, and secure the cover according to its instructions.
Is it safe to wash a car cover in a washing machine?
Only when the manufacturer permits machine washing and the machine can handle the cover’s size and construction. Some covers require hand washing or surface cleaning, and certain fabrics cannot tolerate tumble drying. Check the care label before starting.
Can I use a waterproof tarp instead of a car cover?
A generic tarp may not provide the fit, inner-surface protection, or ventilation designed into a vehicle cover. It can also flap against the paint or trap moisture. Choose a cover intended for your vehicle and parking conditions instead of assuming any waterproof sheet is suitable.
When should I replace my winter car cover?
Replace it when tears, failed seams, stretched fasteners, or worn material prevent secure fitting or reliable protection. If an approved repair restores the cover’s intended function, replacement may not be necessary. Follow the manufacturer’s repair and replacement recommendations.
Final Takeaway: Keep Your Winter Car Cover Clean, Dry, and Secure
Effective winter car cover maintenance starts with a clean vehicle, a suitable cover, and regular checks for dirt, moisture, and damage. These basic habits help reduce avoidable paint abrasion and keep the cover ready for changing weather.
Use the cleaning and drying method approved for your cover, handle frozen fabric patiently, and never store it while damp. If the cover no longer fits securely or its inner material has deteriorated, repair it appropriately or replace it.
Before the next cold spell, inspect your cover, check its fastening points, and review the manufacturer’s care instructions. A few minutes of routine attention can help protect both your cover and the vehicle beneath it.