
How to Reset the Toyota Maintenance Light
Contents
- 1 Key Takeaways
- 2 📑 Table of Contents
- 3 Why the Toyota Maintenance Light Comes On
- 4 Tools and Preparation Needed
- 5 Step-by-Step Guide to Reset the Maintenance Light
- 6 Model-Specific Reset Instructions
- 7 Troubleshooting Common Issues
- 8 When to Seek Professional Help
- 9 Tips for Maintaining Your Toyota
- 10 Conclusion
- 11 Frequently Asked Questions
Resetting the Toyota maintenance light is simple and can be done at home without a mechanic. This guide walks you through the process for various Toyota models, ensuring your vehicle stays on track with scheduled service.
Key Takeaways
- Know your model and year: Reset procedures vary slightly between Toyota models and production years, so identifying your vehicle is the first step.
- Use the trip meter and ignition: Most Toyota maintenance lights are reset using the trip odometer button and ignition key cycles.
- Turn the ignition to “ON” without starting the engine: This activates the dashboard electronics without engaging the motor, allowing access to reset functions.
- Press and hold the trip button: Holding the trip odometer button while turning the ignition triggers the reset sequence.
- Watch for the light to blink or turn off: A successful reset is confirmed when the maintenance light flashes or disappears from the dashboard.
- Repeat if necessary: If the light doesn’t reset on the first try, repeat the steps carefully, ensuring timing and sequence are correct.
- Consult your owner’s manual: For model-specific instructions or if the standard method doesn’t work, your manual is the most reliable resource.
📑 Table of Contents
Why the Toyota Maintenance Light Comes On
The Toyota maintenance light—often labeled as “MAINT REQD” or “SERVICE”—is designed to remind you when it’s time for routine service. This isn’t a warning of a mechanical failure, but rather a proactive alert based on your vehicle’s mileage or time intervals. Toyota vehicles are equipped with a maintenance reminder system that tracks driving conditions and schedules service accordingly.
This light typically illuminates every 5,000 to 10,000 miles, depending on your driving habits and the model of your Toyota. For example, city driving with frequent stops and starts may trigger the light sooner than highway driving. The system considers factors like oil life, engine runtime, and mileage to determine when service is due.
It’s important to understand that the maintenance light is not the same as a check engine light. The check engine light indicates a potential mechanical or emissions issue that needs immediate attention. In contrast, the maintenance light is a friendly nudge to schedule an oil change, tire rotation, or other routine care. Ignoring it won’t damage your engine, but it could lead to reduced performance or fuel efficiency over time.
What Triggers the Maintenance Light?
Several factors can cause the maintenance light to come on. The most common is reaching a preset mileage interval. For instance, many Toyota models are programmed to alert you every 5,000 miles for an oil change. However, some newer models use more advanced algorithms that monitor actual oil degradation, engine load, and driving patterns.
For example, if you frequently drive in stop-and-go traffic, tow heavy loads, or operate in extreme temperatures, your engine oil may degrade faster. In these cases, the maintenance light might appear before the 5,000-mile mark. This adaptive system helps ensure your engine stays protected under real-world conditions.
Additionally, the light may come on if you’ve recently had service performed but didn’t reset the system. Mechanics often reset the light during service, but if they forget or if you perform maintenance yourself, the light will remain on until manually reset.
Why You Should Reset the Light After Service
Resetting the maintenance light after service is crucial for maintaining accurate service records. If you don’t reset it, the light will continue to remind you even though the service has been completed. This can be confusing and may lead you to believe your vehicle needs attention when it doesn’t.
Moreover, keeping the light reset helps you stay on top of future maintenance. Once reset, the system will begin counting down to the next service interval. This ensures you don’t miss important maintenance tasks like oil changes, brake inspections, or tire rotations.
Resetting the light also helps if you’re selling your vehicle. A lit maintenance light might concern potential buyers, even if the car is in excellent condition. A properly reset light shows that the vehicle has been well-maintained and is ready for its next owner.
Tools and Preparation Needed
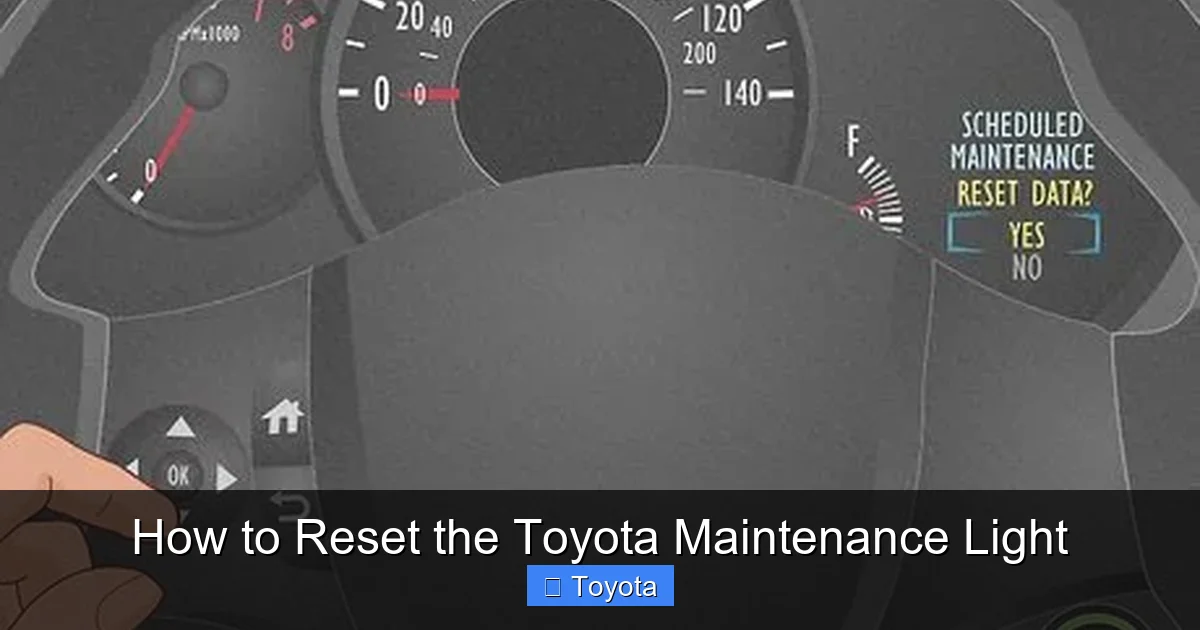
Visual guide about How to Reset the Toyota Maintenance Light
Image source: wikihow.com
One of the best things about resetting the Toyota maintenance light is that it requires no special tools. You don’t need a scan tool, computer, or mechanic. All you need is your vehicle, the ignition key, and about two minutes of your time.
Before you begin, make sure your vehicle is parked on a level surface and the engine is off. This ensures safety and prevents any accidental movement during the process. It’s also a good idea to have your owner’s manual nearby, especially if you’re working with a newer or less common Toyota model.
What You’ll Need
– Your Toyota vehicle (any model from 2000 onward)
– The ignition key (or key fob, depending on the model)
– A few minutes of uninterrupted time
– Optional: Owner’s manual for model-specific guidance
You don’t need any electronic devices or software. The reset process is entirely mechanical and relies on the vehicle’s built-in dashboard controls. This makes it accessible to anyone, regardless of technical skill.
Safety Tips Before Starting
Always ensure the vehicle is in “Park” (for automatic transmissions) or in gear with the parking brake engaged (for manual transmissions). This prevents the car from rolling while you’re working on it.
Also, avoid starting the engine during the reset process unless instructed. Most reset procedures require the ignition to be in the “ON” position without the engine running. Starting the engine can interrupt the sequence and prevent the light from resetting.
Finally, if you’re unsure about any step, consult your owner’s manual. Toyota designs these systems to be user-friendly, but slight variations exist between models and years.
Step-by-Step Guide to Reset the Maintenance Light
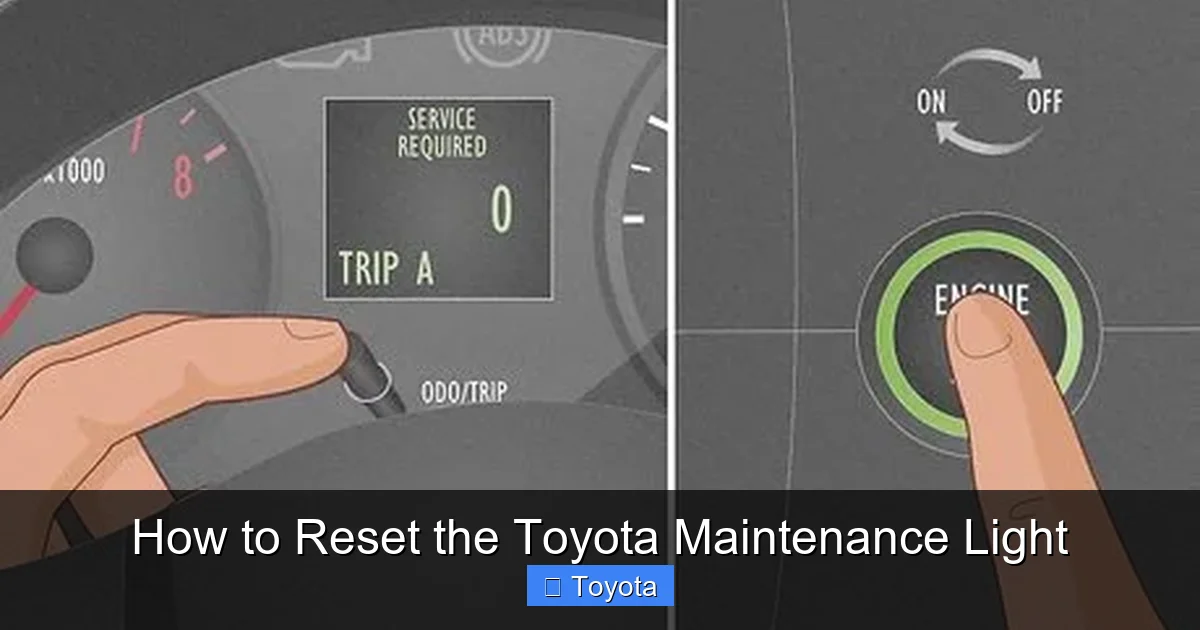
Visual guide about How to Reset the Toyota Maintenance Light
Image source: wikihow.com
Now that you understand why the light comes on and what you’ll need, let’s walk through the reset process. The method described here works for the majority of Toyota models, including the Camry, Corolla, RAV4, Highlander, and Tacoma. However, always double-check your owner’s manual for any model-specific instructions.
Step 1: Turn the Ignition to “ON”
Insert your key into the ignition and turn it to the “ON” position. This is the position just before you start the engine—usually marked by the dashboard lights illuminating. Do not start the engine. You should see all the warning lights on the dashboard light up, including the maintenance light.
If your Toyota has a push-button start, press the “Start” button twice without pressing the brake pedal. This will power up the dashboard without cranking the engine.
Step 2: Locate the Trip Odometer Button
Look at your instrument cluster. You’ll see a small button near the speedometer or tachometer labeled “TRIP” or “ODO/TRIP.” This button allows you to switch between trip meters (Trip A and Trip B) and the main odometer.
Press this button once to ensure you’re on the correct trip meter. For most models, you’ll want to be on Trip A. The display should show a mileage number like “1234.5” or similar.
Step 3: Turn the Ignition Off
Now, turn the ignition back to the “OFF” position. You don’t need to remove the key—just turn it back so the dashboard lights go out.
Step 4: Press and Hold the Trip Button
While the ignition is off, press and hold the trip odometer button. Keep it held down throughout the next step.
Step 5: Turn the Ignition Back to “ON”
With the trip button still held down, turn the ignition back to the “ON” position. Again, do not start the engine. The dashboard lights should come back on.
Step 6: Watch for the Light to Reset
Continue holding the trip button. Within a few seconds, you should see the maintenance light begin to blink. It may flash several times before turning off completely. This indicates that the reset was successful.
Once the light turns off, release the trip button. The maintenance light should remain off, and your trip meter may reset to zero or display a new countdown.
Step 7: Confirm the Reset
To confirm the reset worked, turn the ignition off and then back on. The maintenance light should not reappear. If it does, repeat the process, making sure you follow each step carefully.
Model-Specific Reset Instructions
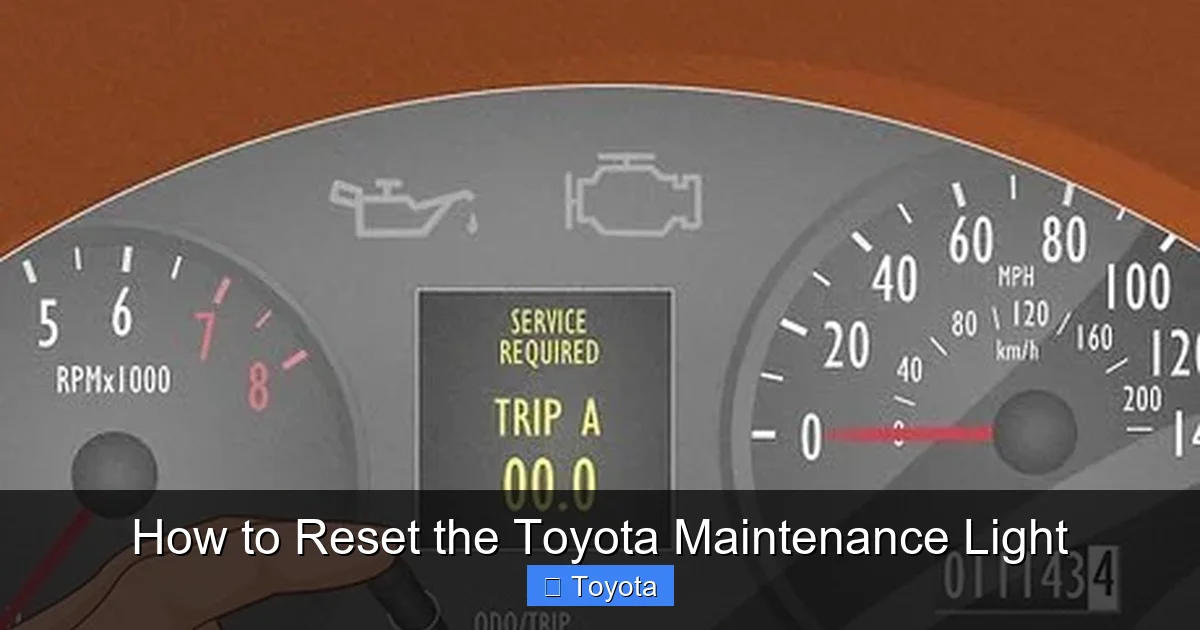
Visual guide about How to Reset the Toyota Maintenance Light
Image source: wikihow.com
While the general method works for most Toyotas, some models have slight variations. Below are instructions for popular Toyota vehicles.
Toyota Camry (2007–2017)
For the Camry, the process is straightforward:
1. Turn ignition to “ON” (do not start engine).
2. Press the trip button to select Trip A.
3. Turn ignition off.
4. Press and hold the trip button.
5. Turn ignition back to “ON” while holding the button.
6. Wait for the maintenance light to blink and turn off.
7. Release the button.
Toyota Corolla (2009–2020)
The Corolla uses the same method as the Camry. Ensure you’re on Trip A before starting. The light should reset within 10 seconds of turning the ignition on while holding the trip button.
Toyota RAV4 (2013–2018)
For the RAV4, the process is nearly identical. One tip: if the light doesn’t reset, try cycling the trip button a few times before starting the sequence. This ensures the system recognizes the input.
Toyota Highlander (2014–2020)
The Highlander may require you to hold the trip button for up to 15 seconds. Be patient—some models take a bit longer to register the reset command.
Toyota Tacoma (2016–2023)
The Tacoma uses the standard method, but some owners report needing to repeat the process twice. If the light doesn’t turn off the first time, try again.
Troubleshooting Common Issues
Sometimes, the maintenance light won’t reset on the first try. Don’t worry—this is common and usually fixable with a few adjustments.
The Light Won’t Turn Off
If the light remains on after following the steps, try repeating the process. Make sure you’re holding the trip button the entire time and that the ignition is turned on smoothly.
Also, check that you’re on the correct trip meter. Some models require Trip A, while others may work with Trip B. Consult your owner’s manual to confirm.
The Light Resets but Comes Back On
If the light resets but returns after a few miles, it may indicate a deeper issue. In some cases, the vehicle’s computer hasn’t fully registered the reset. Try driving the car for 10–15 minutes to allow the system to recalibrate.
Alternatively, the light may be triggered by a different maintenance item, such as a tire rotation or brake inspection. Check your service schedule to ensure all required maintenance has been completed.
Push-Button Start Models
For Toyotas with push-button start, the process is the same, but you’ll use the button instead of a key. Press the “Start” button twice (without pressing the brake) to turn the ignition on. Then follow the same steps with the trip button.
Battery or Electrical Issues
If your vehicle has recently had a dead battery or electrical work, the maintenance light may behave unpredictably. In these cases, a full system reset may be needed. Disconnect the battery for 10 minutes, then reconnect it and try the reset procedure again.
When to Seek Professional Help
While resetting the maintenance light is usually a DIY task, there are times when you should consult a professional.
Persistent Light After Reset
If the light continues to come on despite multiple reset attempts, there may be an underlying issue. For example, a faulty sensor or software glitch could be causing the problem. A certified Toyota technician can diagnose and resolve these issues.
Check Engine Light Also On
If the maintenance light is on along with the check engine light, do not ignore it. The check engine light indicates a potential mechanical problem that requires immediate attention. Have your vehicle inspected as soon as possible.
Unusual Dashboard Behavior
If other dashboard lights flicker, the odometer resets unexpectedly, or the vehicle behaves oddly during the reset process, stop immediately. These could be signs of an electrical issue that needs professional diagnosis.
Older or Rare Models
For very old Toyotas (pre-2000) or rare models, the reset procedure may differ significantly. In these cases, consult a Toyota specialist or refer to a factory service manual.
Tips for Maintaining Your Toyota
Resetting the maintenance light is just one part of vehicle care. To keep your Toyota running smoothly, follow these tips:
Follow the Maintenance Schedule
Your owner’s manual includes a detailed maintenance schedule. Stick to it for oil changes, tire rotations, brake inspections, and fluid checks. Regular maintenance extends the life of your vehicle and improves fuel efficiency.
Use Genuine Toyota Parts
When replacing parts, choose genuine Toyota components or high-quality aftermarket equivalents. These are designed to meet Toyota’s specifications and ensure optimal performance.
Monitor Fluid Levels
Check your engine oil, coolant, brake fluid, and transmission fluid regularly. Low or dirty fluids can lead to engine damage and reduced performance.
Keep Records
Maintain a log of all services performed, including dates, mileage, and work done. This helps you stay on track and adds value if you sell the vehicle.
Drive Responsibly
Avoid aggressive driving, excessive idling, and overloading your vehicle. These habits increase wear and tear and can trigger maintenance alerts prematurely.
Conclusion
Resetting the Toyota maintenance light is a simple yet important task that every Toyota owner should know how to do. It ensures your vehicle’s service reminders are accurate and helps you stay on top of routine maintenance. With just a few steps using the trip odometer and ignition, you can reset the light in under two minutes—no tools or expertise required.
Remember, the maintenance light is there to help you, not hassle you. By resetting it after each service, you keep your Toyota in peak condition and avoid unnecessary worry. Whether you drive a Camry, RAV4, or Tacoma, the process is straightforward and accessible to all.
If you ever run into trouble, don’t hesitate to consult your owner’s manual or reach out to a Toyota service center. With proper care and attention, your Toyota will continue to deliver reliable performance for years to come.
Frequently Asked Questions
How often should I reset the Toyota maintenance light?
You should reset the maintenance light every time you complete scheduled service, such as an oil change or tire rotation. This ensures the next reminder appears at the correct interval.
Can I reset the maintenance light without a key?
No, you need access to the ignition system. For keyless models, you’ll need the key fob to activate the ignition via the push-button start.
Will resetting the light affect my warranty?
No, resetting the maintenance light does not affect your warranty. It’s a standard procedure recommended by Toyota to maintain accurate service records.
What if my Toyota has a digital dashboard?
Some newer Toyotas with digital dashboards may require a different reset method. Check your owner’s manual or consult a Toyota dealer for model-specific instructions.
Can I reset the light if the battery is dead?
No, the vehicle needs electrical power to complete the reset. Jump-start the car or replace the battery first, then follow the reset steps.
Does the maintenance light reset itself after service?
No, the light does not reset automatically. It must be manually reset using the trip odometer and ignition, even if service was performed by a mechanic.


