
How to Reset the Toyota Maintenance Light After an Oil Change
Contents
- 1 Key Takeaways
- 2 📑 Table of Contents
- 3 Understanding Your Toyota’s Maintenance Light
- 4 Preparing to Reset the Light: The Golden Rule
- 5 The Universal Reset Method: For Most Toyota Models (Pre-2015-ish)
- 6 Modern Reset Methods: Steering Wheel Controls and Menus
- 7 Model-Specific Nuances and Examples
- 8 Troubleshooting: What to Do If the Light Won’t Reset
- 9 The Bigger Picture: Why This Small Step Matters
- 10 Conclusion: You’ve Got This!
- 11 Frequently Asked Questions
The Toyota maintenance light illuminates to remind you of scheduled service, typically an oil change. After performing the oil change, you must manually reset the light to stop it from blinking. This process varies slightly by model year but is straightforward with the right steps.
Key Takeaways
- The light is a mileage-based reminder: It’s not an oil quality sensor but a timer based on your last reset and average driving conditions.
- You need no special tools: Most resets are done using only your ignition key and the vehicle’s odometer or trip meter button.
- Methods vary by model generation: Older models use the odometer button, while newer ones with steering wheel controls use a menu system.
- Always complete the oil change first: Resetting the light without changing the oil defeats its purpose and can harm your engine.
- Consult your owner’s manual: It contains the exact procedure and diagrams for your specific model year and trim.
- If the light persists, investigate: A failure to reset may indicate an unresolved issue, low oil level, or a faulty sensor.
- Regular resets are part of maintenance: Properly resetting the light is a small but crucial step in maintaining your Toyota’s health and resale value.
📑 Table of Contents
- Understanding Your Toyota’s Maintenance Light
- Preparing to Reset the Light: The Golden Rule
- The Universal Reset Method: For Most Toyota Models (Pre-2015-ish)
- Modern Reset Methods: Steering Wheel Controls and Menus
- Model-Specific Nuances and Examples
- Troubleshooting: What to Do If the Light Won’t Reset
- The Bigger Picture: Why This Small Step Matters
- Conclusion: You’ve Got This!
Understanding Your Toyota’s Maintenance Light
That little wrench icon or “MAINT REQD” message on your dashboard isn’t trying to annoy you. It’s your Toyota’s friendly (or sometimes persistent) reminder that it’s time for scheduled maintenance. Most commonly, this means an oil and filter change. Modern Toyotas don’t use a sensor to check your oil’s condition. Instead, the car’s computer calculates when service is due based on mileage, engine run time, and driving habits. Once you’ve had the service performed, the light needs to be manually reset to start the countdown for the next interval. Knowing how to reset the Toyota maintenance light after an oil change is an essential DIY skill for any owner. It saves you a trip to the dealer for a simple procedure and gives you a better connection to your vehicle’s needs.
What the Maintenance Light Actually Means
It’s important to distinguish this light from a low oil pressure warning, which is a red, urgent light that requires immediate engine shutdown. The maintenance required light is usually yellow or orange and looks like a wrench. It illuminates steadily once the predetermined service interval has passed. Its sole purpose is to prompt you to perform the maintenance listed in your schedule—primarily oil changes, but also tire rotations, inspections, and other services. Ignoring it doesn’t cause immediate damage, but prolonged neglect can lead to accelerated engine wear and other issues. After the service is complete, resetting the light tells the computer, “The job is done; start counting again for the next service.”
Difference Between “Maintenance Required” and “Oil Change” Lights
Some older or simpler vehicles might have a dedicated “Oil Change” light. In modern Toyotas, these functions are almost always combined into the single “MAINT REQD” or wrench light. However, the principle is identical. The system tracks oil change intervals. Always refer to your owner’s manual to confirm what your specific light indicates, but for the vast majority of Toyotas from the last two decades, it’s the same maintenance reminder light. The steps to reset it are also generally the same across models, which is good news for owners.
Preparing to Reset the Light: The Golden Rule
Before you touch a single button, there is one non-negotiable rule: the oil change must be fully completed. This means fresh oil and a new filter are installed, and the oil level is checked and correct. Resetting the light without doing the work is like erasing a to-do list without doing the tasks. Your engine will continue to run on degraded oil until it fails, and the light will simply come back on after a few hundred miles, having learned nothing. This step is about integrity and engine health, not just turning off an annoyance.
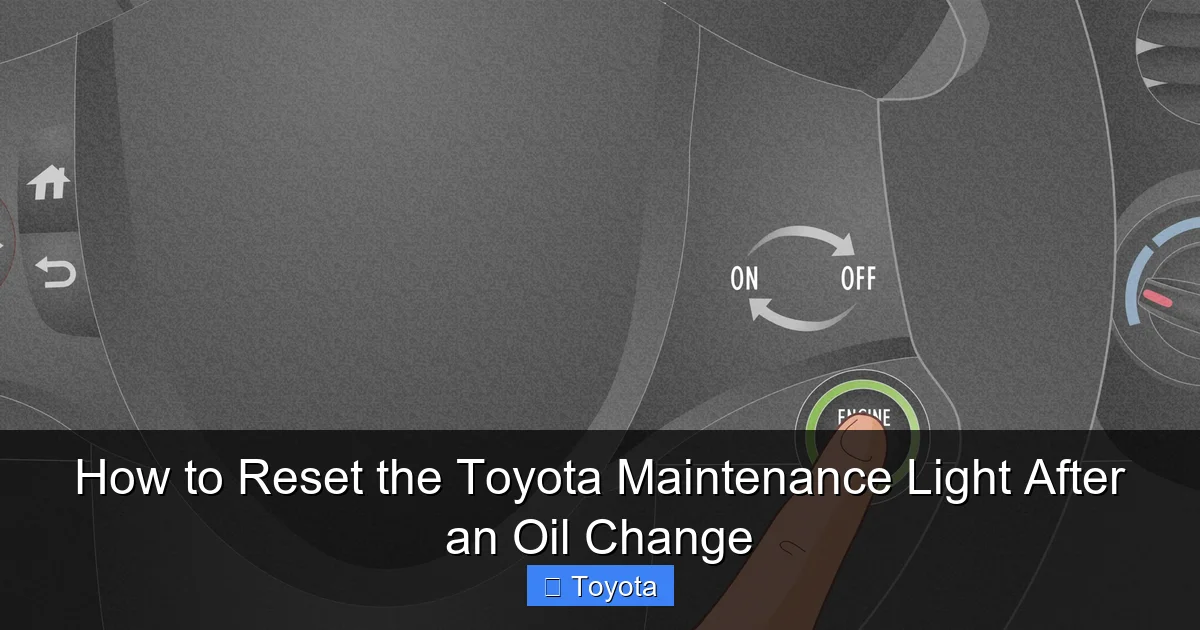
Visual guide about How to Reset the Toyota Maintenance Light After an Oil Change
Image source: wikihow.com
Essential Tools (Spoiler: You Probably Don’t Need Any)
The beauty of resetting a Toyota maintenance light is its simplicity. For 90% of models, you need nothing more than your vehicle’s key or key fob. There is no need for a scan tool, special reset tool, or even a screwdriver. The entire process is designed to be done by the average owner from the driver’s seat. The only “tool” you might need is your owner’s manual for model-specific nuances, but the standard method works for most. Have your key ready, and ensure your parking brake is engaged and the vehicle is in Park (P) or Neutral (N) for safety.
Safety First: Confirm the Service is Done
Double-check your work. If you performed the oil change yourself, verify the drain plug and filter are tightened correctly, and there are no leaks. Check the oil level with the dipstick after starting the engine and letting it run for a minute, then turning it off and waiting a few minutes for the oil to settle. The level should be between the “Full” and “Add” marks. If you had a professional do it, a quick visual check under the car and a glance at the dipstick can give you peace of mind. Only when you are absolutely certain the maintenance is complete should you proceed to the reset procedure.
The Universal Reset Method: For Most Toyota Models (Pre-2015-ish)
This is the classic method that has worked for countless Camrys, Corollas, RAV4s, and Tacomas for years. It uses the vehicle’s odometer display and the button that normally toggles between trip meters and the odometer. The steps are nearly identical across these models. If your Toyota has a digital odometer and a single button on the instrument cluster (often labeled “ODO/TRIP”), this is almost certainly your method.
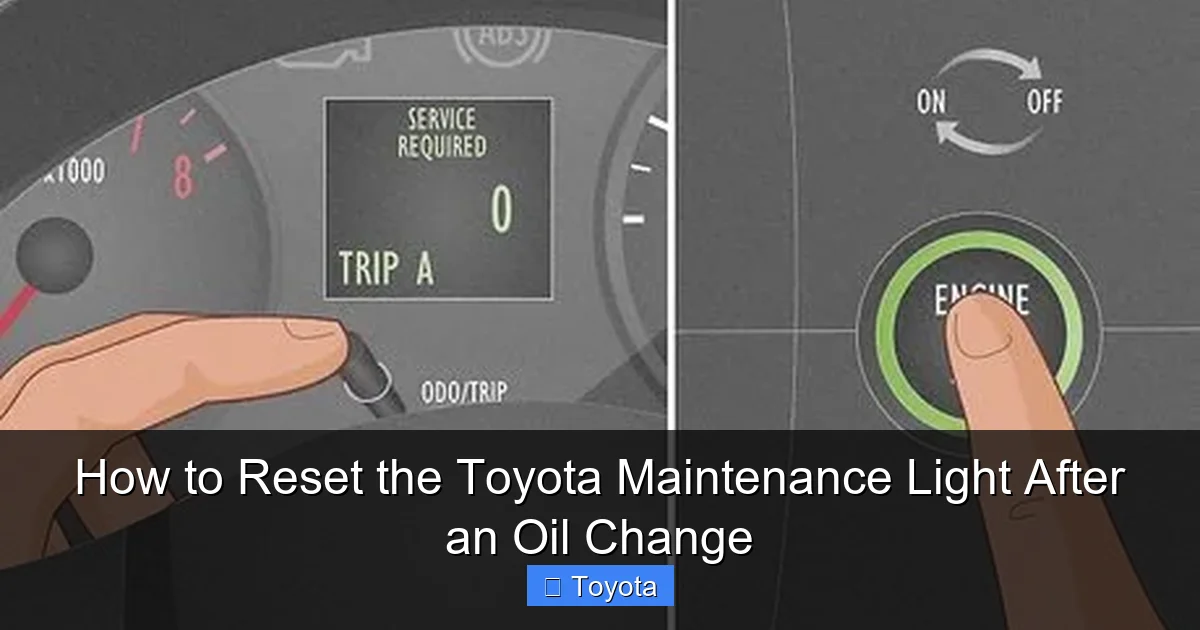
Visual guide about How to Reset the Toyota Maintenance Light After an Oil Change
Image source: wikihow.com
Step-by-Step: The Odometer Button Technique
Follow these steps precisely. The sequence of turning the key and pressing the button is critical.
- Step 1: Insert your key and turn the ignition to the “ON” position (the position right before “START,” where all dashboard lights come on). Do not start the engine. If you have a push-button start, press the “START” button twice without touching the brake pedal to put the car in “ON” mode.
- Step 2: Using the button on your instrument cluster (often the same one you press to switch between odometer and trip A/B), press and release it repeatedly until the display shows the total odometer reading, not a trip meter. You want to see the actual miles/kilometers the car has driven.
- Step 3: Now, turn the ignition “OFF.” The dashboard lights will go dark.
- Step 4: While the ignition is off, press and hold down that same odometer/trip button.
- Step 5: While continuing to hold the button, turn the ignition back to the “ON” position (again, do not start the engine). Keep holding the button.
- Step 6: After a few seconds (usually 3-5), you should see the odometer display change. It may show dashes “—–” or flash several times. This indicates the reset is in progress.
- Step 7: Continue holding the button for another 5-10 seconds until the maintenance required light (wrench icon) begins to blink and then goes out completely. Once it goes out, you can release the button.
- Step 8: Turn the ignition off and then back on to verify the light is no longer illuminated. Start the engine to be sure.
This method is incredibly reliable. If it doesn’t work the first time, turn everything off, take a breath, and try again, ensuring you hold the button long enough in Step 5. The timing is key. For many owners of models like the 2010 Toyota Corolla or 2012 Toyota Camry, this is the definitive guide.
Modern Reset Methods: Steering Wheel Controls and Menus
As Toyota introduced more advanced instrument clusters and steering wheel controls, the reset process migrated from the dash to the wheel. This is common on models from approximately 2013 onward, especially in the RAV4, Highlander, and newer Camry/Corolla lines. The principle is the same—access a service menu—but the interface is different.
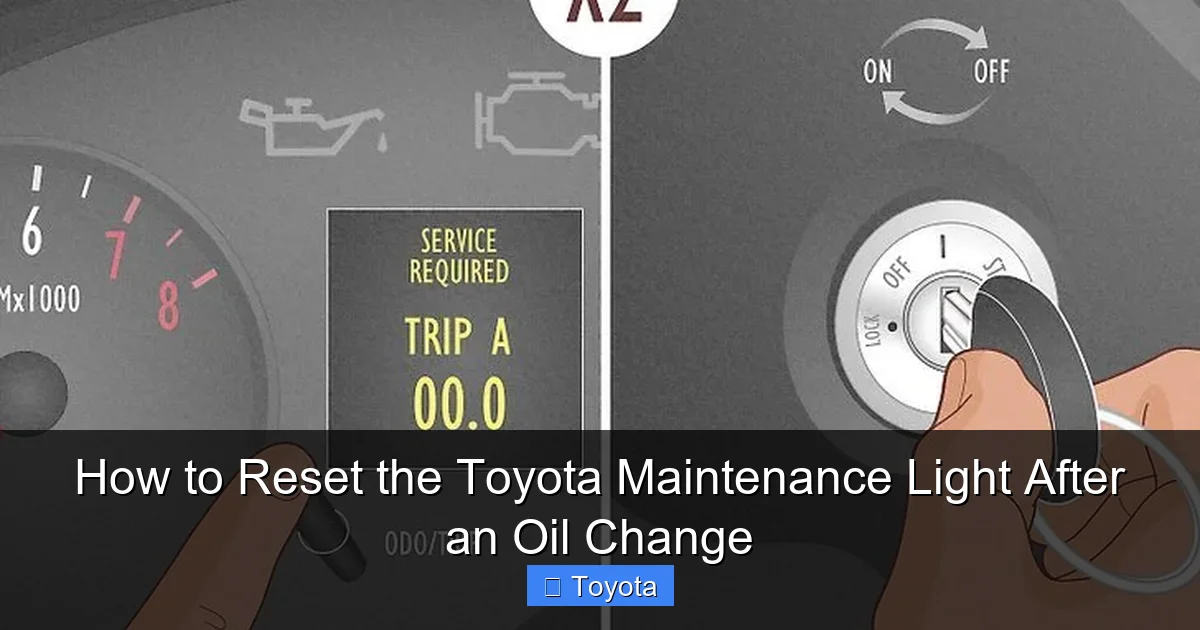
Visual guide about How to Reset the Toyota Maintenance Light After an Oil Change
Image source: wikihow.com
Using the Steering Wheel Menu Buttons
Look for buttons on the left or right spoke of your steering wheel, often labeled with a page icon or “Menu.” You’ll use these to navigate the multi-information display (MID) between the speedometer and fuel gauge.
- Step 1: With the ignition “ON” but engine off, use the arrow buttons on the steering wheel to scroll through the display options until you find the “Settings” or “Vehicle Settings” menu.
- Step 2: Navigate into the settings menu. You’re looking for an option like “Maintenance,” “Service,” or “Maintenance Reset.”
- Step 3: Select that option. The display will likely ask you to confirm or show the current mileage since last reset.
- Step 4: Use the “Enter” or “Set” button (often the center button on the wheel) to confirm the reset. You may need to hold it for a second.
- Step 5: The display should show a confirmation message like “Reset Complete” or the wrench icon should extinguish. Turn the car off and on to verify.
The exact menu names vary. A 2021 Toyota RAV4, for instance, uses a very clear “Maintenance” menu accessible from the steering wheel. For a detailed, model-specific walkthrough with images, our guide on resetting the maintenance light on a 2021 Toyota RAV4 is an invaluable resource. This method can feel more like using a smartphone menu than the old button-press trick, but it’s just as simple once you find the right menu.
The “Trip Meter Reset” Shortcut (Common in Many Newer Models)
Some Toyotas, particularly certain Corollas and RAV4s, have a clever shortcut. With the ignition “ON” and the odometer showing the total miles, you simply press and hold the trip meter reset button (on the dash) until the light begins to blink. There’s no need to cycle the ignition off and on. The display will count down or flash, and the light will go out. This is a streamlined version of the classic method. Always try the simplest method first: display total odometer, then press and hold the trip reset button for 5-10 seconds with the car on. If the wrench light blinks and goes out, you’re done.
Model-Specific Nuances and Examples
While the core principles are universal, the exact button names and menu paths can differ. Let’s look at a few popular models to build your confidence. Remember, if your model isn’t listed, the universal method or steering wheel menu method will almost certainly apply. Your owner’s manual is the final authority.
Toyota Camry and Corolla (2014-2020)
For these best-sellers, the method depends on the trim level’s instrument cluster. Base models with a basic monochrome display typically use the classic odometer button method with the ignition cycle. Higher trims with a color MID will use the steering wheel buttons. For a Camry with a 7-inch display, you’d go: Steering Wheel > Menu > Settings > Vehicle > Maintenance > Reset. The light will blink and go out. The process is nearly identical for the Corolla. The steps are intuitive if you take a moment to explore the display menus.
Toyota RAV4 and Highlander (2013-Present)
These SUVs almost universally use the steering wheel control system for resets. The menu structure is consistent across generations. You navigate to “Settings,” then “Vehicle,” and you’ll find “Maintenance” with options for “Oil & Filter” and other items. Selecting “Oil & Filter” and holding “Enter” will reset the light. Our comprehensive article on resetting the maintenance light on a Toyota Highlander covers the exact steps for various model years, including the use of the “Info” button on the steering wheel. Similarly, the RAV4’s process is well-documented. The key is patience while scrolling through the digital menus.
Toyota Tacoma, Tundra, and Avalon
Pickup trucks and the full-size Avalon follow suit. Tacomas (especially 2016+) and Tundras use the steering wheel menu. Older Tacomas might use the dash button method. The Avalon, being a luxury-oriented model, has used the steering wheel controls for many years. The common thread is: if you have a digital display and wheel controls, use them. If you have a simple analog odometer with a single reset button, use the ignition cycle method. When in doubt, a quick online search for “how to reset maintenance light on [Your Year, Make, Model]” will yield specific results, often linking to the very guides we’ve created for each vehicle.
Troubleshooting: What to Do If the Light Won’t Reset
You followed every step perfectly, but that wrench is still glaring at you. Don’t panic. This is uncommon, but it happens. Here’s a systematic approach to diagnose the issue.
Common Reasons for Reset Failure
- The oil change isn’t actually complete: This is the #1 culprit. Did the mechanic forget to reset it? Did you forget to reset it after your DIY job? Double-check.
- Low oil level: The system may inhibit the reset if the oil level is critically low. Check the dipstick.
- Incorrect reset procedure: You might be using the method for a different model year. Re-read the steps for your specific vehicle. The timing of button presses is crucial.
- A different service light is on: Ensure you’re not confusing the maintenance light with a separate service reminder or a check engine light. They are different.
- Electrical glitch: Rarely, a temporary computer glitch can prevent acceptance of the reset. A full cycle—disconnecting the battery for 10 minutes—can sometimes clear it, but this is a last resort.
Steps to Take If the Light Persists
First, repeat the reset procedure two more times, carefully. Second, verify the oil level is correct. Third, consult your owner’s manual’s troubleshooting section. Fourth, if you have access to an OBD2 scanner, some advanced scanners can perform maintenance resets, but this is usually overkill. Finally, if all else fails, a quick visit to a Toyota dealership or a reputable independent shop can reset it in seconds. They can also scan for any stored fault codes that might be blocking the reset. For broader post-service steps, including what to do after an oil change, our general guide on how to reset the car after an oil change provides helpful context. Sometimes the issue is not the reset process but an underlying problem the car’s computer has detected.
The Bigger Picture: Why This Small Step Matters
Resetting that light isn’t just about making a nuisance icon disappear. It’s about closing the loop on a critical maintenance task and ensuring your Toyota’s onboard computer accurately tracks future service intervals. Neglecting to reset it means you lose your reliable service reminder, potentially leading to missed oil changes down the line.
Protecting Your Engine and Investment
Regular oil changes are the single most important thing you can do for your engine’s longevity. The maintenance light is your schedule. Resetting it starts a fresh countdown, ensuring you’ll be reminded again in 5,000 or 10,000 miles (depending on your oil type and driving conditions). An engine that receives timely oil changes will run smoother, cooler, and far longer. It also directly impacts your vehicle’s resale value. A complete service history with timely resets shows prospective buyers the car was cared for.
Safety and Performance Benefits
Fresh oil reduces friction, cleans the engine, and helps regulate temperature. This leads to better fuel economy, more consistent performance, and a lower risk of catastrophic engine failure. The simple act of resetting the light is the final, affirming step in a process that keeps you safe on the road. It’s a tiny act of responsibility that pays massive dividends in reliability and peace of mind. By mastering this procedure, you take one more step toward becoming a confident, knowledgeable vehicle owner who understands and partners with their machine.
Conclusion: You’ve Got This!
Resetting the maintenance light on your Toyota after an oil change is a fundamental piece of automotive self-sufficiency. Whether you’re using the classic odometer button trick on a 2008 Corolla or navigating the digital menus of a 2022 RAV4, the process is designed to be owner-friendly. Remember the golden rule: never reset without completing the service. Identify your model’s method—likely the ignition cycle for older models, steering wheel menus for newer ones—and follow the steps methodically. If you stumble, your owner’s manual is your best friend, and our library of model-specific guides is here to help. This small act reinforces good habits, keeps your engine healthy, and clears your dashboard of unnecessary distractions. Now, go enjoy that freshly serviced, worry-free drive in your reliable Toyota!
Frequently Asked Questions
Will the Toyota maintenance light reset itself after an oil change?
No. The light is a manual system. It will illuminate and stay on until you perform the specific reset procedure. It does not detect that new oil is in the engine.
How many miles can I drive after the maintenance light comes on before getting an oil change?
The light is designed to come on at your scheduled service interval (e.g., 5,000 or 10,000 miles). You should plan to get the oil change within 1,000 miles or one month, whichever comes first, to avoid excessive wear.
What happens if I accidentally reset the light before changing the oil?
The light will stay off, but your service interval clock will restart. You will not be reminded to change the oil for another full interval, meaning you could drive thousands of miles on old oil, which can damage your engine. Always reset only after the service is complete.
Does resetting the maintenance light affect any other vehicle systems or codes?
No. The reset only communicates with the maintenance reminder system. It does not clear diagnostic trouble codes (check engine light), affect engine performance, or alter any other settings.
Can I use an OBD2 scanner to reset the maintenance light?
Some advanced OBD2 scanners have the capability to perform maintenance resets on Toyota vehicles. However, the built-in manual method is always free, instantaneous, and doesn’t require any special equipment.
Is it safe to drive with the maintenance required light on?
It is safe to drive for a short period to get your oil changed, but it is not advisable to ignore it for long. The light means your oil is past its recommended service life, and continued driving increases the risk of engine wear and potential failure. Treat it as a high-priority reminder.


