

How to Reset the Dodge Journey Oil Change Light
Contents
- 1 Key Takeaways
- 2 📑 Table of Contents
- 3 Why the Oil Change Light Matters
- 4 When to Reset the Oil Change Light
- 5 Step-by-Step Guide to Resetting the Oil Change Light
- 6 Model-Specific Variations and Tips
- 7 Troubleshooting: What If the Light Won’t Reset?
- 8 Maintaining Your Dodge Journey Beyond the Oil Change
- 9 Conclusion
- 10 Frequently Asked Questions


Resetting the Dodge Journey oil change light is a simple process that takes just a few minutes and ensures your vehicle’s maintenance reminders stay accurate. This guide walks you through every step, from locating the right buttons to confirming the reset, so you can keep your Journey running smoothly without visiting a dealership.
Owning a Dodge Journey means enjoying a reliable, family-friendly SUV with plenty of space, comfort, and practicality. But like any vehicle, it needs regular maintenance—and one of the most common reminders you’ll see is the oil change light. This little warning on your dashboard isn’t just a nag; it’s your car’s way of saying, “Hey, it’s time to take care of me!”
But here’s the good news: you don’t need to rush to the dealership every time that light pops up. Resetting the Dodge Journey oil change light is something you can do yourself in under five minutes—no tools, no fees, no hassle. Whether you’ve just changed your oil at home or had it done at a shop, knowing how to reset this light keeps your vehicle’s maintenance tracker accurate and gives you peace of mind.
In this guide, we’ll walk you through the entire process step by step, explain why it’s important, and share tips to avoid common mistakes. We’ll also cover troubleshooting advice and answer frequently asked questions so you feel confident handling this task like a pro. So grab your keys, take a seat in your Journey, and let’s get that light turned off—for good.
Key Takeaways
- Know your model year: The reset procedure may vary slightly between 2009–2020 Dodge Journey models, so always confirm your vehicle’s year before starting.
- Turn the ignition on, don’t start the engine: Most reset procedures require the key to be in the “ON” position with the engine off to access the dashboard controls.
- Use the trip odometer button: This is the primary tool for navigating the instrument cluster menu and initiating the oil life reset.
- Follow the sequence precisely: Skipping or rushing steps can prevent the reset from completing successfully—patience is key.
- Verify the reset worked: After completing the steps, check that the oil change light is off and the oil life percentage resets to 100%.
- Regular maintenance matters: Resetting the light doesn’t replace an actual oil change—always follow your owner’s manual for service intervals.
- When to seek professional help: If the light won’t reset after multiple attempts, there may be an underlying issue requiring a mechanic’s diagnosis.
📑 Table of Contents
Why the Oil Change Light Matters
The oil change light in your Dodge Journey isn’t just a random alert—it’s part of a sophisticated maintenance reminder system designed to help you protect your engine. Engine oil plays a critical role in lubricating moving parts, reducing friction, cooling components, and preventing sludge buildup. Over time, oil breaks down and loses its effectiveness, which is why regular changes are essential.
The oil change light typically comes on based on a combination of factors, including mileage, driving conditions, and engine runtime. Modern Dodge Journey models use an oil life monitoring system (OLMS) that calculates oil degradation rather than relying solely on a fixed mileage interval. This means the light might come on sooner if you frequently drive in stop-and-go traffic, tow heavy loads, or operate in extreme temperatures.
Ignoring the oil change light can lead to serious consequences. Dirty or low oil increases engine wear, reduces fuel efficiency, and in extreme cases, can cause engine overheating or failure. By resetting the light after each oil change, you ensure the system accurately tracks your next service interval. It’s a small step that makes a big difference in your vehicle’s longevity and performance.
When to Reset the Oil Change Light
Visual guide about How to Reset the Dodge Journey Oil Change Light
Image source: i.ytimg.com
Knowing when to reset the oil change light is just as important as knowing how. The light should only be reset after you’ve actually changed the oil—not before, not during, and definitely not if you’re just trying to silence a reminder. Resetting it prematurely can lead to missed maintenance and potential engine damage.
So, when exactly should you reset it? The answer is simple: right after completing an oil change. Whether you did it yourself or had a professional handle it, the reset ensures the system starts counting down from 100% oil life again. Most mechanics will reset the light for you, but it’s always smart to double-check. If they didn’t, or if you’re doing it at home, now’s the time.
It’s also worth noting that the oil change light may come on even if you’ve recently changed the oil. This can happen if the previous reset wasn’t completed properly or if the system detected unusual driving patterns that accelerated oil degradation. In these cases, resetting the light after confirming the oil is fresh and at the correct level is perfectly fine.
One common mistake drivers make is resetting the light without checking the oil level. Always inspect the dipstick to ensure the oil is clean, full, and the right type (check your owner’s manual for specifications). Resetting the light with old or low oil defeats the purpose and puts your engine at risk.
Step-by-Step Guide to Resetting the Oil Change Light

Visual guide about How to Reset the Dodge Journey Oil Change Light
Image source: hiride.com
Now that you understand why and when to reset the oil change light, let’s get into the nitty-gritty: the actual steps. The process is straightforward and requires no special tools—just your key and a few button presses. Below is a detailed, model-year-friendly guide that works for most Dodge Journey vehicles from 2009 to 2020.
Step 1: Turn the Ignition to the “ON” Position
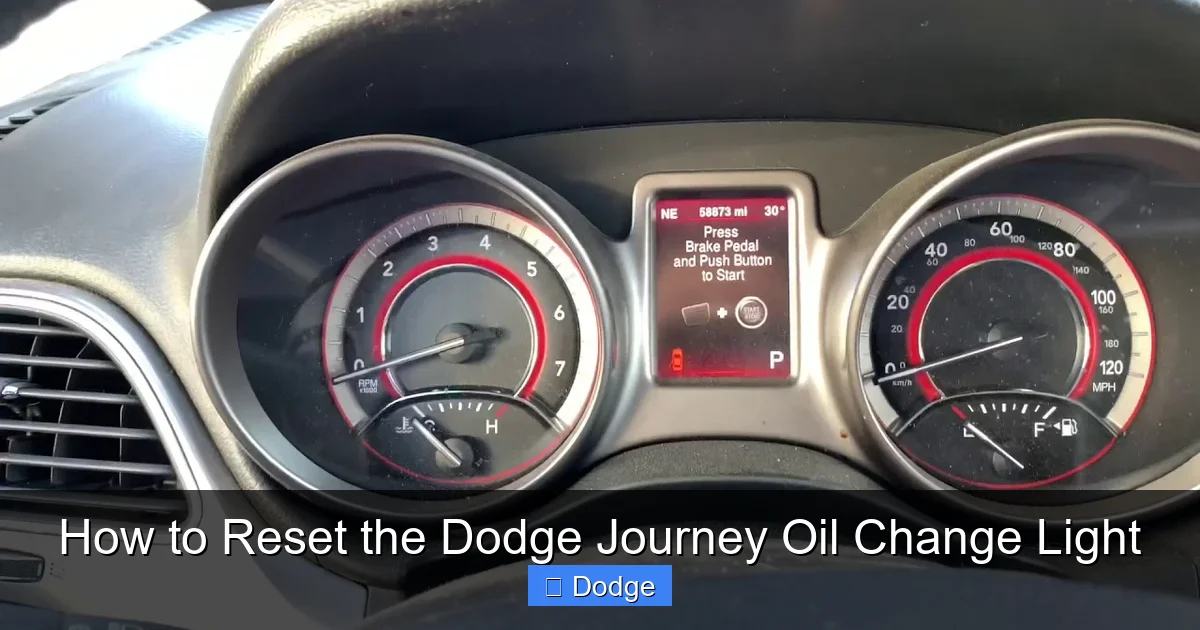
Start by sitting in the driver’s seat and inserting your key into the ignition. Turn the key to the “ON” position—this powers up the dashboard and instrument cluster, but does not start the engine. You’ll see all the warning lights illuminate briefly, including the oil change light. This is normal and indicates the system is active.
Do not start the engine during this process. Starting the engine can interrupt the reset sequence and prevent the system from recognizing your inputs. If you accidentally start the engine, simply turn it off and return the key to the “ON” position before continuing.
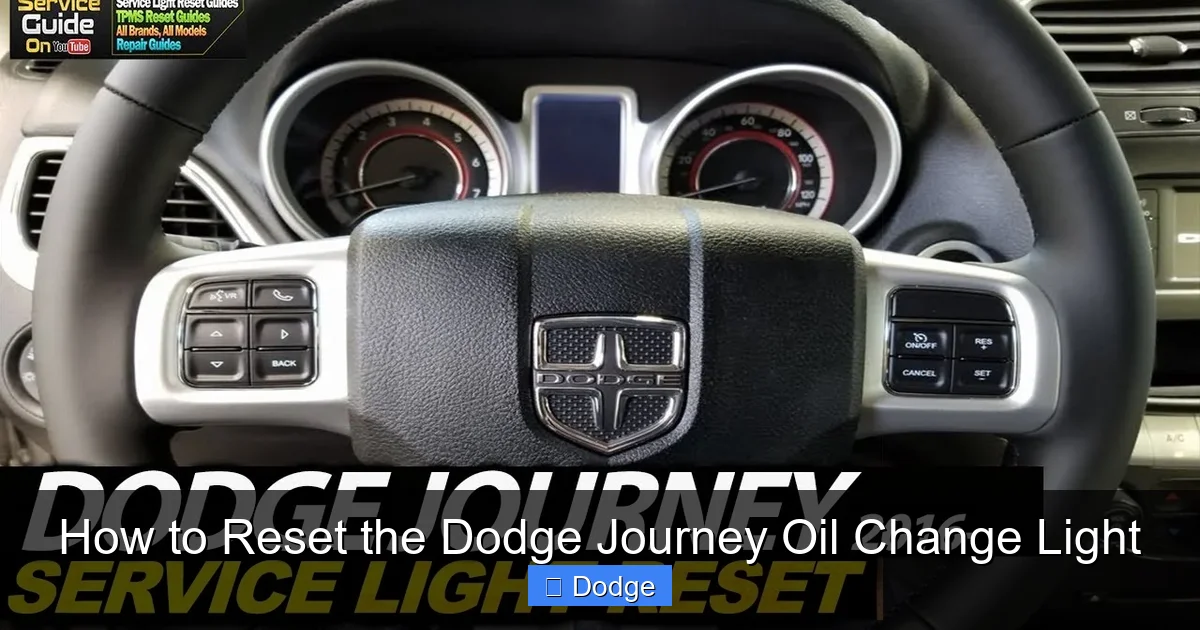
Step 2: Locate the Trip Odometer Button
Next, look at your instrument cluster. On the right side of the speedometer, you’ll find a small button labeled “TRIP” or “RESET.” This button is your main tool for navigating the dashboard menu and initiating the oil life reset. It’s typically black or gray and may be recessed slightly into the panel.
If you’re having trouble finding it, consult your owner’s manual—it will have a diagram of the instrument cluster with labeled buttons. Some newer models may have a multifunction stalk on the steering column, but the trip button on the dashboard is the standard method for oil reset.
Step 3: Press and Hold the Trip Button
With the ignition on and the engine off, press and hold the trip odometer button. Keep it held down. After a few seconds, you’ll notice the oil life percentage on the display begin to change. It may flash or count down from its current value (e.g., 15%) toward 0%.
Continue holding the button. The system is now preparing to reset the oil life monitor. This step may take 10–15 seconds, so be patient. If nothing happens after 20 seconds, release the button, wait a moment, and try again. Sometimes the system needs a moment to respond.
Step 4: Release and Press Again (If Needed)
On some Dodge Journey models, especially those from 2015 onward, you may need to release the trip button once the oil life reaches 0% and then press and hold it again. This second press confirms the reset. Watch the display closely—when the oil life resets to 100%, you’ll know the process is complete.
If your model uses a single press-and-hold method, the display will automatically jump to 100% after counting down. Either way, the key indicator is seeing “100%” or “OIL LIFE 100%” on the screen.
Step 5: Turn Off the Ignition
Once the oil life shows 100%, you can safely turn the ignition back to the “OFF” position. Remove the key if desired. The oil change light should now be off, and your maintenance tracker is reset.
To confirm the reset worked, start the engine and check the dashboard. The oil change light should not illuminate, and the oil life percentage should remain at or near 100%. If the light comes back on immediately, the reset may not have taken—try the process again, ensuring each step is followed precisely.
Model-Specific Variations and Tips
Visual guide about How to Reset the Dodge Journey Oil Change Light
Image source: i.ytimg.com
While the general reset procedure is consistent across most Dodge Journey models, there are slight variations depending on the year and trim level. Being aware of these differences can save you time and frustration.
2009–2014 Dodge Journey Models
For earlier models, the reset process is typically simpler. Turn the ignition to “ON,” press and hold the trip button until the oil life resets to 100%, then turn off the ignition. These models often don’t require a second press—just one continuous hold.
One tip: if your Journey has a basic digital display (not a full-color screen), the oil life may appear as a simple percentage without additional text. Watch for the number to change from a low value (like 10%) to 100%.
2015–2020 Dodge Journey Models
Newer models may feature a more advanced instrument cluster with a color display and additional menu options. In these vehicles, you might need to navigate through a menu using the trip button.
To access the menu, press the trip button repeatedly until you see “OIL LIFE” or “MAINTENANCE” on the screen. Then, press and hold the button to initiate the reset. Some models also allow you to reset other maintenance reminders (like tire pressure or brake fluid) from the same menu.
Uconnect System Integration
If your Journey is equipped with the Uconnect infotainment system, you may be able to reset the oil change light through the touchscreen. Go to “Settings” > “Vehicle” > “Maintenance” and look for the oil life option. From there, select “Reset” and confirm.
However, this method isn’t available on all trims, and the dashboard button method is still the most reliable. If the touchscreen option doesn’t appear, stick with the trip button procedure.
Common Pitfalls to Avoid
Even with clear instructions, mistakes can happen. Here are a few common errors and how to avoid them:
– Starting the engine too soon: Always keep the engine off during the reset.
– Holding the button too briefly: The reset requires a sustained press—don’t let go too early.
– Confusing the trip button with other controls: Make sure you’re pressing the correct button on the instrument cluster, not a steering wheel control.
– Forgetting to check the oil: Always verify the oil is fresh and at the proper level before resetting.
Troubleshooting: What If the Light Won’t Reset?
Sometimes, despite following the steps correctly, the oil change light refuses to reset. Don’t panic—this doesn’t necessarily mean there’s a serious problem. Here are some troubleshooting tips to get you back on track.
Double-Check the Procedure
Go through the steps again, slowly and carefully. It’s easy to miss a detail, especially if you’re doing it for the first time. Make sure the ignition is on, the engine is off, and you’re holding the trip button long enough.
If you’re using a key fob with a push-button start, press the “Start” button twice without pressing the brake pedal to turn the ignition on. Then proceed with the trip button method.
Check the Battery
A weak or dying battery can cause electrical glitches, including issues with the instrument cluster. If your dashboard lights flicker or behave erratically, the battery may not be providing enough power for the reset. Try jump-starting the vehicle or replacing the battery if it’s old.
Inspect the Oil Level and Quality
If the oil is low, dirty, or the wrong type, the system may refuse to reset as a safety measure. Check the dipstick: the oil should be clean, amber-colored, and between the “MIN” and “MAX” marks. If it’s dark, sludgy, or low, change the oil before attempting the reset.
Try a Hard Reset
In rare cases, the system may need a full reset. Turn off the ignition, disconnect the negative terminal of the battery for 10–15 minutes, then reconnect it. This clears the vehicle’s computer memory and may resolve stubborn issues.
Visit a Dealership or Mechanic
If none of the above steps work, there may be a deeper issue—such as a faulty sensor, wiring problem, or software glitch. A certified Dodge technician can diagnose the problem using specialized tools and reset the system manually if needed.
Maintaining Your Dodge Journey Beyond the Oil Change
Resetting the oil change light is just one part of keeping your Dodge Journey in top shape. Regular maintenance goes beyond oil—it includes checking fluids, rotating tires, inspecting brakes, and more.
Follow the maintenance schedule in your owner’s manual, which outlines service intervals based on mileage and time. For example, most Journeys require an oil change every 3,000 to 7,500 miles, depending on driving conditions. Severe driving (like frequent short trips or towing) may require more frequent changes.
Keep a maintenance log to track when services were performed. This helps you stay on schedule and can increase your vehicle’s resale value. Many drivers use apps or simple notebooks to record oil changes, tire rotations, and other services.
Also, pay attention to other dashboard warnings. The oil change light is important, but so are alerts for tire pressure, brake wear, and engine temperature. Addressing these promptly prevents bigger problems down the road.
Conclusion
Resetting the Dodge Journey oil change light is a quick, easy task that every owner should know how to do. It ensures your vehicle’s maintenance system stays accurate, helps you avoid unnecessary trips to the dealership, and keeps your engine running smoothly.
By following the step-by-step guide in this article, you can reset the light in just a few minutes—no tools or expertise required. Remember to always reset the light after an actual oil change, double-check your oil level, and follow your owner’s manual for service intervals.
If you run into issues, don’t hesitate to troubleshoot or seek professional help. Your Dodge Journey is built to last, and a little attention to maintenance goes a long way. So the next time that oil change light pops up, you’ll know exactly what to do—and your Journey will thank you with years of reliable service.
Frequently Asked Questions
Can I reset the oil change light without changing the oil?
No, you should only reset the oil change light after actually changing the oil. Resetting it without fresh oil defeats the purpose of the reminder system and can lead to engine damage.
Why does the oil change light come on before 3,000 miles?
The oil life monitoring system considers driving conditions, not just mileage. Frequent short trips, extreme temperatures, or heavy loads can degrade oil faster, triggering the light early.
Will the oil change light reset itself after an oil change?
No, the light will not reset automatically. You must manually reset it using the trip odometer button or, on some models, the Uconnect system.
What if I don’t have a trip odometer button?
All Dodge Journey models have a trip odometer button on the instrument cluster. If you can’t find it, consult your owner’s manual for a diagram of the dashboard controls.
Can a mechanic reset the oil change light for me?
Yes, most mechanics will reset the oil change light as part of an oil change service. However, it’s always good to confirm they’ve done it before leaving the shop.
Is it safe to drive with the oil change light on?
It’s not recommended. The light indicates your oil is degraded or low, which can lead to engine wear or failure. Schedule an oil change as soon as possible.


