
How to Reset Car After Oil Change on a Toyota Corolla
Contents
- 1 Key Takeaways
- 2 📑 Table of Contents
- 3 Understanding Your Corolla’s Maintenance System
- 4 Method for Newer Corollas with Multi-Information Display (2014-Present)
- 5 Alternative Method: Using an OBD2 Scanner
- 6 Model Year Variations and Special Cases
- 7 Troubleshooting: What If the Light Won’t Reset?
- 8 Frequently Asked Questions

Car Armrest Cushion

Octane Booster

Portable Air Pump
Car Inverter
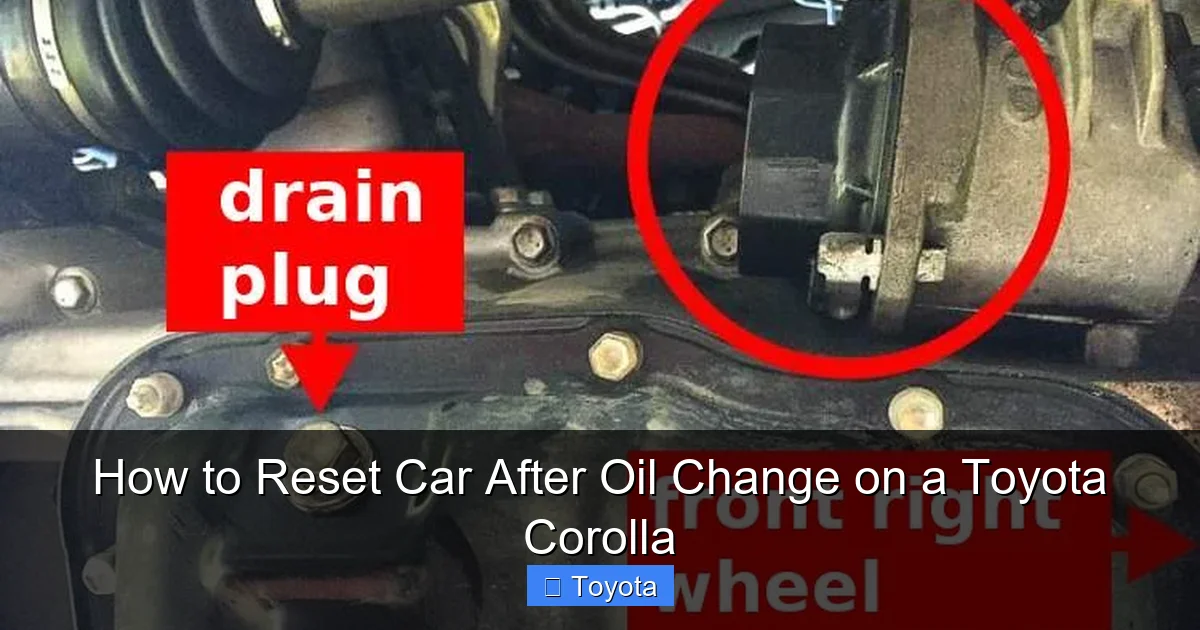
Resetting the oil change or maintenance required light on your Toyota Corolla is a simple task you can do yourself after an oil change. The process typically involves using the odometer/trip meter button on the dashboard to access the maintenance menu. For newer models with a multi-information display, the steps are slightly different but equally easy. Always ensure the oil has been properly changed before performing the reset to maintain engine health.
That little wrench icon or “MAINT REQD” message on your Toyota Corolla’s dashboard is impossible to ignore. It’s your car’s way of saying, “Hey, it’s time for an oil change!” You dutifully head to the shop or roll up your sleeves and do the job yourself. The new oil is in, the filter is tight, and you’ve even topped off the fluids. Then, you start the car… and the light is still on. Frustrating, right? Don’t worry. This isn’t a sign of a faulty job; it’s simply a reminder that needs to be manually turned off. Resetting the oil change light on a Toyota Corolla is a straightforward process that takes less than a minute. It’s a small but important part of completing your routine maintenance. This guide will walk you through every method, for every generation, so you can confidently clear that light and get back on the road with peace of mind.
Understanding why this reset is necessary is key. Your Corolla’s onboard computer doesn’t magically know you changed the oil. It calculates oil life based on algorithms that factor in engine revolutions, temperature, driving habits, and time. When it determines the oil has degraded to a certain point (usually around 5,000 to 10,000 miles depending on your model and oil type), it illuminates the maintenance required light. Performing the reset tells the computer, “The service is done,” and it begins counting down from 100% oil life again. Skipping this step means your car’s service interval timer is inaccurate, and you’ll get the reminder again much sooner than you should. It’s a quick reset that ensures your maintenance tracking stays synchronized with your actual work.
The method you use depends heavily on your Corolla’s model year and trim level. Broadly, we can break them into two camps: older models with a simple digital odometer display and newer models with a full-color multi-information display (MID) or touchscreen. The good news is that Toyota has kept the process relatively consistent within each generation. We’ll start with the most common method, used on hundreds of thousands of Corollas from the late 2000s through the mid-2010s, and then move to the variations. Always have your owner’s manual handy for the definitive word for your specific VIN, but this guide will cover the vast majority.
Key Takeaways
- Purpose of the Reset: The oil change light is a maintenance reminder based on mileage and engine conditions. Resetting it tells your car’s computer you’ve performed the service, starting a new countdown cycle.
- Two Primary Methods: Most Corollas use the “ODO/TRIP” button method. Newer models with digital displays use the “Menu” or “Up/Down” arrow buttons on the steering wheel or dash.
- Model Year Matters: The exact steps vary slightly between generations (e.g., 2009-2013 vs. 2014-2018 vs. 2020+). Always verify your specific model year in the owner’s manual.
- Scanner is an Alternative: A basic OBD2 scanner with maintenance reset functions can perform the reset instantly, useful if the manual method fails or for complex systems.
- Safety First: Only reset the light after you have completed the oil and filter change. Resetting without servicing defeats the system’s purpose and can harm your engine.
- Light Behavior: The maintenance required light typically illuminates steadily when due. If it flashes, it may indicate a more serious issue unrelated to routine maintenance.
- When to Seek Help: If the light reappears shortly after a reset or you cannot access the reset menu, consult a professional mechanic to rule out sensor faults or other problems.
📑 Table of Contents
Understanding Your Corolla’s Maintenance System
Before diving into button presses, it helps to understand what you’re talking to. The system is officially called the “Maintenance Required” system, but it’s commonly referred to as the oil change light or oil life monitor. It’s not a sensor that checks oil quality directly (though some systems use oil quality sensors); it’s a sophisticated software algorithm. It tracks variables like engine load, engine speed, coolant temperature, and time since the last reset. When the calculated oil degradation reaches a preset threshold, the light comes on. Resetting it simply sets this internal counter back to zero. This is why the reset procedure is purely electronic—it’s communicating with the Engine Control Unit (ECU) to clear a stored parameter. For more complex diagnostic resets, like a check engine light, a scanner is required, but the maintenance light is designed for owner reset.
The “ODO/TRIP” Button Method (Most Common for 2009-2013 Models)
If your Corolla has a small, single-line digital display between the speedometer and tachometer that shows odometer and trip meter readings, this is almost certainly your method. You’ll use the button, often labeled “ODO/TRIP” or just a single black button on the instrument cluster, to cycle through displays until you find the maintenance menu. The entire process is done with the ignition in the “ON” position (all dash lights on, but engine not started). Here is the step-by-step breakdown:
- Turn the ignition to the “ON” position. Do not start the engine. Press the “START” button twice (without touching the brake) if you have a push-button start.
- Locate the “ODO/TRIP” button. It’s usually on the instrument panel, near the speedometer, or on the steering column stalk. On some models, it’s the same button you use to toggle between odometer A and trip B.
- Press and release the button repeatedly until you see the display change from the total odometer reading to “MAINT REQD” or a wrench icon. You may need to cycle through “TRIP A,” “TRIP B,” and other settings first.
- Once the maintenance message is displayed, press and hold the button. Hold it for about 5-10 seconds. You should see the display begin to blink or change.
- Continue holding the button until the wrench icon or “MAINT REQD” message disappears and the odometer reading reappears. Some models require you to release and press again quickly after the blink starts. The key is to hold until the reset is confirmed.
- Turn the ignition off and then restart the engine to verify the light is off.
Pro Tip: If the light comes back on immediately after starting, you likely didn’t hold the button long enough. Try again, holding for a solid 10 seconds while watching for the blink sequence. This method is famously finicky; patience is key. If you own a Corolla from this era and this doesn’t work, your model might have a slightly different sequence, so consult the manual. You can also find model-specific video guides online by searching “reset oil light [Your Year] Toyota Corolla.”
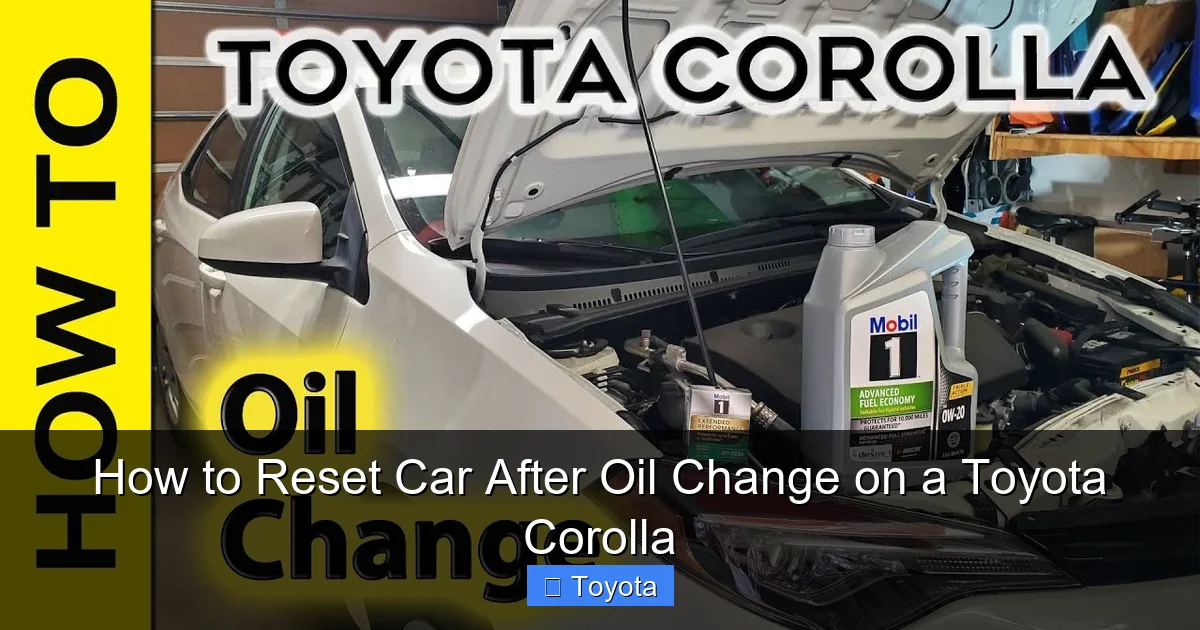
Method for Newer Corollas with Multi-Information Display (2014-Present)
Starting with the 2014 redesign and carrying through the current generation, the Corolla moved to a larger, more informative digital display or a full touchscreen (Entune system). The reset is handled through the vehicle settings menus accessed via buttons on the steering wheel or the touchscreen. The principle is the same, but the navigation is different. There are two primary sub-methods here.
Visual guide about How to Reset Car After Oil Change on a Toyota Corolla
Image source: i.ytimg.com
Using Steering Wheel Buttons (Non-Touchscreen Models)
For Corollas with a basic MID but no touchscreen (often base trims), you’ll use the “DISP” or “Menu” button on the steering wheel.
- With the ignition ON (engine off), press the “DISP” or “Menu” button on the steering wheel repeatedly to cycle through the display options until you see “MAINTENANCE” or an oil can icon.
- Once on the maintenance screen, press and hold the “DISP” button. After a few seconds, the screen should change to show “OIL RESET” or similar.
- Press the “DISP” button again (or sometimes the “Enter” button) to select the reset option.
- The display will ask “RESET?” or show “DONE.” Confirm the reset. The maintenance required light should go out.
Using the Touchscreen (Entune Audio Models)
For Corollas equipped with the Entune touchscreen system, the reset is buried in the vehicle settings menu.
- Turn the car ON (engine off).
- Use the “Menu” or “Home” button on the touchscreen to access the main menu.
- Navigate to Settings (often a gear icon).
- Select Vehicle Settings.
- Scroll down to find Maintenance Reset or Oil Maintenance Reset.
- Select it, and confirm the reset when prompted.
- The system will typically show a confirmation message like “Maintenance Reset Complete.” Exit the menu and check your dash.
Important Note: The exact menu names can vary slightly by model year and Entune software version. If you don’t see “Maintenance Reset,” look for “Service Reset” or “Oil & Filter Reset.” The process to change the time on a 2022 Toyota Corolla uses a similar settings menu path, which can help you familiarize yourself with the interface.
Alternative Method: Using an OBD2 Scanner
If the manual methods prove frustrating or don’t seem to work, an OBD2 scanner is a foolproof alternative. Any basic code reader that supports maintenance reset functions (many inexpensive models do) can clear the light. This is also the method used by professional mechanics and quick-lube shops. Here’s how:

Visual guide about How to Reset Car After Oil Change on a Toyota Corolla
Image source: i.ytimg.com
- Locate the OBD2 port under your dashboard, usually on the driver’s side near the steering column.
- Plug in your scanner and turn the ignition ON (engine off).
- Follow the scanner’s menu prompts. You’ll typically navigate to “Maintenance Reset,” “Oil Life Reset,” or “Service Reset.”
- Select the appropriate reset for “Oil Change” or “Maintenance.”
- The scanner will communicate with the car’s ECU and send the reset command. It will confirm when done.
- Unplug the scanner. The light should be off. Start the engine to confirm.
This method is excellent because it’s universal across all Toyota models and years. If you ever need to reset the maintenance light on a 2017 Toyota Highlander or any other Toyota, the scanner process is virtually identical. It’s a good investment for any DIY car owner.
Model Year Variations and Special Cases
While the methods above cover the majority, there are some specific variations to be aware of. For the 2020+ Corolla (and Corolla Cross), which features a more advanced digital gauge cluster, the process is similar to the steering wheel button method but the menu names might be “Vehicle Settings” > “Maintenance” > “Oil & Filter.” Always look for the wrench icon or “MAINT” text in your gauge cluster displays. For very old Corollas (pre-2009), some used a different procedure involving the trip meter reset button while the odometer was displaying a specific code. If you have a classic Corolla, your owner’s manual is essential. If you’ve recently disconnected the battery, the maintenance light may come on prematurely as the system loses its stored mileage data. In this case, simply perform the reset after your next oil change. Also, if you drive a Corolla that is primarily used for short trips or severe conditions, your oil life percentage may deplete faster, causing the light to come on sooner than the standard 5,000-7,500 mile interval.

Visual guide about How to Reset Car After Oil Change on a Toyota Corolla
Image source: i.ytimg.com
Troubleshooting: What If the Light Won’t Reset?
You followed every step perfectly, but that stubborn wrench is still staring at you. Don’t panic. First, double-check the basics: Did you actually change the oil and filter? Is the oil level correct? A low oil level can sometimes trigger the light. Next, ensure you held the button long enough to see the blinking sequence—this is the most common point of failure. Try the sequence again, holding for a full 10-15 seconds. If it still won’t reset, your car might have a different procedure. Search online forums for your exact year, trim, and transmission (e.g., “2016 Toyota Corolla LE oil light reset”). If all else fails, a visit to a dealership or a shop with a proper scan tool (like a Techstream) may be necessary, as some late-model vehicles have more secure reset protocols. Remember, a light that won’t reset could also indicate a faulty instrument cluster or a deeper electrical issue, though this is rare. For other common Toyota Corolla resets, such as resetting the battery light or resetting the trip meter, the processes are similarly straightforward.
Frequently Asked Questions
What’s the difference between the “Check Engine” light and the “Maintenance Required” (oil change) light?
The “Check Engine” light (usually yellow/amber) indicates an emissions-related fault detected by the engine computer and requires diagnosis. The “Maintenance Required” light (often a wrench icon) is a simple service reminder for scheduled maintenance like oil changes, tire rotations, and is meant to be reset by the owner after the work is done.
Can I reset the oil light without changing the oil?
Technically yes, you can follow the reset steps without performing the service. However, this is strongly discouraged. It defeats the purpose of the system, which is to protect your engine by reminding you of necessary maintenance. Doing this regularly can lead to premature engine wear or failure.
How often should the oil change light come on in a Toyota Corolla?
It depends on your model year and recommended oil type. For most modern Corollas using synthetic oil, the interval is typically 7,500 to 10,000 miles. Older models or those using conventional oil may be set for 3,000 to 5,000 miles. The system calculates based on driving conditions, so severe driving (short trips, extreme temps) may shorten the interval.
What should I do if the oil change light comes back on immediately after I reset it?
If the light returns right away after a reset, first verify the oil level is correct. If the level is fine, it could indicate a faulty oil level sensor, a problem with the maintenance reminder system itself, or that the oil change was not completed properly (e.g., filter not changed, wrong oil used). Have a mechanic diagnose the issue.
Will disconnecting the battery reset the oil change light?
No. Disconnecting the battery may reset the clock and radio presets, but the maintenance required light information is stored in a non-volatile memory within the engine computer (ECU). It is designed to survive a battery disconnect. You must follow the specific reset procedure to clear it.
Is it safe to ignore the oil change light for a little while after it comes on?
The system is designed to give you a buffer. Once the light illuminates, you typically have about 1,000 miles of usable oil life remaining under normal conditions. It’s best to schedule and complete the oil change as soon as convenient, but a short delay (a few hundred miles) is generally not an emergency. Do not ignore it for thousands of miles.


