
How to Protect Tesla Paint
Contents
- 1 Key Takeaways
- 2 📑 Table of Contents
- 3 Why Protecting Your Tesla’s Paint Is a Non-Negotiable Priority
- 4 The Gold Standard: Paint Protection Film (PPF)
- 5 The Chemical Shield: Ceramic Coating
- 6 The Foundation of Protection: Perfect Washing & Drying Techniques
- 7 Beyond the Wash: Daily Maintenance and Specific Threats
- 8 Professional vs. DIY: Knowing When to Call a Pro
- 9 Creating Your Tesla Paint Protection Plan
- 10 Conclusion: Your Tesla Deserves the Best
- 11 Frequently Asked Questions

Car MP3 Player

Car Seat Cover (Universal Fit)

Digital Tire Pressure Gauge
Tire Shine Spray
Protecting your Tesla’s paint is crucial for preserving its stunning appearance and high resale value. The most effective strategies involve applying paint protection film (PPF) or a ceramic coating, combined with meticulous washing and maintenance habits. Avoiding automatic car washes, using the right tools, and addressing contaminants promptly are essential daily practices. This guide breaks down every method, from DIY routines to professional applications, to help you choose the best defense for your Tesla’s unique finish.
Key Takeaways
- Tesla paint is sophisticated and requires specialized care: Tesla’s multi-stage, water-based paints are thinner and more complex than traditional automotive finishes, making them more vulnerable to damage from improper washing and environmental hazards.
- Paint Protection Film (PPF) is the ultimate physical barrier: A clear, self-healing urethane film that shields against stone chips, scratches, and bug splatter. Professional installation is highly recommended for perfect results and full coverage warranties.
- Ceramic Coating provides a durable chemical shield: A liquid polymer that bonds to the paint, creating a hydrophobic, UV-resistant layer that repels dirt and enhances gloss. It requires meticulous surface preparation but offers years of protection with proper maintenance.
- Your washing technique is non-negotiable: The two-bucket method (one with soap, one with rinse water), using a high-quality microfiber wash mitt, and a dedicated drying towel are the single most important habits to prevent swirls and scratches every time you clean your car.
- Never use automatic car washes: The abrasive brushes and harsh chemicals in tunnel washes are the fastest way to destroy your Tesla’s paint, causing countless micro-scratches and a dull, swirled finish.
- Address contaminants immediately: Bird droppings, tree sap, and bug guts are acidic and will etch your paint if left too long. Rinse them off as soon as possible with a gentle spray of water.
- Consider a full wrap for radical change and protection: A vinyl wrap not only changes your Tesla’s color or finish but also acts as a removable protective layer for the original paint. Understanding how much it costs to wrap a Tesla Model 3 is the first step if you choose this route.
📑 Table of Contents
- Why Protecting Your Tesla’s Paint Is a Non-Negotiable Priority
- The Gold Standard: Paint Protection Film (PPF)
- The Chemical Shield: Ceramic Coating
- The Foundation of Protection: Perfect Washing & Drying Techniques
- Beyond the Wash: Daily Maintenance and Specific Threats
- Professional vs. DIY: Knowing When to Call a Pro
- Creating Your Tesla Paint Protection Plan
- Conclusion: Your Tesla Deserves the Best
Why Protecting Your Tesla’s Paint Is a Non-Negotiable Priority
You just drove your stunning new Tesla home. The sleek lines, the flawless finish, the deep, glossy color—it’s a masterpiece of automotive design. But that beautiful paint job is under constant attack. From the moment it leaves the factory, your Tesla’s paint faces a relentless barrage: UV rays that fade and oxidize, road salt and grime that corrode, airborne pollutants that stain, and, most commonly, improper care that inflicts a thousand tiny swirls and scratches. Protecting this finish isn’t just about vanity; it’s about protecting one of your most significant investments. A well-maintained paint job preserves the car’s aesthetic appeal and, crucially, its resale value. A damaged, swirled, or chipped finish can drastically reduce what your Tesla is worth. This guide is your complete playbook for defending your Tesla’s paint against everything the world throws at it.
The Unique Nature of Tesla Paint
Before we talk protection, we need to understand what we’re protecting. Tesla, particularly in its newer models, uses advanced, environmentally-friendly water-based paint systems. These paints are often thinner and have different curing properties than older solvent-based paints. They can be more susceptible to “clear coat failure” if damaged or improperly cared for. Additionally, Tesla’s popular multi-coat “pearl” or “metallic” finishes have complex reflective layers that can be easily marred, making swirls and scratches more visible than on a solid color. This sophistication means generic car care advice isn’t enough—you need a Tesla-specific strategy.
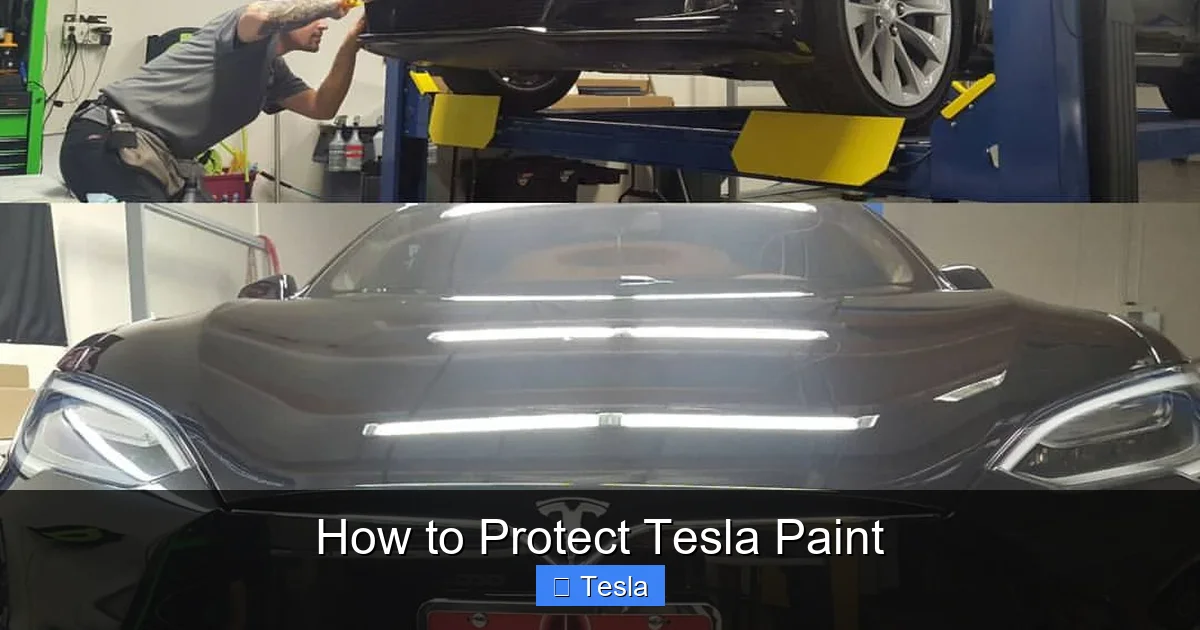
The Gold Standard: Paint Protection Film (PPF)
If you want the highest level of physical protection for your Tesla, Paint Protection Film (PPF), often called a “clear bra,” is the undisputed champion. It’s a transparent, thermoplastic urethane film that is professionally applied to high-impact areas—like the front bumper, hood, fenders, side mirrors, and door edges—or to the entire vehicle.
Visual guide about How to Protect Tesla Paint
Image source: ghostshieldfilm.com
How PPF Works and Its Incredible Benefits
Think of PPF as an invisible, sacrificial armor for your paint. It’s designed to absorb the damage that would otherwise mar your Tesla’s finish. The best PPFs have self-healing properties; minor swirls and light scratches will actually disappear when warmed by the sun or hot water. Key benefits include:
- Stone Chip & Scratch Defense: It stops road debris in its tracks, preventing chips on the front end and scratches along the rocker panels.
- Stain & Chemical Resistance: It creates a barrier against bird droppings, tree sap, and bug acids, which can permanently etch standard paint.
- UV Protection: High-quality PPF blocks UV rays, preventing paint oxidation and fading, keeping colors vibrant for years.
- Hydrophobic Properties: Many top films have a hydrophobic top layer, making washing easier and helping water bead off.
- Preservation of Resale Value: A car with a full PPF application often commands a higher price, as the original paint is pristine.
Professional Installation vs. DIY: Why You Should Hire an Expert
While PPF kits are sold online, installing it on a complex Tesla with its sensors, cameras, and tight body lines is not a beginner project. A poor installation can lead to edges lifting, trapped dust and water, and an overall unsatisfactory look. Professional installers use computer-cut patterns specific to your Tesla model (Model S, 3, X, or Y), ensuring a perfect, seamless fit. They also have the controlled environment, expertise, and tools to apply the film without contaminants. The investment in professional installation is worth every penny for the flawless, warranty-backed result. To understand the financial commitment, researching how much paint protection film costs for a Tesla will give you a clear budget range.
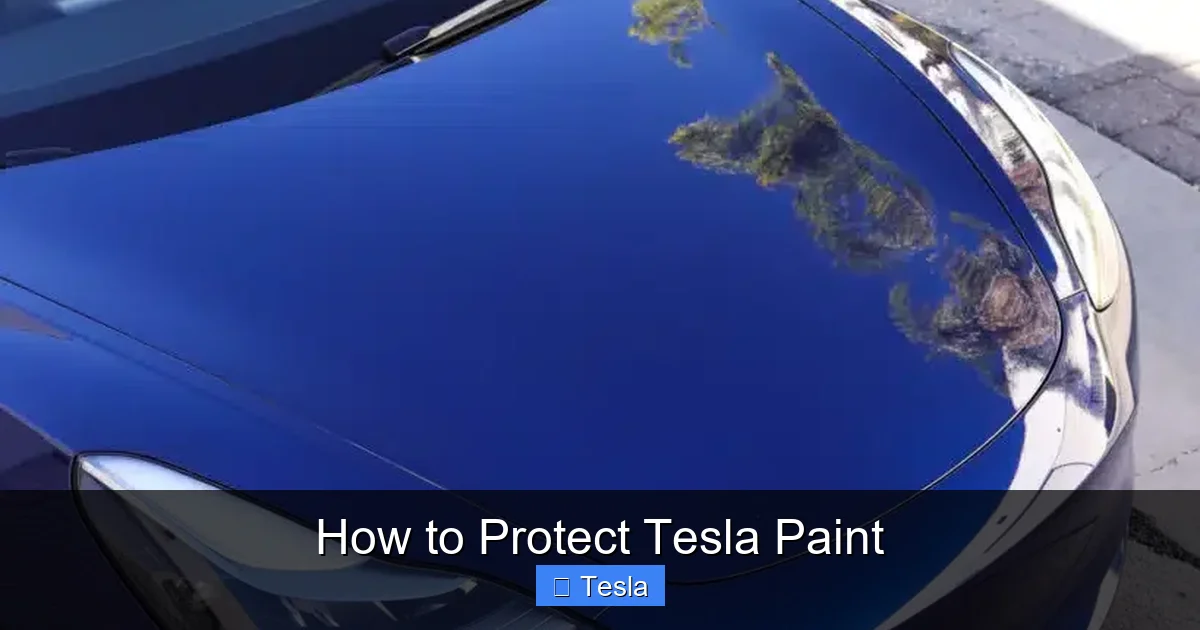
The Chemical Shield: Ceramic Coating
For those seeking a more holistic, liquid-based protection that enhances gloss and makes maintenance easier, a ceramic coating is the answer. It’s a liquid polymer that chemically bonds to the factory paint (and sometimes the PPF), creating a permanent or semi-permanent nano-ceramic layer.

Visual guide about How to Protect Tesla Paint
Image source: ghostshieldfilm.com
What Ceramic Coating Actually Does
A properly applied ceramic coating transforms your Tesla’s surface. It provides:
- Extreme Hydrophobicity: Water beads up and rolls off, taking dirt and grime with it. This is the “lotus effect” you often see in videos.
- UV & Oxidative Resistance: It acts as a powerful sunblock for your paint, preventing fading and oxidation over time.
- Chemical Stain Resistance: It offers a high level of protection against acidic contaminants like bird droppings and bug splatter, giving you more time to safely remove them.
- Deep, Wet-Look Gloss: It intensifies the depth and clarity of your paint, making colors pop with a rich, glassy finish.
- Scratch Resistance (Minor): While not a substitute for PPF against deep scratches, it can protect against very fine swirls and wash-induced marring.
The Critical Importance of Surface Preparation
The #1 reason ceramic coatings fail or look bad is improper surface preparation. The paint must be absolutely perfect before application. This process, often called “paint correction,” involves machine polishing to remove all existing swirls, scratches, and oxidation. Any imperfection left on the paint will be sealed under the coating, magnifying it forever. After correction, the paint is meticulously cleaned with an iron remover and a tar remover to eliminate any embedded contaminants. Only then is the coating applied in a controlled, dust-free environment. This is why a professional ceramic coating job is a significant investment but delivers transformative, long-lasting results.
The Foundation of Protection: Perfect Washing & Drying Techniques
No amount of PPF or ceramic coating can save your Tesla from a bad wash routine. In fact, improper washing is the leading cause of swirl marks and light scratches on any car. This is the most frequent and crucial part of your paint protection regimen.
The Two-Bucket Method: Your New Religion
This is non-negotiable. You need two buckets: one filled with your soapy water (use a high-quality, pH-neutral car shampoo) and one filled with plain rinse water. Dunk your wash mitt in the soap bucket, wash a small section of the car, then rinse the mitt thoroughly in the rinse water bucket before going back to the soap bucket. This simple step prevents you from rubbing the grit and dirt you just removed back onto the paint. For extra precaution, use a grit guard in the bottom of each bucket to trap particles.
Choosing the Right Tools
- Wash Mitt: Use a plush, high-pile microfiber or lambswool mitt. Avoid sponges and old towels, which are abrasive.
- Drying Towel: Use a large, clean, dedicated microfiber drying towel (like a 16×24″ twist-loop weave). Do not use the same towel you used for washing or one that has fallen on the ground. Gently glide or blot the towel; do not rub.
- Wheel & Tire Brushes: Use separate, dedicated brushes for wheels and tires. Brake dust is highly abrasive and will contaminate your paint towels.
The Complete Safe Wash Process
- Rinse: Thoroughly rinse the entire car with water to remove loose dirt and cool the surface.
- Wash: Working from the top down, wash one panel at a time with your soapy mitt, rinsing the mitt frequently. Use minimal pressure.
- Rinse: Rinse each panel immediately after washing to remove all soap.
- Wheels & Tires: Wash these last, using your dedicated brushes and a separate wheel cleaner if needed. Rinse thoroughly.
- Dry: Using your giant drying towel, gently pull it across the wet surface. Use a separate, smaller towel for door jambs and crevices.
Beyond the Wash: Daily Maintenance and Specific Threats
Protection is a holistic practice. It involves knowing how to handle the little things that can cause big damage.
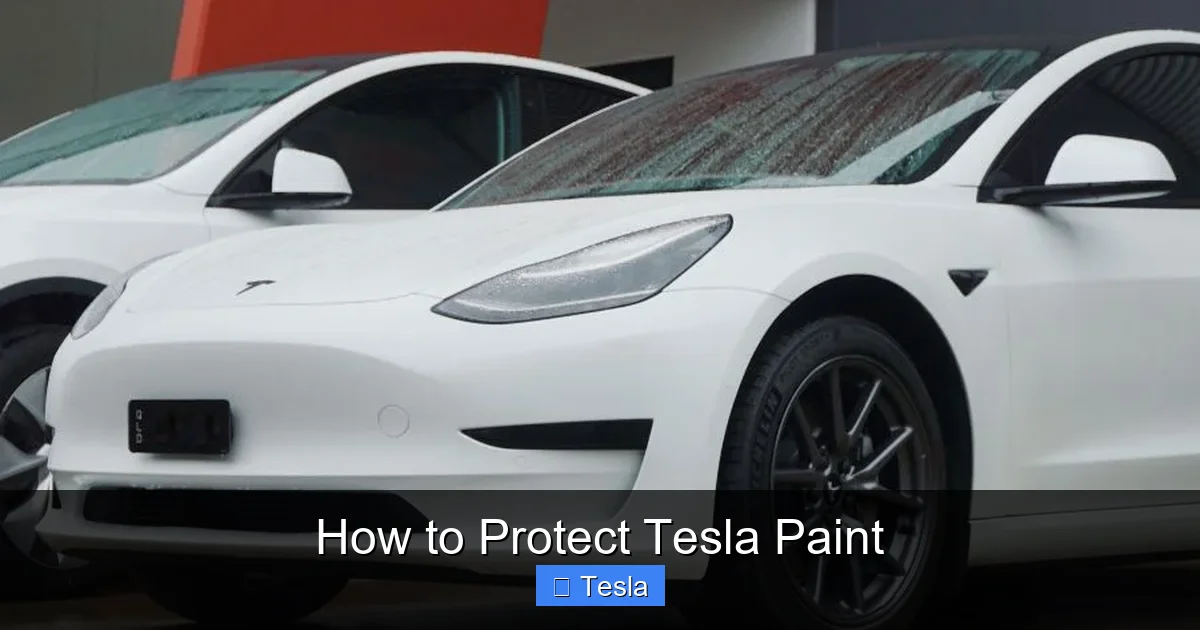
Visual guide about How to Protect Tesla Paint
Image source: wpstaq-ap-southeast-2-media.s3.amazonaws.com
The Acid Attack: Bird Droppings, Tree Sap, and Bug Guts
These are not just unsightly; they are chemically active. Bird droppings contain uric acid, which can permanently etch clear coat in a matter of hours, especially in the sun. The same goes for bug splatter (which contains acids and enzymes) and tree sap. Do not try to scrape or wipe these off dry. The correct procedure is: Soak. Spray the area generously with a quick detailer or a dedicated bug and tar remover. Let it sit for 60-90 seconds to soften the contaminant. Then, gently lift it off with a soft microfiber cloth. If it’s stubborn, re-soak. Rinse the area with water afterward. The goal is to dissolve the bond, not grind the contaminant into the paint.
Winter & Road Salt: The Seasonal Onslaught
For Tesla owners in cold climates, winter is paint protection’s ultimate test. Road salt and brine solutions are highly corrosive. The strategy here is frequency and barrier creation.
- Increase Wash Frequency: Wash your Tesla as often as possible during winter, ideally at a touchless (brushless) automatic wash that uses high-pressure water and soap jets. While not ideal, it’s a necessary evil to remove salt before it can sit and corrode. Follow up with a hand wash as soon as weather permits.
- Apply a Quick Detailer or Spray Ceramic: After washing and drying, spray on a layer of a spray-on ceramic coating or a quick detailer with wax. This adds a sacrificial, hydrophobic layer that helps salt slide off and protects the underlying sealant or coating.
- Focus on Undercarriage & Wheel Wells: These areas trap salt and are prone to corrosion. Rinse them thoroughly during every wash.
Wheel and Brake Dust: The Silent Scratchers
Brake dust is essentially metal shavings that are incredibly fine and sharp. If left on the wheel or, worse, on the paint, it will cause microscopic scratches. Always use a dedicated wheel cleaner and a soft-bristled wheel brush. Apply the cleaner to a cool wheel, let it dwell, agitate, and rinse thoroughly. Never use the same mitt or towel on your wheels that you use on your paint.
Professional vs. DIY: Knowing When to Call a Pro
The DIY spirit is strong in the Tesla community, and for good reason. But paint protection is an area where professional execution often yields superior, longer-lasting results.
What You Can DIY Effectively
- Regular Washing & Drying: With the right tools and technique, this is a perfect weekend DIY task that makes the biggest daily difference.
- Applying a Spray Ceramic Coating: Products like CarPro Reset, Gyeon Bathe+ or similar spray coatings are user-friendly. After a clean, decontaminated surface, you simply spray and wipe. They offer a few months of excellent hydrophobic protection and gloss boost.
- Using Quick Detailers: For touch-ups between washes to remove light dust and add shine.
What You Should Probably Leave to the Pros
- Full Paint Correction: Machine polishing requires skill, the right equipment (DA polisher, various pads and compounds), and a controlled environment. A mistake can cause irreversible damage, like burning through clear coat.
- Ceramic Coating Application: While some consumer-grade coatings are DIY-friendly, the multi-step process (paint correction, decontamination, application, curing) is best left to certified detailers who can guarantee a flawless, fully bonded, and warrantied finish.
- Paint Protection Film Installation: As mentioned, the complexity of Tesla’s panels makes this a professional-only task for 99% of owners.
- Full Vinyl Wraps: Wrapping involves stretching vinyl over complex curves without wrinkles or bubbles. This is a true art form. If you’re exploring this option, start by looking up how much it costs to wrap a Tesla Model Y from reputable shops to understand the value of their expertise.
Creating Your Tesla Paint Protection Plan
Now, let’s assemble all this information into a practical plan based on your budget and commitment level.
The Essential Baseline (Do This Now)
Regardless of any other protection, you must adopt the safe wash routine. Invest in two good buckets, a wash mitt, grit guards, and a large drying towel. Use a quality car shampoo. This habit alone will prevent 80% of the damage that occurs to your Tesla’s paint. Pair this with a good coat of wax or a spray ceramic every 2-3 months for added gloss and sacrificial protection. This is the minimum viable product for paint care.
The Premium, Set-It-and-Forget-It Plan
This is the “protect and enjoy” strategy. Have a professional apply a full-front PPF to the high-impact areas (this is often called a “front-end bra” package). Then, have a professional ceramic coat the entire vehicle, including the PPF. The ceramic will bond to the PPF and the painted areas, creating a seamless, super-hydrophobic, and incredibly durable surface. Your maintenance is now drastically simplified: a gentle touchless wash or a careful two-bucket hand wash every 1-2 weeks, followed by a light dry. Dirt will not stick, and minor scratches will be absorbed by the PPF’s self-healing layer. This combination is the pinnacle of modern paint protection for a Tesla.
The Budget-Conscious & DIY Enthusiast Plan
Start with perfecting your wash technique. Then, invest in a high-quality consumer-grade spray ceramic coating (e.g., from Turtle Wax, Meguiar’s, or CarPro). Apply it meticulously every 4-6 months after a thorough wash. For the front end, consider a partial DIY PPF kit for just the most vulnerable parts (like the leading edge of the hood and bumper), but be prepared for a challenging installation. Alternatively, use a high-quality paint sealant (like a synthetic polymer sealant) instead of wax for longer-lasting protection between ceramic coating applications.
Conclusion: Your Tesla Deserves the Best
Your Tesla is more than a car; it’s a statement, a technology showcase, and a significant financial asset. Its paint is the canvas that displays its beauty. Protecting that canvas is an ongoing commitment, but one that pays off in spades. By understanding the threats, choosing the right combination of physical (PPF) and chemical (ceramic coating) barriers, and mastering the fundamental art of the safe wash, you can keep your Tesla looking factory-fresh for years to come. Remember, the goal is to build layers of defense: a perfect foundation with flawless washing, a strong shield with professional-grade protection, and consistent, mindful maintenance. Start with the baseline habits today, evaluate your investment level, and build a protection plan that gives you peace of mind and a stunning car every single day.
Frequently Asked Questions
Can I take my Tesla through an automatic car wash?
No, you should absolutely avoid any brush-based automatic (tunnel) car washes. The harsh brushes and aggressive chemicals will inflict hundreds of micro-scratches and swirls on your Tesla’s paint, permanently dulling its finish. Only use touchless (brushless) washes in a pinch, followed by a proper hand wash as soon as possible.
Is it worth applying a ceramic coating myself?
It depends on your skill and patience. Consumer-grade spray ceramic coatings are very user-friendly and offer great results for 3-6 months. However, for a true, years-long ceramic coating that requires paint correction and a multi-step application, professional installation is strongly recommended. A DIY mistake on a complex Tesla panel can be difficult and expensive to fix.
What’s the difference between PPF, ceramic coating, and a vinyl wrap?
PPF is a clear, thick urethane film for physical impact protection. Ceramic coating is a liquid chemical that bonds to paint for UV, chemical, and scratch resistance. A vinyl wrap is a colored or textured vinyl film that changes the car’s appearance and offers a basic paint-protective layer. PPF is invisible, ceramic is a liquid layer, and a wrap is a colored film. They can be used together (ceramic on top of PPF).
How often should I wash my Tesla?
This depends on your environment. A good rule of thumb is to wash your Tesla every 1-2 weeks to prevent contaminants like bird droppings and road grime from bonding to the surface. If you have a ceramic coating, you may be able to extend this slightly, as dirt will not adhere as strongly. Never let a dirty car sit for more than a few days without a rinse.
Can I remove scratches from my Tesla’s paint myself?
For very light, surface-level swirls and scratches, you can try a fine polishing compound applied by hand with a dual-action (DA) polisher and a polishing pad. However, for deeper scratches that you can feel with your fingernail, DIY attempts can cause more harm than good. Always start with the least aggressive method and test on a small, inconspicuous area. For significant damage, consult a professional detailer.
What is the single most important thing I can do to protect my Tesla’s paint?
Without a doubt, it’s mastering and consistently using the two-bucket wash method with a high-quality microfiber mitt and a separate grit guard. No amount of expensive protection can compensate for a wash that grinds dirt into the paint every week. This simple habit is the foundation of all paint preservation.


