
How to Protect Car Paint
Contents
- 1 Key Takeaways
- 2 📑 Table of Contents
- 3 Why Protecting Your Car Paint Matters
- 4 Understanding Car Paint: The Layers That Matter
- 5 Essential Car Washing Techniques
- 6 Waxing and Sealing: The First Line of Defense
- 7 Ceramic Coating: The Ultimate Paint Protection
- 8 Parking Smart: Environmental Protection
- 9 Touch-Ups and Maintenance
- 10 Conclusion: A Lifetime of Shine
- 11 Frequently Asked Questions
Protecting your car’s paint isn’t just about looks—it’s about preserving value and preventing long-term damage. From regular washing to advanced ceramic coatings, simple habits and smart products can keep your vehicle’s finish gleaming for years.
Key Takeaways
- Wash your car regularly: Dirt, grime, and road salt can eat away at paint over time. Washing every two weeks helps prevent buildup.
- Use the right tools: Microfiber cloths, pH-balanced soap, and soft brushes prevent scratches and swirl marks.
- Apply wax or sealant: A quality wax or synthetic sealant creates a protective barrier against UV rays, bird droppings, and acid rain.
- Consider ceramic coating: For long-lasting protection, ceramic coatings offer superior durability and water-repellent properties.
- Park smart: Avoid direct sunlight, tree sap, and bird droppings by parking in garages or using car covers.
- Address scratches early: Small chips and scratches should be touched up immediately to prevent rust and further damage.
- Inspect and maintain: Regular visual checks help catch issues before they become costly repairs.
📑 Table of Contents
- Why Protecting Your Car Paint Matters
- Understanding Car Paint: The Layers That Matter
- Essential Car Washing Techniques
- Waxing and Sealing: The First Line of Defense
- Ceramic Coating: The Ultimate Paint Protection
- Parking Smart: Environmental Protection
- Touch-Ups and Maintenance
- Conclusion: A Lifetime of Shine
Why Protecting Your Car Paint Matters
Your car’s paint isn’t just there to make it look good—it’s a vital protective layer that shields the metal underneath from the elements. Think of it like sunscreen for your vehicle. Without proper care, exposure to sun, rain, dirt, and pollutants can cause fading, oxidation, and even rust. Over time, these issues don’t just hurt your car’s appearance—they can significantly reduce its resale value.
Many drivers underestimate how quickly paint damage can occur. A single bird dropping left on the hood for a week can etch into the clear coat. Tree sap, road salt, and industrial fallout can bond to the surface and become nearly impossible to remove without professional help. And let’s not forget about UV rays—those invisible beams from the sun break down the chemical bonds in paint, leading to dullness and chalky finishes.
But here’s the good news: protecting your car paint doesn’t require a full-time job or a mechanic’s toolkit. With a few smart habits and the right products, you can keep your vehicle looking showroom-fresh for years. Whether you drive a daily commuter or a weekend cruiser, investing time in paint care pays off in both pride of ownership and long-term value.
Understanding Car Paint: The Layers That Matter
Visual guide about How to Protect Car Paint
Image source: carrepro.org
Before diving into protection methods, it helps to understand what you’re actually protecting. Modern car paint isn’t just a single coat of color—it’s a multi-layer system designed for durability and shine.
The Base Layers: Primer and Base Coat
The first layer applied to the metal body is the primer. This adhesive layer helps the paint stick to the surface and provides a smooth foundation. It also offers some corrosion resistance, which is especially important in areas prone to moisture or salt.
On top of the primer comes the base coat—the colored layer you actually see. This is where the pigment lives, giving your car its unique hue. Whether it’s metallic silver, deep blue, or classic white, the base coat is responsible for that rich, vibrant look. However, it’s also vulnerable to fading and discoloration if not protected.
The Clear Coat: Your Paint’s Bodyguard
The final and most important layer is the clear coat. This transparent, glossy layer sits on top of the base coat and acts as a shield. It protects against UV rays, minor scratches, chemicals, and environmental contaminants. Most paint damage occurs here—swirl marks, etching, and oxidation all affect the clear coat first.
Because the clear coat is the outermost barrier, it takes the brunt of daily wear and tear. That’s why maintaining it is crucial. Once the clear coat is compromised, the underlying paint becomes exposed and vulnerable to further damage.
How Damage Occurs
Paint damage doesn’t always come from big accidents. In fact, most issues start small. For example:
– **Swirl marks** come from improper washing techniques, like using dirty sponges or automatic car washes with harsh brushes.
– **Water spots** form when hard water evaporates on the surface, leaving mineral deposits.
– **Oxidation** happens when the clear coat breaks down due to sun exposure, making the paint look dull and chalky.
– **Acid rain and bird droppings** contain chemicals that can eat through the clear coat if not removed quickly.
Understanding these layers and threats helps you make smarter decisions about care and protection.
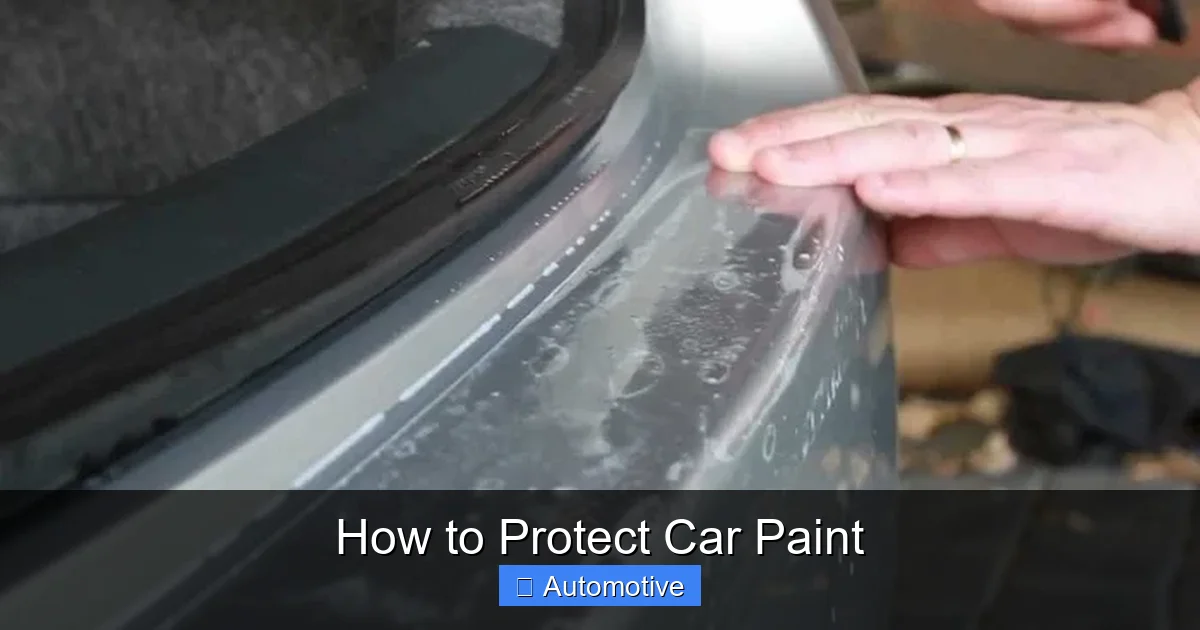
Essential Car Washing Techniques
Visual guide about How to Protect Car Paint
Image source: carfromjapan.com
Washing your car might seem straightforward, but doing it wrong can actually harm the paint. The goal isn’t just to get it clean—it’s to clean it safely, without introducing scratches or contaminants.
Choose the Right Products
Not all soaps are created equal. Dish soap, for example, is too harsh—it strips away wax and can dry out the paint. Instead, use a pH-balanced car wash soap designed specifically for automotive finishes. These formulas lift dirt without damaging protective coatings.
Look for products labeled “lubricating” or “foam-enhancing.” They create a slick layer that helps dirt slide off instead of scratching the surface. Brands like Meguiar’s, Chemical Guys, and Adam’s Polishes offer reliable options.
Use the Two-Bucket Method
One of the best ways to prevent swirl marks is the two-bucket method. Here’s how it works:
1. Fill one bucket with soapy water.
2. Fill the second with clean rinse water.
3. Dip your wash mitt into the soapy bucket, wash a section of the car, then rinse the mitt in the clean bucket before re-dipping.
This keeps dirt from being reintroduced to the paint. It’s a simple step that makes a big difference.
Wash from Top to Bottom
Always start at the roof and work your way down. Dirt and grime tend to accumulate on the lower panels, so washing top-first prevents you from dragging contaminants onto cleaner areas.
Use a high-quality microfiber wash mitt or sponge. Avoid sponges with rough textures—they can trap grit and scratch the surface. Rinse the car thoroughly before washing to remove loose debris.
Rinse and Dry Properly
After washing, rinse the car with a hose or pressure washer on a low setting. Make sure all soap is removed—residue can leave streaks or spots.
Drying is just as important. Use a clean, plush microfiber drying towel. Don’t air-dry your car, especially in sunny conditions. Water droplets can act like tiny magnifying glasses, focusing sunlight and causing water spots or even heat damage.
For best results, dry in sections, using a blotting motion instead of dragging the towel across the paint.
How Often Should You Wash?
A good rule of thumb is every two weeks under normal conditions. If you live in a coastal area, drive on salted roads in winter, or park under trees, you may need to wash more frequently—especially after rain or snow.
Avoid washing in direct sunlight. The heat can cause soap to dry too quickly, leaving streaks and spots. Early morning or late afternoon is ideal.
Waxing and Sealing: The First Line of Defense
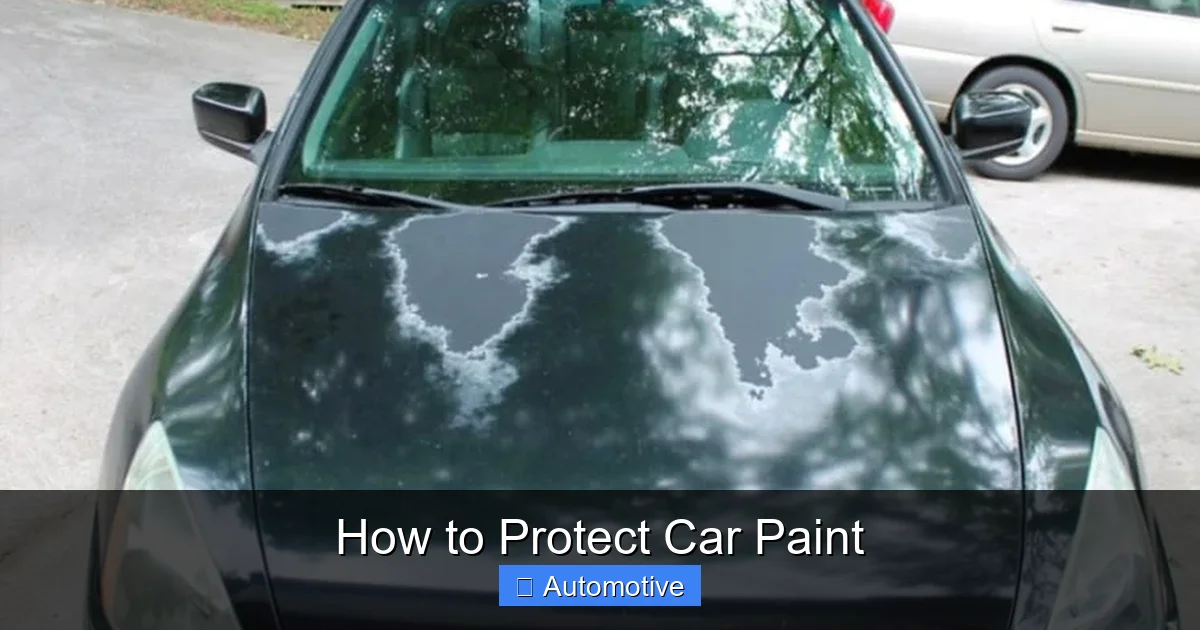
Visual guide about How to Protect Car Paint
Image source: thecarsky.com
Once your car is clean and dry, it’s time to add protection. Waxing and sealing are two of the most effective ways to shield your paint from the elements.
What Is Car Wax?
Car wax is a protective coating made from natural waxes (like carnauba) or synthetic polymers. It bonds to the clear coat and creates a hydrophobic (water-repelling) barrier. This helps water bead up and roll off, taking dirt and contaminants with it.
Wax also adds depth and shine, making colors pop and giving the paint a wet, glossy look. It’s like putting a raincoat on your car.
Natural vs. Synthetic Waxes
There are two main types of wax:
– **Natural waxes** (like carnauba) come from plants and offer a warm, deep shine. They’re popular among enthusiasts but typically last 4–6 weeks.
– **Synthetic sealants** are made from polymers and last longer—up to 3–6 months. They provide better UV protection and are more resistant to chemicals.
Many products combine both for the best of both worlds. For example, hybrid waxes offer the shine of carnauba with the durability of synthetics.
How to Apply Wax Correctly
Applying wax isn’t hard, but doing it right ensures maximum protection:
1. Work in small sections (like one panel at a time).
2. Use a foam applicator pad—never apply wax directly from the container.
3. Apply a thin, even layer using circular motions.
4. Let it haze over (usually 5–10 minutes, depending on the product).
5. Buff off with a clean microfiber towel using light pressure.
Avoid waxing in direct sunlight or on hot surfaces. Heat can cause the wax to dry too quickly, making it difficult to remove.
When to Wax
Most experts recommend waxing every 2–3 months. If you use a sealant, you can stretch it to 4–6 months. Always wax after washing and before applying any other protective treatments.
Common Waxing Mistakes
– Using too much wax (a little goes a long way).
– Buffing too hard (can create swirl marks).
– Applying wax to dirty or wet paint.
– Using the same towel for application and removal (can scratch the surface).
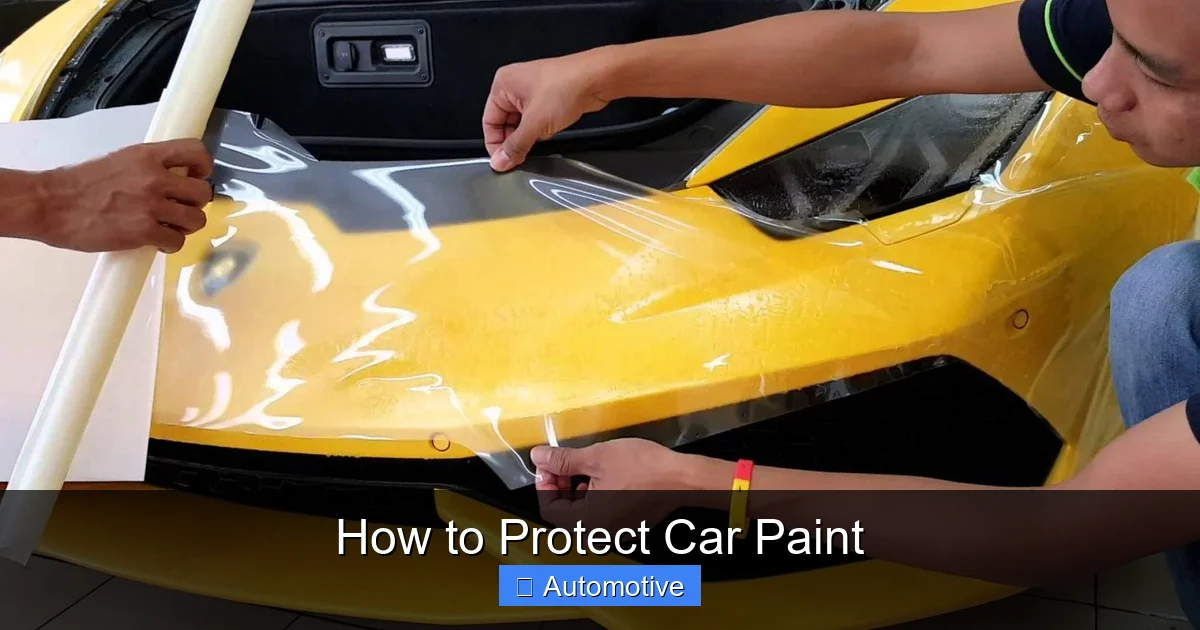
Ceramic Coating: The Ultimate Paint Protection
If you’re serious about protecting your car paint, ceramic coating is the gold standard. It’s a liquid polymer that chemically bonds with the clear coat, creating a semi-permanent protective layer.
How Ceramic Coating Works
Ceramic coatings are made from silicon dioxide (SiO2), the same compound found in glass and quartz. When applied, they form a hard, transparent shell that’s highly resistant to scratches, UV rays, chemicals, and water spots.
Unlike wax, which sits on top of the paint, ceramic coatings bond at a molecular level. This makes them much more durable—lasting anywhere from 1 to 5 years, depending on the product and maintenance.
Benefits of Ceramic Coating
– **Superior protection:** Resists bird droppings, tree sap, acid rain, and road salt.
– **Hydrophobic effect:** Water beads up and rolls off, making washing easier.
– **UV resistance:** Prevents fading and oxidation.
– **Enhanced gloss:** Gives paint a deep, glass-like shine.
– **Reduced maintenance:** Dirt and grime don’t stick as easily.
Is Ceramic Coating Worth It?
For most drivers, yes—especially if you want long-term protection with minimal upkeep. While professional installation can cost $500–$2,000, DIY kits are available for $50–$200.
However, ceramic coating isn’t a cure-all. It won’t prevent deep scratches or rock chips. For that, you’ll need paint protection film (PPF). But for everyday wear and environmental damage, it’s one of the best investments you can make.
Applying Ceramic Coating: DIY vs. Professional
DIY kits are user-friendly and come with detailed instructions. The process involves:
1. Thoroughly washing and decontaminating the paint (using clay bars to remove embedded particles).
2. Polishing to remove swirl marks and imperfections.
3. Applying the coating with a microfiber applicator.
4. Curing time (usually 24–48 hours before exposure to water).
Professional application ensures flawless results and often includes paint correction. If you’re new to detailing, a pro might be worth the cost.
Parking Smart: Environmental Protection
Where and how you park plays a huge role in paint protection. Even the best wax or coating can’t stop damage from prolonged exposure to harmful elements.
Avoid Direct Sunlight
UV rays are one of the biggest enemies of car paint. Over time, they break down the clear coat, causing fading and oxidation. If possible, park in a garage or under a carport. If that’s not an option, use a sunshade or park in the shade of a building or tree.
Beware of Tree Sap and Bird Droppings
Tree sap is sticky and acidic—it can etch into the paint if left too long. Bird droppings are even worse, containing uric acid that can damage the clear coat in just a few days.
If you park under trees, inspect your car regularly. Carry a quick-detailer spray and microfiber towel in your trunk for emergency cleanups.
Use a Car Cover
A high-quality car cover protects against dust, pollen, bird droppings, and UV rays. Choose a breathable, soft-lined cover designed for outdoor use. Avoid cheap plastic covers—they can trap moisture and scratch the paint.
For long-term storage, a fitted cover is ideal. Make sure the car is clean and dry before covering to prevent mold or mildew.
Avoid Parking Near Construction or Industrial Areas
Construction sites and factories often release airborne chemicals and debris that can settle on your car. Acid rain, soot, and industrial fallout can bond to the paint and cause etching.
If you must park in these areas, wash your car more frequently and consider a protective coating.
Touch-Ups and Maintenance
No matter how careful you are, chips and scratches happen. The key is to address them quickly before they lead to rust or deeper damage.
How to Spot Paint Damage
Regularly inspect your car’s paint, especially after driving on gravel roads or in heavy traffic. Look for:
– Small chips on the hood, fenders, and mirrors (common impact zones).
– Scratches that expose the primer or metal.
– Areas where the paint looks dull or discolored.
Use a bright flashlight to check in shaded areas. Run your fingers over the surface—rough spots often indicate damage.
Touch-Up Paint: A Simple Fix
Most automakers sell touch-up paint that matches your car’s exact color code. You can find this code on the driver’s side door jamb or in the owner’s manual.
To apply:
1. Clean the area with isopropyl alcohol.
2. Use a fine-tip brush or pen applicator.
3. Apply thin layers, allowing each to dry before adding the next.
4. Finish with a clear coat touch-up for protection.
Don’t expect perfection—touch-ups are best for small chips. For larger areas, consider professional repair.
When to Call a Professional
If you notice deep scratches, rust spots, or widespread fading, it’s time to visit a detailer or body shop. Professionals can perform paint correction, polishing, and even clear coat restoration.
Regular maintenance—like clay barring and polishing—can also revive dull paint and remove contaminants that washing alone can’t handle.
Conclusion: A Lifetime of Shine
Protecting your car paint isn’t about perfection—it’s about prevention. With regular washing, proper waxing, smart parking, and timely touch-ups, you can keep your vehicle looking its best for years to come.
Think of it as a routine, like changing the oil or checking tire pressure. A little effort goes a long way. Whether you’re using a simple wax or investing in a ceramic coating, the goal is the same: to preserve that glossy finish and protect the value of your investment.
Your car is more than just transportation. It’s a reflection of your care and attention. By following these tips, you’ll not only enjoy a cleaner, shinier ride—you’ll also save money on repairs and boost resale value down the road.
So grab your microfiber towel, pick up a quality wax, and give your car the protection it deserves. Your paint will thank you.
Frequently Asked Questions
How often should I wax my car?
Most experts recommend waxing every 2–3 months. If you use a synthetic sealant or ceramic coating, you can extend this to 4–6 months. Always wax after washing and when the paint feels dull or less hydrophobic.
Can I use dish soap to wash my car?
No, dish soap is too harsh and can strip away wax and protective coatings. Use a pH-balanced car wash soap designed for automotive finishes to safely clean without damaging the paint.
Is ceramic coating worth the cost?
Yes, especially if you want long-lasting protection. Ceramic coatings offer superior durability, UV resistance, and water-repellent properties. While professional installation can be expensive, DIY kits provide good results at a lower cost.
How do I remove water spots from my car?
Light water spots can be removed with a vinegar-water solution and a microfiber cloth. For stubborn spots, use a dedicated water spot remover or clay bar. Always dry the car thoroughly after washing to prevent new spots.
Can I apply wax over ceramic coating?
Generally, no. Wax sits on top of the coating and can interfere with its performance. However, some hybrid products are designed to be compatible. Check the manufacturer’s instructions before applying anything over a ceramic coating.
What’s the difference between wax and sealant?
Wax is typically made from natural ingredients like carnauba and offers a warm shine but lasts 4–6 weeks. Sealants are synthetic, last longer (3–6 months), and provide better UV and chemical protection.


