
How to Install Harley Exhaust Gaskets
Contents
- 1 Key Takeaways
- 2 📑 Table of Contents
- 3 How to Install Harley Exhaust Gaskets: A Complete Guide
- 4 Why Exhaust Gaskets Matter on Your Harley
- 5 Tools and Materials You’ll Need
- 6 Step-by-Step Installation Process
- 7 Testing for Leaks
- 8 Common Mistakes to Avoid
- 9 Maintenance Tips for Long-Lasting Gaskets
- 10 Conclusion
- 11 Frequently Asked Questions
Installing Harley exhaust gaskets correctly is essential for preventing leaks, maintaining engine performance, and ensuring a smooth ride. This detailed guide walks you through the entire process—from removing old gaskets to installing new ones—with practical tips and safety advice to help both beginners and experienced riders get the job done right.
Key Takeaways
- Use the right gasket type: Always match your Harley model and exhaust system to ensure a proper fit and seal.
- Clean surfaces thoroughly: Any dirt, carbon buildup, or old gasket residue can cause leaks and poor performance.
- Follow torque specifications: Over-tightening or under-tightening bolts can damage components or lead to exhaust leaks.
- Inspect exhaust components: Check for cracks, warping, or damage while the system is off to avoid future issues.
- Use high-temperature sealant (if needed): Some installations benefit from a thin layer of high-heat RTV sealant for extra protection.
- Allow proper cure time: Let sealants and gaskets set before starting the engine to ensure a secure seal.
- Test for leaks after installation: Use soapy water or a smoke test to confirm there are no exhaust leaks before riding.
📑 Table of Contents
How to Install Harley Exhaust Gaskets: A Complete Guide
So, you’ve decided to tackle the job of installing Harley exhaust gaskets. Maybe you’re hearing a little puffing sound near the exhaust ports, or perhaps you’re upgrading your pipes and want to make sure everything seals up tight. Whatever the reason, you’re in the right place. Installing exhaust gaskets on a Harley-Davidson motorcycle might sound intimidating at first, but with the right tools, a bit of patience, and this step-by-step guide, you’ll have it done in no time.
Harley exhaust gaskets play a crucial role in your bike’s performance. They sit between the cylinder head and the exhaust pipes, creating a tight seal that prevents exhaust gases from escaping. When these gaskets wear out or get damaged, you might notice a loss of power, increased noise, or even a backfiring sound. Replacing them isn’t just about fixing a leak—it’s about restoring your Harley’s efficiency and ensuring a smooth, quiet ride. And the good news? You don’t need to be a professional mechanic to do it.
In this guide, we’ll walk you through the entire process of how to install Harley exhaust gaskets, from gathering your tools to testing your work. Whether you’re working on a Sportster, a Softail, or a Touring model, the principles remain largely the same. We’ll cover everything you need to know, including safety tips, common mistakes to avoid, and how to choose the right gaskets for your bike. By the end, you’ll not only have a properly sealed exhaust system but also the confidence to handle similar maintenance tasks in the future.
Why Exhaust Gaskets Matter on Your Harley
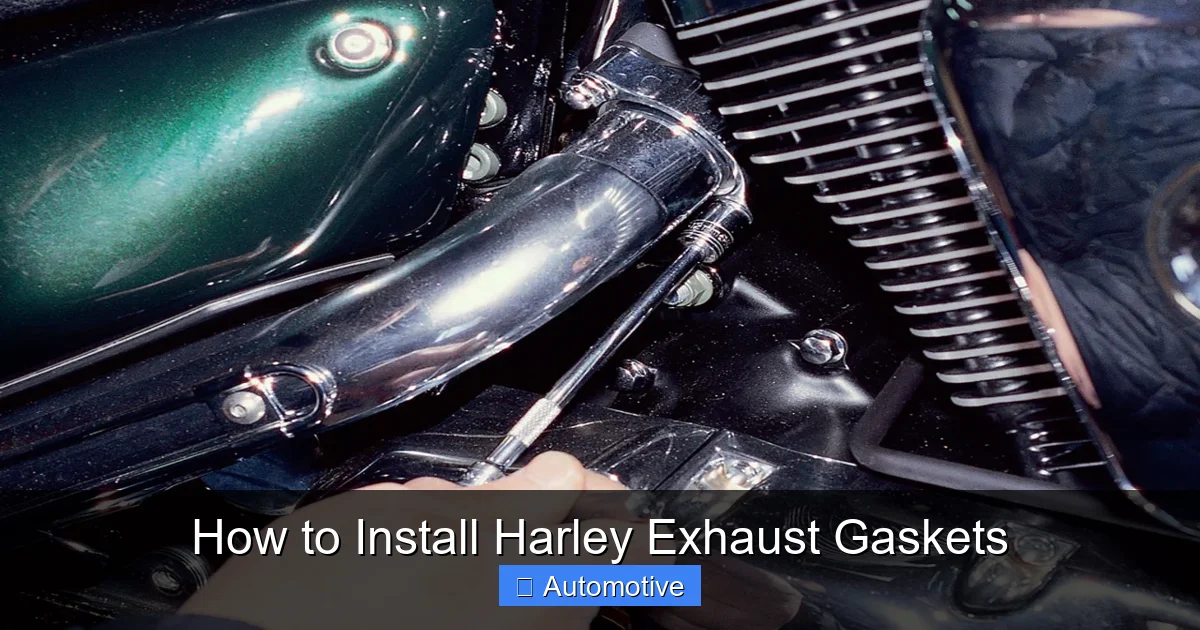
Visual guide about How to Install Harley Exhaust Gaskets
Image source: motorbikeinsider.com
Before we dive into the installation steps, let’s talk about why exhaust gaskets are so important. Think of them as the unsung heroes of your Harley’s exhaust system. They’re small, often overlooked, but absolutely vital to how your bike performs.
Exhaust gaskets create a seal between the cylinder head and the exhaust manifold or header pipes. This seal ensures that all the hot gases produced during combustion exit through the mufflers and not through gaps where they don’t belong. When that seal fails—whether due to age, heat cycles, or improper installation—you start to see problems.
One of the most common signs of a failing gasket is an exhaust leak. You might hear a ticking or puffing sound near the engine, especially when you first start the bike or when it’s under load. You might also notice a drop in power, poor fuel efficiency, or even a rough idle. In some cases, exhaust leaks can lead to dangerous fumes entering the cabin area, which is a serious safety concern.
Another reason to keep your gaskets in good shape is heat management. Harley engines run hot, and the exhaust system gets even hotter. Over time, repeated heating and cooling can cause gaskets to harden, crack, or lose their elasticity. Once that happens, they can’t maintain a proper seal, even if you tighten the bolts perfectly.
Replacing your exhaust gaskets isn’t just a repair—it’s preventive maintenance. By installing new gaskets before they fail completely, you avoid more serious issues down the road, like warped exhaust ports or damaged threads from over-tightening. Plus, a properly sealed exhaust system helps your Harley run smoother, quieter, and more efficiently.
Tools and Materials You’ll Need

Visual guide about How to Install Harley Exhaust Gaskets
Image source: m.media-amazon.com
Before you start, it’s important to gather all the tools and materials you’ll need. Having everything ready beforehand saves time and frustration, especially when you’re working in a tight space under your bike.
Here’s a checklist of what you’ll need:
- New exhaust gaskets: Make sure they’re the correct type for your Harley model and year. Common types include Cometic, S&S, and Harley OEM gaskets.
- Socket wrench set: Typically, you’ll need a 9/16” or 1/2” socket for the exhaust flange bolts.
- Torque wrench: Essential for tightening bolts to the manufacturer’s specifications.
- Penetrating oil: Like WD-40 or PB Blaster, to loosen stubborn bolts.
- Wire brush or scraper: For cleaning the exhaust ports and flange surfaces.
- High-temperature gasket sealant (optional): Some mechanics recommend a thin layer of high-heat RTV sealant for extra protection.
- Clean rags: For wiping down surfaces and cleaning up grease.
- Safety gear: Gloves and safety glasses to protect your hands and eyes.
- Jack stand or lift: To safely elevate your bike if needed.
- Soapy water or leak detection spray: For testing for leaks after installation.
It’s also a good idea to have your Harley’s service manual on hand. It will provide specific torque specs, bolt patterns, and any model-specific instructions. If you don’t have a physical copy, many are available online or through Harley-Davidson’s website.
Choosing the Right Gaskets
Not all exhaust gaskets are created equal. The type you choose can affect performance, durability, and ease of installation. Here are the most common types used on Harley motorcycles:
OEM (Original Equipment Manufacturer) gaskets: These are made by Harley-Davidson and are designed to meet factory specifications. They’re reliable and widely available, but can be more expensive than aftermarket options.
Cometic gaskets: Known for their high-quality materials and precision fit, Cometic gaskets are a popular choice among performance riders. They’re made from multi-layer steel and can handle extreme heat and pressure.
S&S gaskets: Another trusted brand, S&S offers durable gaskets that are often used in performance builds. They’re designed to withstand high temperatures and provide a long service life.
Graphite or fiber gaskets: These are more traditional and less expensive, but may not last as long under high-heat conditions. They’re fine for stock setups but may not be ideal for modified engines.
When choosing a gasket, consider your riding style, engine modifications, and budget. If you’ve upgraded your exhaust or added a performance cam, a higher-end gasket like Cometic or S&S might be worth the investment.
Step-by-Step Installation Process
Visual guide about How to Install Harley Exhaust Gaskets
Image source: hdforums.com
Now that you’ve got your tools and gaskets ready, it’s time to get to work. Follow these steps carefully to ensure a proper installation.
Step 1: Prepare Your Bike
Start by parking your Harley on a level surface and turning off the engine. Let it cool down completely—working on a hot engine can lead to burns and inaccurate torque readings. If your bike has been running recently, wait at least an hour before starting.
Next, elevate the bike using a jack stand or lift. This gives you better access to the exhaust system and makes the job safer. Make sure the bike is stable and secure before you begin.
Step 2: Remove the Exhaust Pipes
Begin by loosening the exhaust flange bolts that connect the pipes to the cylinder heads. These are usually located near the front of the engine. Use your socket wrench and apply penetrating oil if the bolts are stuck. Let it sit for a few minutes to break down rust and corrosion.
Once the bolts are loose, carefully remove them and set them aside. Be careful not to drop them into the engine bay. Gently wiggle the exhaust pipes to break the seal, then slide them out of the mufflers and remove them completely.
If you’re working on a dual-exhaust system, do one side at a time to avoid mixing up parts.
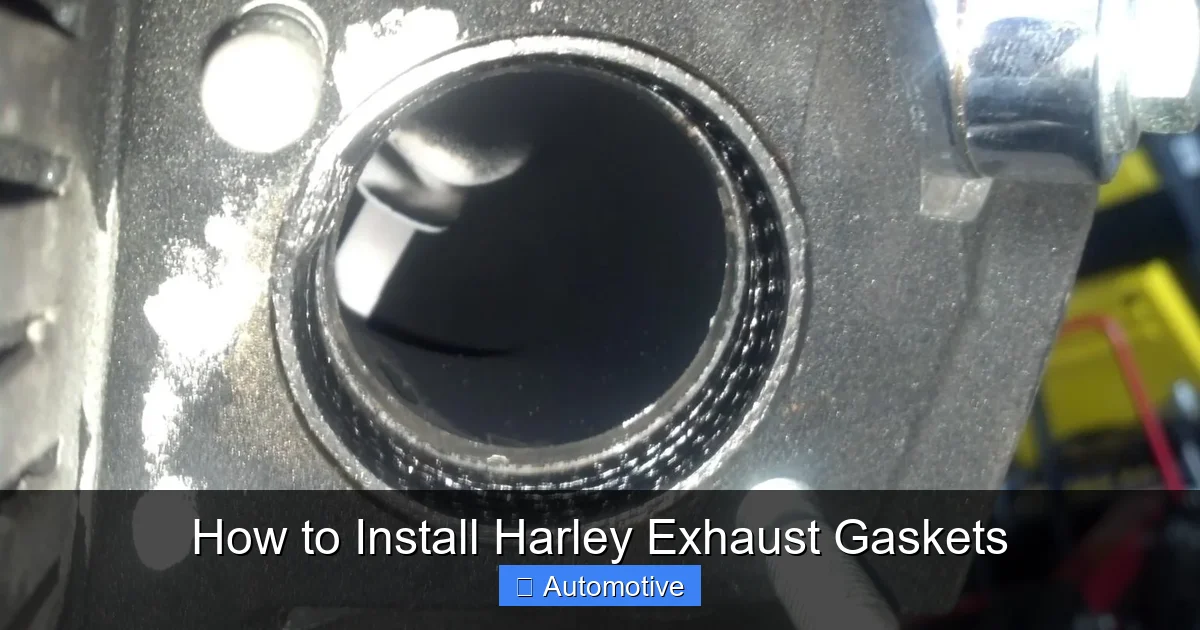
Step 3: Remove the Old Gaskets
With the pipes off, you’ll see the old exhaust gaskets still in place on the cylinder heads. Use a wire brush or scraper to carefully remove them. Be gentle—you don’t want to scratch or damage the mating surfaces.
Clean both the cylinder head and the exhaust flange thoroughly. Remove any carbon buildup, dirt, or old gasket material. A clean surface is critical for a proper seal. Wipe everything down with a clean rag.
Step 4: Install the New Gaskets
Now it’s time to install the new gaskets. Place them over the exhaust ports on the cylinder heads. Make sure they’re seated properly and aligned with the bolt holes.
If you’re using a high-temperature sealant, apply a very thin, even layer to both sides of the gasket. Don’t overdo it—too much sealant can squeeze out and cause blockages or leaks.
Step 5: Reattach the Exhaust Pipes
Carefully slide the exhaust pipes back into place, aligning them with the gaskets and bolt holes. Insert the bolts by hand first to avoid cross-threading.
Once the bolts are in, tighten them gradually in a crisscross pattern. This ensures even pressure and prevents warping. Use your torque wrench to tighten them to the manufacturer’s specifications—usually between 12 and 18 ft-lbs, depending on your model.
Step 6: Reconnect the Mufflers
If you removed the mufflers, reattach them now. Make sure all clamps and bolts are secure. Double-check that everything is aligned properly to avoid stress on the pipes.
Step 7: Let It Set
If you used sealant, allow it to cure according to the manufacturer’s instructions—usually 30 minutes to an hour. Avoid starting the engine during this time.
Testing for Leaks
Once everything is back in place, it’s time to test your work. Start the engine and let it idle. Listen carefully for any unusual sounds near the exhaust ports.
To check for leaks, spray a small amount of soapy water around the gasket areas. If you see bubbles forming, there’s a leak. Tighten the bolts slightly and retest.
For a more thorough check, take your bike for a short ride and listen for any changes in sound or performance. A properly installed gasket should eliminate puffing or ticking noises.
Common Mistakes to Avoid
Even experienced riders can make mistakes when installing exhaust gaskets. Here are a few to watch out for:
- Over-tightening bolts: This can warp the flange or damage the gasket. Always use a torque wrench.
- Using the wrong gasket: Make sure it matches your model and year.
- Skipping cleaning: Dirty surfaces lead to leaks.
- Ignoring torque specs: Each model has specific requirements—don’t guess.
- Starting the engine too soon: If you used sealant, let it cure first.
Maintenance Tips for Long-Lasting Gaskets
To extend the life of your new gaskets, follow these tips:
- Inspect them during regular oil changes.
- Avoid sudden temperature changes (like pouring cold water on a hot engine).
- Use quality gaskets and proper installation techniques.
- Address exhaust leaks immediately.
Conclusion
Installing Harley exhaust gaskets might seem like a small job, but it has a big impact on your bike’s performance and safety. By following this guide, you’ve taken an important step in maintaining your Harley and ensuring it runs smoothly for miles to come. Remember, the key to success is preparation, patience, and attention to detail. With the right tools and a little know-how, you can handle this task like a pro—and save money on shop labor in the process.
Frequently Asked Questions
How often should I replace Harley exhaust gaskets?
There’s no set interval, but most riders replace them every 10,000 to 20,000 miles or when signs of a leak appear. Inspect them during routine maintenance.
Can I reuse old exhaust gaskets?
No, it’s not recommended. Old gaskets lose their elasticity and won’t seal properly. Always install new ones for the best performance.
Do I need to use sealant with exhaust gaskets?
It depends. Some gaskets are designed to be used dry, while others benefit from a thin layer of high-temperature RTV sealant. Check the manufacturer’s instructions.
What happens if I over-tighten the exhaust bolts?
Over-tightening can warp the exhaust flange, crack the cylinder head, or damage the gasket. Always use a torque wrench and follow specs.
Can I install exhaust gaskets with the engine hot?
No, always let the engine cool completely. Working on a hot engine can cause burns and lead to inaccurate torque readings.
How do I know if my exhaust gasket is leaking?
Common signs include a ticking or puffing sound near the engine, loss of power, rough idle, or visible soot around the exhaust ports.


