
How to Clear the Check Engine Light on a Toyota Camry
Before you clear your Toyota Camry’s check engine light, you must understand why it’s on. Simply turning it off without fixing the underlying problem is ineffective and potentially dangerous. This guide explains the safe methods to reset the light, from the basic battery disconnect to using an OBD2 scanner and completing a drive cycle. Always retrieve and address the diagnostic trouble codes (DTCs) first for a lasting solution.
Key Takeaways
- The light is a warning, not the problem: The check engine light indicates an issue the car’s computer has detected. Clearing it without repair is like turning off a fire alarm without putting out the fire.
- Always read codes first: Use an OBD2 scanner to retrieve the specific Diagnostic Trouble Codes (DTCs) before clearing. This tells you what system needs attention.
- Disconnecting the battery is a temporary fix: This method clears the computer’s memory but will not turn off the light if the fault persists. It also resets other systems like radio presets.
- A drive cycle is often required: After clearing codes with a scanner, the car must complete specific driving conditions (a drive cycle) for all monitors to reset and the light to stay off.
- Some issues require professional diagnosis: Complex problems like intermittent electrical faults or internal engine issues often need a mechanic’s expertise and advanced tools.
- A recurring light means the problem wasn’t fixed: If the check engine light returns after a reset, the original repair was incomplete or a new issue has developed.
📑 Table of Contents
- Understanding Your Toyota Camry’s Check Engine Light
- Safety First: Precautions Before You Begin
- Method 1: The Basic Battery Disconnect (The “Hard Reset”)
- Method 2: Using an OBD2 Scanner (The Correct Professional Method)
- Method 3: Completing the Drive Cycle
- When to Seek Professional Help
- Preventing Future Check Engine Light Issues
- Conclusion: The Right Way to a Lasting Reset
- FAQs
Understanding Your Toyota Camry’s Check Engine Light
That small, glowing amber or yellow light on your dashboard—the one that looks like an engine—is your Toyota Camry’s way of getting your attention. It’s formally called the Malfunction Indicator Lamp (MIL), but we all know it as the check engine light. When it illuminates, it means your car’s primary computer, the Engine Control Module (ECM), has detected a problem it can’t correct on its own. It’s not a single “thing” but a messenger for hundreds of possible issues, from a loose gas cap to a failing catalytic converter. Your first goal isn’t to make the light go out; it’s to find out what message it’s trying to send.
Many drivers make the mistake of immediately trying to reset the light. This is like ignoring a doctor’s diagnosis and just hiding the medical chart. The light will often come right back on because the root cause remains. The proper process is: 1) Acknowledge the light is on. 2) Diagnose the problem by reading the stored codes. 3) Repair the issue. 4) Clear the codes and reset the light. This guide will walk you through steps 3 and 4, but we must stress that step 2 is non-negotiable for a real fix.
What Triggers the Check Engine Light?
The ECM constantly monitors dozens of sensors and systems. If a sensor’s reading falls outside the expected range, or if a component isn’t responding correctly, the ECM stores a Diagnostic Trouble Code (DTC) and turns on the MIL. Common triggers for a Camry include:
- Loose or faulty gas cap: This is the most common and simplest fix. A poor seal allows fuel vapors to escape, triggering an EVAP system code.
- Oxygen (O2) sensor failure: These sensors monitor exhaust gases. A failing one reduces fuel efficiency and increases emissions.
- Mass Air Flow (MAF) sensor issues: This sensor measures incoming air. Contamination or failure leads to poor performance and mileage.
- Catalytic converter problems: A failing cat is expensive. It often follows ignored O2 sensor issues and will cause your Camry to fail emissions tests.
- Spark plug or ignition coil misfires: A misfiring cylinder can damage the catalytic converter and cause rough running.
- Faulty thermostat or coolant temperature sensor: These affect engine management and can cause overheating or poor warm-up performance.
Knowing these common causes helps you understand that clearing the light is the final step, not the first.
Safety First: Precautions Before You Begin
Before you pop the hood or touch any tools, there are critical safety steps. The check engine light might be warning you of a condition that could be unsafe to drive. For example, a severe misfire can cause the catalytic converter to overheat and potentially catch fire. A major engine management fault could lead to a loss of power steering or brake assist.
Visual guide about How to Clear the Check Engine Light on a Toyota Camry
Image source: enginelightfixers.com
Assess the Severity of the Problem
Pay attention to how the light is on:
- Solid, steady light: This indicates a non-emergency issue that needs attention soon. You can usually drive the car to a repair shop, but avoid long trips or high speeds.
- Flashing or blinking light: This is a severe, urgent warning, typically signifying a cylinder misfire severe enough to damage the catalytic converter. Stop driving immediately. Have the car towed to a mechanic. Do not attempt to clear a flashing light; you must address the catastrophic misfire first.
Also, note any other dashboard warnings: Is the temperature gauge in the red? Is the oil pressure light on? Are you experiencing rough running, loss of power, or strange noises? These are separate, critical issues that take priority over the check engine light procedure.
Gather Your Tools and Information
You’ll need a few things depending on your chosen method. For the most reliable and informative reset, an OBD2 scanner is essential. You can borrow one from an auto parts store (often a free service), buy a basic one for $20-$50, or use a smartphone-compatible adapter with a free app. Have your Camry’s year, make, and model ready. For the battery disconnect method, you’ll need a socket wrench or pliers for the battery terminal and possibly a memory saver for your radio presets. For the drive cycle, you need patience and a safe, open road.
Method 1: The Basic Battery Disconnect (The “Hard Reset”)
This is the oldest trick in the book and works on many older vehicles. It cuts power to the Engine Control Module (ECM), forcing it to reset and forget its stored codes. However, it’s a blunt instrument with significant downsides.

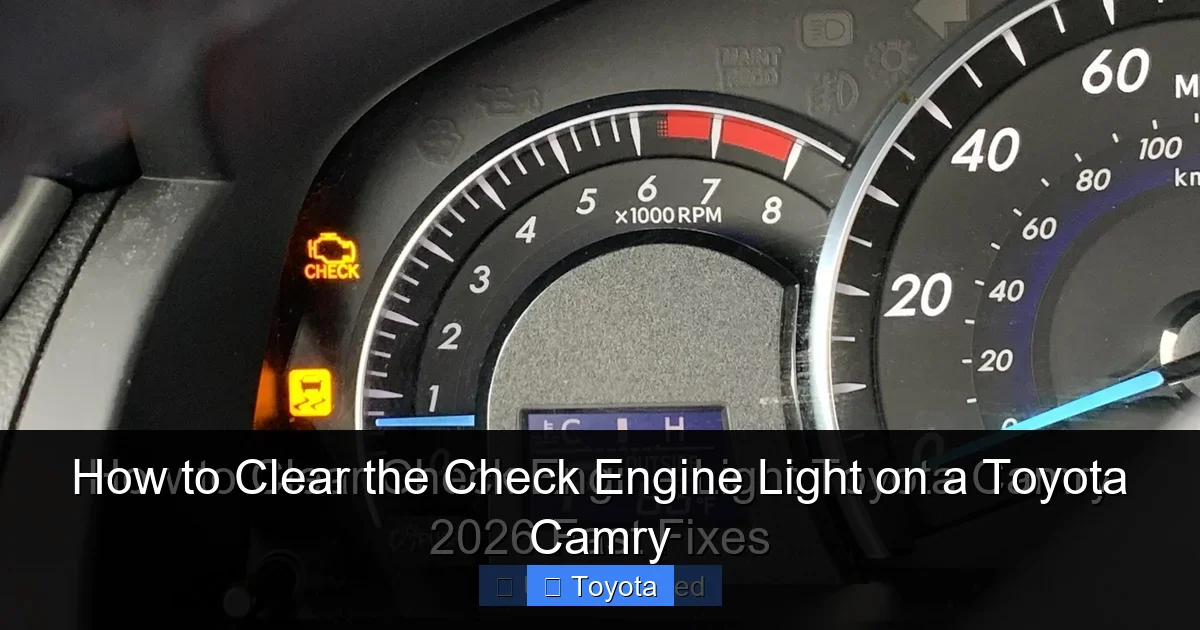
Visual guide about How to Clear the Check Engine Light on a Toyota Camry
Image source: enginelightfixers.com
Step-by-Step Battery Disconnect Procedure
Warning: This will reset all electronic systems. You will lose radio presets, seat memory settings, and clock time. On some models, it may also affect the power window auto-up/down function and require a steering wheel angle sensor relearn procedure. Proceed with caution.
- Park safely: Ensure your Camry is in park (or neutral for a manual), the parking brake is set, and the engine is off. Remove the keys.
- Locate the battery: Open the hood. The battery is typically in the front-right corner of the engine bay (for US models).
- Identify terminals: Identify the positive (+) terminal (usually red or with a red cover) and the negative (-) terminal (usually black or with a black cover).
- Disconnect the NEGATIVE terminal first: Using the correct size wrench or socket (usually 10mm), loosen the nut on the negative terminal clamp. Once loose, carefully lift the clamp off the terminal post. Tuck it away so it cannot accidentally touch the post.
- Wait: This is the crucial step. You must wait at least 10-15 minutes. This ensures all residual power (capacitors) in the ECM and other modules drains completely. Some mechanics recommend waiting up to an hour for a full reset.
- Reconnect: Reattach the negative clamp to the terminal post and tighten the nut securely. Then reconnect the positive terminal if you disconnected it (some only disconnect the negative).
- Start the car: Start your Camry. The check engine light will likely come on initially as the system runs its self-diagnostics. This is normal. Let the engine idle for a minute.
- Take a test drive: Drive normally for 15-20 minutes. If the problem that originally triggered the light is truly gone (e.g., you tightened the gas cap), the light should go out on its own as the monitors complete. If the light comes back on, the fault is still present.
Limitations and Important Notes
The battery disconnect method is unreliable for modern Toyotas. Why?
- Non-volatile memory: Many ECMs use memory that retains codes even when power is removed. The light may stay off temporarily, but the code is still stored and will relight once the system rechecks the faulty component.
- Readiness Monitors: Your Camry has multiple emissions “readiness monitors” (like for the EVAP system, O2 sensors, and catalytic converter). For an emissions test, all must be “ready.” A battery disconnect wipes these monitors to “not ready.” It can take days or weeks of specific driving (a drive cycle) to reset them all. You will fail an emissions test immediately after this reset.
- Doesn’t fix the problem: If the issue is a bad sensor or mechanical failure, disconnecting the battery does nothing to repair it. The light will return as soon as the ECM redetects the fault, which could be within a minute of driving.
- Potential for other resets: As mentioned, you may need to perform additional reset procedures for the steering angle sensor or other systems. Consult your owner’s manual.
This method is best used as a last resort if you have no scanner and have already fixed a simple issue like a gas cap. For a definitive reset, an OBD2 scanner is the professional tool.
Method 2: Using an OBD2 Scanner (The Correct Professional Method)
This is the standard, recommended method for clearing a check engine light. An OBD2 scanner plugs into your Camry’s Data Link Connector (DLC), communicates directly with the ECM, and allows you to read and clear Diagnostic Trouble Codes (DTCs). It’s precise, preserves other system settings, and gives you the vital information you need to actually fix the car.
Visual guide about How to Clear the Check Engine Light on a Toyota Camry
Image source: enginelightfixers.com
Locating the OBD2 Port and Choosing a Scanner
The DLC is a trapezoidal-shaped port, usually found under the dashboard, to the left of the steering column, within easy reach of the driver. It may have a cover labeled “OBD II” or “DLC.”
For scanners, you have options:
- Basic Code Reader ($20-$50): These read and clear generic codes (P0xxx). They are sufficient for most common issues. Brands like Autel, Ancel, and Launch are reliable.
- Advanced Scanner/Scan Tool ($100+): These read manufacturer-specific codes (P1xxx for Toyota), access more systems (like ABS, airbag), and offer live data streaming. Better for complex diagnostics.
- Smartphone Adapter + App ($15-$30): A small OBD2 Bluetooth or Wi-Fi dongle plugs into the port, and you use an app on your phone (like Torque Pro for Android or OBD Fusion for iOS). Very cost-effective and capable.
For a Toyota Camry, any OBD2-compliant tool will work. Ensure it states it supports “OBD2” or “OBD II.”
Step-by-Step Scanning and Clearing
- Connect the scanner: With the ignition OFF, plug the scanner’s cable firmly into the DLC.
- Turn on the ignition: Turn the key to the “ON” or “RUN” position (do not start the engine). The scanner should power on. Some require you to turn the scanner on separately.
- Establish communication: Follow the scanner’s prompts. You’ll typically select “Read Codes” or “Diagnostics.” The tool will communicate with the car’s computers. If it fails, check your connection and ensure the ignition is on.
- Read and record the codes: THIS IS THE MOST IMPORTANT STEP. The scanner will display one or more alphanumeric codes (e.g., P0171, P0300). Write these down or take a photo. These codes tell you what system has a fault. Look them up online or consult a mechanic to understand the potential causes.
- Address the problem: Use the code as your starting point for diagnosis and repair. Fix the loose gas cap, replace the faulty O2 sensor, clean the MAF sensor, etc. Do not skip this.
- Clear the codes: After the repair is complete, return to the scanner’s menu. Select “Clear Codes” or “Erase DTCs.” Confirm the action. The scanner will send a command to the ECM to wipe its memory.
- Verify the reset: The check engine light should go out immediately. Turn the ignition off, wait a few seconds, and turn it back on. The light should remain off.
- Perform a drive cycle: The light may stay off, but the ECM’s readiness monitors are now “not complete.” To ensure the light stays off and to pass an emissions test, you must complete a drive cycle. See the next section.
Method 3: Completing the Drive Cycle
After clearing codes, your Camry’s computer needs to verify that the repaired system is now functioning correctly under various operating conditions. It does this through a series of internal tests called “readiness monitors.” There are typically monitors for: Misfire, Fuel System, EVAP, O2 Sensors, and Catalyst. For a light to stay off permanently and for your car to be emissions-compliant, all applicable monitors must switch to a “Ready” or “Complete” status.
General Drive Cycle Guidelines for a Toyota Camry
There is no single universal drive cycle; it varies slightly by model year and engine. However, the principles are the same. The cycle involves specific combinations of speed, engine load, and coolant temperature. Do not clear codes and immediately take your car for an emissions test; it will fail.
A typical effective drive cycle takes 30-60 minutes of driving and includes these phases:
- Cold start and warm-up: Start the car when the engine is cold (overnight). Let it idle for 2-3 minutes. Then drive gently for 5-10 minutes until the engine reaches normal operating temperature (thermostat opens, temp gauge stabilizes).
- Steady-speed cruising: On a highway or open road, maintain a steady speed between 45-60 mph for at least 5-10 minutes. This tests the O2 sensors and catalyst under constant load.
- Deceleration: Slow down without braking (if safe), letting the car decelerate in gear from 50 mph down to 20 mph. This tests the EVAP system’s ability to handle fuel cut-off.
- Acceleration under load: Find a safe incline or accelerate firmly from a stop to 50+ mph. This loads the engine and tests for misfires and fuel system response.
- Stop-and-go traffic: Simulate city driving for 10-15 minutes with multiple stops and starts. This cycles the EVAP system and tests idle quality.
- Final cool-down: After the drive, let the engine idle for 2-3 minutes before turning it off.
- Flashing check engine light: As stated, this is an emergency. Stop driving.
- Severe drivability problems: If the car is shaking violently, stalling, has no power, or is overheating, tow it.
- Multiple complex codes: If your scanner shows numerous codes across different systems (engine, transmission, ABS), the problem might be a shared ground, wiring harness issue, or a failed main computer—diagnosis requires expertise.
- Intermittent problems: If the light comes and goes, or if codes clear but return after a short drive, the fault is hard to catch. Professionals have advanced tools like oscilloscopes and factory-level scan tools to catch gremlins.
- Lack of tools or confidence: If you don’t have an OBD2 scanner or are uncomfortable performing repairs, it’s wise to consult a professional. A misdiagnosis can lead to replacing expensive, good parts.
- Emissions test failure: If your car needs to pass a state emissions test and you can’t get all monitors to “Ready,” a certified repair shop can perform the necessary drives and verifications.
- Use quality fuel: Buy gas from reputable stations. Low-quality or contaminated fuel can cause misfires and sensor issues.
- Tighten the gas cap: Every time you fill up, ensure the cap clicks into place at least three times. A loose cap is the #1 cause of preventable EVAP codes.
- Follow the service schedule: Adhere to Toyota’s recommended maintenance intervals in your owner’s manual. This includes oil changes, air filter replacements, spark plug service, and fluid flushes.
- Address minor issues promptly: A small oil leak, a slowly leaking coolant hose, or a weak battery can lead to bigger, more expensive problems that trigger the check engine light.
- Use OEM or high-quality replacement parts: Cheap aftermarket sensors and components often fail prematurely and can cause new codes.
- Keep the battery terminals clean: Corrosion can cause voltage issues that confuse the ECM.
- Regularly inspect: Look for damaged wiring, especially in the engine bay where heat and vibration take a toll. Check for cracked or disconnected vacuum hoses, which are a common source of lean condition codes (P0171/P0174).
To check if your monitors are ready, you need an OBD2 scanner that can read “Readiness Status” or “Monitor Status.” After your drive cycle, plug in the scanner and look at this menu. All monitors should show “Ready” or “Complete.” If any show “Not Complete” or “Incomplete,” repeat the drive cycle, paying special attention to the conditions for that specific monitor (e.g., EVAP often needs a specific temperature soak).
When to Seek Professional Help
Not all check engine light issues are DIY projects. Knowing when to call a pro saves time, money, and prevents damage.
Signs You Need a Mechanic
A reputable independent Toyota specialist or a dealership has access to Technical Service Bulletins (TSBs), wiring diagrams, and repair procedures specific to your Camry’s model year and engine (2.5L 4-cylinder, 3.5L V6, hybrid). They can also perform “relearn” procedures for sensors or the ECM if needed after a repair.
Preventing Future Check Engine Light Issues
The best way to deal with a check engine light is to avoid it. Consistent, proper maintenance is your best defense.
Proactive Maintenance for Your Camry
By treating your Camry well, you’ll enjoy many miles of trouble-free driving with a dark, reassuring dashboard.
Conclusion: The Right Way to a Lasting Reset
Clearing the check engine light on your Toyota Camry is not a magic trick; it’s the final, celebratory step in a repair process. The sequence is ironclad: Diagnose → Repair → Clear → Verify. Skipping the diagnosis and repair is a waste of time and money, as the light will inevitably return, often with a new code added. While the battery disconnect method is a quick hack, it’s outdated and problematic for modern vehicles. The OBD2 scanner method is the gold standard, giving you the information you need and performing a clean reset. Remember to follow up with a proper drive cycle to set all readiness monitors. For complex, flashing-light, or persistent issues, investing in professional diagnosis is the smartest choice. Your Camry is a reliable machine, and with the right care, it will reward you with years of dependable service and a clear, worry-free dashboard.
FAQs
Can I clear the check engine light without fixing the problem?
Yes, you can physically clear the light using a scanner or by disconnecting the battery. However, this is strongly discouraged. The light will return as soon as the car’s computer redetects the fault, which could be within minutes or a few drive cycles. This practice also masks a potentially serious issue that could cause engine damage, failed emissions tests, or unsafe driving conditions.
Will disconnecting the battery clear all codes?
It might clear some codes, but not necessarily all. Modern Engine Control Modules (ECMs) often have non-volatile memory that retains certain codes even when power is removed. More importantly, disconnecting the battery will wipe all readiness monitors, meaning your car will immediately fail an emissions test. An OBD2 scanner is required to be certain all codes are cleared.
How long does it take for the check engine light to come back on after a reset?
It depends entirely on the nature of the problem. If you cleared the code but did not fix a loose gas cap, it might return within 10-20 drive cycles. If you cleared a code for a faulty oxygen sensor that is still bad, it will likely return very quickly, often within the first few minutes of driving as the sensor sends invalid data again. If the problem was truly fixed, the light should stay off permanently.
Do I need a special scanner for a Toyota Camry?
No. Any standard OBD2 (OBD II) scanner will work with a 1996 or newer Toyota Camry. These scanners read generic powertrain codes (P0xxx series). For more advanced, manufacturer-specific codes (P1xxx series) or to access other systems like ABS or airbags, you would need a more expensive, professional-grade scan tool. For simply reading and clearing the check engine light, a basic OBD2 reader is sufficient.
What is a drive cycle and why is it important?
A drive cycle is a specific sequence of driving conditions (speed, acceleration, temperature, idle time) that allows your car’s computer to run all its internal self-tests, called readiness monitors. After clearing codes, these monitors are reset to “not complete.” To pass an official emissions test and ensure your repair is verified, all monitors must show “ready.” A proper drive cycle, which usually takes 30-60 minutes of varied driving, sets these monitors. Without it, your car will fail an emissions inspection even if the problem is fixed.
My check engine light is on, but the car seems to run fine. What should I do?
Do not ignore it. Many problems, especially early-stage ones like a slightly faulty oxygen sensor or a small evaporative (EVAP) leak, do not cause noticeable drivability issues but will increase emissions and fuel consumption. Over time, they can lead to more serious damage (like a ruined catalytic converter from a bad O2 sensor) and will cause your car to fail an emissions test. Use an OBD2 scanner to read the code immediately, diagnose the cause, and address it. The process for reading codes is very similar across many Toyota models, so understanding it for your Camry is a valuable skill.
Frequently Asked Questions
What is How to Clear the Check Engine Light on a Toyota Camry?
How to Clear the Check Engine Light on a Toyota Camry is an important topic with many practical applications.


