How to Check Primary Oil on Harley-davidson
Contents
- 1 Key Takeaways
- 2 📑 Table of Contents
- 3 How to Check Primary Oil on Harley-Davidson
- 4 Why Primary Oil Matters on Your Harley
- 5 When and How Often to Check Primary Oil
- 6 Tools and Supplies You’ll Need
- 7 Step-by-Step Guide to Checking Primary Oil
- 8 Common Mistakes to Avoid
- 9 Primary Oil Maintenance: When to Change It
- 10 Final Thoughts: Keep Your Harley Running Smooth
- 11 Frequently Asked Questions
Checking the primary oil on your Harley-Davidson is essential for maintaining optimal performance and longevity of your motorcycle’s transmission and clutch systems. To do it correctly, ensure the bike is on a level surface, warmed up, and the oil has settled—then remove the inspection plug and verify the oil level reaches the bottom thread of the fill hole. Regular checks prevent costly damage and keep your ride smooth and reliable.
Key Takeaways
- Check oil when engine is cold: Ensures accurate reading and prevents burns.
- Locate the primary chaincase drain plug: Found on the bottom of the primary housing.
- Use a clean rag to wipe the dipstick: Prevents debris from contaminating the oil.
- Reinsert dipstick fully before checking level: Gives the most accurate oil measurement.
- Maintain oil between “Full” and “Add” marks: Prevents damage from over- or under-filling.
- Replace drain plug with new gasket: Prevents leaks and ensures proper sealing.
📑 Table of Contents
- How to Check Primary Oil on Harley-Davidson
- Why Primary Oil Matters on Your Harley
- When and How Often to Check Primary Oil
- Tools and Supplies You’ll Need
- Step-by-Step Guide to Checking Primary Oil
- Common Mistakes to Avoid
- Primary Oil Maintenance: When to Change It
- Final Thoughts: Keep Your Harley Running Smooth
How to Check Primary Oil on Harley-Davidson
So, you’ve just taken your Harley-Davidson out for a long weekend ride along the coast, the wind in your face, the engine purring like a contented beast beneath you. You pull into your driveway, shut off the bike, and take a deep breath—satisfied. But then it hits you: when was the last time you checked the primary oil?
If you’re like most Harley riders, you probably check your engine oil regularly—after all, it’s right there on the dipstick, easy to access and hard to ignore. But the primary oil? That’s a different story. It’s tucked away, out of sight, and often out of mind. Yet, this humble fluid plays a critical role in keeping your Harley running smoothly. The primary oil lubricates the clutch, transmission input shaft, and primary drive components. Neglect it, and you could be looking at costly repairs down the road—literally.
In this guide, I’m going to walk you through everything you need to know about checking the primary oil on your Harley-Davidson. Whether you’re a seasoned rider or a newbie who just bought their first Big Twin, this step-by-step breakdown will help you stay on top of your bike’s maintenance. No jargon, no fluff—just real, practical advice from someone who’s been there, done that, and probably made a few mistakes along the way.
Why Primary Oil Matters on Your Harley
Let’s start with the basics: what exactly is primary oil, and why should you care? On a Harley-Davidson, the primary oil is the fluid that lives in the primary chain case—the area between the engine and the transmission. It’s not the same as engine oil or transmission oil, though it’s often the same type of fluid (usually 20W-50 or a synthetic equivalent). Its main job is to keep the clutch plates, primary drive gears, and input shaft bearings well-lubricated.
Visual guide about How to Check Primary Oil on Harley-davidson
Image source: automotivewidgets.com
The Role of Primary Oil in Harley Performance
Think of the primary oil as the unsung hero of your Harley’s drivetrain. While engine oil keeps your pistons and valves happy, and transmission oil handles gear shifts, the primary oil ensures that power flows smoothly from the engine to the transmission. Without proper lubrication, the clutch can overheat, wear out prematurely, or even start slipping—especially under heavy loads or during long rides.
I remember one summer when I ignored my primary oil level for too long. I was riding through the desert, pulling a trailer, and suddenly noticed my clutch starting to slip. At first, I thought it was just the heat, but after pulling over and checking, I found the primary oil was nearly empty. Turns out, a small leak had been slowly draining it over several hundred miles. That was a $400 lesson in the importance of regular checks.
Signs Your Primary Oil Needs Attention
So how do you know if your primary oil is low or degraded? Here are a few telltale signs:
- Clutch slipping: If your bike revs high but doesn’t accelerate as it should, especially under load, low or dirty primary oil could be the culprit.
- Hard shifting: Difficulty getting into gear, especially first, can indicate poor lubrication in the primary.
- Unusual noises: Grinding, whining, or clunking from the primary area—especially when engaging the clutch—may signal insufficient oil.
- Oil leaks: Visible oil around the primary cover or clutch cable area could mean a seal is failing and oil is escaping.
Don’t wait for these symptoms to appear. A quick check every 3,000 to 5,000 miles (or before long trips) can save you from a breakdown—and a big repair bill.
When and How Often to Check Primary Oil
Now that you know why primary oil matters, let’s talk timing. How often should you check it? The answer depends on how you ride, but here’s a good rule of thumb: check your primary oil every time you change your engine oil, or at least every 5,000 miles. If you ride hard—hauling gear, riding in extreme heat, or doing frequent stop-and-go city riding—you might want to check it more often, like every 3,000 miles.
Visual guide about How to Check Primary Oil on Harley-davidson
Image source: i.ytimg.com
Best Practices for Maintenance Intervals
Harley-Davidson recommends checking the primary oil level during routine maintenance, but they don’t always emphasize it in the owner’s manual. That’s why it’s up to you to stay proactive. Here’s a simple maintenance schedule you can follow:
- Every 1,000 miles: Visual inspection for leaks or low oil (if you’re prone to leaks).
- Every 3,000–5,000 miles: Full primary oil check and top-off if needed.
- Every 10,000–15,000 miles: Full primary oil change (drain and refill).
Keep in mind that newer Harley models with sealed primary systems (like some Softails and Touring bikes) may have different requirements. Always consult your owner’s manual or a trusted Harley mechanic if you’re unsure.
Seasonal Considerations
Your riding season also plays a role. If you store your Harley for the winter, it’s a great time to check and change the primary oil before putting it away. Old oil can break down over time, losing its lubricating properties and potentially causing corrosion. Fresh oil helps protect internal components during storage.
Likewise, before a long summer trip, don’t skip the primary oil check. Heat is one of the biggest enemies of oil performance, and degraded oil can’t protect your clutch and gears like it should.
Tools and Supplies You’ll Need
Checking your primary oil isn’t complicated, but you’ll need a few basic tools to do it right. The good news? You probably already have most of them in your garage.
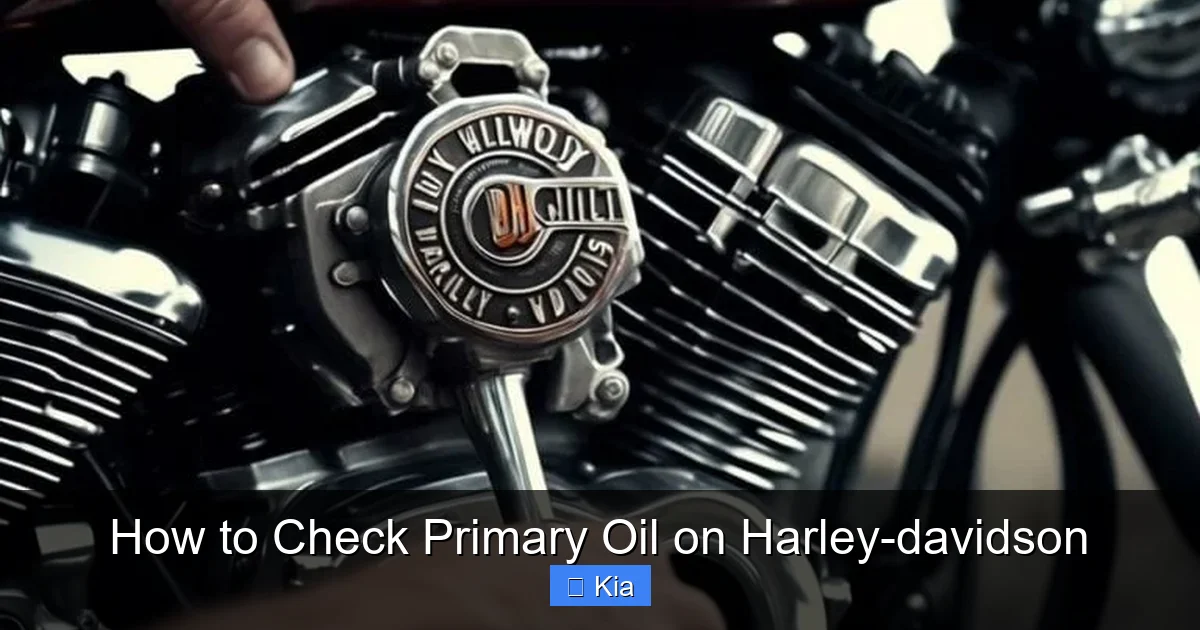
Visual guide about How to Check Primary Oil on Harley-davidson
Image source: ironhorserebels.com
Essential Tools for the Job
Here’s what you’ll need:
- Primary oil dipstick or sight glass tool: Most Harleys use a dipstick that screws into the primary cover. Some newer models have a sight glass, which lets you see the oil level without removing anything.
- Clean rag or paper towels:
- Funnel (optional but helpful):
- Recommended oil: Harley recommends 20W-50 mineral oil or a high-quality synthetic equivalent. Avoid using engine oil unless specified—some synthetics can cause clutch slippage.
- Torque wrench (if removing the cover): Only needed if you’re doing a full oil change.
Pro tip: Keep a small bottle of primary oil in your saddlebag or garage. That way, if you’re on the road and notice the level is low, you can top it off without a trip to the dealer.
Choosing the Right Oil
Not all oils are created equal. Harley-Davidson specifies that primary oil should be non-detergent or low-detergent to prevent clutch slippage. Detergents in regular engine oil can make the clutch plates too slick, leading to poor engagement.
Popular choices include:
- Harley-Davidson SYN3 Synthetic Primary Oil
- Red Line V-Twin Primary Oil
- Amsoil Synthetic V-Twin Primary Oil
Stick with reputable brands and avoid cheap, generic oils. Your clutch will thank you.
Step-by-Step Guide to Checking Primary Oil
Alright, let’s get to the main event: how to actually check the primary oil on your Harley. I’ll walk you through it step by step, using a typical Big Twin model (like a Dyna or Softail) as an example. If you have a newer model with a sight glass, the process is even easier—I’ll cover that too.
Step 1: Warm Up the Engine
Start by warming up your bike for about 5–10 minutes. This gets the oil flowing and ensures an accurate reading. Cold oil can give a false high reading because it hasn’t fully drained back into the primary case.
After warming up, shut off the engine and let it sit for a minute or two. This allows the oil to settle.
Step 2: Locate the Primary Oil Dipstick
The dipstick is usually found on the left side of the bike, near the primary cover. It’s a small, threaded plug with a hex head or a simple twist cap. On some models, it’s labeled “Primary” or has a small oil can icon.
If you’re not sure where it is, check your owner’s manual or look for a small cap near the clutch cable.
Step 3: Remove and Clean the Dipstick
Use a clean rag to wipe off any dirt or grime from the dipstick area. Then, unscrew the dipstick by hand or with a wrench (if it’s tight). Be careful not to cross-thread it.
Once removed, wipe the dipstick clean with a rag. This is important—you need a clean surface to get an accurate reading.
Step 4: Reinsert and Check the Level
Now, fully reinsert the dipstick—don’t screw it in, just push it all the way down. Then pull it out and look at the oil level.
The dipstick will have markings indicating “Full,” “Add,” or sometimes just a crosshatch area. The oil should be within the safe range. If it’s below the “Add” line, you’ll need to top it off.
Pro tip: If the oil looks dark, gritty, or smells burnt, it’s time for a full change—not just a top-off.
Step 5: Top Off if Needed
If the level is low, use a funnel to add the recommended oil slowly. Don’t overfill—Harley recommends filling to the bottom of the dipstick threads when cold, or to the “Full” line when warm.
After adding oil, reinsert the dipstick, screw it back in securely, and wipe away any spills.
For Bikes with a Sight Glass
On newer Harley models (like some Touring bikes), you might have a sight glass instead of a dipstick. In that case, simply look through the glass on the primary cover. The oil level should be visible and within the marked range.
If it’s low, locate the fill plug (usually near the sight glass), remove it, and add oil until it reaches the proper level. Replace the plug and clean up any spills.
Common Mistakes to Avoid
Even experienced riders can make mistakes when checking primary oil. Here are a few common pitfalls and how to avoid them.
Overfilling the Primary
Adding too much oil is a classic error. Overfilling can cause the oil to foam, reduce lubrication efficiency, and even lead to leaks. It can also increase pressure in the primary case, which may damage seals.
Always follow the manufacturer’s recommended fill level. When in doubt, add a little at a time and recheck.
Using the Wrong Oil
As mentioned earlier, using detergent-rich engine oil in the primary can cause clutch slippage. Stick to non-detergent or low-detergent oils designed for Harley primaries.
Also, avoid mixing different oil types unless they’re compatible. Mixing synthetics and conventional oils can reduce performance.
Ignoring the Dipstick Threads
Some riders forget to fully insert the dipstick before checking the level. If you only push it in partway, you’ll get a false reading. Always insert it completely, then remove it to check.
And remember: don’t screw the dipstick in when checking—just push it in and pull it out.
Skipping Regular Checks
The biggest mistake? Not checking at all. Primary oil doesn’t get the attention it deserves, but it’s just as important as engine oil. Make it part of your routine, and your Harley will reward you with smoother shifts and a longer-lasting clutch.
Primary Oil Maintenance: When to Change It
Checking the level is one thing, but knowing when to change the oil is just as important. Over time, primary oil breaks down, collects contaminants, and loses its ability to protect your components.
How Often to Change Primary Oil
Harley recommends changing the primary oil every 10,000 to 15,000 miles, or once a year—whichever comes first. If you ride in harsh conditions (dust, heat, heavy loads), consider changing it more frequently, like every 5,000 to 7,500 miles.
Here’s a quick reference table to help you keep track:
| Riding Conditions | Recommended Change Interval |
|---|---|
| Normal city/highway riding | 10,000–15,000 miles |
| Heavy loads, towing, or frequent stop-and-go | 5,000–7,500 miles |
| Extreme heat or dusty environments | 5,000 miles |
| Winter storage (before putting bike away) | Change oil before storage |
How to Change Primary Oil
Changing the oil is a bit more involved than just checking the level, but it’s still doable at home with the right tools. Here’s a quick overview:
- Warm up the engine to thin the oil.
- Place a drain pan under the primary drain plug (usually on the bottom of the primary cover).
- Remove the drain plug and let the oil drain completely.
- Replace the drain plug and torque it to spec (usually 12–15 ft-lbs).
- Fill with fresh oil using a funnel—typically 32–36 oz, but check your manual.
- Start the bike and let it run for a minute to circulate the oil.
- Shut off, recheck the level, and top off if needed.
Always dispose of used oil responsibly—most auto parts stores will take it for recycling.
Final Thoughts: Keep Your Harley Running Smooth
Checking the primary oil on your Harley-Davidson might not be as glamorous as polishing the chrome or tuning the exhaust, but it’s one of the most important things you can do to keep your bike in top shape. It’s a simple task that takes just a few minutes, yet it can prevent costly repairs and keep your rides smooth and worry-free.
Think of it this way: your Harley is more than just a motorcycle—it’s a companion on the open road. And like any good relationship, it requires care, attention, and a little bit of maintenance. By staying on top of your primary oil, you’re not just protecting your investment; you’re ensuring that every ride feels as good as the first.
So the next time you’re in the garage, don’t skip the primary oil check. Grab your dipstick, take a look, and give your Harley the love it deserves. Your clutch—and your wallet—will thank you.
Frequently Asked Questions
How do you check the primary oil on a Harley-Davidson?
To check the primary oil on a Harley-Davidson, ensure the motorcycle is on a level surface and the engine is cool. Locate the primary chaincase inspection plug on the left side of the engine, remove it, and check that the oil level reaches the bottom of the fill hole.
Where is the primary oil dipstick on a Harley?
Most Harley-Davidson models don’t use a dipstick for the primary oil; instead, they have a threaded inspection plug on the primary chaincase. You remove this plug to check the oil level, which should be even with the bottom of the fill hole when properly filled.
How often should you check primary oil on a Harley?
It’s recommended to check the primary oil every 5,000 miles or during routine maintenance, such as oil changes. Regular checks help ensure proper lubrication of the clutch and transmission components.
Can you overfill the primary oil on a Harley-Davidson?
Yes, overfilling the primary oil can cause leaks, foaming, and clutch slippage. Always fill only to the bottom of the inspection hole and avoid adding too much oil.
What type of oil should be used in the Harley primary?
Harley-Davidson recommends using primary-specific oil, such as Harley Davidson Primary Fluid or a high-quality 20W-50 motorcycle oil. Using the correct oil ensures proper clutch operation and component protection.
Is the primary oil the same as transmission oil on a Harley?
No, the primary oil lubricates the clutch and primary drive, while transmission oil serves the gearbox. On many Harley models, they are separate systems and require different oil types and levels.