How to Change Gas Cap on Ford F150
Contents
- 1 Key Takeaways
- 2 📑 Table of Contents
- 3 Understanding Your Ford F150’s Gas Cap: More Than Just a Plug
- 4 Gathering Your Tools and the Correct Replacement Cap
- 5 Step-by-Step: Removing the Old Gas Cap
- 6 Step-by-Step: Installing the New Gas Cap
- 7 Resetting the Check Engine Light and Verifying the Repair
- 8 Troubleshooting: What If the Light Comes Back On?
- 9 Maintenance Best Practices for Your Fuel System
- 10 Conclusion: A Simple Fix with Big Rewards
- 11 Frequently Asked Questions
Replacing the gas cap on your Ford F150 is a quick, inexpensive fix that can resolve check engine lights and prevent fuel vapor leaks. Most replacements take under 5 minutes and require no special tools—just the correct cap for your model year. This guide walks you through identifying a faulty cap, selecting the right replacement, and installing it properly to ensure your truck’s emission system works correctly.
That little check engine light on your Ford F150’s dashboard can be a real headache. You scan the code, and it points to a “large EVAP leak”—often a frustratingly simple culprit: the gas cap. It might feel like a prank, but a faulty fuel cap is one of the most common reasons for that pesky light to illuminate. The good news? Changing the gas cap on a Ford F150 is arguably one of the easiest DIY repairs you can do. It requires no mechanical expertise, takes minutes, and costs less than a tank of gas. Whether you drive a 2015 or a 2024 F150, this guide will walk you through every single step, from understanding why your cap matters to ensuring that check engine light stays off for good.
We’ll break it down in plain language. No jargon, no confusion. Just you, your truck, and a new gas cap. By the end, you’ll not only have solved the problem but also understand a critical piece of your truck’s emissions system. So, grab a socket set if you have one (you probably won’t need it), and let’s get started on how to change gas cap on Ford F150.
Key Takeaways
- The gas cap is a critical emissions component: A loose, damaged, or missing cap triggers the check engine light, reduces fuel efficiency, and allows harmful vapors to escape.
- Always use an OEM or high-quality aftermarket cap: The correct cap ensures a proper seal; universal caps often fail to meet Ford’s specifications and can cause repeated errors.
- Replacement is a simple 3-step process: Open the fuel door, remove the old cap by turning counterclockwise, and twist the new cap on until you hear three distinct clicks.
- The check engine light may not reset immediately: After replacement, the truck’s computer needs a drive cycle to verify the seal; this can take 50-100 miles of driving.
- Never force the cap: If it doesn’t turn easily, the threads may be cross-threaded or the cap incompatible—stop to avoid damaging the filler neck.
- Inspect the fuel door and seal annually: Look for cracks in the rubber seal around the filler neck and debris in the cap’s threads to prevent future issues.
- If the light persists, diagnose further: A lingering code after cap replacement could indicate a faulty EVAP system component, requiring professional diagnosis.
📑 Table of Contents
- Understanding Your Ford F150’s Gas Cap: More Than Just a Plug
- Gathering Your Tools and the Correct Replacement Cap
- Step-by-Step: Removing the Old Gas Cap
- Step-by-Step: Installing the New Gas Cap
- Resetting the Check Engine Light and Verifying the Repair
- Troubleshooting: What If the Light Comes Back On?
- Maintenance Best Practices for Your Fuel System
- Conclusion: A Simple Fix with Big Rewards
Understanding Your Ford F150’s Gas Cap: More Than Just a Plug
Before we touch a tool, it helps to understand what this little component actually does. The gas cap on your F150 is a sophisticated part of the Evaporative Emission Control (EVAP) system. Its job is to create an airtight seal on the fuel tank filler neck. This seal is absolutely vital for two main reasons. First, it prevents liquid gasoline from sloshing out during cornering or a collision. Second, and more importantly for daily driving, it traps fuel vapors inside the tank. These vapors are routed to the engine to be burned, rather than being released into the atmosphere as pollution.
The Seal is Everything
The cap has a rubber gasket that compresses against the filler neck’s rim. When you twist it on, you should hear a series of clicks—usually three. These clicks mean the ratcheting mechanism inside has engaged and the seal is properly set. A cap that doesn’t click, or a rubber gasket that’s cracked, brittle, or missing, cannot hold pressure. The truck’s computer constantly monitors the EVAP system for pressure. If it detects a leak (which a bad cap creates), it logs a diagnostic trouble code (like P0455 for a large leak) and illuminates the check engine light.
Common Symptoms of a Failing Gas Cap
How do you know it’s the cap and not something more serious? Look for these telltale signs:
- The Check Engine Light is On: This is the #1 indicator. A scan tool will often reveal an EVAP-related code.
- Strong Gasoline Smell: You might notice a raw fuel odor around the rear of the truck, especially after filling up.
- Poor Fuel Economy: A significant leak can cause the engine to run less efficiently as vapors escape.
- The Cap Won’t Come Off or On Easily: Cross-threading, stripped threads, or a stuck locking mechanism are clear signs of damage.
- Visible Cracks or Damage: A quick visual inspection of the cap’s plastic body or rubber seal often reveals the problem.
If you have these symptoms, especially the check engine light, the gas cap is the first and easiest thing to check and replace. It’s a classic case of starting with the simplest fix before moving to more complex and expensive repairs.
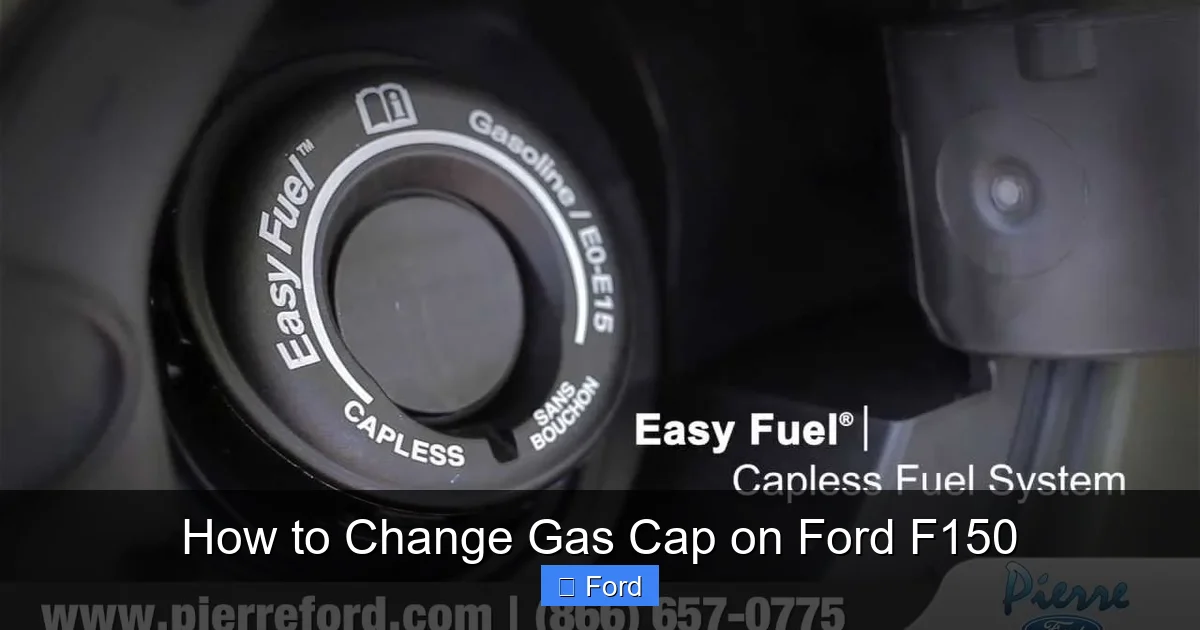
Gathering Your Tools and the Correct Replacement Cap
This is the most important preparation step: getting the right cap. Using the wrong one is a waste of time and money and will likely turn your check engine light back on. You have two primary options: an OEM (Original Equipment Manufacturer) cap or a high-quality aftermarket cap that meets Ford’s specifications.

Visual guide about How to Change Gas Cap on Ford F150
Image source: m.media-amazon.com
OEM vs. Aftermarket: Which Should You Choose?
OEM (Ford) Caps: These are guaranteed to fit and seal perfectly because they’re the exact same part that was on your truck when it left the factory. They are the safest, most reliable choice. The downside is cost—they typically run $25-$45 from a dealership or OEM parts website.
High-Quality Aftermarket Caps: Brands like Allied, Febi Bilstein, or Standard Motor Products produce caps that meet or exceed OEM standards. They are often significantly cheaper, around $10-$20. The key is to ensure it’s listed for your specific F150 model year and engine type (e.g., 3.5L EcoBoost, 5.0L V8). Never use a “universal” cap. They are not designed for the precise tolerances of your filler neck and will fail.
How to Find the Exact Cap for Your Truck
Your best sources are:
- Your Ford Dealer’s Parts Department: Provide your VIN (Vehicle Identification Number) for a guaranteed match. The VIN is on your driver’s side dashboard (visible through the windshield) or on your registration and insurance card.
- Reputable Online Auto Parts Retailers: Sites like FordPartsGiant, RockAuto, or even Amazon. Use your F150’s year, make, model, and engine size to filter. Read reviews carefully.
- Local Auto Parts Stores: Stores like AutoZone or O’Reilly often have catalogs where you can look up your cap by vehicle. They may also have the part in stock.
While you’re ordering, take a moment to look at your current cap. On the underside or top, there is often a part number printed. Searching for that number online is a foolproof way to find an exact replacement.
Minimal Tool Requirements
For this job, you likely need nothing more than your hands. However, having these items nearby is wise:
- A clean rag or paper towel: To wipe away any dirt or debris from the filler neck before installing the new cap.
- A flashlight: The fuel door area can be dark, especially at night.
- Your vehicle’s owner’s manual: It will have the exact specifications and sometimes a diagram.
You do not need wrenches, sockets, or screwdrivers. The gas cap is designed for hand tightening only. If you feel you need a tool, something is wrong—likely cross-threading.
Step-by-Step: Removing the Old Gas Cap
Now for the hands-on part. This process is straightforward, but a couple of model-year nuances exist. The vast majority of F150s from the past two decades follow this simple procedure.
Visual guide about How to Change Gas Cap on Ford F150
Image source: i.ytimg.com
Step 1: Access the Fuel Door
The fuel door on your F150 is typically on the driver’s side, near the rear quarter panel. To open it, you usually have one of two methods:
- Press-to-Release: Simply press on the rear edge of the door. It will pop open slightly. Pull it fully open.
- Lever or Button Inside: Some older models (pre-2015) or specific trims have a release lever or button on the lower part of the driver’s side door panel or the floorboard. Pull the lever or press the button to pop the door.
Pro Tip: If the door won’t open, check for a child lock feature (rare on fuel doors) or a damaged cable/linkage. Don’t force it. Consult your owner’s manual. For comparison, some vehicles like the 2022 Honda Civic use a button inside the cabin, which is a different mechanism entirely.
Step 2: Remove the Old Cap
Once the fuel door is open, you’ll see the filler neck with the cap screwed on top.
- Turn the cap counterclockwise (lefty-loosey). Apply steady, even pressure. You should feel it break free after a quarter-turn or so.
- Continue turning until it comes off. Be prepared for a slight hissing sound as the vacuum in the tank is released. This is normal.
- Inspect the old cap immediately. Look at the rubber seal on the underside. Is it cracked, shriveled, or missing? Are the plastic threads on the cap or the metal threads on the filler neck stripped or damaged? This inspection confirms your diagnosis.
What if it’s stuck? Rarely, a cap can seize due to corrosion or overtightening. Do not use a wrench or pliers—you’ll damage the filler neck. Try using a rubber glove for extra grip. If it still won’t budge, a tiny squirt of penetrating lubricant (like WD-40) around the threads, waiting 10 minutes, can help. Be extremely gentle.
Step-by-Step: Installing the New Gas Cap
Installation is the reverse of removal, but precision matters here. A proper seal is non-negotiable.
Visual guide about How to Change Gas Cap on Ford F150
Image source: cimg1.ibsrv.net
Step 1: Clean the Filler Neck
Before you do anything, use your clean rag to wipe around the top of the filler neck. Remove any dirt, gravel, or old fuel residue. Even a small piece of debris can prevent the new cap’s seal from making full contact, causing a leak. Pay special attention to the sealing surface—the flat metal ring where the cap’s rubber gasket will sit.
Step 2: Position and Hand-Tighten the New Cap
- Place the new cap on the filler neck. Ensure the tabs on the cap (if it has a keyed or locking mechanism) align correctly with the notches on the neck. It should sit flush and level.
- Turn it clockwise (righty-tighty). Apply firm, even pressure with the palm of your hand. You will feel resistance increase as the threads engage.
- Tighten until you hear the clicks. Most caps are designed with a ratcheting mechanism. You should hear a distinct clicking sound. Three clicks is the standard for Ford, but consult your cap’s instructions if provided. Do not overtighten past the clicks. The mechanism is designed to stop at the correct torque. Overtightening can crack the cap’s body or damage the filler neck threads.
Important: The cap should feel snug but not require brute force. If it feels like it’s stripping, stop and unscrew it. Check the alignment and try again. Forcing it is the #1 cause of installation failure.
Step 3: Verify the Installation
Give the cap a gentle counterclockwise tug. It should not move. If it does, it wasn’t tightened enough. Listen closely—you should not hear any hissing of vapors escaping. Visually confirm the cap is sitting straight and the fuel door closes without obstruction.
Resetting the Check Engine Light and Verifying the Repair
You’ve installed the new cap. The fuel door is closed. Now what? The check engine light will probably still be on. Don’t panic. The truck’s computer (PCM) needs to run a series of self-tests, called a “drive cycle,” to confirm the EVAP system is now sealed. Until it passes that test, the light remains on.
The Drive Cycle: Let the Truck Do the Work
This is the most common and often successful method. You simply drive the truck normally. The conditions needed for the EVAP monitor to run are specific but achievable:
- Start with a cold engine. The engine coolant temperature should be below 122°F (50°C) at startup.
- Drive at steady speeds. Cruise on the highway for 20-30 minutes at 45-65 mph. The system needs the fuel tank to be at a specific pressure and temperature.
- Include city driving. Stop-and-go traffic, idling at lights, and gentle acceleration help complete other monitors that must pass before the EVAP test runs.
- Avoid refueling during the cycle. Opening the fuel cap during the drive cycle will reset the test.
Typically, after 50-100 miles of mixed driving, the computer will complete its checks. If the cap is good and the seal is perfect, the check engine light will turn off on its own. If it comes back on after this, there is likely another leak in the EVAP system (like a cracked hose or faulty purge valve), and further diagnosis is needed.
Using an OBD2 Scanner to Clear the Code (Optional)
If you have access to an OBD2 scanner (a simple code reader works), you can manually clear the code after replacing the cap. This will turn the light off immediately. However, the monitor will still be “incomplete” until the drive cycle finishes. If there is another problem, the light will return once the monitor re-runs (usually within a few drive cycles). If you don’t have a scanner, you can often find local auto parts stores that will scan and clear codes for free. While they’re there, you can also ask them to look up the exact gas cap part number for your F150, which is a great double-check. This is also a good time to think about other maintenance; for instance, learning how to replace brakes on a Ford F150 is another valuable DIY skill that saves significant money.
Troubleshooting: What If the Light Comes Back On?
So you followed all the steps, drove 100 miles, and the light is still glowing, or it came back on after a few days. Now it’s time to dig deeper. While the gas cap is the prime suspect 70% of the time, other EVAP system components can fail.
Other Common EVAP Leak Sources
The EVAP system is a network of hoses, valves, and the charcoal canister. Here are the next most likely culprits:
- Loose or Damaged Fuel Filler Neck: The metal neck itself can corrode or crack, especially in regions that use road salt. Inspect it closely for any signs of damage.
- Faulty Purge Valve or Vent Solenoid: These are electronic valves that control the flow of vapors. They can stick open or fail, causing leaks. Diagnosis requires a smoke machine test, typically done by a professional.
- Cracked or Disconnected EVAP Hoses: Underneath the truck, there are several small plastic or rubber hoses running to the charcoal canister (usually near the spare tire or rear axle). They can become brittle and crack or simply pop off a connector.
- Faulty Charcoal Canister: This component absorbs fuel vapors. If it’s saturated or cracked, it will leak. It’s located under the vehicle and can be damaged by road debris.
When to Call a Professional
If you’ve replaced the cap with a guaranteed correct OEM part, cleaned the filler neck, and completed a full drive cycle only to have the code return, it’s time to seek professional help. Diagnosing an EVAP leak beyond the cap often requires specialized tools like a smoke machine that pressurizes the system with harmless vapor to visually spot leaks. This is not typically a DIY job unless you have the equipment and experience. A reputable mechanic can perform this test in under an hour and pinpoint the exact failed component.
Maintenance Best Practices for Your Fuel System
Prevention is always better than repair. A few simple habits can extend the life of your gas cap and keep your EVAP system healthy for years.
Handle the Cap with Care
Never slam the fuel door or toss the cap onto the ground. Always place it gently on the rim of the fuel door or in a clean pocket while refueling. Avoid over-tightening—the three-click rule is firm. If you have a locking cap (common on certain trims or aftermarket anti-theft caps), don’t use excessive force with the key.
Keep the Area Clean
During fill-ups, wipe around the filler neck opening occasionally. Dirt and small stones can work their way into the threads or onto the sealing surface, causing damage over time. A quick wipe with a gas station paper towel is sufficient.
Regular Visual Inspections
Every few months, take 10 seconds to look at your gas cap when you open the fuel door. Check the rubber seal for cracks, hardening, or pieces missing. Ensure the cap’s plastic body isn’t cracked. If you notice any degradation, replace it preemptively. It’s a $20 insurance policy against a future check engine light.
Protect from Extreme Conditions
If you live in an area with harsh winters with road salt, or extremely hot deserts, the plastic and rubber on your cap can degrade faster. Consider inspecting it twice a year in these climates. Storing a spare cap in your glovebox isn’t a bad idea for long road trips.
By treating this small part with respect, you ensure your F150’s engine runs efficiently, passes emissions tests, and does its part to keep the air clean. It’s a small task with a big impact on your truck’s health and your peace of mind.
Conclusion: A Simple Fix with Big Rewards
Changing the gas cap on your Ford F150 is a perfect example of automotive empowerment. It’s a 5-minute job that saves you a diagnostic fee, prevents failed emissions tests, and restores your confidence in your dashboard. The key takeaway is simple: a check engine light for an EVAP leak is most likely the cap. Buy the correct one (OEM is best), install it with care by hand until it clicks three times, and then drive normally for about a week. In all likelihood, that light will vanish on its own.
Don’t let a simple problem intimidate you. Your F150 is built to be worked on, and this is one of the friendliest entry points into DIY truck maintenance. You’ve now got the knowledge to tackle it yourself. Next time that light comes on, you’ll know exactly what to do. And if the problem persists after a new cap, you’ll also know when it’s time to hand it over to a pro for a deeper EVAP system diagnosis. Happy driving, and enjoy that clear dashboard!
Frequently Asked Questions
How do I know if my Ford F150 gas cap is bad?
The most common sign is an illuminated check engine light with an EVAP leak code. You may also smell fuel vapors near the truck or notice decreased fuel economy. A visual inspection often reveals cracks in the cap’s rubber seal or plastic body.
Can I use any gas cap on my Ford F150?
No. You must use a cap specifically designed for your F150’s model year and engine. Universal caps rarely seal correctly. Always opt for an OEM Ford cap or a high-quality aftermarket cap listed for your exact vehicle to ensure a proper seal and avoid repeated check engine lights.
Do I need any special tools to change the gas cap?
No. The gas cap is designed for hand tightening and removal. You only need your hands and possibly a flashlight to see in the fuel door area. Never use a wrench or pliers, as this can damage the filler neck threads.
How long does it take for the check engine light to reset after changing the gas cap?
After installing a new cap, the truck’s computer needs to complete a “drive cycle” to verify the seal. This typically requires 50-100 miles of mixed driving (city and highway). The light should turn off on its own once the system passes the test.
What if my new gas cap doesn’t have the same locking mechanism as the old one?
The locking mechanism (if your truck has one) is separate from the sealing function. You can often transfer the locking ring from your old cap to the new one if they are the same style. Ensure the new cap is compatible with your truck’s locking system before purchasing, or buy a non-locking cap if your model didn’t originally have a lock.
My check engine light came back on after a new cap. What now?
If the light returns after a proper drive cycle, the leak is likely elsewhere in the EVAP system (e.g., cracked hose, faulty purge valve, or damaged filler neck). A professional diagnosis with a smoke machine is needed to locate the exact source of the leak.