
How Do You Reset the Check Light on a Toyota Corolla?
Contents
- 1 Key Takeaways
- 2 📑 Table of Contents
- 3 Understanding the Check Engine Light: More Than Just an Annoyance
- 4 Essential Preparations Before You Begin: Safety and Knowledge
- 5 Methods to Reset the Check Light: A Step-by-Step Guide
- 6 What to Do After Resetting the Light: The Critical Follow-Up
- 7 When to Seek Professional Help: Don’t Gamble with Your Engine
- 8 Conclusion: Knowledge is Your Best Tool
- 9 Frequently Asked Questions
Resetting your Toyota Corolla’s check engine light is a simple process, but it’s crucial to understand that this is only a temporary fix. The light indicates an underlying issue that must be addressed by a professional to prevent costly damage. Always diagnose the problem first using an OBD2 scanner before attempting any reset.
Hey there, fellow Toyota Corolla owner! Let’s talk about that little, yet nerve-wracking, check engine light. It appears on your dashboard, a glowing reminder that something under the hood isn’t quite right. Your first instinct might be to figure out how to turn it off, and fast. Before we dive into the “how,” I need to be brutally honest with you: resetting the light is not a repair. It’s like turning down the smoke alarm while a fire still burns. The goal of this guide is to give you the knowledge to reset the light safely after you’ve fixed the problem, or to understand why you absolutely shouldn’t just reset it and hope for the best. We’ll cover the methods, the essential prep work, and the critical warnings you need to know. Your Corolla is a reliable machine, and treating this warning with respect will keep it that way for years to come.
Key Takeaways
- Diagnosis First: Never reset the light without identifying and fixing the underlying problem. Use an OBD2 scanner to read the trouble codes.
- Temporary Solution: Resetting only turns off the warning light; it does not repair the fault. The light will return if the issue persists.
- Multiple Methods Exist: The primary methods are using an OBD2 scanner, disconnecting the battery, or performing a complete drive cycle after a repair.
- Battery Disconnect Has Side Effects: This method may reset radio presets, clock, and engine idle adaptations, requiring a relearn period.
- Safety is Paramount: A flashing check engine light indicates a severe problem. Stop driving immediately and seek professional help.
- Know Your Model Year: Procedures can vary slightly between model years. Always consult your owner’s manual for model-specific guidance.
- Professional Help is Often Wise: If you’re uncomfortable or the problem is complex, a mechanic can diagnose and reset the light correctly.
📑 Table of Contents
- Understanding the Check Engine Light: More Than Just an Annoyance
- Essential Preparations Before You Begin: Safety and Knowledge
- Methods to Reset the Check Light: A Step-by-Step Guide
- What to Do After Resetting the Light: The Critical Follow-Up
- When to Seek Professional Help: Don’t Gamble with Your Engine
- Conclusion: Knowledge is Your Best Tool
Understanding the Check Engine Light: More Than Just an Annoyance
That amber light, officially called the Malfunction Indicator Lamp (MIL), is your car’s way of saying, “Hey, I’ve detected something outside the normal parameters in my emission or engine management system.” Since 1996, all vehicles sold in the U.S., including your Corolla, have used a standardized system called OBD-II (On-Board Diagnostics, Second Generation). When the car’s computer, the Engine Control Module (ECM), senses a problem it can’t correct, it stores a Diagnostic Trouble Code (DTC) and illuminates the light to get your attention.
Why It’s Not Always an Emergency (But Often Is)
Not all check engine light triggers are catastrophic. Sometimes, it’s as simple as a loose or faulty gas cap. A bad seal allows fuel vapors to escape, which the EVAP system detects. This is a common and easy fix. However, the light can also signal serious issues like a failing catalytic converter, faulty oxygen sensors, or misfiring cylinders. Driving with a misfire, for instance, can dump unburned fuel into your exhaust, overheating and destroying the catalytic converter—a repair that can cost thousands. So, the light’s urgency ranges from “check this soon” to “stop driving now.” A flashing light is always a severe, immediate problem, usually a severe misfire that can damage the engine. If your light is flashing, pull over safely and call for a tow.
Common Triggers in Your Toyota Corolla
While any number of issues can trigger the light, some are particularly common in Corollas. These include:
- Faulty Oxygen (O2) Sensors: These monitor exhaust gases. A failing sensor reduces fuel efficiency and increases emissions.
- Loose or Damaged Gas Cap: The #1 simplest fix. Ensure it’s tightened until it clicks.
- Catalytic Converter Issues: Often a symptom of another ignored problem, like a misfire.
- Mass Airflow Sensor (MAF) Problems: A dirty or failed MAF sensor affects the air-fuel mixture.
- Spark Plug or Ignition Coil Failure: Causes misfires, rough running, and poor performance.
- EVAP System Leaks: Small leaks in the fuel vapor system from hoses or the charcoal canister.
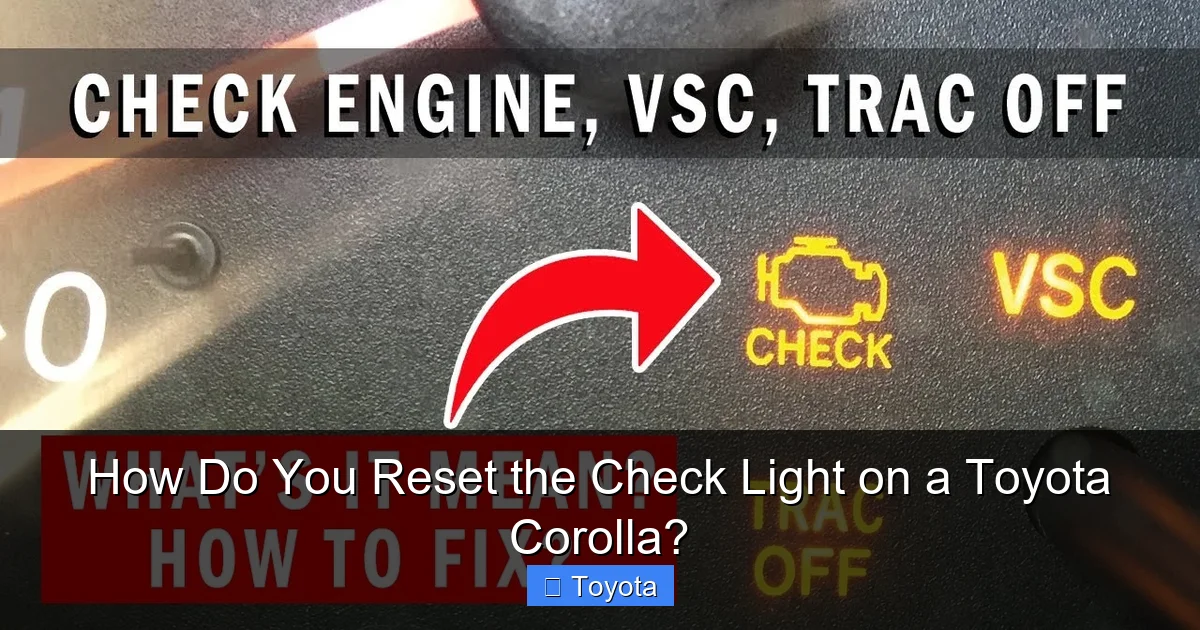
Essential Preparations Before You Begin: Safety and Knowledge
Before you touch a wrench or scan tool, preparation is key. Rushing into a reset without a plan can lead to mistakes, erased computer memory, or even injury.
Visual guide about How Do You Reset the Check Light on a Toyota Corolla?
Image source: i.ytimg.com
Safety First: Protect Yourself and Your Car
Always work in a well-ventilated area, preferably outdoors or with the garage door open. Your car’s engine should be turned off. If you need to disconnect the battery, remember it contains sulfuric acid and can produce explosive hydrogen gas. Wear safety glasses and gloves. Never let the positive and negative battery terminals touch each other or any metal part of the car with the cable connected, as this can cause a short circuit and damage the ECM.
Gather Your Tools
The method you choose dictates your tools. For the most effective and safest reset, an OBD2 scanner is indispensable. You can buy a basic code reader for $20-$50 or a more advanced scan tool for $100+. You’ll also likely need a set of wrenches or sockets (usually 10mm) to disconnect the battery terminal. A good pair of work gloves and your vehicle’s owner’s manual are also essential.
Consult Your Owner’s Manual
This is your single most important resource. Your manual will have the definitive procedure for your specific model year. It will show you exactly where the OBD2 port is located (almost always under the dashboard, near the steering column), and it may detail any model-specific steps or warnings for battery disconnect procedures. If you’ve lost your manual, Toyota often has digital copies available on their website.
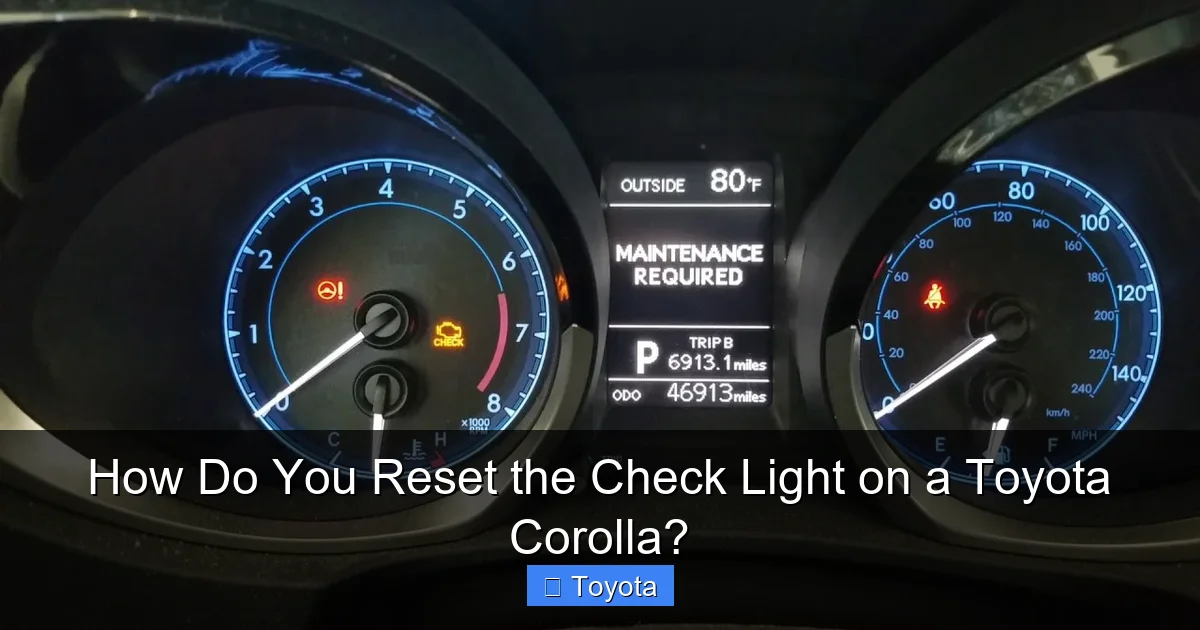
Methods to Reset the Check Light: A Step-by-Step Guide
Now for the core of the matter. There are three primary methods to reset the check engine light. Method 1 is the gold standard. Methods 2 and 3 are workarounds with significant caveats.
Visual guide about How Do You Reset the Check Light on a Toyota Corolla?
Image source: i.ytimg.com
Method 1: The Professional Approach – Using an OBD2 Scanner
This is the correct, recommended method. An OBD2 scanner communicates directly with your car’s computer. It can read the stored trouble codes, which tell you exactly what problem was detected (e.g., P0171 – System Too Lean). After you repair the issue, you use the scanner’s “Clear Codes” or “Erase DTCs” function to reset the light.
Steps:
- Locate the OBD2 port under your dashboard and plug in the scanner.
- Turn your ignition to the “ON” position (do not start the engine).
- Follow the scanner’s prompts to establish a connection with your Corolla’s ECM.
- Select the option to “Read Codes” first. Write these down! This is your diagnostic clue. If you haven’t fixed anything yet, now you know what to address.
- After making the necessary repair, return to the scanner and select “Clear Codes” or “Erase All DTCs.”
- The scanner will confirm the codes are cleared. The check engine light should turn off immediately.
- Start the engine and verify the light remains off. Take the car for a short drive to see if the light returns, which would indicate the repair was incomplete or a new problem has arisen.
Pro Tip: Many auto parts stores like AutoZone or O’Reilly will scan your codes for free. You can then buy the needed part and use their tool to reset the light after the repair. If you own a different Toyota model, the process is nearly identical. For instance, resetting the check engine light on a Toyota Highlander follows these same fundamental OBD2 steps.
Method 2: The Classic Workaround – Disconnecting the Battery
This is the old-school method. The theory is that disconnecting the battery for a period of time will “reset” the car’s computer by draining its residual memory. However, this method is crude and has notable downsides.
Steps:
- Ensure the engine is off and the keys are out of the ignition.
- Open the hood and locate the battery.
- Always disconnect the NEGATIVE (black, -) terminal first. Use a 10mm wrench to loosen the nut and remove the cable. Tuck it away so it cannot accidentally touch the terminal.
- Wait at least 10-15 minutes. Some recommend longer. This allows the ECM’s capacitors to fully discharge.
- Reconnect the negative cable and tighten the nut securely.
- Reconnect the positive (red, +) terminal if you disconnected it (some only disconnect the negative).
- Start the car. The check engine light may be off, but you’ll likely see other lights on the dash (like the ABS or traction control light) that will go away after a short drive as the systems re-initialize.
Major Caveats:
- Erases Learned Data: The ECM stores “learned” adaptations for fuel trim, idle speed, and transmission shift points. Disconnecting the battery wipes this, causing rough idle or poor shift quality until the computer relearns (which can take 50-100 miles of driving).
- Resets Other Systems: You will lose radio presets, clock settings, and power window/mirror memory.
- May Not Work: On many modern vehicles, the ECM has a non-volatile memory that retains codes even with battery disconnected. The light may simply come back on as soon as you restart the car if the fault is still present.
- Potential Harm: On some cars, this can cause issues with the steering angle sensor or require a steering angle sensor recalibration procedure.
Use this method only as a last resort if you have no scanner and have already fixed the problem, understanding you’ll need to drive for a while to let the car’s systems recalibrate.
Method 3: The Natural Reset – Driving After a Repair
If you have already fixed the underlying problem (e.g., replaced a bad gas cap or oxygen sensor), the check engine light may turn off on its own. The ECM runs a series of self-tests called “drive cycles” or “monitors.” Once the repaired system passes its test multiple times, the ECM will automatically turn the light off. This is the most natural reset but can be unpredictable. It might take several drive cycles (days or weeks) for the light to extinguish. To potentially speed this up, drive under varied conditions: highway speeds, city stop-and-go, and let the engine reach full operating temperature. However, for a guaranteed and immediate reset after a repair, using an OBD2 scanner (Method 1) is always superior.
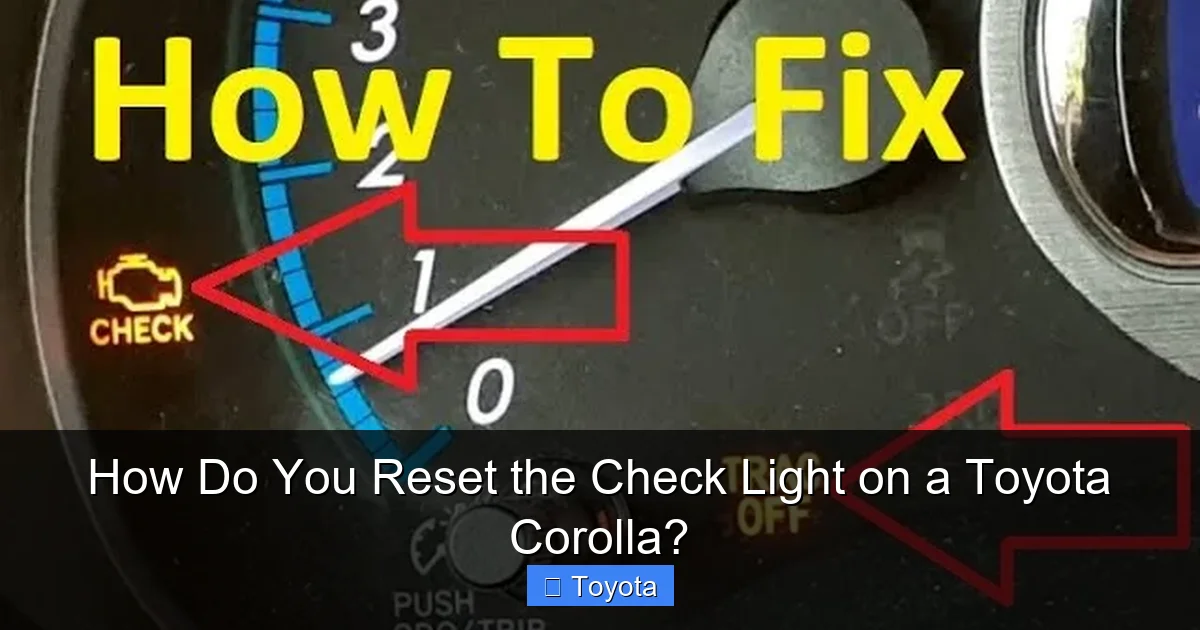
What to Do After Resetting the Light: The Critical Follow-Up
You’ve cleared the code and the light is off. Great! But your job isn’t done. This is the most important phase.
Visual guide about How Do You Reset the Check Light on a Toyota Corolla?
Image source: i.ytimg.com
The Light May Come Back – And That’s a Clue
If the check engine light reappears, sometimes immediately or after a few drives, it means the problem was not correctly fixed. Return to your OBD2 scanner and read the new codes. This feedback loop is vital. For example, you might have cleared a code for a “Bank 1, Sensor 2” O2 sensor, but if the new code is for “Bank 1, Sensor 1,” you may have misdiagnosed which sensor was faulty. Always re-scan after a reset to confirm the repair’s success.
Monitor Your Driving and Performance
Pay close attention to how your Corolla drives for at least a week after a reset. Note any changes in fuel economy, engine smoothness (rough idle, hesitation), or new noises. These symptoms, even without a light, can indicate a lingering issue. Keep a simple log of when the light came on, what code it was, what you did, and when it (hopefully) stayed off.
Keep Records for Future Diagnosis
If you’re a DIYer, document everything. Note the exact DTC (e.g., P0420), the parts you replaced, and the date. This history is invaluable if the problem recurs or if you sell the car. It shows you’ve maintained it proactively.
When to Seek Professional Help: Don’t Gamble with Your Engine
There are clear times when you should skip the DIY reset and call a pro.
Persistent or Intermittent Lights
If you’ve attempted a reset and the light returns within a day or two, the fault is likely persistent. Intermittent issues, where the light comes and goes, can be even more frustrating to diagnose and often require a professional with advanced scan tools that can monitor live data streams to catch a glitch in action.
Flashing Light or Severe Symptoms
If the check engine light is flashing, stop driving immediately. This indicates a severe engine misfire that is dumping unburned fuel into your exhaust, which can overheat and destroy the catalytic converter in minutes. Other red flags include: steam or thick smoke from the exhaust, loud knocking noises, a complete loss of power, or the engine overheating. These require a tow truck, not a code scanner.
Complex Codes or Multiple Codes
Some trouble codes point to complex systems. A code like P0300 (Random/Multiple Cylinder Misfire Detected) requires systematic testing of spark plugs, coils, wires, fuel delivery, and compression. If your scan reveals multiple codes across different systems (e.g., an O2 sensor code *and* an EVAP code), it might indicate a larger issue like a major vacuum leak or even a failing ECM. These are beyond most DIYers and need a technician’s expertise and equipment.
Conclusion: Knowledge is Your Best Tool
So, how do you reset the check light on a Toyota Corolla? The answer is: carefully, and only after you’ve addressed the root cause. The preferred method is using an OBD2 scanner to clear the codes, which is quick, clean, and preserves all your car’s computer memory. While disconnecting the battery works in a pinch, its side effects make it a less desirable option. Remember, that light is your car’s voice. It’s telling you something is wrong. By learning to read its language (the trouble codes) and responding appropriately with a real fix, you’re not just turning off a nuisance—you’re protecting your investment, ensuring your safety, and maintaining the legendary reliability of your Toyota Corolla. Drive safe, diagnose smart, and don’t ignore the warning.
Frequently Asked Questions
Can I drive my Toyota Corolla with the check engine light on?
It depends. If the light is steady and the car is running normally with no strange noises or performance issues, you can drive it a short distance to a repair shop. However, if the light is flashing, or you notice symptoms like rough running, loss of power, or overheating, you should stop driving immediately and seek help. Driving with a severe problem can cause catastrophic and expensive engine damage.
Will resetting the check engine light clear the trouble codes?
Yes, using an OBD2 scanner’s “Clear Codes” function will erase the stored Diagnostic Trouble Codes (DTCs) from the computer’s memory, and the light will turn off. However, if the underlying problem is not fixed, the ECM will detect the fault again and store a new code, causing the light to return, often within a few drive cycles.
How much does it cost to get the check engine light diagnosed?
Many auto parts stores offer free code scanning, which gives you the DTC number. A full diagnostic service at a repair shop typically costs between $80 and $150. This fee is usually waived if you proceed with the recommended repair at that shop. The diagnostic fee covers the technician’s time to not only read the code but also perform tests to pinpoint the exact failed component, as a code only points to a system, not always a specific part.
Should I reset the light myself or take it to a mechanic?
If you have diagnosed and repaired the problem yourself (e.g., replaced the gas cap, oxygen sensor, or spark plugs) and own an OBD2 scanner, you can and should reset the light to verify the repair. However, if you have not identified the issue, you should take it to a mechanic. Resetting a light without a repair is pointless and dangerous, as it masks a problem that could worsen. A professional can accurately diagnose the cause and then reset the light as the final step.
Is it ever safe to just ignore the check engine light?
No, it is never safe to ignore it long-term. While a steady light might not cause immediate danger, it indicates your car is likely running less efficiently, polluting more, and could be suffering internal damage that will become costly. For example, a faulty oxygen sensor can reduce fuel economy by 10-15% and eventually damage the catalytic converter. Ignoring a small issue often leads to a big, expensive repair. Always have the code read and the problem addressed promptly.
How do I reset the check engine light without a scanner?
The only common method without a scanner is to disconnect the car’s battery for 10-15 minutes, specifically the negative (black) terminal. This can drain the ECM’s memory and turn off the light. However, this method has significant drawbacks: it erases radio presets and clock settings, and it wipes the ECM’s learned fuel trim and idle data, potentially causing rough running until the computer relearns (which can take 50-100 miles of driving). Furthermore, on many modern vehicles, this method may not even work, as the ECM may retain codes in non-volatile memory. It is not a recommended practice compared to using a proper OBD2 scanner.


