How Do You Reset the Check Engine Light on a Toyota Corolla?
Contents
- 1 Key Takeaways
- 2 📑 Table of Contents
- 3 What Does the Check Engine Light Actually Mean?
- 4 Before You Reset: The Essential First Steps
- 5 Methods to Reset Your Corolla’s Check Engine Light
- 6 What to Do After You Reset the Light
- 7 Professional Reset vs. DIY: Which is Right for You?
- 8 Conclusion: A Light is a Message, Not Just an Annoyance
- 9 Frequently Asked Questions


Resetting the check engine light on your Toyota Corolla is a straightforward process, but it must be done correctly. First, you must diagnose the underlying issue using an OBD2 scanner to read the trouble codes; simply clearing the light without fixing the problem is ineffective and potentially dangerous. The most reliable reset method uses an OBD2 scanner, while alternative methods like battery disconnection can have unintended side effects. Always ensure the problem is resolved before resetting, and monitor the light afterward to confirm the fix was successful.
That little amber icon on your dashboard—the one that looks like an engine with a line through it—is one of the most misunderstood features in your Toyota Corolla. When it glows, it sends a spike of anxiety through any driver’s mind. Your first thought might be, “How do I make it go away?” But before we dive into the “how,” we need to talk about the “why” and the “what.” Resetting your Corolla’s check engine light is a simple button-press or cable-pull away, but doing it without understanding the cause is like turning off a smoke alarm without checking for fire. It’s a temporary fix that ignores a potentially serious problem. This guide will walk you through everything you need to know, from the critical first step of diagnosis to the various reset methods, ensuring you handle this common issue safely and effectively.
Key Takeaways
- Diagnose Before You Reset: Always use an OBD2 scanner to read and address the underlying trouble code causing the light. Clearing a code without repair will cause the light to return.
- Scanner is the Best Tool: Using an OBD2 scanner is the safest, most reliable method to reset the check engine light without disrupting other vehicle systems.
- Battery Disconnect Has Risks: Disconnecting the battery can reset the light but may also erase radio presets, engine idle settings, and require steering wheel angle sensor recalibration.
- Not All Lights Are the Same: The check engine light indicates emissions-related issues, which is different from the maintenance required or service lights. Resetting one does not affect the others.
- Drive Cycle May Be Needed: After a repair, the vehicle’s computer may require a specific “drive cycle” to verify the fix and turn off the light automatically, which can take multiple trips.
- Safety First: A steady check engine light requires attention soon; a flashing light indicates a severe problem (like a misfire) that can damage your catalytic converter—stop driving immediately.
- Professional Help is Wise: If you cannot identify or fix the problem, or if multiple codes appear, consult a mechanic. A persistent light after resetting signals an unresolved issue.
📑 Table of Contents
What Does the Check Engine Light Actually Mean?
Your Toyota Corolla’s check engine light, or Malfunction Indicator Lamp (MIL), is part of a sophisticated onboard diagnostics system (OBD-II). Since 1996, all cars sold in the U.S. have had this standardized system. Its sole job is to monitor the performance of your engine, transmission, and emissions control systems. When the engine control module (ECM) detects a parameter outside its accepted range—say, an oxygen sensor reading too high or a cylinder misfiring—it stores a Diagnostic Trouble Code (DTC) and illuminates the light to get your attention.
Common Triggers for the Check Engine Light
The list of possible triggers is long, but some are far more common than others in a Corolla. A loose or faulty gas cap is the notorious number one cause; it allows fuel vapors to escape, triggering an evaporative emissions (EVAP) system code. Other frequent culprits include failing oxygen sensors (O2 sensors), a malfunctioning catalytic converter, a bad mass airflow sensor (MAF), spark plug or ignition coil issues causing misfires, and problems with the exhaust gas recirculation (EGR) system. Even something as simple as a damaged or loose gas cap can cause the light to come on. It’s the ECM’s way of saying, “Hey, I’ve noticed something isn’t operating within specs, and it might be affecting your car’s performance, fuel economy, or emissions.”
Why You Should Never Simply “Ignore” or Blindly Reset It
It might be tempting to just reset the light and forget about it, especially if your car seems to be running fine. But this is a costly gamble. A minor issue like a failing O2 sensor can, if left unchecked, lead to a ruined catalytic converter—a repair that can cost thousands. A misfire can dump unburned fuel into your exhaust, overheating and destroying the catalytic converter. Furthermore, a lit check engine light will cause your Corolla to fail any mandatory emissions test (smog check), making it illegal to register in many states. Most importantly, a flashing check engine light is a severe emergency. It indicates a misfire so severe it could be damaging the engine or catalytic converter right now. If your light is flashing, pull over safely and shut off the engine immediately. Do not drive the car.
Before You Reset: The Essential First Steps
Resetting the light without addressing the root cause is pointless. The ECM is a memory bank; it will simply re-illuminate the light once it detects the same fault again, usually within 50-100 miles of driving. Therefore, the reset process is actually the final step in a repair sequence, not the first. The mandatory first step is to read the diagnostic trouble codes.
Visual guide about How Do You Reset the Check Engine Light on a Toyota Corolla?
Image source: toyotacheckenginelight.com
Reading Diagnostic Trouble Codes (DTCs)
You need to know why the light is on. This requires an OBD-II scanner, also called a code reader or scan tool. These are widely available—you can borrow one from an auto parts store (often for free), buy a basic one for $20-$50, or use a smartphone app with a Bluetooth OBD2 adapter. Here’s how to do it:
- Locate the OBD-II Port: In your Corolla, it’s under the dashboard, just below the steering column, often near the driver’s knee. It’s a trapezoidal-shaped 16-pin connector.
- Connect the Scanner: With the ignition in the “ON” position (engine off), plug the scanner into the port.
- Read Codes: Follow the scanner’s menu to “Read Codes” or “Read DTCs.” It will display one or more alphanumeric codes (e.g., P0171, P0300, P0420).
- Interpret the Codes: Write these down. You can look them up online (search “Toyota Corolla P0420 meaning”) or use the scanner’s built-in definitions. The code tells you which system or component has a problem, not the exact failed part. For example, P0300 is a random/multiple cylinder misfire detected. The cause could be spark plugs, coils, fuel injectors, or a vacuum leak.
Once you have a code, research it thoroughly. A reputable source like a repair manual or a trusted mechanic can help you diagnose the specific cause. Fix the problem—replace the faulty part, tighten the gas cap, repair the vacuum leak—before proceeding to reset the light. If you’re dealing with multiple codes, it’s often best to seek professional help, as they can be interconnected.
Safety Precautions and Final Checks
Before you even think about resetting, ensure your repair is complete and the area is safe. Double-check that any disconnected electrical connectors are secure, hoses are re-attached, and fluid levels are correct. If the issue was a loose gas cap, tighten it until you hear several clicks. If you replaced an oxygen sensor, ensure the electrical connector is fully seated. Only when you are confident the problem is resolved should you move to the reset procedure. Remember, if the light comes back on shortly after resetting, your repair was not successful.
Methods to Reset Your Corolla’s Check Engine Light
With the problem fixed and the codes cleared from the ECM’s memory, you can now turn off that annoying light. There are three primary methods, ranked from best and easiest to last-resort with caveats.
Visual guide about How Do You Reset the Check Engine Light on a Toyota Corolla?
Image source: enginelightfixers.com
Method 1: The OBD2 Scanner Reset (Recommended & Easiest)
This is the professional and correct way. The same scanner you used to read the codes will have a function to clear them. After your repair is complete:
- Reconnect the scanner to the OBD-II port with the ignition ON.
- Navigate the menu to find “Clear Codes,” “Erase Codes,” or “Reset MIL.”
- Select this function. The scanner may ask for confirmation.
- The light on your dashboard should go out immediately.
Why this is best: It’s targeted. It only erases the stored diagnostic codes and turns off the light. It does not affect any other vehicle systems, radio settings, or learned fuel trim data. It’s fast, clean, and what dealerships and shops use. If you don’t own a scanner, most major auto parts stores will scan and clear codes for free as a customer service.
Method 2: The Battery Disconnect Method (Use with Caution)
This old-school method works by cutting power to the ECM, forcing it to reset and clear its memory. However, it comes with significant downsides and should be a last resort if you have no scanner.
- Safety First: Ensure the engine is off and the keys are out of the ignition. Wear safety glasses.
- Disconnect the Negative Terminal: Open your hood and locate the battery. Using a 10mm wrench (common size for Corolla battery terminals), loosen and remove the NEGATIVE (-) black cable clamp from the battery post. Tuck it away so it cannot accidentally touch the post.
- Wait: Leave the battery disconnected for at least 5-10 minutes. Some sources recommend longer (15-30 minutes) to ensure all residual power drains from the ECM’s capacitors. For a complete reset, waiting 15 minutes is a good practice.
- Reconnect: Reattach the negative cable clamp securely to the battery post and tighten the nut.
- Start the Car: The check engine light may come on initially as the system runs its self-checks (a normal “bulb check”). It should go out after a few seconds if no faults are detected. If it stays on, a fault still exists.
Major Drawbacks: This method erases all “learned” data in the ECM, including fuel trim adjustments and idle settings. Your car may run rough for the first 10-20 minutes of driving while the computer relearns optimal settings. More frustratingly, it will also reset your radio presets, clock, and power window/mirror settings. On some models, it can trigger the steering wheel angle sensor light, requiring a specific steering wheel turn pattern to recalibrate. Because of these hassles, the scanner method is vastly superior.
Method 3: The Natural Drive Cycle (Passive & Unreliable)
In theory, if you fix the problem, the ECM will eventually turn off the light on its own after the system verifies the repair through a series of specific driving conditions called a “drive cycle.” This is not a method you can actively “do” to reset the light; it’s a passive process that can take days or weeks of normal driving. The drive cycle involves specific speeds, engine loads, and temperatures (e.g., driving at 40-55 mph for 10 minutes, then a deceleration with closed throttle, followed by a stop and idle). The variability of daily driving often means this cycle is never completed perfectly, leaving the light on indefinitely. Therefore, you should not rely on this method. Use a scanner to actively clear the code after the repair.
What to Do After You Reset the Light
The reset is not the end of the story; it’s the beginning of a verification period. Your job isn’t done until you’re sure the problem is truly solved.
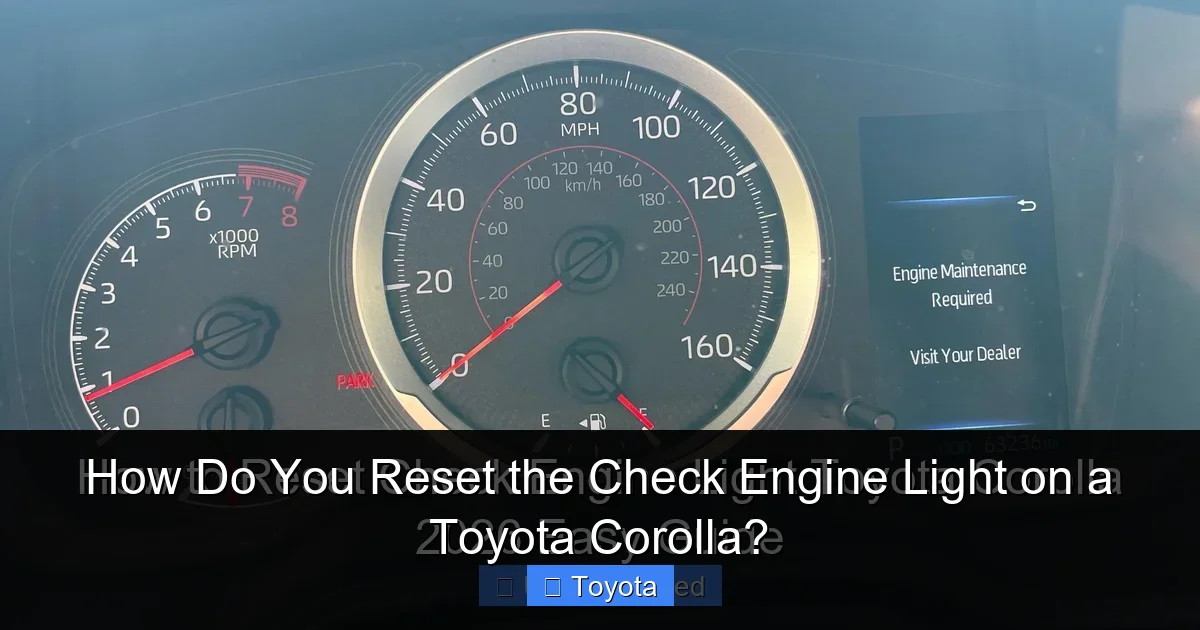
Visual guide about How Do You Reset the Check Engine Light on a Toyota Corolla?
Image source: enginelightfixers.com
Monitoring for Recurrence
After resetting, drive your Corolla normally for at least 50-100 miles. Pay attention to how it runs. Does it feel smooth? Is fuel economy normal? Are there any new noises, smells, or performance issues? If the check engine light comes back on, it means the fault is still present or your repair was incomplete. Retrieve the codes again. The same code returning points to a failed repair or a misdiagnosis. A new, different code could indicate a secondary problem caused by the first issue. For example, a long-term misfire (P0300) might eventually trigger a catalytic converter efficiency code (P0420).
When to Seek Professional Help
There is no shame in calling a professional. Do so if:
- You cannot retrieve any codes or the scanner shows “No Data” or “Unable to Communicate.”
- Multiple, seemingly unrelated codes appear.
- The light returns immediately after resetting, even with a simple fix like a new gas cap.
- You are uncomfortable performing any of the diagnostic or repair steps.
- The problem involves critical safety systems like emissions, fuel delivery, or ignition.
A certified technician has advanced scan tools that can view live sensor data, perform specific tests, and access manufacturer-specific codes. They can save you from a costly misdiagnosis. If you’re considering a Toyota Corolla, understanding common issues is helpful; for instance, some model years have known problems with certain sensors or actuators. A professional will have this historical knowledge.
Professional Reset vs. DIY: Which is Right for You?
Deciding between a DIY reset and a professional service depends on your skill level, tools, and the nature of the problem.
The DIY Scenario: Ideal For Simple, Clear-Cut Issues
DIY is perfect if:
- The code points to a simple, obvious fix you can verify yourself (e.g., P0455 – Evaporative Emission System Leak Detected (large). You check and find the gas cap is missing or not tightened).
- You have your own OBD2 scanner and are comfortable using it.
- The repair was a straightforward part replacement you performed yourself (e.g., you just changed the air filter and the light came on due to a disconnected sensor—you reconnected it).
- You want to save the $80-$150 diagnostic fee at a shop after you’ve already fixed the problem yourself.
In these cases, using your own scanner to clear the code is quick, free, and satisfying.
The Professional Scenario: Necessary for Complex Problems
Call a professional if:
- The trouble codes are complex (e.g., multiple cylinder misfires, catalytic converter efficiency below threshold).
- The repair involved major components (e.g., intake manifold, catalytic converter, transmission solenoid).
- You’ve attempted a repair based on a code, but the light returns. This suggests a deeper, possibly interconnected issue.
- You lack the tools, knowledge, or confidence to diagnose the root cause correctly. Misdiagnosis is the most expensive “repair” you can make.
A professional diagnosis ensures the correct part is fixed the first time. Remember, the goal is not just to turn off a light; it’s to make your Corolla reliable, fuel-efficient, and pass emissions. Paying for a proper diagnosis is an investment in your car’s health. For other Toyota models, the process is similar; you can find specific guides, like how to reset the check engine light on a Toyota Highlander, which follows the same OBD2 principles.
Conclusion: A Light is a Message, Not Just an Annoyance
Resetting the check engine light on your Toyota Corolla is the final, ceremonial step in a repair journey. It’s the equivalent of taking the “Out of Order” sign off a machine after it’s been fixed. The real work—the diagnosis, the research, the physical repair—happens long before you grab the scanner or wrench. By treating the check engine light as a helpful diagnostic messenger rather than a nuisance to be silenced, you protect your investment, ensure your safety, and keep your Corolla running smoothly for years to come. Always diagnose first, repair thoroughly, and then reset with confidence. And if the light ever flashes, remember: stop driving and seek help immediately. Your engine will thank you.
Frequently Asked Questions
Can I drive my Toyota Corolla with the check engine light on?
If the light is steady, you can drive a short distance to a safe location or repair shop, but you should address the issue promptly. A flashing light indicates a severe problem like an active misfire; you must stop driving immediately to prevent catastrophic engine or catalytic converter damage.
Will disconnecting the battery reset the check engine light for good?
Disconnecting the battery will clear the light temporarily, but if the underlying problem isn’t fixed, the light will return, usually within 50-100 miles of driving. The ECM will redetect the fault and relight the MIL. It’s a reset, not a repair.
How much does it cost to have a shop reset my check engine light?
The reset itself is often free if you’re already paying for a diagnostic and repair. The cost is in the diagnosis, which typically ranges from $80 to $150 at a reputable shop. Some shops may charge a small fee just to scan and clear codes if no repair is performed.
Do I need a special scanner for a Toyota Corolla?
No. Any standard OBD-II scanner (1996 and newer) will work. Basic code readers are inexpensive and sufficient for reading and clearing generic codes. For deeper, manufacturer-specific diagnostics, a more advanced “enhanced” scan tool is needed, but for a simple reset after a known repair, a basic model is fine.
Why does my check engine light come back on right after I reset it?
This almost always means the original problem was not properly fixed. The ECM has redetected the same fault. Re-scan the vehicle to get the new or recurring code. If it’s the same code, your repair was incomplete or the diagnosis was incorrect. If it’s a different code, the original problem may have caused a secondary failure.
How long does it take for the check engine light to go out after fixing the problem?
If you use an OBD2 scanner to clear the code, the light goes out instantly. If you rely on a natural drive cycle without clearing codes, it could take anywhere from one to several days of driving under varied conditions for the ECM to verify the repair and turn off the light on its own, which is why manual clearing is recommended.