
Car Cover Seams Failing? Here Is Why They Split and How to Fix Them

Quick Answer
Car cover seams fail primarily due to constant UV degradation, severe wind flutter, and trapped moisture that breaks down factory-applied thread sealants. You can fix minor split seams using heavy-duty UV-resistant outdoor thread or specialized fabric repair tape, but total structural failure usually requires a replacement. Protecting your paint finish starts with addressing these structural splits before water pools against your clear coat.
Top Signs Your Cover Seams Are Failing
- Thread degradation: Tiny white or fuzzy lint lines appear where panels are stitched together.
- Water seepage: Moisture pools directly underneath specific stitch lines after heavy rain.
- Flapping gaps: Stitching separates entirely during high wind gusts, creating loose pocket tears.
How to Verify the Damage
- Gently tug on both sides of a suspect seam to see if the thread pulls apart with minimal resistance.
Every daily-driver owner knows the frustration of walking out to find their protective car cover torn apart at the seams. When you invest in a quality cover to shield your vehicle from environmental hazards, seeing the stitching unravel feels like a complete waste of money.
This guide dives deep into why car cover seams fail, how you can repair them, and what steps you can take to make your next cover last significantly longer.
In This Guide
Why Do Car Cover Seams Fail First?
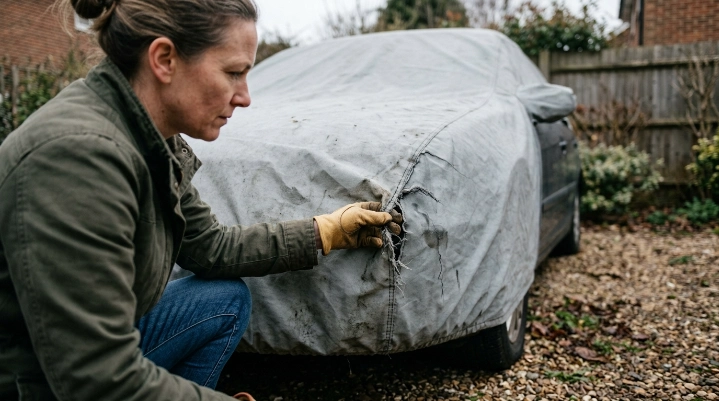
Car covers rarely rip right down the middle of a smooth fabric panel. They almost always start pulling apart along the stitched lines.
Stitching creates thousands of tiny puncture holes in an otherwise weather-resistant material. Even when manufacturers use double-needle stitching and heat-sealed tape over the back, these joints endure the highest mechanical stress.
Ultraviolet radiation breaks down standard polyester and nylon threads long before it ruins the heavier outer fabric layers. Once the thread loses its tensile strength, wind buffeting finishes the job.
Trapped moisture also plays a major role in premature stitching decay. When morning dew or heavy rain cannot evaporate quickly enough, humidity attacks the inner core of the threads.
Section Takeaway: Seams are inherently vulnerable because stitching punctures protective layers and concentrates wind stress on thin threads.
Should You Repair or Replace a Damaged Car Cover?
Deciding whether to fix a failing seam or buy a brand-new cover comes down to the extent of the damage and the age of the material.
If your cover is less than two years old and features just one or two localized seam splits, repairing it makes great financial sense. You can restore its structural integrity with minimal investment.
However, if the fabric itself feels brittle, powdery, or tears easily when you stretch it, stitching a broken seam is a temporary band-aid. Old, sun-rotted material will simply rip right next to your new repair line within a few weeks.
Look closely at the entire perimeter before grabbing your sewing kit. Multiple failing seams mean the synthetic fibers have reached the end of their lifespan.
Section Takeaway: Repair localized seam splits on young covers, but replace entirely if the base fabric shows signs of UV rot or brittleness.
How to Fix Split Car Cover Seams Step-by-Step
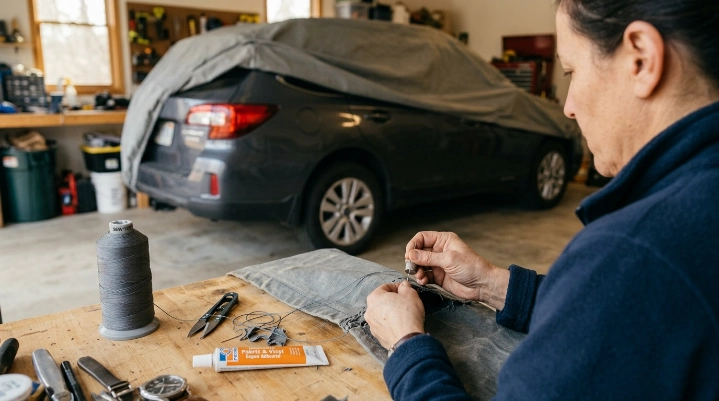
Fixing a split car cover seam at home requires a few basic supplies you can find at any local hardware or fabric store. You do not need a commercial sewing machine for a sturdy fix.
Gather heavy-duty UV-resistant outdoor thread, a sturdy sailmaker needle, and a tube of flexible outdoor fabric sealant. Standard cotton thread will rot quickly outdoors, so choose bonded polyester or nylon.
Follow these steps to complete a lasting manual repair:
- Clean and dry: Wash and completely dry the damaged area so adhesives and patches bond properly.
- Trim loose threads: Cut away frayed string ends to create a clean surface for your new stitches.
- Lockstitch the gap: Use a tight whipstitch or lockstitch through the original factory puncture holes to avoid adding extra stress.
- Seal the stitching: Apply a waterproof seam sealer over the interior side of your new stitches to prevent leaks.
Allow the sealant to cure fully for 24 hours before putting the cover back on your vehicle. Taking your time here ensures your handiwork withstands upcoming wind and rain.
Section Takeaway: Use bonded polyester thread and a flexible waterproof sealant to restore strength and weather resistance to split seams.
How to Prevent Premature Seam Degradation
Stopping seam failure before it starts saves you money and protects your car’s paint from sudden exposure. Proper handling makes a massive difference in how many years your cover survives.
Always secure your cover tightly using built-in grommets and a secure cable lock during windy weather. Excessive flapping stretches stitching and accelerates thread fatigue.
Avoid dragging the cover across abrasive asphalt or concrete when taking it off your car. Picking up dirt particles inside the folds weakens the fabric fibers over time.
Apply a specialized UV-blocking fabric protectant spray annually to keep the outer layers and stitching resilient against harsh sunlight. This simple maintenance step slows down polymer breakdown.
Section Takeaway: Minimize wind flap, keep covers clean, and apply annual UV protectants to double the lifespan of your cover seams.
Car Cover Material Comparison Guide
Different car cover materials handle environmental stress and seam tension in unique ways. Review this breakdown to understand how your cover’s composition affects its durability.
| Material Type | Seam Durability | Weather Resistance | Ideal Climate |
|---|---|---|---|
| Multi-Layer Polypropylene | Moderate | High breathability | Moderate/Rainy |
| Woven Polyester | High | Strong UV block | High Sun/Desert |
| Microfiber Fleece-Lined | Low to Moderate | Indoor/Light outdoor | Garage/Protected |
Choosing the right fabric for your specific local climate ensures the thread and material can handle regional weather patterns without premature splitting.
Section Takeaway: Matching your car cover material to your local climate prevents early stitching fatigue and paint damage.
Frequently Asked Questions
Why do car cover seams leak water first?
Stitching punctures the waterproof outer membrane of the cover. Without proper heat-sealed tape backing, water easily finds its way through these thousands of tiny needle holes during heavy rainstorms.
Can I use regular sewing thread to fix a car cover?
You should never use standard cotton or light polyester thread. Regular thread degrades rapidly under UV exposure and moisture, causing your repair to break apart within weeks.
How can I stop my car cover from flapping in the wind?
Use a properly fitted cover designed specifically for your vehicle dimensions, and utilize a bottom cable lock system to secure the hem tightly against heavy gusts.
Does a warranty cover failing car cover seams?
Many reputable car cover manufacturers offer limited warranties that cover premature stitching failure and material defects. Check your specific purchase agreement before attempting DIY repairs.
How often should I clean my car cover?
Wash your car cover every three to six months by laying it flat on clean pavement, rinsing with a gentle hose spray, and using mild automotive shampoo to remove trapped grit.
Is it safe to put a wet car cover back on my car?
Putting a wet cover on your vehicle traps moisture against the clear coat, which can cause water spotting and paint oxidation over time. Always let it dry completely first.
Closing Takeaway
Dealing with failing car cover seams is an inevitable part of outdoor vehicle storage, but catching the damage early prevents major headaches. By performing quick thread repairs or investing in a climate-appropriate replacement, you keep your daily driver fully protected against the elements.
