How to Test a Bmw Oil Level Sensor
Contents
- 1 Key Takeaways
- 2 📑 Table of Contents
- 3 Understanding Your BMW’s Oil Level Sensor System
- 4 Symptoms of a Faulty BMW Oil Level Sensor
- 5 Essential Tools and Preparation for Testing
- 6 Step-by-Step Guide to Testing the Oil Level Sensor
- 7 Interpreting Your Test Results and Next Steps
- 8 Common Mistakes and Pro Tips
- 9 Conclusion
- 10 Frequently Asked Questions
Your BMW’s oil level sensor is a critical guard against engine damage. When it fails, you’ll see warning lights or erratic gauge behavior. Testing it requires basic tools and a systematic approach. Start by checking oil manually with a dipstick to rule out low oil. Then, access the sensor—usually near the oil pan—and test its electrical output with a multimeter. A healthy sensor shows consistent resistance; erratic readings mean replacement. Always reset the system after fixes. If unsure, consult a pro. Regular maintenance, like following the recommended oil change intervals for your BMW 3 Series, keeps the sensor and engine happy.
Have you ever been driving your BMW, enjoying the smooth ride, when suddenly a weird oil can symbol or a cryptic “Oil Level” message pops up on your dashboard? Your heart skips a beat. Is it a real emergency, or just a glitch? More often than not, the culprit is the BMW oil level sensor—a small but mighty component that can cause big worries. Testing this sensor yourself is a valuable skill that saves you time, money, and the stress of unnecessary shop visits. It’s a straightforward process once you know the steps. In this complete guide, we’ll walk through everything from understanding what the sensor does to using a multimeter for a definitive test. Think of it as a friendly chat over the hood of your Beamer, where we demystify this part together.
Your BMW’s engine is a precision instrument, and oil is its lifeblood. The oil level sensor’s job is to constantly monitor how much oil is in the sump and report that data to the car’s computer (DME/DDE). This information is then displayed on your dashboard, either as a simple bar graph or a precise percentage in newer models. If the sensor fails, it’s like your engine’s own built-in lie detector is broken. It might scream “LOW OIL!” when there’s plenty, or worse, stay silent when oil is critically low. That’s why learning how to test a BMW oil level sensor is not just a hobbyist trick—it’s essential maintenance for protecting your investment. We’ll start with the basics and build up to the hands-on testing, ensuring you feel confident at every step.
Key Takeaways
- Safety First: Always test with the engine cool, off, and on a level surface to avoid burns and false readings.
- Know the Symptoms: A failing BMW oil level sensor triggers warning lights, inaccurate dashboard displays, or erratic gauge movement, even with correct oil levels.
- Manual Check is Crucial: Always verify actual oil level with the dipstick before blaming the sensor to rule out simple low-oil conditions.
- Electrical Testing is Key: Use a multimeter to check sensor resistance and wiring continuity; a good sensor provides a stable reading within spec.
- Location Matters: The sensor is typically mounted on the oil pan or sump, requiring safe access—often by removing the undertray or skid plate.
- Reset After Repair: Once a faulty sensor is replaced, the system must be reset using BMW-specific tools or procedures to clear the warning.
- When to Seek Help: If testing is confusing, wiring is damaged, or you lack tools, a professional BMW technician can diagnose and fix it correctly.
📑 Table of Contents
Understanding Your BMW’s Oil Level Sensor System
Before we grab tools, let’s get familiar with what we’re dealing with. The BMW oil level sensor isn’t a single, universal part. Its design and location can vary between models and years, but the core principle is the same.
How It Works: The Basics
Most modern BMWs use an electronic oil level sensor mounted directly into the oil pan. It’s a small cylindrical unit with an electrical connector. Inside, there’s typically a resistive float or a thermal sensing element. As the oil level rises and falls, the float moves, changing the electrical resistance. The car’s computer sends a small voltage to the sensor and measures the return signal. That resistance value correlates to a specific oil level. The computer then translates this into the familiar dashboard display. It’s a clever, passive system that works without moving parts (in most designs), which is good for longevity but means it can still fail electronically.
Where to Find It on Your BMW
Location is the first practical hurdle. On most BMWs—from the 3 Series (E90, F30, G20) to the 5 Series (E60, F10, G30) and X5s—the sensor is screwed into the bottom of the oil pan. You’ll usually find it near the drain plug, often on the side or rear of the pan. To see it, you’ll need to look up from underneath the car. This typically means safely raising the vehicle with jack stands and removing the plastic engine undertray or skid plate. On some older models (like certain E46s), the sensor might be accessible from the top inside the engine bay, but this is rare. Always consult your specific BMW’s repair manual (like the official BMW TIS or a reputable Bentley manual) for the exact location and removal procedure before starting. Knowing where it is saves you from a frustrating hunt under the car.
Why It Fails: Common Culprits
Sensors fail for a few key reasons. First is simple age and wear. The seal around the sensor can degrade, allowing oil to slowly leak into the connector, causing corrosion and short circuits. Second is electrical damage—vibrations, heat, and moisture can break the internal circuitry or the wiring harness. Third, and often overlooked, is using the wrong oil or neglecting oil changes. Sludge and debris from degraded oil can coat the sensor’s sensing element, giving false readings. A proper manual oil check with a dipstick remains the gold standard because it’s not affected by sensor gremlins. Understanding these failure modes helps you interpret your test results later.
Symptoms of a Faulty BMW Oil Level Sensor
How do you know if your suspicion about the sensor is correct? The symptoms are usually clear, but they can mimic other problems. Here’s what to watch for.
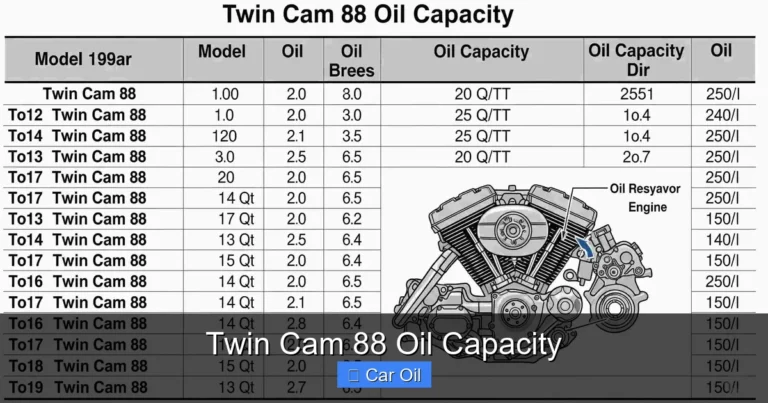
Visual guide about How to Test a Bmw Oil Level Sensor
Image source: cdn11.bigcommerce.com
Dashboard Warnings and Gauge Issues
The most obvious sign is an oil level warning light or message. This might be a dedicated “Oil Level” icon, a generic “Service Engine” light, or a message in the iDrive/instrument cluster display like “Oil Level Low – Add Oil.” Pay close attention to when it appears. Does it come on only when the engine is hot? Does it flicker on and off while driving? Does it show a full bar when you know the oil is low? Erratic behavior—like the gauge jumping from full to empty—is a classic sign of a failing sensor or its wiring. In some BMWs, the system will also log a fault code, which we’ll discuss later.
Inconsistent Readings After an Oil Change
Here’s a practical example: You just did an oil change, filling it to the exact recommended capacity. You reset the oil service indicator (a separate system). But after driving a few miles, the oil level message pops up again. You check the dipstick—it’s perfectly full. This mismatch is a huge red flag pointing directly at the sensor or its circuit. The car’s computer is getting a signal that doesn’t match reality. Before you panic and add more oil (which you should never do without checking the dipstick first!), this inconsistency tells you the sensor needs testing.
No Warning at All When Oil Is Low
The scariest symptom is silence. You accidentally let the oil get critically low—maybe from a slow leak—but the dashboard stays quiet. No light, no message. This means the sensor has failed in a way that gives a “full” or “normal” signal all the time, or the circuit is open. This is extremely dangerous because you have no electronic backup warning. It underscores why you should still check your oil manually periodically, even in cars with electronic sensors. Don’t rely solely on the computer.
Essential Tools and Preparation for Testing
Testing a BMW oil level sensor is a simple electrical check, but you need the right gear and a safe setup. Rushing this step can lead to mistakes or injury.
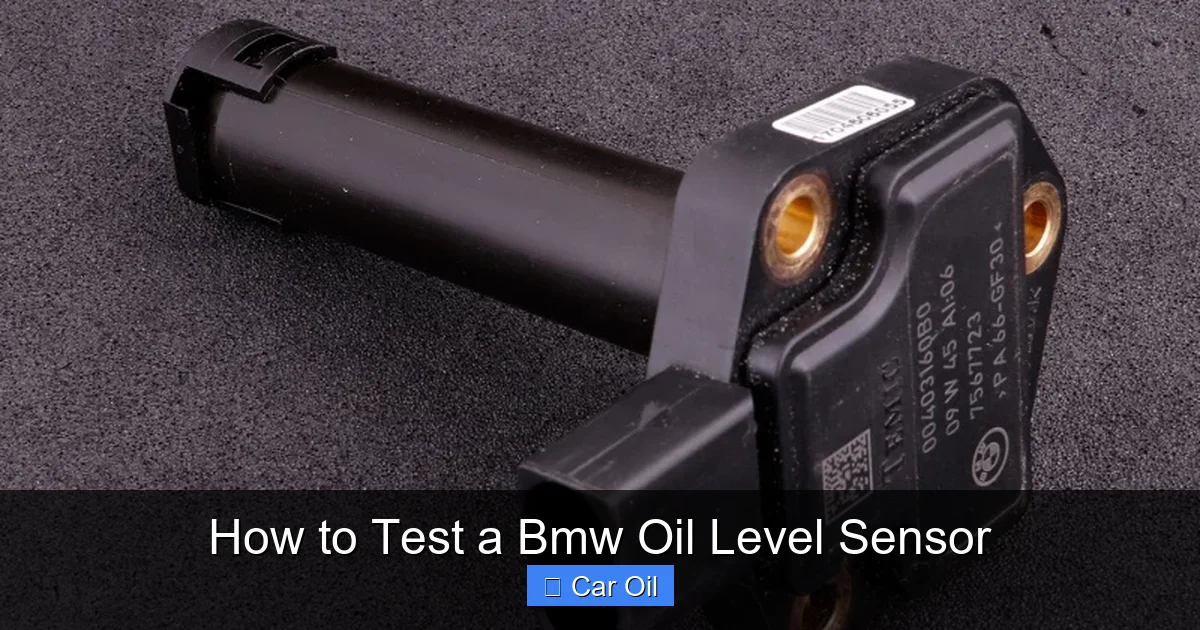
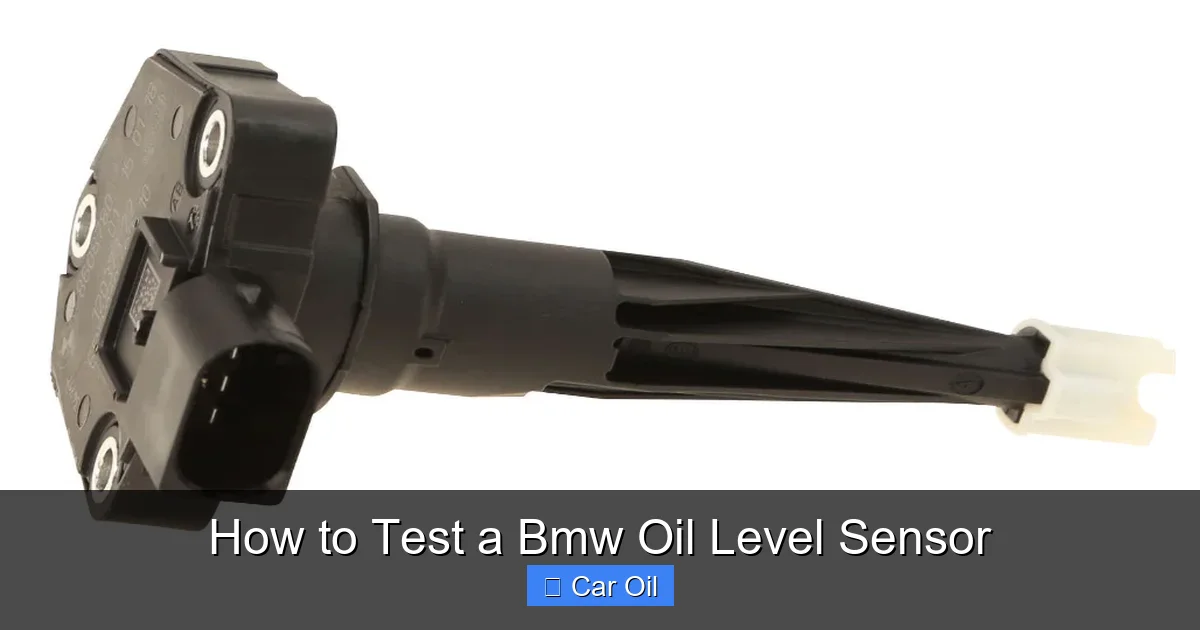
Visual guide about How to Test a Bmw Oil Level Sensor
Image source: maxxecu.com
Basic Tool List
You won’t need a fancy toolbox. Gather these essentials:
- A digital multimeter: This is your star tool. It will measure resistance (ohms) and continuity. Any basic auto-ranging multimeter will work.
- Safety glasses and gloves: Always wear them when working under a car.
- Socket set and ratchet: To remove the sensor. Common sizes are 17mm or 22mm, but verify for your model.
- Flashlight or work light: The area under the engine is often dark.
- Jack and jack stands: You must lift the car safely. Never rely on the factory jack alone. Use sturdy jack stands on solid frame rails.
- Basic hand tools: Screwdrivers, pliers, and maybe a pick for removing plastic undertray clips.
- Service manual or reliable online resource: For your specific BMW’s sensor location, torque specs, and any model-specific quirks.
Safety First: Vehicle Prep and Positioning
Park on a solid, level surface like a concrete garage floor or driveway. Engage the parking brake and chock the wheels opposite the end you’re lifting. If you have an automatic, put it in Park; if manual, leave it in gear. Let the engine cool completely for at least two hours. Hot oil and exhaust components are serious burn hazards. Once lifted, give the car a firm shake to ensure it’s secure on the stands. Your safety is non-negotiable.
Initial Diagnostic Step: The Dipstick Check
Before you even touch the sensor, perform the most critical check: the manual oil level. Pull the dipstick, wipe it clean, reinsert it fully, then pull it out again. Read the level against the markings. Is it between MIN and MAX? Is the oil itself clean, or is it dark, gritty, or smells burnt? This step does two things: it rules out a genuine low-oil condition (which would trigger a correct warning) and gives you a baseline. If the oil is low, top it up with the correct BMW-approved oil viscosity and see if the warning resets after a drive cycle. If the level is fine, the sensor is now your prime suspect.
Step-by-Step Guide to Testing the Oil Level Sensor
Now for the hands-on part. We’ll assume the dipstick shows correct oil level and the warning persists. Let’s test the sensor itself.
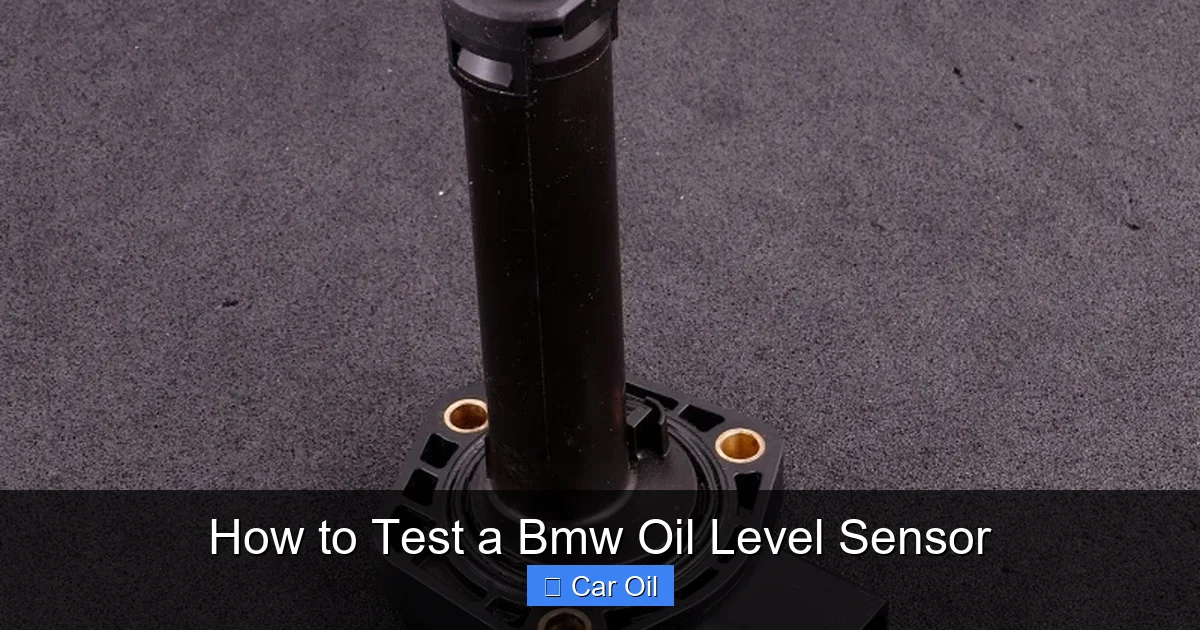
Visual guide about How to Test a Bmw Oil Level Sensor
Image source: maxxecu.com
Step 1: Locate and Access the Sensor
Refer to your manual. Raise the front of the car securely on jack stands. Remove the engine undertray or plastic skid plate. This is usually held by numerous plastic clips or a few bolts. Be patient; these clips break easily. Once the tray is off, locate the oil pan. The sensor is a small, usually black or brown, plug with a two-wire electrical connector, screwed into the pan. It will be near the oil drain plug. Clean any excessive dirt and grime from around the sensor and connector with a brush and brake cleaner. A clean work area prevents contaminants from falling into the oil pan when you remove the sensor.
Step 2: Disconnect the Electrical Connector
Gently press the tab on the electrical connector and pull it apart. Do not pull on the wires themselves. Inspect the connector and wires for any signs of oil intrusion, corrosion, or fraying. Oil inside the connector is a death sentence for the sensor and is a common cause of failure. If you see oil, the sensor seal has failed, and replacement is definitely needed. Also, check the wiring for any chafing or damage where it might rub against the engine or chassis.
Step 3: Remove the Sensor
Place your socket on the sensor’s hex head. Apply steady, counter-clockwise pressure. These sensors can sometimes be stuck due to years of heat and vibration. If it’s stubborn, a light tap with a rubber mallet can help break it free. Never use excessive force that could round the head or damage the oil pan threads. Once loose, carefully unscrew it by hand. Be prepared for a tiny drip of oil—have a rag and a small container ready. As you remove it, note the condition of the sensor’s sealing washer. A crushed or missing washer means it was not sealing properly, confirming a leak path.
Step 4: Perform the Multimeter Test
This is the core test. You are checking the sensor’s internal resistance.
- Set your multimeter: Turn the dial to the resistance (ohms, Ω) setting, often in the 20k or 200k range. If your meter is auto-ranging, just select Ω.
- Connect the probes: Touch one multimeter probe to one of the sensor’s electrical terminals and the other probe to the second terminal. It doesn’t matter which probe goes where for resistance.
- Read the value: Note the resistance reading. For most BMW oil level sensors, the spec is typically between 500 and 1500 ohms when the float is in a neutral position (sensor out of the oil). However, this can vary by model. A good reference is to compare it to a known-good sensor from a parts store, or consult factory specs. The key is this: the reading should be stable and within a reasonable range. Gently move the float arm up and down (if your sensor design has an accessible float—many are sealed). You should see the resistance change smoothly and consistently as the float moves. If the reading is infinite (OL or 1), the circuit is open—the sensor is dead. If it reads zero ohms, it’s shorted internally. If it jumps around erratically, the internal circuitry is faulty.
Step 5: Check Wiring and Ground
With the sensor still out, you can also test the wiring back to the car’s computer. Reconnect the electrical connector to the car’s harness. Set your multimeter to the continuity or diode mode. Place one probe on a terminal at the sensor connector and the other probe on the corresponding terminal at the other end (you’d need the wiring diagram for exact pin locations, but a simple check is for shorts to ground). More practically, check for voltage at the connector with the key in the ON position (engine off). You should see a small reference voltage (often 5 volts) from the DME. If there’s no voltage, the problem might be in the car’s wiring or control module, not the sensor. This step is more advanced but useful if the sensor tested good but the problem persists.
Interpreting Your Test Results and Next Steps
You have your multimeter readings. Now what? Here’s how to decode them.
What a “Good” Sensor Looks Like
A healthy BMW oil level sensor will show a stable resistance value that changes smoothly as you move the float. The exact number isn’t as critical as the behavior. For example, you might see 800 ohms with the float down (low) and 1200 ohms with the float up (high). The change should be gradual and repeatable. There should be no intermittent open circuits or spikes. If your sensor passes this test, the fault likely lies elsewhere—perhaps in the wiring harness (a broken wire inside the insulation), a poor connector, or even the instrument cluster itself. In this case, a deeper electrical diagnostic is needed, possibly by a professional.
Clear Signs of a Bad Sensor
Replace the sensor if:
- It shows infinite resistance (open circuit).
- It shows zero ohms (short circuit).
- The resistance value is wildly unstable and jumps erratically even when the float is still.
- You found oil inside the electrical connector, indicating a breached seal.
- The sensor body is physically damaged or corroded.
These are all definitive failures. Given the relatively low cost of an OEM or quality aftermarket BMW oil level sensor (often $50-$150) versus the potential cost of engine damage from a silent failure, replacement is the prudent choice.
Reinstallation and System Reset
If you’re replacing the sensor, clean the threads in the oil pan. Install the new sensor with a new sealing washer. Hand-tighten it first to avoid cross-threading, then torque it to the manufacturer’s specification (often around 20-30 Nm, but verify!). Do not overtighten. Reconnect the electrical harness securely. Reinstall the undertray. Lower the car. Now, the crucial final step: reset the oil level system. This is not the same as resetting the oil service interval. You typically need a BMW-specific scan tool (like ISTA, INPA, or a high-end OBD2 scanner with BMW software) to perform an “Oil Level Reset” or “Service Reset” that tells the car’s computer to relearn the new sensor’s characteristics. Simply disconnecting the battery may not work. If you don’t have the tool, a BMW dealership or independent shop can do this quickly. After the reset, start the engine and check if the warning is gone. The display may show “—” or “Level Check Active” for a minute while the car recalibrates—this is normal.
Common Mistakes and Pro Tips
Even with a good guide, it’s easy to slip up. Here are pitfalls to avoid and advice from experience.
Mistake: Skipping the Manual Dipstick Check
This is the #1 error. You could replace a perfectly good sensor because the oil was actually low. Always, always confirm the actual oil level with the dipstick first. It takes two minutes and saves you from a wasted diagnosis and part purchase. Remember, the electronic system is an aid, not a replacement for basic checks.
Mistake: Forgetting to Clean the Connector
If you find oil in the old connector, don’t just replace the sensor. You must thoroughly clean the connector on the car’s wiring harness. Use electrical contact cleaner and a small brush. Let it dry completely. A corroded connector will kill your new sensor quickly. Consider applying a tiny amount of dielectric grease to the new connector’s seals to keep moisture out.
Mistake: Overlooking the Undertray
Many BMWs have a complex, multi-piece plastic undertray. Removing it can seem daunting. Take your time. Document how it comes off with your phone. Often, the front section comes off first, revealing the oil pan. Some clips are one-time use; have spares on hand. Working comfortably with good lighting under the car makes all the difference.
Pro Tip: Use a Small Magnet
When the sensor is out, you can sometimes gently move the internal float with a small magnet to simulate changes in oil level while testing resistance. Be careful not to force it. This helps confirm the sensor’s response without having to fill and drain the oil pan.
Pro Tip: Check for Related Codes
Before or after your test, scan the car for fault codes. A code like P0528 or P0529 (Oil Level Sensor Circuit) is a direct hit. Other codes might point to voltage issues. A scan tool gives you a complete picture and helps avoid chasing ghosts.
Pro Tip: Consider the Big Picture
If your BMW is high-mileage and you’re replacing the sensor, it’s a great time to do a full oil and filter change. You’re already under the car. Use the correct oil—BMW’s specification (like LL-04 or LL-17 FE+) is critical for sensor longevity and engine health. Also, inspect the oil pan for any dents or damage that could affect sensor mounting.
Conclusion
Testing your BMW oil level sensor is a perfectly doable DIY project that empowers you as a car owner. It bridges the gap between simple maintenance and deeper electrical diagnosis. By following this guide—starting with the essential manual dipstick check, safely accessing the sensor, and using a multimeter to probe its resistance—you can confidently determine if that dashboard warning is a simple sensor glitch or something more serious. Remember, the sensor is just one part of a system. A healthy sensor paired with clean, correct oil and good wiring keeps your BMW’s heart protected. If at any point you feel overwhelmed, especially with wiring diagnostics or system resets, don’t hesitate to seek a BMW specialist. Your engine will thank you for the attention. Now, go grab your multimeter and take control of your Beamer’s maintenance.
Frequently Asked Questions
Can I drive my BMW with a faulty oil level sensor?
You can drive it, but it’s risky. The main danger is a complete failure where the sensor never warns you of low oil. You must manually check the oil level frequently until the sensor is fixed. If the sensor is giving false low warnings, you might add too much oil, which is also harmful.
Do I need a special BMW scan tool to reset the oil level sensor?
Yes, for a full reset and adaptation. Basic OBD2 scanners can clear generic codes but cannot perform the BMW-specific oil level system reset. Tools like ISTA, INPA, or a high-end scanner with BMW software are required. A dealership or independent BMW shop can do this for you.
How much does a BMW oil level sensor replacement cost?
The sensor itself costs between $50 and $150 for an OEM or quality aftermarket part. Labor adds 1-2 hours at a shop rate, so total DIY cost is just the part. Professional replacement typically runs $200-$500 depending on the model and labor rates.
Is the oil level sensor the same as the oil pressure sensor?
No, they are completely different. The oil level sensor measures how much oil is in the pan. The oil pressure sensor measures the pressure of the oil as it circulates. Both have separate warning lights/messages and test procedures. A bad pressure sensor is a more urgent issue.
Will changing the oil type affect the oil level sensor reading?
No, the sensor measures level, not oil type or quality. However, using the wrong oil can lead to sludge, which might coat the sensor and cause false readings over time. Always use the BMW-specified oil to maintain overall engine and sensor health.
My BMW shows an oil level warning, but the dipstick is full. Is it always the sensor?
Not always, but it’s the most likely culprit after confirming the dipstick level. Other possibilities include a wiring short/break, a faulty instrument cluster, or a software glitch. Testing the sensor’s resistance as described is the best way to isolate the problem.