
How to Reset Maintenance Light on 2014 Toyota Corolla
Contents
- 1 Key Takeaways
- 2 📑 Table of Contents
- 3 Understanding Your 2014 Corolla’s Maintenance Required Light
- 4 Essential Preparation Before You Begin
- 5 Method 1: The Manual Dashboard Reset (The Most Common Method)
- 6 Method 2: Using an OBD2 Scanner Tool
- 7 Common Mistakes and Troubleshooting
- 8 The Importance of Heeding the Reminder
- 9 Conclusion: A Simple Act of Car Care
- 10 Frequently Asked Questions
Seeing the “MAINTENANCE REQUIRED” light on your 2014 Toyota Corolla can be annoying, but resetting it is a straightforward DIY task you can handle in minutes. This light is a reminder for scheduled service, not an emergency, and it must be manually reset after the maintenance is performed. You can reset it using only your dashboard buttons or with a simple OBD2 scanner tool. Always ensure the required service, like an oil change, is completed before resetting the light to keep your Corolla running reliably.
Ah, the little wrench icon on your dashboard. It’s a familiar sight for many 2014 Toyota Corolla owners, a silent (and sometimes glowing) nudge that your trusty sedan is due for some care. You’ve likely just had your oil changed or maybe checked your tires, and now that “MAINTENANCE REQUIRED” message is stubbornly refusing to go away. You might be wondering, “Did the shop forget to reset it?” or “Can I do this myself to avoid another trip?” The great news is that resetting this maintenance light on your Corolla is one of the simplest DIY tasks you can do. It takes less than a minute, requires no mechanical skill, and saves you a minor inconvenience. Think of it as the automotive equivalent of turning off a kitchen timer—it’s just acknowledging that the task is done. This guide will walk you through exactly why that light is on, what it means, and two foolproof methods to turn it off, getting you back on the road with a clear dashboard and peace of mind.
Key Takeaways
- The light is a reminder, not a diagnosis: The wrench icon indicates scheduled maintenance is due based on your driving mileage or time, not a specific problem with the car.
- Perform maintenance first: You should only reset the light after completing the necessary service, such as an oil and filter change, to maintain your vehicle’s health and warranty.
- Two primary methods exist: You can reset the light using the manual trip meter/reset button sequence on your dashboard or by using an OBD2 scanner tool that can access the vehicle’s computer.
- No special tools for the manual method: The standard button reset requires no tools, just knowing the correct sequence of pressing the odometer button while turning the ignition.
- The light will return if service is skipped: If you reset the light without doing the actual maintenance, the car’s computer will trigger the light again after a short distance as it knows service wasn’t performed.
- Consult your owner’s manual: Your specific Corolla’s manual provides the definitive reset procedure and maintenance schedule for your model year and trim.
- Seek help if unsure: If the light illuminates for other reasons or the reset fails, a professional mechanic can diagnose any underlying issues.
📑 Table of Contents
- Understanding Your 2014 Corolla’s Maintenance Required Light
- Essential Preparation Before You Begin
- Method 1: The Manual Dashboard Reset (The Most Common Method)
- Method 2: Using an OBD2 Scanner Tool
- Common Mistakes and Troubleshooting
- The Importance of Heeding the Reminder
- Conclusion: A Simple Act of Car Care
Understanding Your 2014 Corolla’s Maintenance Required Light
Before we start pushing buttons, it’s crucial to understand what that little wrench really means. It’s not a “check engine” light. It’s not signaling a fault. It’s a purely mileage- or time-based reminder system programmed into your car’s computer. For your 2014 Corolla, this system is designed to illuminate after a predetermined interval, typically every 5,000 miles or 6 months, whichever comes first, to remind you of factory-recommended service. This service usually includes fundamental items like an oil and filter change, tire rotation, and a general safety inspection.
The “Why” Behind the Wrench
Toyota’s maintenance reminder system is a smart, proactive tool. Instead of relying on a fixed schedule that doesn’t account for your driving habits—whether you do mostly short city trips or long highway commutes—it uses algorithm-based calculations. It monitors engine run time, vehicle speed, and engine temperature to estimate when specific components will need attention. The “MAINTENANCE REQUIRED” light is the system’s way of saying, “Hey, based on how you’ve driven me, it’s time for my check-up.” This helps optimize engine life, fuel efficiency, and reliability. Ignoring it won’t cause immediate damage, but postponing essential maintenance like oil changes can lead to accelerated engine wear over time.
What It Is NOT
This is a critical distinction. The maintenance light is not a diagnostic trouble code (DTC) indicator. It does not point to a failed sensor, a bad catalytic converter, or low tire pressure. Those issues trigger the check engine light or the tire pressure monitoring system (TPMS) light, which require a different diagnostic and reset process. If your check engine light is on, you must address that underlying problem first. The maintenance light is simply a calendar alert from your car’s computer. Once you complete the scheduled service, you tell the computer, “The maintenance is done,” by performing the reset procedure, and it starts the countdown clock anew.
Essential Preparation Before You Begin
Resetting the light is the final step, but the most important step before that is actually performing the maintenance. It might be tempting to just turn the light off to make the dashboard look clean, but that defeats the entire purpose of the system and can harm your vehicle. Here’s what you need to do and have ready.
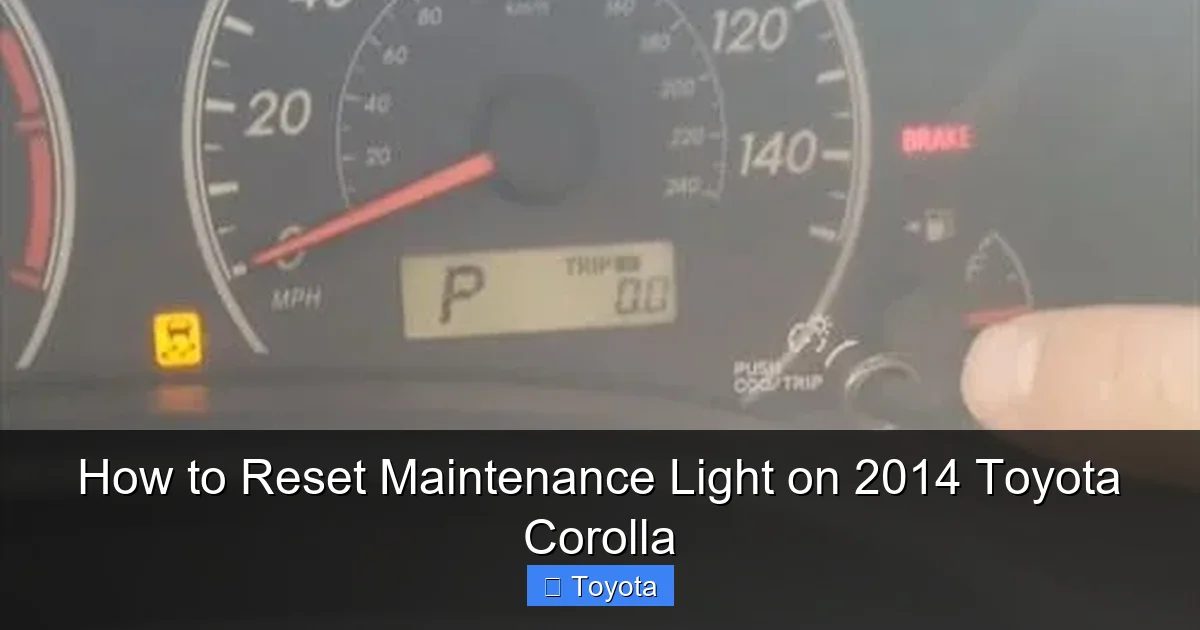
Visual guide about How to Reset Maintenance Light on 2014 Toyota Corolla
Image source: backyardmechanic.org
Complete the Scheduled Service
First and foremost, ensure the maintenance the light is reminding you of has been completed. For a 2014 Corolla at the 5,000-mile interval, this almost always means an oil and filter change using the correct oil grade (typically 0W-20 synthetic). It also includes checking fluid levels (coolant, brake fluid, windshield washer), inspecting belts and hoses, checking tire pressure and tread wear, and rotating the tires if needed. If you’re a DIY enthusiast, you’ve likely done this yourself. If you use a quick-lube shop or dealership, always ask the technician to reset the light for you. A reputable shop will do this as part of the service. If they forget or you service the car yourself, you’ll need to do it.
Gather Your Tools (You Probably Don’t Need Any!)
For the most common manual reset method, you need absolutely no tools—just your fingers and your car’s ignition key or push-button start. However, having your owner’s manual handy is always a good idea for reference. If the manual method doesn’t work for some reason, or if you prefer a more tech-involved approach, you will need a basic OBD2 (On-Board Diagnostics II) scanner. This is a small electronic device that plugs into the OBD2 port, usually located under the dashboard near the steering column. Almost all OBD2 scanners, from simple code readers to advanced ones, have a function to reset maintenance lights on most vehicles, including Toyotas. You don’t need an expensive, factory-level scan tool; a reliable generic OBD2 reader will suffice.
Safety First: A Quick Checklist
Your car should be parked safely, with the parking brake engaged. The engine should be off. If you have a traditional key ignition, make sure you have the key. If you have a push-button start, you don’t need to press the brake for the initial steps of the manual reset, but you will for the OBD2 method if the car needs to be in the “ON” position. Ensure your phone is not in your hand—this is a simple, quick process that deserves your full attention for 30 seconds.
Method 1: The Manual Dashboard Reset (The Most Common Method)
This is the classic, no-tools-required method that works for the vast majority of 2014 Toyota Corolla owners. It uses the trip meter/odometer button on your dashboard to communicate with the car’s computer. The sequence is specific and must be followed precisely. Don’t worry; it’s easy once you know the steps. This method is identical to the procedure used for many other Toyota models, such as the Toyota Yaris and Toyota Avalon, making it a good skill to master.
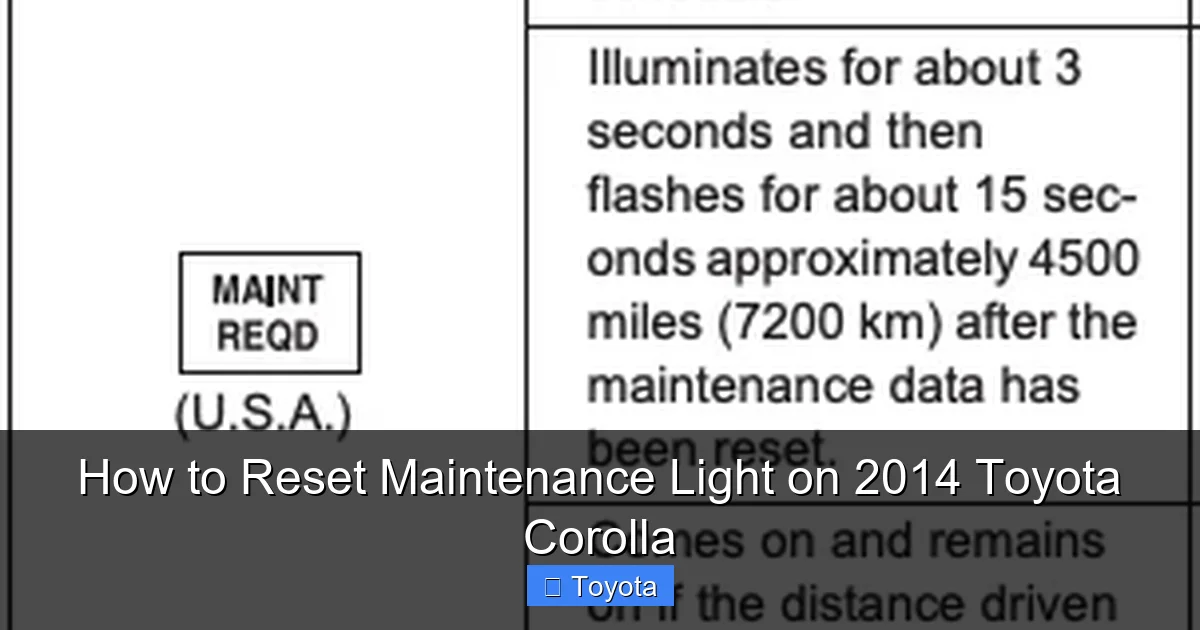
Visual guide about How to Reset Maintenance Light on 2014 Toyota Corolla
Image source: oilreset.com
Step-by-Step Button Sequence
Follow these steps exactly. The entire process should take about 15-30 seconds.
- Turn the ignition to the “OFF” position. If you have a key, remove it. If you have a push-button start, ensure the car is off and you are not pressing the brake pedal.
- Press and hold the “ODO/TRIP” button. This is the button you normally use to switch between your odometer and trip meter readings. It’s usually on the instrument cluster, near the speedometer. Press and hold it down. Don’t release it yet.
- While still holding the button, turn the ignition to the “ON” position. For a key, turn it to the position just before starting the engine (where the dashboard lights come on). For push-button start, press the button once without touching the brake pedal. The dashboard will illuminate, but the engine will not start.
- Continue holding the ODO/TRIP button. You should see the odometer display change. After a few seconds (typically 3-5 seconds), the display will show a series of dashes “—–” or it may change to show “000000” or a “SET” indicator. This is the system entering reset mode.
- Release the ODO/TRIP button. Once you see the dashes or the reset confirmation, you can let go of the button.
- Turn the ignition OFF and then back ON to check. Turn the key back to OFF (or press the start button again with brake to turn car completely off, then press without brake to turn to ON). Start the engine or just leave it in the ON position. The maintenance required light should now be off. The wrench icon should be gone, and your odometer should display normally.
What If It Doesn’t Work on the First Try?
Timing is everything. If the light doesn’t go out, try the sequence again. Make sure you are pressing and holding the button before you turn the ignition to ON. The transition from OFF to ON while holding the button is the trigger. Also, ensure you are holding it long enough to see the dashes appear—sometimes it takes 5-7 seconds of holding after the dash lights come on. On some 2014 Corolla trims, the button might be labeled “TRIP” or have a small car icon. It is the primary button for the odometer display. If you are still unsuccessful after several attempts, your car may have a different software version, or there could be an electrical issue. In that case, move on to Method 2.
Method 2: Using an OBD2 Scanner Tool
If the manual button sequence fails for any reason, or if you simply prefer a more “high-tech” method, an OBD2 scanner is your backup plan. This method is also useful if you own a Corolla and other vehicles, as the scanner is a versatile tool. Many basic OBD2 readers, like those from Autel, Ancel, or Innova, have a “Maintenance Reset” or “Oil Reset” function. This process is very similar to how you might reset the light on a newer RAV4.
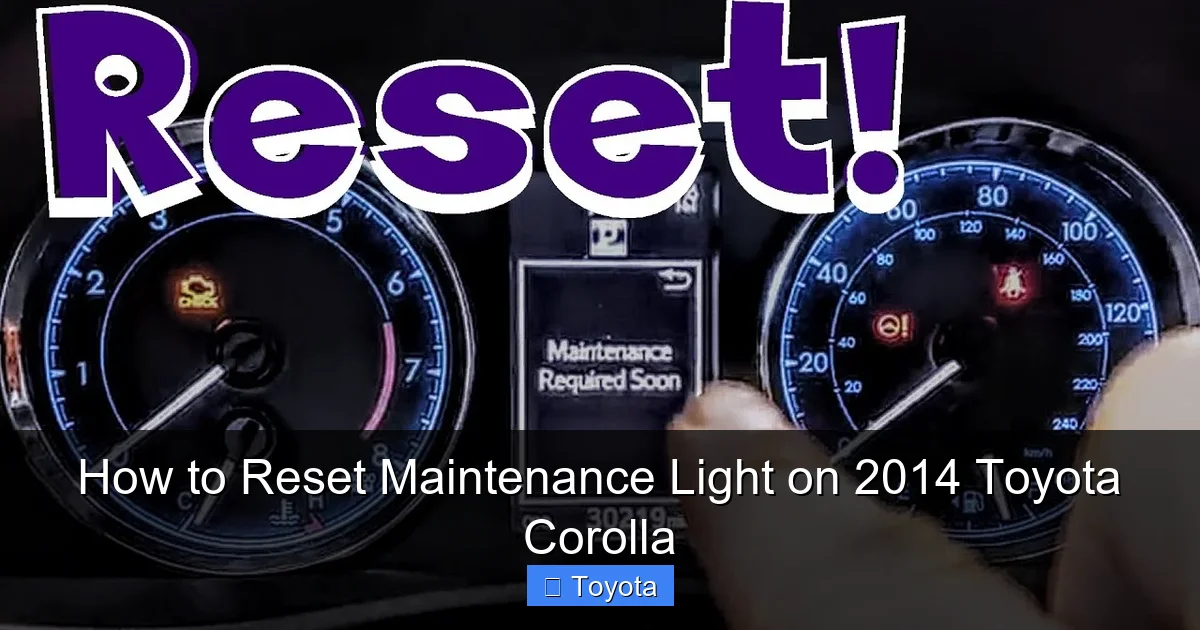
Visual guide about How to Reset Maintenance Light on 2014 Toyota Corolla
Image source: i.ytimg.com
Connecting and Navigating the Scanner
- Locate your OBD2 port. It’s a trapezoidal-shaped connector, usually black, found under the dashboard on the driver’s side, to the left of the steering column. It might have a plastic cover. You should be able to reach it easily while sitting in the driver’s seat.
- Plug in your scanner. With the ignition OFF, insert the scanner’s cable firmly into the port.
- Turn the ignition to the “ON” position. Do not start the engine. Turn the key to the ON position (or press the start button once without the brake). This powers up the vehicle’s computer and the scanner.
- Wait for the scanner to boot and connect. Your scanner should power on and display a menu. It may automatically search for and connect to your vehicle’s computer (protocol). You should see something like “2014 Toyota Corolla” or “System Link Established.”
- Navigate to the Maintenance Reset function. This is the key step. The menu varies by scanner brand. Look for options like:
- “Maintenance Reset”
- “Oil Service Reset”
- “Service Reminder”
- “Wrench Icon Reset”
- Sometimes it’s under “Diagnostic > Special Functions”
Use the scanner’s arrow keys and enter button to select the correct function.
- Follow the on-screen prompts. The scanner will guide you. It might ask you to confirm the vehicle type, the type of service (usually “Oil & Filter” or “General Maintenance”), and the mileage or date. Enter the required information as directed. Often, the final step is simply confirming “YES” or “RESET” to clear the light.
- Disconnect and verify. Once the scanner shows a success message (e.g., “Reset Complete” or “Service Light Reset”), you can turn the ignition OFF, unplug the scanner, and then turn the ignition back ON. Check your dashboard. The maintenance required light should be extinguished.
Choosing the Right Scanner
You don’t need a $500 professional tool. A reliable $30-$60 generic OBD2 reader that explicitly lists “Toyota Maintenance Reset” in its description will work perfectly for this task. Before purchasing, check the product description or reviews to confirm it supports 2014 Toyota maintenance light resetting. Some very basic scanners only read and clear check engine codes and do not have the ability to reset maintenance reminders. If you already own a scanner that doesn’t have this function, the manual method in Section 3 is your best bet.
Common Mistakes and Troubleshooting
Even with clear instructions, a few hiccups can happen. Knowing the most common pitfalls will save you frustration.
Mistake 1: Resetting Without Performing Service
This is the number one mistake. You turn the light off, but you haven’t changed the oil or done the work. The car’s computer is smarter than that. It monitors various parameters. If you reset the light but don’t change the oil, the system will likely detect the old oil (via oil life percentage calculations) and turn the maintenance light back on after driving just 100-200 miles. You’ve only succeeded in temporarily annoying yourself. Always do the maintenance first.
Mistake 2: Incorrect Button or Sequence
Make sure you are using the ODO/TRIP button. On some models, there is a separate “TRIP” button. You must hold the correct button. Also, the sequence is: OFF -> HOLD BUTTON -> turn key to ON (while still holding) -> HOLD until dashes -> RELEASE -> turn OFF/ON. Pressing the button in the wrong order or releasing it too early will fail.
Mistake 3: Ignoring Other Warning Lights
What if your check engine light is also on? Or your tire pressure light? Resetting the maintenance light will not affect these other systems. You must address those issues separately. The maintenance reset procedure only targets the wrench icon. If other lights are on, diagnose and repair those issues first. For example, if your battery light is on, that indicates a charging system problem that needs immediate attention.
What To Do If the Light Comes Back Immediately
If you successfully reset the light, but it comes back on within a day or after a short drive, it usually means one of two things. First, and most likely, the maintenance was not actually completed properly (e.g., the oil wasn’t changed, a critical part was missed). Second, there could be a fault in the maintenance reminder system itself, such as a blown fuse for the instrument cluster or a problem with the car’s main computer (ECU). In the latter case, a professional scan with a more advanced diagnostic tool is needed to identify and clear any stored fault codes that might be preventing the reset. A trip to your trusted mechanic is the best course of action here.
The Importance of Heeding the Reminder
Now that you know how to turn off the light, let’s talk about why you should only do so after the work is done. Your 2014 Corolla is a reliable machine, but it’s a complex collection of mechanical and chemical systems that need regular attention. The maintenance schedule isn’t arbitrary; it’s engineered to prevent wear and failure.
Protecting Your Investment
Regular oil changes are the single most important maintenance item for your engine. Oil lubricates, cools, and cleans internal components. Over time, it breaks down and becomes contaminated. Driving with degraded oil causes friction, heat buildup, and sludge formation, leading to premature engine wear and potentially catastrophic failure. The $40-$70 you spend on an oil change every 5,000 miles is a tiny fraction of the $3,000-$6,000 cost of an engine rebuild or replacement. The maintenance light is your engine’s best friend, reminding you to protect this core component.
Safety and Performance
The scheduled service also includes safety checks. Brakes are inspected, tire tread and pressure are evaluated, and steering/suspension components are looked over. Worn brake pads or low tread depth tires are major safety hazards. Catching these issues during a routine service is far cheaper and safer than discovering them during an emergency stop. Additionally, a well-maintained Corolla with fresh fluids, clean filters, and properly inflated tires will deliver better fuel economy, smoother performance, and a more comfortable ride. It’s a win for your wallet, your safety, and your driving experience.
Resale Value and Warranty
If you ever plan to sell your Corolla, a complete and documented service history, with timely oil changes and maintenance, significantly increases its value and makes it easier to sell. Potential buyers look for this. Furthermore, if your car is still under its original powertrain warranty, following the recommended maintenance schedule is often a condition of the warranty. Neglecting the maintenance reminders could potentially void warranty coverage for related components if a failure can be linked to lack of maintenance.
Conclusion: A Simple Act of Car Care
Resetting the maintenance required light on your 2014 Toyota Corolla is a empowering little skill. It transforms a nagging dashboard icon from a source of annoyance into a simple, completed task. You now have the knowledge to silence that wrench yourself in under a minute, whether you use the classic manual button sequence or an OBD2 scanner. Remember the golden rule: the reset is the final step, not the first. Always perform the actual maintenance—change the oil, rotate the tires, inspect the systems—before you clear the reminder. This small act of responsibility is what keeps your Corolla the reliable, fuel-efficient, and long-lasting vehicle it was designed to be. By understanding the system and following these clear steps, you maintain not just your car, but your peace of mind on every drive. Now, go ahead and turn that light off. Your dashboard—and your engine—will thank you for it.
Frequently Asked Questions
What should I do if the maintenance light won’t reset after following the steps?
First, double-check that you held the ODO/TRIP button long enough to see the dashes appear. If it still fails, ensure the scheduled maintenance (like the oil change) was actually completed. If both are correct, try using an OBD2 scanner. If the light still returns, there may be an electrical fault or a deeper issue with the car’s computer, requiring a professional diagnostic.
Can I reset the light without changing the oil?
Technically yes, using the methods described, but you absolutely should not. The system is designed to remind you of critical service. Resetting it without performing the maintenance means your engine is running on degraded oil, which leads to increased wear, poor performance, and potential engine damage. The light will likely return very quickly as the system detects the lack of service.
How often does the maintenance light come on a 2014 Toyota Corolla?
For the 2014 model year, the maintenance required light is typically programmed to illuminate every 5,000 miles or 6 months, whichever occurs first. This interval aligns with the severe service maintenance schedule for oil changes. Your owner’s manual provides the exact schedule for your specific driving conditions.
Is the maintenance light the same as the check engine light?
No, they are completely different. The maintenance required light (usually a wrench icon) is a simple reminder for scheduled service. The check engine light (usually an engine-shaped icon) indicates a problem with the engine or emissions system that needs diagnosis. They have separate meanings and reset procedures. You can find guides on resetting a Corolla’s check engine light if that is your issue.
Will disconnecting the battery reset the maintenance light?
Disconnecting the negative battery terminal for a few minutes will reset many electronic systems in your car, but it will not reset the maintenance required light on a 2014 Corolla. The maintenance reminder data is stored in non-volatile memory that is not lost when battery power is cut. You must use the specific manual button sequence or an OBD2 scanner to clear it.
My light came on, but I just had an oil change. Why?
The most common reason is that the technician at the shop simply forgot to reset the light after completing the service. This happens occasionally. You can easily reset it yourself using the methods in this guide. It’s also possible the light was on from a previous interval and wasn’t addressed during your last visit. Always check your service receipt to confirm the reset was performed.


