
How Do I Reset the Check Engine Light on a 2010 Toyota Corolla?
Contents
- 1 Key Takeaways
- 2 📑 Table of Contents
- 3 Understanding Your 2010 Toyota Corolla’s Check Engine Light
- 4 When to Reset and When to Diagnose: The Golden Rule
- 5 Method 1: The OBD2 Scanner Method (Recommended)
- 6 Method 2: The Battery Disconnect Method
- 7 Method 3: The Natural Driving Cycle (Not a Reset Method)
- 8 What Happens After the Reset? Verification is Key
- 9 Warnings, Best Practices, and When to Seek Help
- 10 Conclusion: A Simple Task with Serious Responsibility
- 11 Frequently Asked Questions
Resetting the check engine light on a 2010 Toyota Corolla is a simple process, but it must be done correctly. First, you must diagnose and fix the underlying problem that triggered the light; simply clearing the code without repair is temporary and unwise. You can reset the light using an OBD2 scanner, by disconnecting the battery, or by performing a specific driving cycle. Always ensure the issue is resolved before attempting a reset to prevent repeated warnings and potential engine damage.
Key Takeaways
- Diagnose Before You Reset: The check engine light indicates a problem. Use an OBD2 scanner to read the trouble code, identify the issue (like a loose gas cap or faulty sensor), and repair it first. Resetting without fixing is pointless.
- Method 1: OBD2 Scanner is Best: The easiest, safest, and most reliable method is using an OBD2 scanner. It clears codes without disrupting other vehicle systems like the radio or clock presets.
- Method 2: Battery Disconnect Works: Disconnecting the negative battery terminal for a few minutes will clear most codes. Be aware this may also reset radio presets, clock, and engine idle adaptations.
- Method 3: Driving Cycle is Unreliable: Some lights may turn off automatically after the vehicle completes a specific “drive cycle” if the problem was transient and resolved. You cannot force this; it happens on its own.
- Light Will Return If Problem Persists: If the underlying issue isn’t fixed, the check engine light will illuminate again, often within 10-50 miles of driving after a reset.
- Consult a Professional for Complex Codes: For persistent lights or complex codes (e.g., catalytic converter, misfire), seek a mechanic. A professional diagnosis prevents small issues from becoming major repairs.
- Know Your Lights: A solid check engine light requires attention. A flashing check engine light indicates a severe problem (like a misfire) that can damage the catalytic converter—stop driving immediately.
[FEATURED_IMAGE_PLACEHOLDER]
📑 Table of Contents
- Understanding Your 2010 Toyota Corolla’s Check Engine Light
- When to Reset and When to Diagnose: The Golden Rule
- Method 1: The OBD2 Scanner Method (Recommended)
- Method 2: The Battery Disconnect Method
- Method 3: The Natural Driving Cycle (Not a Reset Method)
- What Happens After the Reset? Verification is Key
- Warnings, Best Practices, and When to Seek Help
- Conclusion: A Simple Task with Serious Responsibility
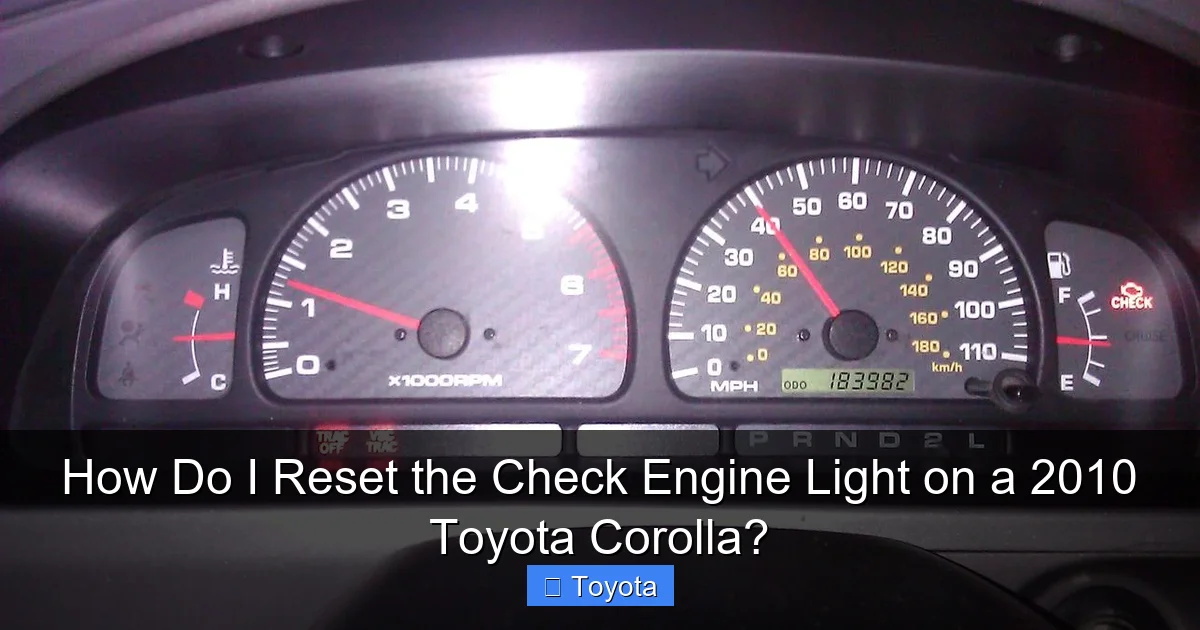
Understanding Your 2010 Toyota Corolla’s Check Engine Light
That little amber light on your dashboard, shaped like an engine with an exclamation point, is your car’s way of getting your attention. It’s formally called the Malfunction Indicator Lamp (MIL), but everyone knows it as the check engine light. In your 2010 Toyota Corolla, this light is part of the On-Board Diagnostics II (OBD2) system, a standardized computer network that monitors your engine, transmission, and emissions systems. When the car’s computer, the Engine Control Module (ECM), detects a problem it can’t correct, it stores a diagnostic trouble code (DTC) and turns on the light to let you know something needs checking.
It’s crucial to understand that the light itself is not the problem—it’s a symptom. The light coming on doesn’t tell you what is wrong, only that something is wrong. The problem could be as simple as a loose or missing gas cap, which can cause fuel vapor leaks and affect emissions. Or it could be something more serious, like a failing oxygen sensor, a faulty catalytic converter, or an engine misfire. Your first job is to find out why the light is on before you ever think about turning it off.
Common Triggers for the 2010 Corolla
While hundreds of codes can trigger the light, some are very common on the 2010 Corolla’s 1.8L 2ZR-FE engine. These include:
- P0171/P0174 (System Too Lean): Often caused by a vacuum leak, a dirty mass airflow sensor (MAF), or a faulty oxygen sensor.
- P0420/P0430 (Catalyst System Efficiency Below Threshold): Usually indicates a failing catalytic converter, but can also be caused by a bad oxygen sensor or exhaust leak.
- P0300-P0304 (Random/Multiple Cylinder Misfire or Specific Cylinder Misfire): Could be spark plugs, ignition coils, fuel injectors, or a vacuum leak.
- P0455/P0456 (EVAP System Leak): A large or very small leak in the fuel vapor system. The classic culprit is a loose, damaged, or missing gas cap.
- P0128 (Coolant Thermostat): The engine isn’t reaching proper operating temperature quickly enough, often a failing thermostat.
For specific guides on other models, the process for a Toyota Highlander’s maintenance light is different, as it’s a service reminder, not an emissions-related fault.
When to Reset and When to Diagnose: The Golden Rule
Here is the most important rule: Never reset the check engine light without first diagnosing and, if necessary, repairing the problem that caused it. Resetting the light is simply erasing the computer’s memory of a fault. It does not fix the fault itself. If you clear the code and the problem still exists, the car’s computer will detect it again and turn the light back on, usually within 10-50 miles of driving. This cycle can be frustrating and, worse, it prevents you from knowing a serious issue is brewing.
Visual guide about How Do I Reset the Check Engine Light on a 2010 Toyota Corolla?
Image source: i2.wp.com
Think of it like a fire alarm. If the alarm sounds (check engine light on), you don’t just take the battery out (reset the light). You look for the fire (diagnose the problem). If there’s a small, contained fire (loose gas cap), you put it out (tighten the cap). If there’s a large fire (catalytic converter failure), you call the firefighters (take it to a mechanic). Only after the fire is out do you silence the alarm (reset the light).
The Diagnostic Process: Your First Step
Before any reset, you need to know the code. Here’s how:
- Get an OBD2 Scanner: You can buy a basic Bluetooth or Wi-Fi OBD2 adapter (like an Autel, Launch, or OBDLink) for $20-$50 and use it with a free app on your phone (Torque, OBD Fusion). Or, you can use a professional-grade scanner. Many auto parts stores (AutoZone, Advance Auto, O’Reilly) will also scan your car for free.
- Plug In and Read: Locate the OBD2 port under your dashboard, to the left of the steering column. Plug in your scanner, turn the ignition to “ON” (do not start), and follow the scanner’s prompts to read “Stored” or “Pending” codes.
- Research the Code: Write down the code (e.g., P0171). A quick online search for “2010 Toyota Corolla P0171” will give you a wealth of information on common causes and fixes for that specific code.
- Inspect and Repair: Based on the code and common causes, perform simple inspections. Is the gas cap tight? Are the air intake hose clamps secure? Are spark plug wires connected? Address the most likely, simplest fixes first.
If the repair is beyond your skill level, or if the code points to a major component, get a professional diagnosis. A shop’s scanner can provide live data and perform advanced tests that a basic code reader cannot.
Method 1: The OBD2 Scanner Method (Recommended)
This is by far the best method. It’s quick, clean, and doesn’t cause any collateral resetting of other vehicle systems. If you’ve already diagnosed and fixed the problem, this is how you clear the code and extinguish the light.
Visual guide about How Do I Reset the Check Engine Light on a 2010 Toyota Corolla?
Image source: i.ytimg.com
Step-by-Step Guide
- Ensure the Problem is Fixed: Double-check your repair. For a gas cap code, tighten the cap until it clicks. For a sensor, verify the connector is seated.
- Turn the Ignition On: Insert the key and turn it to the “ACC” or “ON” position (the position right before starting). Do not start the engine.
- Connect Your Scanner: Plug the OBD2 connector firmly into your Corolla’s port.
- Navigate to “Erase Codes” or “Clear DTCs”: The exact menu varies by scanner. On basic scanners, it’s often a dedicated “Erase” button. On advanced ones, you’ll go into a menu like “Codes” > “Erase All Codes” or “Clear DTCs.”
- Confirm the Action: The scanner will usually ask you to confirm. Select “Yes” or “OK.”
- Wait for Completion: The scanner will process the command. This takes a few seconds. You’ll see a message like “Codes Cleared” or “DTCs Erased.”
- Disconnect the Scanner: Unplug it from the port.
- Start the Engine: Turn the key to start the engine. The check engine light should illuminate briefly (for a bulb check) and then turn off. If it stays on, the code may not have cleared, or the problem is still present and the computer has already detected it again.
- Test Drive: Drive the car normally for 15-20 minutes. The light should remain off. If it comes back on, your repair was not successful or a new problem has developed.
Pro Tip: Some scanners have a “Monitor Reset” or “I/M Monitor Reset” function. After clearing codes, you should also reset the emission system monitors so the car’s computer can re-run its self-tests. This is important for passing emissions inspections. The process is usually in the same menu as the code erase. Consult your scanner’s manual.
Method 2: The Battery Disconnect Method
This is the old-school method that works on almost any car, including your 2010 Corolla. Disconnecting the battery cuts power to the ECM, forcing it to forget all stored codes and adaptive learning data. However, it’s a blunt instrument with side effects.
Visual guide about How Do I Reset the Check Engine Light on a 2010 Toyota Corolla?
Image source: i.ytimg.com
Step-by-Step Guide & Important Warnings
- Park Safely and Turn Off Everything: Park on a level surface, engage the parking brake, and turn off the engine, lights, radio, and accessories. Have your radio security code handy if applicable.
- Locate the Battery: Open the hood. The battery is in the front right corner of the engine bay.
- Identify the Terminals: The negative (-) terminal is connected to the black battery cable and is usually marked with a “-” symbol or a black cover. The positive (+) terminal has a red cable and a “+” symbol.
- Loosen the Negative Terminal: Using the correct size wrench or socket (usually 10mm), loosen the nut on the negative terminal clamp. You don’t need to remove the nut completely; just loosen it enough to slide the clamp off the terminal post.
- Disconnect the Negative Cable: Carefully lift the negative cable clamp off the post and tuck it away so it cannot accidentally touch the battery post. Never let the positive and negative cables touch each other.
- Wait: Let the battery sit disconnected for at least 10-15 minutes. This ensures the ECM’s memory capacitors fully discharge. Some sources recommend 15-30 minutes for a complete reset.
- Reconnect: Slide the negative clamp back onto the negative post. Tighten the nut securely. Do not overtighten and risk stripping the threads.
- Close the Hood and Start the Car: You will likely need to reset your clock, radio presets, and window “auto-up/down” settings. The engine idle may be rough for the first few minutes as the ECM relearns fuel trims—this is normal.
- Check the Light: The check engine light should be off. If it comes back on quickly, the problem persists.
Critical Considerations for This Method:
- Radio Code: If your radio displays “CODE” or is locked, you will need the unique security code (often found in the owner’s manual or on a sticker in the glove box) to reactivate it.
- Window & Sunroof Recalibration: For the power windows and sunroof to regain their “auto-up/down” feature, you will need to perform a recalibration procedure (usually: close window, hold switch up for 2-3 seconds after window is fully closed). Consult your owner’s manual.
- Transmission Shifts: Shifts may feel harsh for the first 20-30 minutes of driving as the Transmission Control Module (TCM) relearns shift points.
- Does Not Always Work: On some newer vehicles, disconnecting the battery may not clear all codes. The ECM might have a non-volatile memory. However, on a 2010 Corolla, it is generally effective for clearing most emission-related codes.
Method 3: The Natural Driving Cycle (Not a Reset Method)
There is a myth that you can “drive the light off.” While not a reset method per se, it’s important to understand how it works. The OBD2 system has multiple “monitors” that test various systems (e.g., oxygen sensor, catalytic converter, EVAP system). These tests only run under specific driving conditions (speed, engine load, temperature, etc.).
If a fault was detected but then resolved on its own (e.g., a temporary fuel trim glitch, a gas cap that was loose but is now tight), the computer may turn off the light after it successfully completes the monitor test for that system without detecting a fault again. This can happen after driving for 20-50 miles under a mix of city and highway conditions. You cannot force this; you can only drive normally and hope the monitor passes. If the problem is still present, the light will not go out.
Important: If you have repaired a problem, you should still use an OBD2 scanner to clear the code and reset the monitors. Relying on a natural drive cycle is inefficient and leaves you uncertain if the repair was successful. You need to know the light is off because the problem is fixed, not because the computer hasn’t yet rechecked the system.
What Happens After the Reset? Verification is Key
You’ve cleared the code and the light is off. Your job isn’t done yet. You must verify that the repair was successful and that all system monitors have run and passed.
Using the OBD2 Scanner to Check Monitors
After driving your Corolla for 15-20 minutes, reconnect your OBD2 scanner. Instead of just reading codes, look for a menu option called “I/M Monitor Status,” “Emissions Monitor,” or “O2 Monitor.” This screen shows the status of each system test.
- N/A or Not Supported: This is normal for monitors that don’t apply to your vehicle (e.g., A/C Refrigerant on a car without factory A/C).
- Complete or OK: This is what you want to see. The monitor has run and the system is functioning within specs.
- Incomplete or Not Ready: The monitor has not yet run. You need to drive more under the specific conditions required for that monitor. Common incomplete monitors are the Catalyst and EVAP monitors, which often require a specific drive cycle involving steady highway cruising and cool-down periods.
For Emissions Testing: To pass a state emissions (smog) test, your Corolla must have all required monitors showing “Complete” or “OK.” A recently cleared code will cause monitors to be “Incomplete.” You must drive the car enough to complete all monitors before testing. This can take 50-100 miles of varied driving. If a monitor refuses to complete, it indicates a problem that needs diagnosis.
The Road Test
While driving, pay attention to how the car runs. Does it feel smooth? Is there any roughness, hesitation, or loss of power? Are there any unusual noises? If the original problem was a misfire, you might feel it. If it was a lean condition, the car might feel sluggish. A successful repair means the car’s performance returns to normal. If the check engine light comes back on during this test drive, immediately note any changes in performance and re-scan for codes.
Warnings, Best Practices, and When to Seek Help
Resetting the light is a simple task, but the context around it is everything. Here are the vital warnings and best practices to follow.
Never Ignore a Flashing Light
This is non-negotiable. If your check engine light is flashing or blinking, it means the ECM has detected a severe, active misfire. Unburned fuel is being dumped into the exhaust, which can overheat and destroy your catalytic converter in a matter of minutes. If the light is flashing, stop driving the car as safely and immediately as possible. Have it towed to a repair shop. Driving with a flashing light can turn a $100 spark plug fix into a $2,000+ catalytic converter replacement.
Don’t Reset for Emissions Tests
You cannot “trick” an emissions test by simply resetting the light. The test technician will connect their scanner to your car’s OBD2 port. If your monitors are not “Complete,” or if the system detects that codes were recently cleared (often indicated by a “Not Ready” status or a “Test Not Complete” flag), you will automatically fail the test. You must drive the car to complete all monitors after any repair or battery disconnect.
The “Freeze Frame” Data
When a code is stored, the ECM also saves “freeze frame” data—a snapshot of engine parameters (RPM, load, temperature, fuel trim) at the exact moment the fault occurred. This is invaluable for diagnosis. If you clear codes with a scanner, you lose this data. Always read and note the freeze frame data before erasing codes, especially for intermittent problems. This is another reason the scanner method is superior—it gives you this information.
When to Call a Professional
Seek professional help if:
- The check engine light is flashing.
- After clearing and repairing, the light returns immediately with the same code.
- The code points to a major component (catalytic converter, internal engine mechanical issue, transmission solenoid).
- You are not comfortable using an OBD2 scanner or performing basic repairs.
- The car is running poorly (rough idle, poor acceleration, stalling) in addition to the light.
- Multiple unrelated codes appear at once, which can indicate a broader electrical issue like a bad ground or ECM power supply problem.
For other Toyota models, the process for a battery warning light on a Corolla involves different electrical system checks, not just a simple reset.
Conclusion: A Simple Task with Serious Responsibility
Resetting the check engine light on your 2010 Toyota Corolla is technically straightforward. You can do it in minutes with an OBD2 scanner or a wrench. But the real responsibility lies in what comes before the reset: the diagnosis and repair. The light is your car’s voice, telling you it needs help. Ignoring that voice or silencing it without addressing the problem is a recipe for expensive breakdowns and unsafe driving conditions.
Embrace the diagnostic process. Invest in a good-quality OBD2 scanner—it’s one of the most useful tools a car owner can have. Learn to read basic codes. Perform simple checks like ensuring your gas cap is tight. If the problem is beyond your expertise, take the code to a trusted mechanic. Once the underlying issue is truly resolved, use your scanner to clear the code and reset the monitors. Then, verify your work by driving and ensuring the light stays off and all monitors read “Complete.”
By following this responsible approach, you protect your Corolla’s engine, save money on unnecessary repairs, ensure your car passes emissions tests, and drive with confidence knowing your vehicle is safe and healthy. That little amber light is a tool for communication—use it wisely.
Frequently Asked Questions
Can I just disconnect the battery to reset the check engine light on my 2010 Corolla?
Yes, disconnecting the negative battery terminal for 10-15 minutes will clear most codes and turn off the light. However, this also resets other settings like radio presets and engine idle adaptations. It’s a blunt method; using an OBD2 scanner is preferred as it’s more precise and avoids unwanted resets.
Will the check engine light reset itself if I fix the problem?
Sometimes. If the problem was very minor and self-correcting (like a loose gas cap that you tightened), the computer may turn the light off after it successfully completes the relevant system monitor test during normal driving. However, for most active faults, you must manually clear the code with a scanner or battery disconnect after the repair.
Is it safe to drive my Corolla with the check engine light on?
It depends. If the light is solid and the car is running normally (smooth idle, good power, no strange noises), it is likely safe to drive a short distance to get it diagnosed. However, if the light is flashing, or if you notice severe symptoms like misfires, loss of power, or overheating, stop driving immediately and seek help, as you can cause catastrophic engine damage.
How long will it take for the check engine light to come back on after I reset it if the problem isn’t fixed?
If the underlying issue still exists, the ECM will typically detect it again within 10 to 50 miles of driving. The exact time depends on the nature of the fault and the specific drive cycle. A consistent misfire might trigger it almost immediately, while a small EVAP leak might take several drive cycles.
What’s the difference between resetting and clearing a check engine code?
There is no difference in common automotive parlance. “Resetting” and “clearing” both refer to the act of erasing a stored diagnostic trouble code from the ECM’s memory, which turns off the check engine light. The more precise term is “clearing DTCs” (Diagnostic Trouble Codes).
Do I need a special scanner for a 2010 Toyota Corolla?
No. Your 2010 Corolla uses the universal OBD2 protocol, which is standard on all cars sold in the US since 1996. Any basic OBD2 scanner (wired, Bluetooth, or Wi-Fi) will be able to read and clear generic and most manufacturer-specific codes. You do not need an expensive, proprietary Toyota scan tool for basic functions.


