
How to Jack Up a Lifted Jeep
Contents
- 1 Key Takeaways
- 2 📑 Table of Contents
- 3 Introduction: Why Lifted Jeeps Need a Different Approach
- 4 Understanding Your Lifted Jeep’s New Anatomy
- 5 Choosing Your Weapons: Jacks and Stands for Lifted Jeeps
- 6 The Step-by-Step, Safety-First Jacking Procedure
- 7 Safety Protocols and Common (Dangerous) Mistakes
- 8 Lift Kit Considerations: How Your Specific Mods Change the Game
- 9 Maintenance and Post-Lift Checklist
- 10 Conclusion: Confidence Through Competence
- 11 Frequently Asked Questions
Jacking up a lifted Jeep requires special attention due to its higher center of gravity and altered frame geometry. You must use a heavy-duty floor jack rated for the vehicle’s weight and place it on reinforced factory jacking points to avoid damage. Always use jack stands for safety, never rely on the jack alone. Understanding your specific lift kit’s impact on the undercarriage is crucial to find safe, solid support locations and prevent costly accidents.
Key Takeaways
- Use the Right Jack: A heavy-duty floor jack with a minimum 3-ton capacity is non-negotiable for a lifted Jeep; the factory scissor jack is unsafe and insufficient.
- Find Factory Jacking Points: Always locate and use the reinforced steel jacking points specified in your Jeep’s owner’s manual, typically along the frame rails behind the front wheels and ahead of the rear wheels.
- Jack Stands Are Mandatory: Never work under a Jeep supported only by a jack. Use high-quality, adjustable jack stands placed on solid, flat surfaces of the frame or axle tubes (if designed for it).
- Mind the Lift Kit: Your lift kit (spacers, control arms, etc.) changes the undercarriage layout. Re-familiarize yourself with the new positions of the exhaust, driveshaft, and brake lines before lifting.
- Stability First: Ensure the Jeep is on level, solid ground. Engage the parking brake, put the transmission in Park (or First/Reverse for manuals), and chock the wheels on the opposite end securely.
- Lift Slowly and Check: Pump the jack handle slowly, lifting in small increments. Pause frequently to check that the jack saddle is secure and the vehicle is rising evenly without shifting.
- Lower with Control: When lowering, open the jack valve slowly to let the vehicle descend in a controlled, steady motion. Never just “crack” the valve open.
📑 Table of Contents
- Introduction: Why Lifted Jeeps Need a Different Approach
- Understanding Your Lifted Jeep’s New Anatomy
- Choosing Your Weapons: Jacks and Stands for Lifted Jeeps
- The Step-by-Step, Safety-First Jacking Procedure
- Safety Protocols and Common (Dangerous) Mistakes
- Lift Kit Considerations: How Your Specific Mods Change the Game
- Maintenance and Post-Lift Checklist
- Conclusion: Confidence Through Competence
Introduction: Why Lifted Jeeps Need a Different Approach
So, you’ve joined the club. Your Jeep Wrangler, Cherokee, or Gladiator now has that glorious extra inches of ground clearance, ready to conquer trails that would leave stock SUVs cowering. That lift kit—whether it’s a simple spacer lift or a full long-arm system—changes everything about your rig’s character. But here’s the thing they don’t always put in the glossy brochure: it also changes how you perform the most basic maintenance. Jacking up a lifted Jeep isn’t the same as jacking up a stock one. The rules are different, the risks are higher, and the margin for error is razor-thin.
Think about it. You’ve raised the center of gravity, making the vehicle less stable. You’ve potentially tucked larger tires and modified suspension components into the wheel wells, creating new pinch points and obstructions. The factory-recommended jacking points might now be harder to reach, or worse, might not be the best place to support the vehicle’s new weight distribution. A simple oil change, which should take 20 minutes, can become a dangerous ordeal if done incorrectly. This guide exists to bridge that knowledge gap. We’re going to walk through, in explicit detail, the safe, correct procedure for lifting your lifted Jeep. This isn’t just about getting it in the air; it’s about doing it without bending a frame rail, crushing a differential, or, worst of all, getting hurt. Safety isn’t a suggestion; it’s the only procedure.
Understanding Your Lifted Jeep’s New Anatomy
Before you even touch a jack, you need to become an expert on your specific vehicle’s new undercarriage. A lift kit isn’t just a spacer. It’s a suite of components that alters geometry, clearance, and stress points. Rushing into a lift without this understanding is a recipe for disaster.

Visual guide about How to Jack Up a Lifted Jeep
Image source: jeepfixes.com
The Critical Impact of Lift Height
The amount of lift dictates the challenge. A 2-inch spacer lift on a JK Wrangler is a different beast than a 6-inch long-arm lift on a TJ. With a modest lift, your factory jacking points are likely still accessible and valid. But as you climb past 3-4 inches, those points can become awkwardly positioned, and the frame’s orientation relative to the ground changes. The differentials and axles are now higher, which can mean your jack needs a longer reach. More importantly, the angle of the frame rails you’ll be placing jack stands on may have changed, affecting stand stability. Always consult your lift kit’s installation manual. It often includes diagrams showing recommended support points, which supersede factory advice when they conflict.
Identifying Modified Areas and New Obstructions
Get down on the ground with a flashlight. Look for what’s new or moved. A common mistake is not accounting for a relocated exhaust. A lift often pushes the exhaust higher and sometimes forward. That factory jacking point behind the front wheel? It might now be perilously close to your new, larger exhaust pipe. One slip of the jack saddle and you’re putting a dent in your header. Similarly, check your driveshaft and its new operating angle. Is it now closer to the crossmember? You must ensure your jack and stands don’t interfere with these moving or sensitive parts. Also, inspect your brake lines and fuel lines. Extended-length brake lines should have been installed with the kit. If they’re taut or kinked, you could damage them during the lifting process. Knowing these new obstructions is half the battle.
The Importance of Your Vehicle’s Weight
This is fundamental physics. A lifted Jeep often weighs more. Bigger tires, heavier bumpers, rock rails, and the lift components themselves add pounds. You must know your actual curb weight, not just the stock spec. A JL Wrangler Rubicon with a 4-inch lift, 37-inch tires, and a steel bumper can easily push 5,000 lbs. Your jack and stands must be rated for at least 50% more than the weight you’re lifting. A “3-ton” (6,000 lb) jack is the absolute minimum for most lifted Wranglers. If you’re unsure, err on the side of massive overcapacity. This is not the place to save a few bucks. The cost of a proper jack is infinitesimal compared to the cost of a wrecked Jeep or a serious injury. For context, the investment in a quality lift kit itself is significant, so protecting that investment with the right tools is essential.
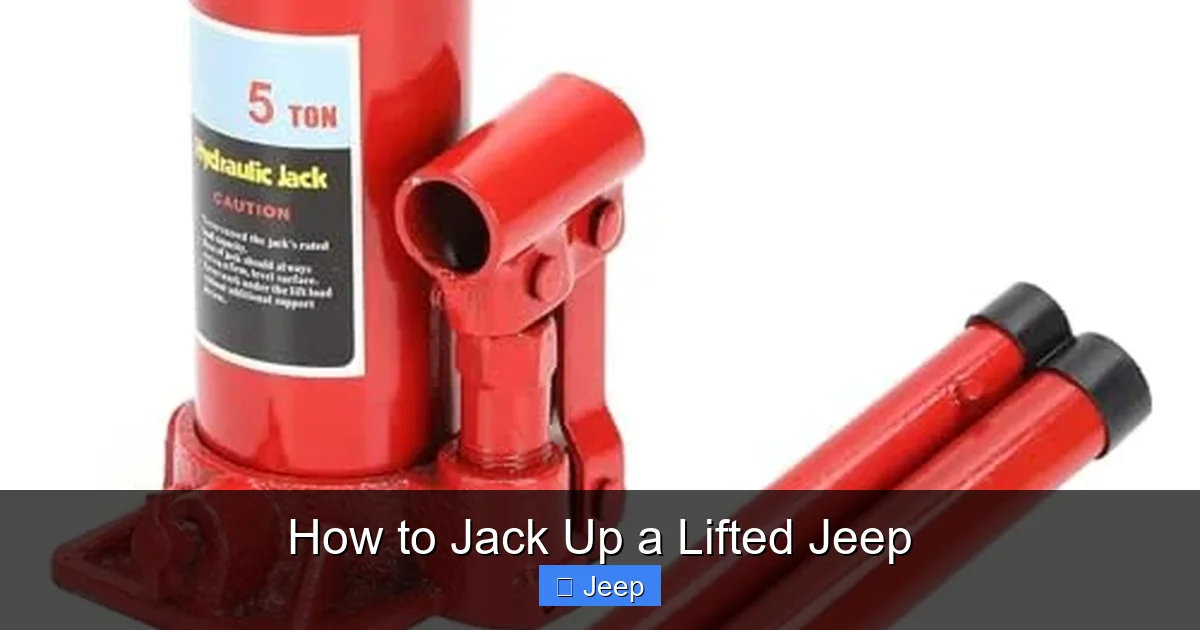
Choosing Your Weapons: Jacks and Stands for Lifted Jeeps
Using the wrong tool for the job is the #1 cause of shop accidents. For a lifted Jeep, the factory-provided scissor jack is a decorative paperweight. It’s designed for the stock ride height, has a minimal lift range, and is terrifyingly unstable. You need a proper arsenal.
Visual guide about How to Jack Up a Lifted Jeep
Image source: jeepfixes.com
Floor Jacks: Your Primary Lifting Tool
The floor jack is your workhorse. For a lifted Jeep, you need two key features: high lift capacity and a low profile with a high maximum height.
- Capacity: As stated, minimum 3 tons (6,000 lbs). For a heavily modified Jeep, step up to a 4-ton (8,000 lb) or even 5-ton model. This gives you a huge safety margin.
- Lift Range: This is critical. A stock floor jack might have a low profile of 4-5 inches. Your lifted Jeep’s frame might be 12+ inches off the ground. You need a jack that can physically reach the jacking point. Look for “low profile” jacks that still have a high maximum lift (often 18-20+ inches). Some brands offer “extra high” lift ranges specifically for lifted trucks and Jeeps.
- Saddle Design: A large, rubber-padded saddle is ideal. It provides a secure, non-slip grip on the frame rail and protects the paint. A small, pointed saddle can dent or slip.
- Recommended Types: A hydraulic floor jack is the standard. For ultimate portability and use in tight spaces (like on the trail), a Hi-Lift Jack is a classic Jeep owner tool. However, Hi-Lifts are slower, require more physical effort, and have a very different, less stable lifting motion. They are excellent for recovery but are not the preferred tool for routine maintenance in a garage. Use a floor jack for 95% of your at-home work.
Jack Stands: Your Non-Negotiable Safety Net
Let’s be unequivocal: jack stands are not optional. The hydraulic jack is a lifting device. It is not a supporting device. Jack stands are the only thing standing between you and a catastrophic failure. For lifted Jeeps, you need stands that match the new height.
- Height & Adjustability: Your stands must be tall enough to reach the frame or axle when the tire is off the ground. A set with a minimum height of 12-16 inches and a maximum of 24+ inches is a good starting point. Pin-lock or ratchet-style stands are common; ensure the locking mechanism is solid and wears well.
- Load Rating: Each stand must be rated for at least half your Jeep’s weight. If your Jeep weighs 5,000 lbs, get 3-ton (6,000 lb) stands per side. Never use a stand with a lower rating.
- Base Width: A wider base provides more stability, especially on uneven garage floors. This is crucial for a tall, top-heavy vehicle.
- Where to Place Them: This is the most critical decision. NEVER place a jack stand on the axle housing unless the manufacturer of your lift kit explicitly states it’s a designed support point. The axle is a casting, not a structural member. It can crack. The frame rails are the only universally safe location. Find the thickest, most solid portion of the rail, typically just behind the front wheel and just ahead of the rear wheel. Place the stand saddle on the top of the rail, not the side. Ensure it’s sitting flat and won’t roll or slip. If your lift kit includes “jack pad” reinforcements that bolt to the frame, use those—they are engineered for this purpose.
Other Essential Gear
Don’t forget the supporting cast. A wheel chock is a simple block of wood or rubber that prevents the opposite wheels from rolling. Use two chocks on the opposite side of the lift. A torque wrench is essential for reinstalling lug nuts to spec after a tire rotation or brake job. Finally, a good flashlight or work light is invaluable for seeing under a lifted vehicle in a dim garage.
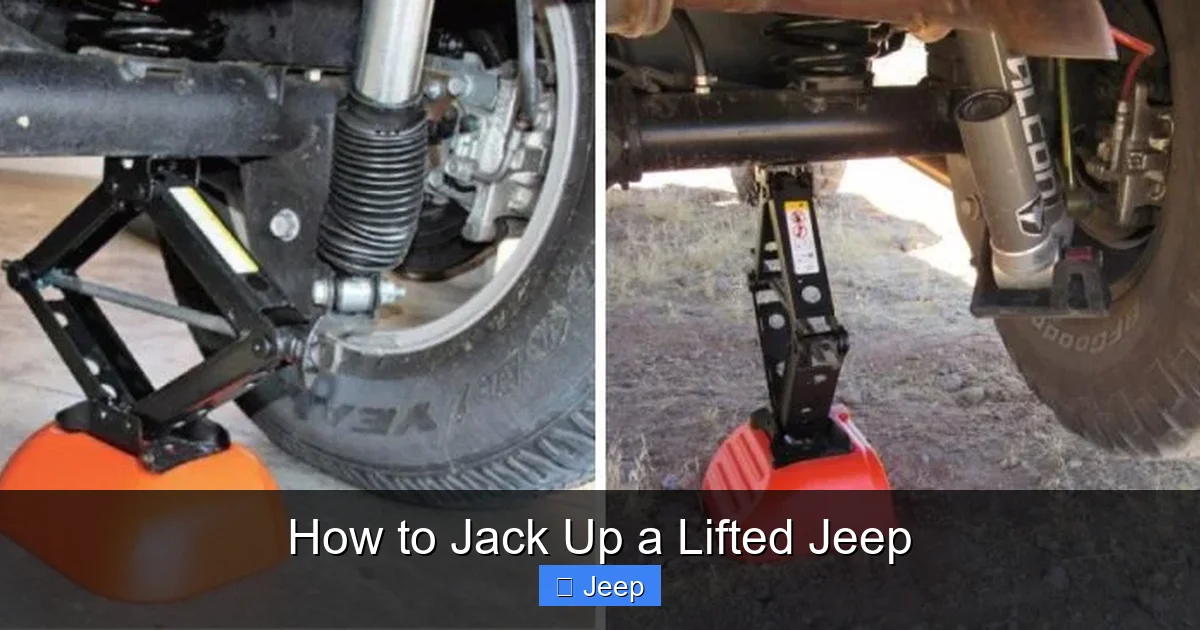
The Step-by-Step, Safety-First Jacking Procedure
Now, let’s get into the nitty-gritty. Follow these steps in order, every single time. This procedure is for a typical front or rear lift. For a full-vehicle lift (all four wheels off the ground), you’ll repeat the process on the other axle after securing the first.
Visual guide about How to Jack Up a Lifted Jeep
Image source: adventurejeep.com
Phase 1: Preparation and Positioning (The 5-Minute Setup)
Rushing this phase causes 80% of problems.
- Location, Location, Location: Park on a concrete or solid, level asphalt surface. Never lift on grass, dirt, gravel, or a slanted driveway. If your garage floor is uneven, use thick, flat plywood sheets under the jack and stands to distribute weight and create a level platform.
- Secure the Vehicle: Engage the parking brake firmly. For an automatic, shift into Park. For a manual, shift into First gear (or Reverse). This is your first mechanical lock.
- Chock the Wheels: Place wheel chocks securely against the tires on the opposite end of the vehicle from where you’re lifting. If lifting the front, chock both rear tires. If lifting the rear, chock both front tires. Use the chock’s curve to bite into the tire rubber. Give it a firm kick to seat it.
- Remove the Target Wheel/Tire: If your goal is to remove a wheel (for tire rotation, brake work, etc.), loosen the lug nuts while the vehicle is still on the ground. Break their initial torque with the vehicle’s weight pressing down. Loosen them in a star pattern, but do not remove them yet. This is a critical safety step; trying to break lug nuts with a wheel in the air can cause the vehicle to shift on the jack.
- Locate Your Jacking Point: Crawl under and identify the exact spot. Use a flashlight. It should be the reinforced factory point on the frame rail. If you have skid plates or rock rails, you may need to remove them to access the point. Have your jack ready.
Phase 2: The Lift
- Position the Jack: Roll the jack into place. Center the saddle directly over the identified jacking point. Ensure the jack’s base is perpendicular to the ground and on a solid, non-slip surface. If your jack has a swivel saddle, adjust it to sit flat on the frame rail.
- Initial Contact: Pump the jack handle slowly until the saddle makes firm, even contact with the frame. Do not lift yet. Give the Jeep a gentle nudge or rock. It should not shift or teeter. If it does, reposition the jack.
- Lift in Increments: Begin lifting. Pump the handle 3-5 times, then stop. Check the following:
- Is the jack saddle still fully seated and not slipping?
- Is the vehicle rising straight up, not tilting forward or backward?
- Listen for any creaking from the suspension or lift components.
Continue this stop-and-check rhythm until the tire is about 2-3 inches off the ground. This is your target height for removing the wheel. If you’re lifting to place jack stands for under-vehicle work, lift higher, but stop well before the suspension fully extends (the “bump stop” point). Lifting to full extension puts extreme, unnatural stress on ball joints, control arms, and the lift components themselves.
Phase 3: Securing with Jack Stands (The Most Important Step)
- Position the Stand: With the vehicle at your working height, slide the jack stand into position next to the jack. It should be directly under the same frame rail section you’re lifting on, or on the designated support point for your lift kit. The stand’s saddle should be directly under a thick section of the frame.
- Transfer the Load: This is done carefully. Slowly lower the jack just enough so the full weight of the Jeep settles onto the jack stand saddle. You should feel and hear a solid “thunk” or weight transfer. The jack will now be slightly loose. Give the Jeep a gentle push to confirm it’s stable on the stand.
- Lower the Jack Completely: Once the weight is fully on the stand, lower the jack all the way down and remove it from under the vehicle. You now have a Jeep securely supported by a jack stand. Repeat this entire process for the other side of the same axle if you need both wheels off. For a full-vehicle lift, you would then move to the other axle, but you must use two additional jack stands under the frame of the first axle before lifting the second. The rule: at any point, any section of the vehicle that could potentially fall must be supported by a stand.
Phase 4: Working and Lowering
With the vehicle secure, you can work. For tire removal, finish removing the lug nuts and the wheel. When your work is done, the process is reversed.
- Reinstall the Wheel (if applicable): Hand-tighten the lug nuts in a star pattern, then use a torque wrench to tighten them to the manufacturer’s specification (often around 100 ft-lbs for Jeeps). Do this before lifting the vehicle off the stands.
- Position the Jack: Roll the jack back under the vehicle, centered on the same jacking point.
- Lift to Remove Stand: Lift the vehicle just high enough to clear the jack stand. Give a slight pull on the stand to ensure it’s free, then remove it.
- Lower Slowly: This is where many people get careless. Never just open the jack valve all the way. Turn the release valve slowly, typically a quarter-turn at a time. Listen and watch as the vehicle descends in a smooth, controlled motion. A sudden drop can destabilize the jack or cause the vehicle to land off-center.
- Final Lowering: Once the tire touches the ground, remove the jack. Fully tighten the lug nuts in a star pattern one last time. Remove wheel chocks. You’re done.
Safety Protocols and Common (Dangerous) Mistakes
Knowing the steps is one thing. Understanding why shortcuts fail is what keeps you alive. Let’s dissect the most common and perilous errors.
Mistake 1: Using the Factory Scissor Jack or a Weak Jack
The little jack that came with your Jeep is a “emergency use only” device for changing a flat on the side of the road. It has a tiny lift range, a precarious base, and a low weight rating. On a lifted Jeep, it often can’t even reach the frame. Using it is an invitation for the jack to fail, the saddle to slip, or the vehicle to tip. It’s simply not engineered for the leverage and height required. Invest in a proper floor jack. It’s the single most important safety tool you can buy for your lifted Jeep.
Mistake 2: Placing Jack Stands on the Axle or Control Arms
This is the big one. People see a big, solid-looking axle tube and think, “That’ll hold the weight.” They are catastrophically wrong. The axle housing is designed to transmit torque and support the wheel, not to be a primary structural lifting point. It can crack or break under the concentrated point load of a jack stand saddle, especially on a lifted Jeep where the stand might be resting on a thinner section or a bend in the tube. Control arms are even worse—they are designed to pivot, not to bear the entire vehicle’s weight. The frame is the only safe bet. If your lift kit documentation suggests axle supports, it will be very specific about exact locations (usually on the tube, near the center section, and only on certain types of axles). When in doubt, stick to the frame.
Mistake 3: Lifting on Unstable or Inclined Surfaces
Physics is unforgiving. On a slope, gravity has a vector pulling your Jeep off the jack and stands. Even a slight grade (1-2 degrees) is dangerous. The jack base can slide, the stand can tip. Always, always work on a level surface. If your driveway has a slope, you must find a level spot. Using wood blocks to level the jack base is a temporary fix at best; the entire vehicle’s weight will want to find the low point. The chocks are your first line of defense against rolling, but they cannot prevent a side-to-side tip-over on a slope.
Mistake 4: Not Chocking or Not Chocking Properly
Chocks are cheap. Complacency is deadly. You must chock the wheels on the ground. One chock is not enough; use two on the same axle, positioned tightly against the tire tread. Test them by trying to rock the vehicle. There should be zero play. Remember, when you lift one axle, the other axle’s weight shifts slightly. Without chocks, the vehicle can pivot on the lifted axle and roll off the jack.
Mistake 5: Getting Under the Vehicle Without a Secondary Safety
This is the ultimate rule: Never, under any circumstances, place any part of your body under a vehicle that is supported only by a hydraulic jack. The jack could fail, the valve could leak, or you could accidentally bump the handle. The moment you’re under there, your life is in the hands of a single point of failure. The jack stand is that second, independent, mechanical safety. If you need to be completely under the vehicle (to change a differential cover, for example), you should ideally have it on all four jack stands, one at each corner, on the frame. This creates a stable, four-point support system that is incredibly unlikely to shift.
Lift Kit Considerations: How Your Specific Mods Change the Game
A “lift” is not a monolithic thing. The type of lift you have dictates the best practices.
Spacer Lifts vs. Full Suspension Lifts
A simple spacer or coil spring lift (often 1-3 inches) generally maintains the factory control arm geometry. Your frame rails are in roughly the same position relative to the ground. The jacking procedure is very similar to stock, just with more reach needed from your jack. The main concern is clearance for the jack saddle from larger tires and wheels. You may need to position the jack slightly differently or use a different saddle adapter.
A full suspension lift (long arms, control arms, etc.) that raises the Jeep 4+ inches is a different animal. The frame is now significantly higher off the ground. More importantly, the axles have been dropped relative to the frame (in most systems). This means the differentials are now closer to the ground than the frame rails. When you’re looking for a place to put a jack stand, the frame is still your target, but it’s now much higher up. You need taller stands. Furthermore, the driveshaft and exhaust are often in new positions. A long-arm lift typically requires re-gearing to compensate for larger tires. If you’ve done this, you’ve already invested significantly, and understanding the final drive ratio change is crucial for drivability, but it also means your axles and driveline are under different stresses, making safe support even more critical.
The Role of Aftermarket Skid Plates and Rock Rails
Many lifted Jeeps wear heavy-duty steel skid plates and rock rails. These are fantastic for protection but can interfere with jacking. Some skid plates have built-in, reinforced jacking points that are stronger than the factory frame points. If your skid plate manufacturer provides specific jacking instructions and points, you can often use those instead of the frame. However, you must be 100% certain they are designed as lifting points, not just protective covers. Never assume a thick steel plate is a jacking point. Rock rails almost never are. They are meant to take a scrape, not a vertical load. You will likely need to temporarily remove a skid plate section to access the factory frame rail. Keep the bolts in a safe place!
Body Lifts: A Special Warning
If your Jeep has a body lift (pucks between the body and frame), the frame rails are now even further from the ground. Your jack and stands must be tall enough to reach them. More importantly, the body is now separated from the frame by rubber blocks. This means if you mistakenly try to jack from a body seam (like a rocker panel), you will lift the body off the frame, potentially shearing brake lines, wiring harnesses, and the shift linkage. This is a silent, destructive failure. A body lift makes identifying the correct frame rail jacking points absolutely paramount. They will be the only solid metal points that move with the wheels.
Maintenance and Post-Lift Checklist
Getting the Jeep in the air is only half the job. What you do while it’s there, and how you treat it after, matters.
Torque is Law
Whenever you remove and reinstall a wheel, the lug nuts must be torqued to specification. This is not a “gut feeling” or “pretty tight.” Use a calibrated torque wrench. For most Jeeps, the spec is between 85-100 ft-lb. The sequence is a star pattern. Under-torqued nuts can allow the wheel to shift, damaging the studs or the wheel itself. Over-torquing can stretch or break studs. Do it right. This also applies to any suspension components you might work on, like track bar bolts or control arm bolts, which often have much higher torque specs and may require thread locker.
The “Wiggle Test” Before Lowering
Before you remove the jack stands, give your work a final inspection. For a wheel job, give the wheel a firm shake side-to-side and in-out. There should be no play. For suspension or brake work, try to move the component you worked on by hand. It should be solid. Then, with the stands still in place, give the entire vehicle a firm push from the bumper. It should not rock, shift, or feel loose on the stands. This final test can catch a misaligned stand or a missed bolt.
After the Lift: Re-torque and Inspect
After your first few drives following a major lift installation or any under-car work, it’s wise to re-check the torque on all critical fasteners. Suspension components can settle. A good practice is to re-torque all lug nuts and any major suspension bolts (like control arms, track bars, sway bar end links) after the first 50-100 miles. Also, take a moment to visually inspect under the vehicle. Look for any new scrapes, signs of rubbing (especially on the tires and fenders), or any components that look out of place. A lifted Jeep changes the angles of everything, and sometimes a new driveshaft vibration or a brake line that’s too close to the tire can only be discovered when the vehicle is moving. Catching these early prevents a breakdown on the trail. For ultimate peace of mind, a professional alignment is always recommended after a lift, and while you’re thinking about maintenance, don’t forget other critical systems like your windshield, which can be compromised by trail debris on a lifted vehicle.
Conclusion: Confidence Through Competence
Jacking up your lifted Jeep doesn’t have to be a nerve-wracking gamble. It becomes a routine, safe procedure through knowledge, the right equipment, and unwavering discipline. The core principles are simple but absolute: use a jack and stands rated for the job, lift only at the reinforced factory points on the frame, always use jack stands, and work on a level surface with chocked wheels. Your lifted Jeep is a capable, adventurous machine, but that capability comes with new responsibilities. Treat the process with respect, follow the steps without shortcuts, and you’ll protect your significant investment in that lift kit and, more importantly, ensure you’re around to enjoy it for years to come. The freedom of the trail starts with safety in your own driveway. Now, go get that oil changed or those brakes serviced with the confidence that comes from doing it the right way.
Frequently Asked Questions
Can I use my Jeep’s factory scissor jack on a lifted Wrangler?
No. The factory scissor jack is designed for the stock ride height and has a very limited lift range. It likely cannot physically reach the frame on a lifted Jeep and is dangerously unstable. It is for emergency roadside tire changes only, not for maintenance.
What is the single most important safety rule when jacking up a Jeep?
Never, ever place any part of your body under a vehicle supported only by a hydraulic jack. The jack stands are your mandatory, secondary safety support. The jack is for lifting; the stands are for holding.
My lift kit is 4 inches. Do I need special taller jack stands?
Almost certainly, yes. A 4-inch lift raises the frame significantly. Your stock jack stands (often 9-12 inches tall) will not reach. You need stands with a minimum height that matches your new frame height, typically 16-24 inches, with enough adjustment to get a solid, stable fit.
Can I jack up my lifted Jeep by the axle housing?
Generally, no. The axle housing is not a designed structural lifting point. It can crack under the point load of a jack or jack stand saddle. The only universally safe location is the reinforced frame rails. Consult your lift kit manual, as some systems may provide specific, reinforced axle support points, but the frame is always preferred.
How can I be sure my Jeep is stable on the jack stands before I crawl under?
After transferring the load to the stands and removing the jack, give the vehicle a firm push from the bumper. It should not rock, shift, or feel like it’s settling. Then, check that each stand saddle is fully seated on a solid, flat section of the frame and that the stand’s pin or ratchet is locked at the same height on both sides.
My lifted Jeep sits uneven on the stands. What’s wrong?
Stop immediately. An uneven lift means one stand is higher than the other, putting a torsional stress on the frame and likely causing the vehicle to want to roll off the lower stand. Lower the vehicle, reposition both stands on level ground, and ensure they are set to the exact same height on solid, level sections of the frame.


