
How to Restore Jeep Fenders
Contents
- 1 Key Takeaways
- 2 📑 Table of Contents
- 3 Why Bother? The Joy and Value of Restoring Your Jeep Fenders
- 4 Phase 1: The Critical Assessment – Know What You’re Dealing With
- 5 Phase 2: Removal – Taking the Fender Off the Jeep
- 6 Phase 3: Repair – Fixing Rust, Dents, and Cracks
- 7 Phase 4: Surface Preparation – The Foundation of a Perfect Finish
- 8 Phase 5: Priming and Painting – Bringing Back the Color
- 9 Phase 6: Reassembly and Final Installation
- 10 Conclusion: Pride in Your Work and Long-Term Care
- 11 Frequently Asked Questions
Restoring your Jeep’s fenders is a highly rewarding DIY project that saves significant money compared to replacement. This comprehensive guide walks you through every critical phase, from diagnosing damage and removing parts to executing flawless paint jobs. You’ll learn professional techniques for rust treatment, dent repair, and surface preparation that deliver durable, showroom-quality results. With patience and the right tools, you can bring your Jeep’s iconic fenders back to life and enhance its value and appearance for years to come.
Key Takeaways
- Thorough Assessment is Non-Negotiable: Never skip the inspection phase. Identify all rust, cracks, and previous repair attempts to plan the correct restoration strategy and avoid surprises mid-project.
- Removal Requires Organization: Label and bag all bolts, clips, and hardware. Take photos before disconnecting anything, especially wiring for marker lights, to ensure a smooth reassembly process.
- Rust is the #1 Enemy: Complete rust removal and proper conversion treatment are the most important steps for a lasting repair. Any remaining rust will continue to spread underneath new paint.
- Surface Prep is 80% of the Paint Job: The final finish depends almost entirely on the sanding and priming work. Skipping grits or rushing this process guarantees a poor, short-lived result.
- Test Fit Before Paint: Always dry-fit the fender after all repairs and before final paint. This catches any alignment issues with bolts, brackets, or the hood, saving you from costly rework.
- Patience Between Coats is Critical: Follow the paint and clear coat manufacturer’s flash-off times religiously. Rushing this leads to solvent pop, runs, and a soft finish that scratches easily.
- Consider the Total Cost vs. New: While DIY is cheaper, factor in your time, tools, and materials. For heavily damaged or complex fenders, a professional might be more economical. Researching how much does it cost to paint a Jeep professionally can provide a useful benchmark.
📑 Table of Contents
- Why Bother? The Joy and Value of Restoring Your Jeep Fenders
- Phase 1: The Critical Assessment – Know What You’re Dealing With
- Phase 2: Removal – Taking the Fender Off the Jeep
- Phase 3: Repair – Fixing Rust, Dents, and Cracks
- Phase 4: Surface Preparation – The Foundation of a Perfect Finish
- Phase 5: Priming and Painting – Bringing Back the Color
- Phase 6: Reassembly and Final Installation
- Conclusion: Pride in Your Work and Long-Term Care
Why Bother? The Joy and Value of Restoring Your Jeep Fenders
Let’s be honest: your Jeep’s fenders take a beating. They’re the first line of defense against rocks, mud, tree branches, and parking lot dings. Over time, that battle leaves its mark—rust spots, dents, cracked mounting points, and faded, chalky paint. It’s easy to look at a set of battered fenders and think, “Just replace them.” But hold on. There is immense satisfaction and financial sense in restoring them yourself. A proper fender restoration isn’t just about making something look pretty; it’s about preserving a piece of your vehicle’s history, understanding its construction, and earning a deep connection to your rig. When you finish, you won’t just have a nice-looking fender; you’ll have the knowledge and confidence that you conquered the rust and won. This guide is your manual to that victory. We’ll break down the intimidating process into clear, manageable steps, turning you from a hesitant owner into a capable restorer.
Phase 1: The Critical Assessment – Know What You’re Dealing With
Before you buy a single tool or part, you must become a detective. Your mission is to uncover every flaw hidden beneath the surface. Park your Jeep on a flat surface with good lighting. Grab a bright flashlight and run your hands over every square inch of the fender. You’re looking for three main enemies: rust, structural damage, and previous hack jobs.

Visual guide about How to Restore Jeep Fenders
Image source: overkilloffroad.net
Diagnosing Rust: The Silent Killer
Rust is your primary adversary. It’s rarely just a surface blemish. Use a sharp pick or a razor blade to gently probe any bubbled or discolored paint. If the metal flakes away or the probe sinks easily into the metal, you have active, penetrating rust. Mark these areas with a silver sharpie. Pay special attention to the inner fender well, behind the fender liner, and where the fender bolts to the body. These are moisture traps. Also, inspect the lower rear corner by the rear wheel—this is a classic rust spot on many Jeep models due to debris buildup. If the rust is merely surface-level (a thin, orange layer), it’s manageable. If it’s pitted and creating holes, your repair will be more involved, likely requiring filler or even welding.
Checking for Cracks and Structural Issues
Jeep fenders, especially older steel ones, are susceptible to cracking at the mounting holes or along the bend where they meet the front fascia. Flex the fender gently. Do you hear any creaking or see movement at the bolt holes? Cracks here will propagate over time and need to be addressed with welding or epoxy reinforcement. Also, check the condition of the welded-on nuts inside the fender for the hood hinge and turn signal. If these are rusted solid or broken off, you have a major repair on your hands that may require drilling and tapping new threads or using oversized nutserts.
Identifying Previous Repairs
Look for areas of thick, globby Bondo or body filler. Tap the fender with your knuckle. A solid metal sound is good. A dull, plastic-like thud indicates thick filler. This is a red flag. Often, previous owners tried to cover rust with filler, which inevitably fails as the rust continues to eat from underneath. You must remove all this old filler to get to the root of the problem. It’s more work now, but it’s the only way to a permanent fix.
Phase 2: Removal – Taking the Fender Off the Jeep
With your damage map in hand, it’s time to free the fender. This process varies slightly by Jeep model (YJ, TJ, JK, JL, etc.), but the principles are the same. Always start by disconnecting the negative battery terminal. This is a non-negotiable safety step to prevent any electrical shorts, especially since you’ll be working near wiring for marker lights and turn signals.
Visual guide about How to Restore Jeep Fenders
Image source: cartireinflator.com
Step-by-Step Removal Process
First, remove the fender liner. These plastic liners are held on by numerous plastic clips and sometimes screws. Be gentle; the plastic becomes brittle with age. Use a trim removal tool or a flathead screwdriver wrapped in tape to pry the clips out without breaking them. If they break, replacements are cheap and available at any auto parts store. Once the liner is off, you get your first real look at the inner fender and the backside of the problem areas.
Next, unbolt the fender. There are typically 4-6 bolts holding it to the frame and body. They are often in tight, awkward spots. A ratchet with extensions and universal joints will be your best friend here. As you remove each bolt, place it in a labeled bag or container (e.g., “Front Fender Lower Bolt”). Take a photo of the fender fully attached before removal. This is your reference for any wiring harnesses or ground straps you might miss.
Now, carefully work the fender free. It may be stuck due to years of paint bonding or corrosion. Do not use excessive force that could bend the fender or the nearby body panel. A gentle tap with a rubber mallet on the fender’s edges can help break it loose. Once loose, lift it straight up and away. Be mindful of the wiring harness for the front marker light; it will have a connector you must unplug.
Phase 3: Repair – Fixing Rust, Dents, and Cracks
This is the heart of the restoration. Your fender is now off the Jeep and on your workbench. Time to transform it.
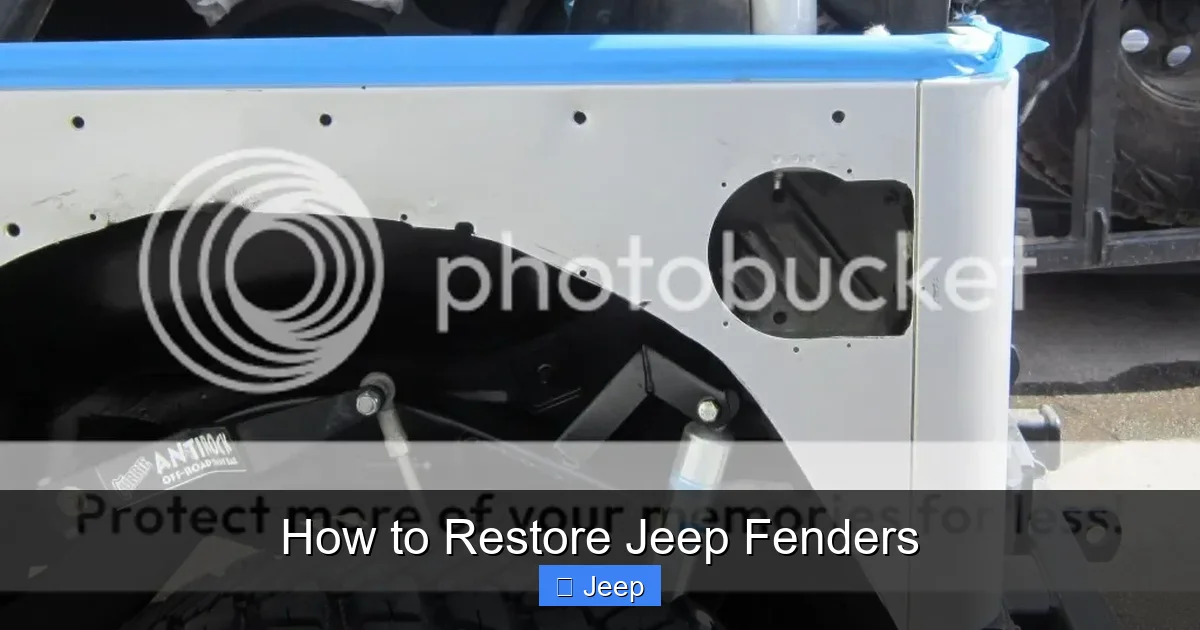
Visual guide about How to Restore Jeep Fenders
Image source: i722.photobucket.com
Rust Removal: Going to War with Wire Wheels and Grinders
Your goal here is to get to 100% clean, bare metal. For surface rust, a wire wheel on an angle grinder is incredibly effective. Wear safety glasses, a respirator, and gloves. The sparks and dust are no joke. Work systematically, moving the wheel in one direction to avoid swirling marks. For heavier, pitted rust, you’ll need to grind it out completely. This means cutting away the rusted metal until you hit solid, shiny metal all around the affected area. This often creates a hole or a very thin spot. That’s okay; we’ll fix it next. For small holes, you can use an epoxy-based metal filler or fiberglass-reinforced filler. For larger holes or areas where structural integrity is compromised (like around bolt holes), welding is the correct repair. If you don’t weld, seek a local shop for this critical step. A poorly repaired structural area is dangerous.
Dent and Gap Repair
For minor dents and creases, you can often work them out from the backside using a hammer and dolly. This is a skill that takes practice. Place the dolly behind the dent and gently tap the high spots with a hammer. For larger dents, a stud welder and puller can be used, but this is an advanced technique. Sometimes, the best approach is to simply grind the area smooth and fill it with quality body filler. Remember, filler is for smoothing, not for building thickness. If you need to rebuild a large area, welding in new metal is the professional way.
Filler Application and Shaping
Once all rust is gone and the surface is sound, you can apply filler. Mix it according to the instructions—usually a 50/50 ratio by volume. Apply a thin, firm layer over the prepared area. Let it cure fully (don’t rush this). Then, sand it with 80-grit sandpaper on a sanding block to shape it roughly. Apply a second, thinner coat if needed to perfect the contour. The key is to sand it flush with the surrounding metal. You should not be able to feel a step where the filler meets the metal. Once satisfied, move to 120-grit to remove the 80-grit scratches. The surface should feel uniformly smooth to the touch.
Phase 4: Surface Preparation – The Foundation of a Perfect Finish
I cannot stress this enough: your paint job will only be as good as the preparation. This phase is tedious but absolutely critical. Rushing here guarantees orange peel, fish eyes, and premature paint failure.
The Sanding Ladder: Grit by Grit to Smoothness
After filler work, your entire fender needs to be sanded to a uniform, dull finish. Start with 180-grit sandpaper on a dual-action (DA) sander. This removes the last of the filler highs and creates a consistent “tooth” for the primer to grip. Sand the entire fender, including the original paint that wasn’t filled. Wipe it clean with a tack cloth. Then, move to 220-grit. This finer grit removes the 180 scratches and further smooths the surface. Finally, go to 320-grit for a silky-smooth feel. After 320, wipe again thoroughly. The surface should have no glossy spots, only a uniform, satin/matte appearance. Any shiny areas mean you’ve missed a spot and the primer won’t adhere properly there.
Cleaning: The Invisible Enemy
All sanding dust must be removed. Use a dedicated tack cloth or a high-quality microfiber towel with a dedicated surface cleaner or denatured alcohol. Wipe in one direction, folding the cloth frequently to a clean section. Do not use household cleaners or wax-based products. The goal is a surface free of any contaminants—dust, grease, oil, silicone. Even a fingerprint can cause a defect in the paint. After wiping, let the surface air dry completely. Some pros use a final wipe with a sanding dust remover or anti-static wipe to ensure every last particle is gone.
Phase 5: Priming and Painting – Bringing Back the Color
Now for the fun part. But remember, the prep work you did determines 90% of this stage’s success.
Priming: Sealing the Deal
Choose a primer appropriate for your repair. For bare metal and filler, an etching primer (often called self-etching primer) is excellent as it chemically bonds to the metal. For areas over existing, well-adhered paint, a high-build urethane primer is great for filling minor imperfections. Apply in light, even coats. Hold the spray gun or can about 6-8 inches from the surface and use a sweeping, overlapping motion. Two to three medium coats are better than one heavy, dripping coat. Allow proper flash-off time between coats as per the product instructions. After the final primer coat, let it cure fully (often 24 hours). Then, wet-sand it with 600-grit sandpaper and water to remove any dust nibs and create a super-smooth base. Rinse and dry completely.
Basecoat (Color) Application
This is where your Jeep’s color returns. If you’re matching factory paint, you’ll need to get the exact paint code from your door jamb sticker and have it mixed at an auto paint store. For custom colors, you have more freedom. Again, technique is key. Apply 2-3 light, even coats of basecoat. The goal is to achieve full, uniform coverage without runs. Watch the “wet edge” and maintain consistent overlap. Let each coat flash off (become tacky but not dry) before applying the next. After the final basecoat, follow the paint’s recommended recoat window before moving to clear coat. This can be as short as 30 minutes or overnight—read the label!
Clear Coating for Protection and Depth
The clear coat is your fender’s armor and gives it that deep, glossy shine. Use a high-quality automotive clear coat. Apply 2-3 coats, following the same light, even technique. The final coat should be allowed to “level” and cure. Do not touch it. The clear coat remains soft for hours and easily marred. Let the fender cure in a clean, dust-free environment for at least 24-48 hours before handling. For a truly show-quality finish, you’ll wet-sand the clear with 1500-grit, then compound and polish it to remove any orange peel or dust. This is an advanced step but makes a dramatic difference.
Phase 6: Reassembly and Final Installation
Your fender is now a beautifully restored piece of art. The final steps are just as important to protect your work.
Hardware and Sealants
Before reinstalling, inspect all the original bolts. If they are rusted or damaged, replace them. It’s cheap insurance. Also, replace any old, cracked plastic fender liner clips. Apply a thin, even bead of automotive-grade seam sealer or butyl tape to the back of the fender where it meets the body and the frame. This prevents water and debris from getting behind the fender and starting new rust. Reinstall the fender liner first, then the fender itself. Hand-tighten all bolts first to ensure proper alignment, then torque them to the manufacturer’s specification (found in a service manual) in a criss-cross pattern. This prevents warping the fender.
Reconnecting and Final Checks
Reconnect the wiring harness for the marker light and turn signal. Double-check that the light works. Reconnect the negative battery terminal. Now, check the fender’s fit. Does it sit flush with the hood and the front bumper? Are the gaps even on all sides? If not, you may need to loosen bolts and gently adjust. Once perfect, fully torque all bolts. Finally, apply a coat of high-quality wax or paint sealant to the entire fender. This adds a sacrificial layer against UV rays and road grime. Consider applying a stone chip guard (a clear, flexible film) to the leading edge and lower rear corner to protect against future damage.
Conclusion: Pride in Your Work and Long-Term Care
You did it. That stack of rusted, dented metal is now a crisp, clean fender that looks like it just left the factory. The process of restoring your Jeep fenders is more than a repair; it’s an investment in your vehicle’s future and a testament to your capability as a DIYer. You’ve learned to diagnose hidden problems, wield tools with purpose, and appreciate the nuance of a perfect paint job. To keep your hard work looking its best, make fender inspection part of your regular Jeep maintenance routine. Wash it regularly, especially after off-roading in mud or salt. Address any new stone chips or scratches immediately with touch-up paint to prevent rust from gaining a foothold again. Your restored fenders will not only make your Jeep look fantastic but will also stand as a durable shield for years of adventure. Every time you look at them, you’ll remember the skill and patience you applied. That’s the true reward of the project.
Frequently Asked Questions
How much does it cost to restore Jeep fenders DIY?
The cost varies based on damage severity and your existing tools. For basic rust repair and paint, expect $150-$400 for materials (sandpaper, primer, paint, clear coat, filler). Major rust requiring welding or professional blasting can push costs higher. This is typically far less than buying new fenders or paying a shop for full restoration.
How long does a full fender restoration take?
For a first-timer, allocate a full weekend for removal, repair, and painting. The actual hands-on work might be 8-12 hours, but you must account for drying/curing times between steps (primer, paint, clear coat), which can add 24-72 hours of waiting. With experience, you can complete the active work in a single day.
What are the most essential tools I need?
You’ll need an angle grinder with a wire wheel and cutting disc, a DA sander with sandpaper (80-320 grit), a set of socket wrenches and extensions, safety gear (respirator, glasses, gloves), body filler and spreaders, and a place to paint (a garage with good ventilation or a paint booth). Spray guns or high-quality aerosol cans are needed for primer and paint.
Can I restore fenders with significant rust holes without welding?
For small holes (dime-sized), epoxy-based metal fillers or fiberglass-reinforced fillers can work if the surrounding metal is solid. For larger holes or those near critical mounting points, welding in new metal patch panels is the only structurally sound repair. Ignoring this can lead to the fender failing and causing damage to other parts.
How do I match the factory paint color perfectly?
Locate your Jeep’s paint code on the driver’s side door jamb sticker. It’s usually a 2-3 letter/number code (e.g., “B5”, “JK3”). Take this code to a reputable auto paint supplier. They will mix a basecoat that matches your vehicle’s original formula. For best results, spray a test panel and compare it in different lighting before committing to the fender.
Should I just pay a professional to restore my fenders?
Consider a professional if you lack time, a proper workspace, confidence in using tools like grinders and spray guns, or if the rust is extremely severe (e.g., structural rust). For mild to moderate damage, DIY is very achievable and rewarding. If you’re on the fence, get quotes from a few body shops and compare to your estimated material cost plus the value of your time and learning.


