
How to Disable Air Suspension on a Jeep Grand Cherokee
Disabling the air suspension on your Jeep Grand Cherokee can save significant money on expensive repairs but involves important trade-offs. The two primary methods are a temporary manual disable (pulling fuses/unplugging the compressor) and a permanent conversion to traditional coil springs. A permanent conversion is a major mechanical project that affects ride quality, warranty, and resale value, requiring careful consideration and often professional installation.
Let’s be real: the air suspension system on your Jeep Grand Cherokee is a marvel of modern engineering when it’s working perfectly. It gives you a smooth, car-like ride on the highway and can lift the vehicle for serious off-road adventures. But for many owners, especially as the years and miles pile up, that same system becomes a source of dread. The dreaded “air suspension fault” message, a sagging rear end, or a compressor that sounds like a dying whale are all too common. The quotes from the dealership for a new compressor or air strut can easily hit four figures, and that’s before labor. This reality leads many Grand Cherokee owners to seriously consider a radical step: disabling the air suspension system altogether. But how do you do it, and more importantly, should you? This comprehensive guide will walk you through everything you need to know about how to disable air suspension on a Jeep Grand Cherokee, from the simple temporary fix to the full, permanent coil spring conversion.
Key Takeaways
- The air suspension system is complex: It uses air springs, a compressor, height sensors, and a computer to automatically adjust ride height and quality, making repairs costly.
- Common reasons for disabling: High repair costs, unreliability as the vehicle ages, desire for a simpler off-road platform, and avoiding expensive air component replacements.
- Two main approaches exist: A temporary, reversible manual disable for diagnostics or towing, and a permanent, irreversible conversion to coil spring suspension.
- Permanent conversion is a major project: It requires purchasing a complete conversion kit, significant mechanical labor, a professional alignment, and TPMS recalibration.
- Consider the consequences: Disabling voids the suspension warranty, permanently alters ride and handling characteristics, and can negatively impact resale value.
📑 Table of Contents
Understanding Your Jeep’s Air Suspension System
Before you start unplugging things, it’s crucial to understand what you’re dealing with. The Quadra-Lift or Air Ride suspension (depending on your model year and trim) is not just a fancy set of airbags. It’s a fully integrated system. At its heart are the air springs (often called air struts in the front and air bags in the rear), which replace traditional coil springs. These are inflated and deflated by a powerful electric air compressor, usually mounted in the engine bay or under the vehicle. This compressor connects to the air springs via airline tubing.
The Brains of the Operation
The system is controlled by a dedicated module, often called the ” Suspension Control Module” or SCM. This computer constantly monitors data from height sensors mounted on each corner of the vehicle. It knows exactly how high the vehicle is supposed to be at any given speed and driving mode (like “Normal,” “Off-Road,” or “Aero”). If a sensor detects the vehicle is lower than it should be, the SCM commands the compressor to turn on and fill the appropriate air spring until the correct height is restored. This all happens seamlessly in the background. The system also works with the vehicle’s stability control and braking systems, which is a critical point to remember.
Why Disable Air Suspension? The Pros and Cons
This isn’t a decision to make lightly. You’re fundamentally changing how your vehicle rides, handles, and performs. Let’s break down the compelling reasons to do it, and the significant downsides you must accept.

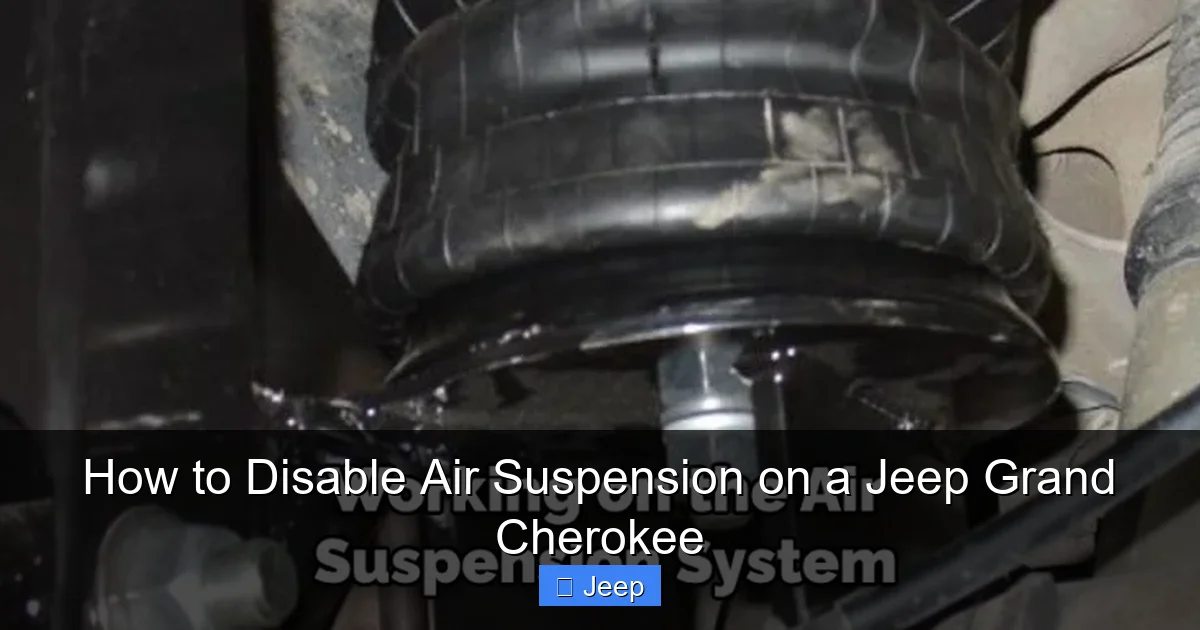
Visual guide about How to Disable Air Suspension on a Jeep Grand Cherokee
Image source: jeepfixes.com
The Alluring Pros: Cost and Simplicity
The number one driver for disabling air suspension is cost avoidance. A single failed air strut can cost $800-$1,500+ to replace at a shop. The air compressor itself is another $1,000-$2,000 part. A full set of four air springs is a mortgage payment. By converting to coil springs, you eliminate this entire category of expensive, wear-and-tear components. Coil springs, when they do eventually fail, are a fraction of the cost and are a much simpler mechanical swap.
The second major pro is reliability and simplicity. Air systems have many potential failure points: leaks in the air bag, cracked airline fittings, a failed compressor, faulty height sensors, or bad wiring. Once you convert to coils, you remove all those points of failure. There’s no compressor to burn out, no airlines to leak, and no sensors to fail. For a vehicle used for daily driving, towing, or as a rugged workhorse, this “set it and forget it” simplicity is a huge benefit. It also makes the vehicle much more straightforward for off-road modifications, as you’re not dealing with air lines that can be snagged on rocks.
The Significant Cons: Ride, Warranty, and Value
The most immediate con is the change in ride quality and handling. The air system is tuned for a specific, compliant ride. A coil spring conversion, even with high-quality springs, will almost always feel firmer and less isolated. You lose the automatic load-leveling capability, meaning the rear end will sag when heavily loaded with cargo or a trailer. The vehicle will also no longer automatically lower at high speed for improved aerodynamics. Handling characteristics will change, and the system’s integration with stability control may be altered, which can trigger warning lights or affect performance in slippery conditions.
Next is the warranty and factory support. Any modification of this magnitude will instantly void the warranty on the suspension system and likely any related components. Furthermore, Jeep (Stellantis) will not provide any technical support for a vehicle with a modified suspension. You are on your own for any future diagnostics or issues that might be remotely related.
Finally, there’s resale value. While some knowledgeable buyers may see a converted suspension as a plus (no future air-suspension bills), the vast majority of private buyers and all dealerships will see it as a major red flag. It’s a permanent modification that deviates from the original factory specification. This will almost certainly lower your vehicle’s trade-in value and make it harder to sell. You are drastically shrinking your potential buyer pool to only those who specifically want a non-air Grand Cherokee. If you’re curious about the financial landscape, you can research how much a standard 2014 Jeep Grand Cherokee is worth to understand baseline values before modifications.
Method 1: The Manual Disable (Temporary Fix)
This method is not a conversion. It’s a way to deactivate the system without removing any parts. It’s useful for a few specific scenarios: to diagnose if a noise or problem is coming from the air system, to safely tow the vehicle with all four wheels on the ground (as the air system can be damaged by towing), or as a very temporary measure to get a vehicle with a failed compressor or air bag home.

Visual guide about How to Disable Air Suspension on a Jeep Grand Cherokee
Image source: jeepfixes.com
How to Perform a Manual Disable
The process is relatively simple but must be done correctly. WARNING: This will cause the vehicle to sit at its default (usually lower) height and will trigger multiple warning lights on the dash (Suspension, ESP/BAS, often the check engine light). This is normal. The vehicle is still fully drivable, but you have manually turned off a major safety system.
- Locate the Fuse Box: Open the hood and find the main power distribution center (PDC). It’s a black box near the battery. Remove the cover. You’ll need your owner’s manual to identify the correct fuse. Look for fuses labeled “AIR SUSPENSION,” “COMPRESSOR,” “SUSPENSION,” or “QUADRA-LIFT.” Common fuse locations are F42, F43, or F50 in the engine bay PDC, but this varies by year. Do not guess. Pulling the wrong fuse can disable critical systems like the fuel pump or ABS.
- Pull the Compressor Fuse: Using a fuse puller or needle-nose pliers, carefully remove the identified fuse. This stops power to the air compressor, preventing it from running.
- Unplug the Compressor (Optional but Recommended): For a more complete disable, locate the air compressor (usually near the front of the engine, on the driver’s side). Unplug its main electrical connector. This prevents any stray voltage from potentially activating it.
- Secure the Vehicle: If the vehicle is already sagging, you must support it with jack stands under the frame rails before getting underneath. Never rely on the air system to hold the vehicle up.
To re-enable the system, simply reinstall the fuse and reconnect the compressor plug. The vehicle’s computer will run a self-check cycle the next time you start it, and the system should begin functioning again within a few minutes of driving. The warning lights should go out.
Method 2: The Permanent Coil Spring Conversion
This is the “nuclear option” and what most people mean when they ask about disabling air suspension. It involves permanently removing all air suspension components and installing a complete set of coil springs and, usually, new shock absorbers designed for a non-air application. This is a significant mechanical project that should only be attempted by those with advanced DIY skills or, more wisely, handed off to a reputable independent mechanic or suspension shop.
Visual guide about How to Disable Air Suspension on a Jeep Grand Cherokee
Image source: jeepfixes.com
What You’ll Need: The Conversion Kit
You cannot just bolt on random coil springs. You need a kit specifically designed for your specific Jeep Grand Cherokee model year and drivetrain (2WD vs. 4WD). These kits are sold by several reputable aftermarket manufacturers like Eibach, Rough Country, and OME (Old Man Emu). A complete kit typically includes:
- Front Coil Springs: Designed to fit the front strut assembly.
- Rear Coil Springs: Designed to fit the rear independent suspension or solid axle, depending on your model.
- New Rear Shock Absorbers: The factory air shocks are not compatible with coils. You must purchase new conventional shocks.
- Front Shock Absorbers (Optional but Recommended): While some kits reuse the factory front air strut’s shock, it’s often best to replace them with new conventional shocks or struts designed for the kit.
- Hardware & Brackets: Some kits require small brackets or plates to mount the new springs correctly, especially in the rear.
Critical Note: You must also source a set of factory non-air suspension rear sway bar end links. The air-suspension links are a different length and will not work with coils. This is a commonly overlooked part that will cause immediate failure if missed.
Step-by-Step Guide to a Permanent Conversion
This is a general overview. Specific steps, torque specs, and safety procedures vary by model year. Always refer to the instructions provided with your specific conversion kit and a factory service manual for your vehicle.
Phase 1: Removal of Air Components
This is the most involved part. You must safely remove and discard all parts of the air system.
- Safety First: Disconnect the negative battery terminal. Safely raise and support the entire vehicle on jack stands under the frame rails. Remove all four wheels.
- Drain the Air System: With the battery disconnected, the system will slowly bleed off. You can speed this up by carefully unscrewing the airline fittings on the air springs (have a rag ready for a small puff of air). Do not cut lines while pressurized.
- Remove Air Springs & Struts:
- Front: Unbolt the top of the air strut from the strut tower (inside the hood). Unbolt the bottom from the steering knuckle. Carefully lower and remove the entire strut assembly. You will need to disassemble this to reuse the factory top mount (or use the kit’s mount) and install the new coil spring and new front shock/strut.
- Rear: This is often easier. Support the rear axle with jack stands. Unbolt the air bag from the axle and from the frame/chassis mount. Unplug the height sensor and airline. Remove the air bag. You will then install the new rear coil spring into the existing location on the axle and chassis, often using new brackets from the kit.
- Remove Compressor & Dryer: Unplug the compressor and remove it from its mount. Remove the air dryer unit (usually located near the compressor). Remove all airline tubing from the vehicle. This entire “air train” is now scrap.
- Remove Height Sensors: Unplug and remove the height sensors from each corner. These are no longer needed. Their mounting holes may need to be plugged or left empty.
- Address the Sway Bar Links: Remove the factory air-suspension rear sway bar end links and install the new, correct-length links from your kit or sourced separately.
Phase 2: Installation of Coil Springs & Shocks
- Front Assembly: Following your kit’s instructions, compress the new front coil spring using spring compressors, and install it onto the strut assembly along with the new shock. Reinstall the entire front strut assembly by bolting the bottom to the knuckle and the top to the strut tower. Torque all bolts to the factory specification.
- Rear Assembly: Position the new rear coil spring between the axle and chassis mount points. Use the provided brackets or hardware to secure it. Install the new rear shock absorber. Ensure it is mounted correctly and not binding.
- Remove All Air System Debris: Double-check that all air lines, the compressor, dryer, and sensors are completely removed from the vehicle. Zip-tie any loose wiring harnesses out of the way.
Phase 3: Final Steps and Critical Recalibrations
- Reinstall Wheels and Lower Vehicle: Torque lug nuts to spec. Carefully lower the vehicle.
- TPMS Recalibration (MANDATORY): The Tire Pressure Monitoring System (TPMS) on these Jeeps uses the air suspension’s height data as part of its validation. With the system gone, you must perform a TPMS sensor relearn procedure. This usually involves a drive cycle (driving at specific speeds for a set time) or using a scan tool. Consult your owner’s manual or a professional. Failure to do this will trigger a constant TPMS warning light.
- Alignment (MANDATORY): The removal and reinstallation of suspension components will change your alignment angles. You must take the vehicle to a professional alignment shop immediately after the conversion. An improper alignment will cause rapid tire wear and poor handling.
- Clear Fault Codes: Connect an OBD2 scanner that can access the Suspension Control Module. Clear all stored fault codes. The module will still be there, but it won’t have any sensors to talk to. Some scanners can also disable the module’s monitoring functions to prevent warning lights, but this is not always possible or legal in all regions.
After the Conversion: What to Expect and Maintain
Your Grand Cherokee will now sit at a permanently lower height compared to its maximum “Off-Road” mode, but likely similar to its normal “Normal” mode. The ride will be noticeably firmer. You will no longer have automatic load-leveling, so a heavy rear load will cause the back to sag. You must be mindful of this for towing or carrying cargo.
Maintenance is now drastically simpler. There is no air system to service. Your new maintenance items are standard: periodic inspection of coil springs for cracks, regular shock absorber inspections for leaks, and routine tire rotations and alignments. If you’re looking to save on other maintenance, learning a skill like how to reset your oil change light can be another easy way to keep your ownership costs down after this big job.
The Financial and Practical Reality
A professional coil spring conversion, including all parts and labor, will typically cost between $1,500 and $3,000+ depending on your location and the quality of the parts. A DIY job with quality parts can be done for $800-$1,500 in parts alone. Compare this to a potential $3,000-$5,000+ repair bill for a failed air system. The math often makes sense for high-mileage vehicles you plan to keep long-term. However, you must factor in the permanent loss of the original system’s capabilities and the hit to resale value. When you eventually go to sell, be prepared for a lower offer and a longer wait for the right buyer who understands and appreciates the modification.
Frequently Asked Questions
Will disabling my Grand Cherokee’s air suspension turn off important safety features?
Yes, it will. The system is integrated with Electronic Stability Program (ESP) and Traction Control. Disabling it will trigger permanent warning lights for the suspension system, ESP/BAS, and potentially others. While the vehicle remains drivable, these active safety systems may not function as intended, especially in slippery conditions.
How much does a permanent coil spring conversion cost?
For a professional installation with quality aftermarket parts, expect to pay between $1,500 and $3,000. A DIY project using purchased parts can range from $800 to $1,500, but requires significant mechanical skill, specialized tools like spring compressors, and a subsequent professional alignment.
Can I disable the air suspension myself by just pulling a fuse?
Yes, you can perform a temporary manual disable by locating and removing the specific fuse for the air compressor in the engine bay fuse box. However, this is only a temporary diagnostic or towing measure. The vehicle will sit lower, throw multiple warning lights, and the system will not function at all. The fuse must be replaced to restore operation.
How long does a full conversion to coil springs take?
For a professional shop with a lift and experience, it typically takes one full day (8-10 hours). For a competent DIYer working in a garage with the proper tools, it can take a full weekend (12-16 hours), especially if you are learning as you go. The removal of the old air components is the most time-consuming part.
What happens to the TPMS light after I remove the air suspension?
The TPMS light will almost certainly illuminate and stay on. The system uses data from the air suspension’s height sensors as part of its validation. After conversion, you must perform a specific TPMS sensor relearn procedure, which often requires a drive cycle or a scan tool. Without this, the light will remain on as a constant nuisance.
Will a converted Grand Cherokee be harder to sell?
Yes, it will significantly narrow your pool of potential buyers. While some enthusiasts seeking a simpler, more reliable platform may see it as a positive, the vast majority of used car shoppers and all dealerships will view it as a major modification that deviates from factory specs. This will lower your resale value and increase the time it takes to sell the vehicle. You’ll need to be prepared to explain the modification and its benefits to educated buyers.


