
How to Install a Front License Plate on Tesla Model 3
Contents
- 1 Key Takeaways
- 2 📑 Table of Contents
- 3 Why Install a Front License Plate on Your Tesla Model 3?
- 4 Understanding Your Model 3’s Front End Design
- 5 Gathering Your Tools and Parts
- 6 Step-by-Step Installation Guide
- 7 Alternative Methods and Common Pitfalls
- 8 Sensor Considerations and Post-Installation Checks
- 9 Maintenance, Aesthetics, and Final Thoughts
- 10 Frequently Asked Questions
Installing a front license plate on a Tesla Model 3 is a straightforward DIY task that requires specific tools and attention to detail. The process involves locating the pre-installed mounting points, using the correct hardware (often not included), and ensuring proper alignment to avoid blocking sensors. Following this guide will help you comply with local laws while keeping your Tesla’s front end looking sleek and damage-free.
Key Takeaways
- Your Model 3 has hidden mounting holes: The front bumper has pre-drilled, covered holes for a license plate, but Tesla does not include the mounting bracket or screws in the car.
- You must source the correct bracket: You need a specific Tesla Model 3 front license plate bracket and appropriate screws (typically M6x20mm) to complete the installation.
- Sensor placement is critical: The front bumper houses critical Autopilot and parking sensors; the plate must be mounted low enough to avoid obstructing them.
- Use the right tools to avoid damage: A plastic trim removal tool is essential to pry off the cover without scratching the paint, and a torque wrench prevents over-tightening.
- Check local laws first: Some regions require a front plate, while others do not. Verify your state or country’s regulations before proceeding.
- Consider a no-drill mount: Aftermarket no-drill brackets that use existing tow hook holes are a popular alternative that preserves the factory look.
- Professional installation is an option: If you’re uncomfortable, a Tesla Service Center or reputable body shop can install it quickly and correctly.
📑 Table of Contents
- Why Install a Front License Plate on Your Tesla Model 3?
- Understanding Your Model 3’s Front End Design
- Gathering Your Tools and Parts
- Step-by-Step Installation Guide
- Alternative Methods and Common Pitfalls
- Sensor Considerations and Post-Installation Checks
- Maintenance, Aesthetics, and Final Thoughts
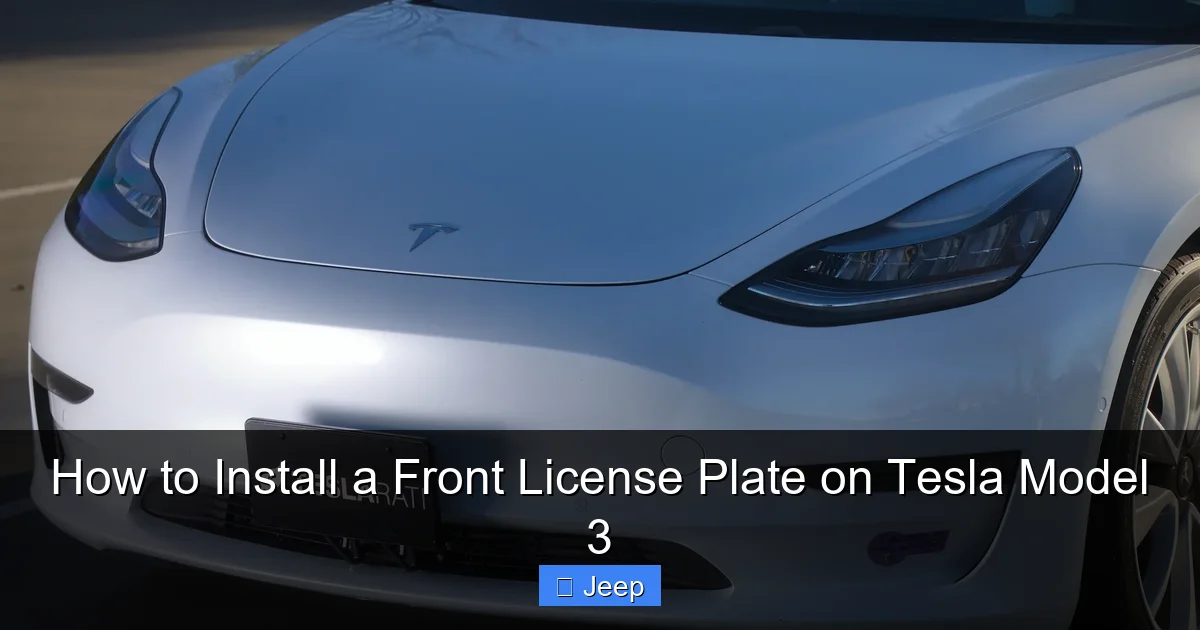
Why Install a Front License Plate on Your Tesla Model 3?
So, you’ve got a sleek, minimalist Tesla Model 3. That smooth, blank front bumper is a big part of its modern aesthetic. But then reality hits: your state’s DMV sends a stern letter about a missing front license plate, or you’re planning a road trip to a jurisdiction where it’s mandatory. Suddenly, that design feature becomes a legal headache. Installing a front license plate isn’t just about obeying the law; it’s about protecting your investment from costly tickets and potential front-end damage in minor bumps.
Many new Tesla owners are surprised to find the car doesn’t come with a front plate bracket. Tesla’s design philosophy often prioritizes clean lines, leaving it to owners to solve the “plate problem.” This guide will walk you through everything you need to know, from understanding your Model 3’s unique front end to choosing the right hardware and executing a perfect, sensor-safe installation. We’ll make it simple, so you can get back to enjoying your drive with peace of mind.
Understanding Your Model 3’s Front End Design
Before you buy a bracket or pick up a screwdriver, you need to understand what you’re working with. The Tesla Model 3’s front fascia is a complex piece of engineering, housing not just the grille (which is actually a solid panel) but also a suite of critical sensors for safety and Autopilot functionality.
Visual guide about How to Install a Front License Plate on Tesla Model 3
Image source: media.printables.com
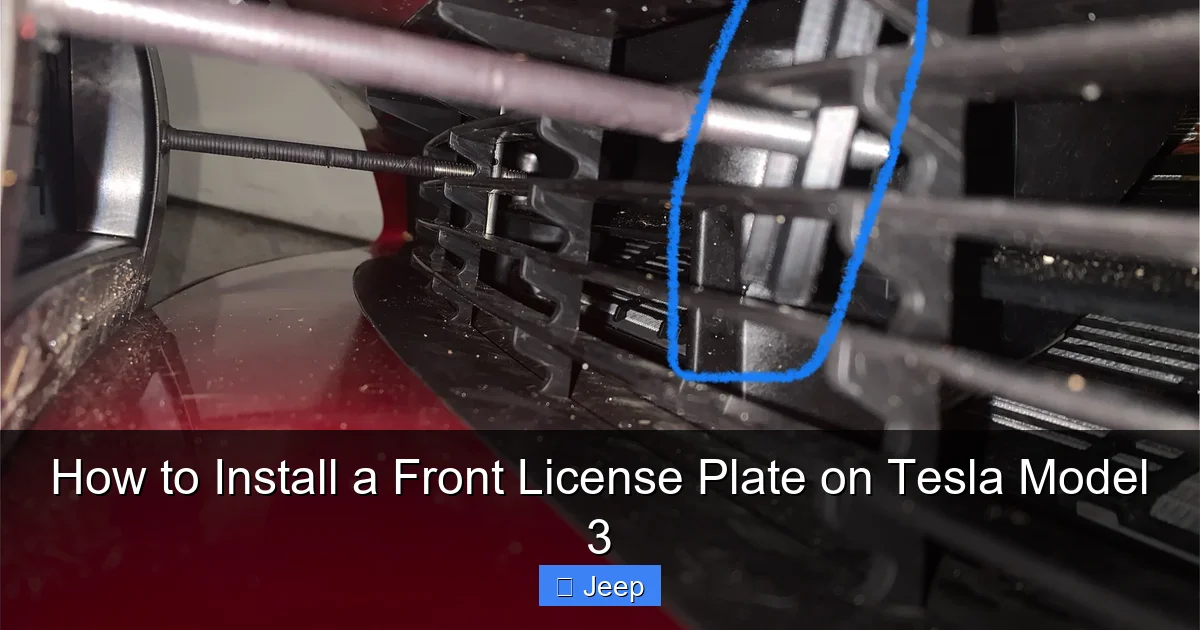
The Location of the Pre-Drilled Holes
Behind that smooth bumper cover, Tesla has actually provided for a front license plate. There are two small, round holes covered by black plastic caps, located just below the front grille area and centered on the bumper. These are your mounting points. The challenge is that these covers are tightly fitted and can be tricky to remove without the right tool. They are not meant to be permanently left on; their purpose is to cover the holes until an owner in a “front plate required” state needs to install one.
Navigating the Sensor Array
This is the most important part. Your Model 3 is equipped with multiple forward-facing cameras (in the windshield header and behind the front grille), a radar sensor (on older models), and ultrasonic sensors arrayed across the lower bumper. The license plate bracket must be positioned so the plate sits below the primary camera and radar field of view. Installing it too high can interfere with Autopilot, Traffic-Aware Cruise Control, and collision warnings. The factory-designed bracket positions the plate correctly, which is why using the proper Tesla part or a verified aftermarket equivalent is crucial.
If you’ve ever considered customizing your Tesla’s appearance, you might be weighing a wrap against keeping the original paint. While a full wrap changes the car’s entire look, the front license plate bracket is a small but necessary detail. For those exploring aesthetic options, understanding costs is key. You can check out our detailed guide on how much it costs to wrap a Tesla Model 3 to see how this small installation fits into larger modification budgets.
Gathering Your Tools and Parts
Attempting this with the wrong tools is a recipe for scratched paint, stripped screws, or a misaligned plate. Here is your definitive shopping and tool list.
Visual guide about How to Install a Front License Plate on Tesla Model 3
Image source: shop.teslarati.com
The Essential Bracket and Hardware
You cannot use random screws from your toolbox. The holes in the bumper are specific. You will need:
- Tesla Model 3 Front License Plate Bracket: Part number 1044223-00-A (this can vary slightly by model year). It’s a simple, painted black bracket that attaches to the bumper and provides a mounting surface for the plate.
- M6x20mm Flange Head Screws (x2): These are the screws that go through the bracket and into the bumper’s hidden holes. They have a wide, flat head that sits flush. Do not use longer screws, as they can damage wiring or sensors behind the bumper.
- Optional: Rubber or Plastic Washers: Some aftermarket kits include these to provide a cushion between the bracket and the bumper, preventing vibration noise and paint wear.
You can source the official Tesla parts through a Service Center, their online parts store, or reputable third-party sellers like TeslaTap or TeslaAftermarket. Many aftermarket “no-drill” kits are also available that use the tow hook mounting points instead of the factory holes, which we’ll discuss later.
The Tool Kit You’ll Need
- Plastic Trim Removal Tools (at least 2): This is non-negotiable. You need these to gently pry off the black plastic bumper covers without marring the paint. Metal tools will scratch.
- Torque Wrench (with 10mm socket): To tighten the M6 screws to the correct specification (typically 8-10 Nm / 70-88 in-lbs). Over-tightening can crack the bumper or strip the threads.
- 10mm Socket and Ratchet: As a backup if you don’t have a torque wrench that size.
- Small Flathead Screwdriver (plastic preferred): For carefully prying the covers if the trim tool doesn’t get initial purchase.
- Microfiber Cloth: To protect the paint surface while you work.
- Isopropyl Alcohol (optional): To clean the mounting surface on the bumper before installation.
- Helper (highly recommended): A second set of hands makes aligning the bracket and plate infinitely easier.
Setting up your workspace is key. Park on a level surface, engage the parking brake, and clean the front bumper area thoroughly. A clean surface prevents dirt from getting trapped under the bracket and scratching the paint over time. If you’re thinking about other Tesla maintenance, like cabin air filter changes, the process is similarly tool-sensitive. You can see our step-by-step for a Honda Civic cabin air filter as an example of a different but similarly precise DIY task.
Step-by-Step Installation Guide
With your parts and tools ready, let’s get that plate on. Patience is the most important tool here. Rushing leads to mistakes.
Visual guide about How to Install a Front License Plate on Tesla Model 3
Image source: shop.teslarati.com
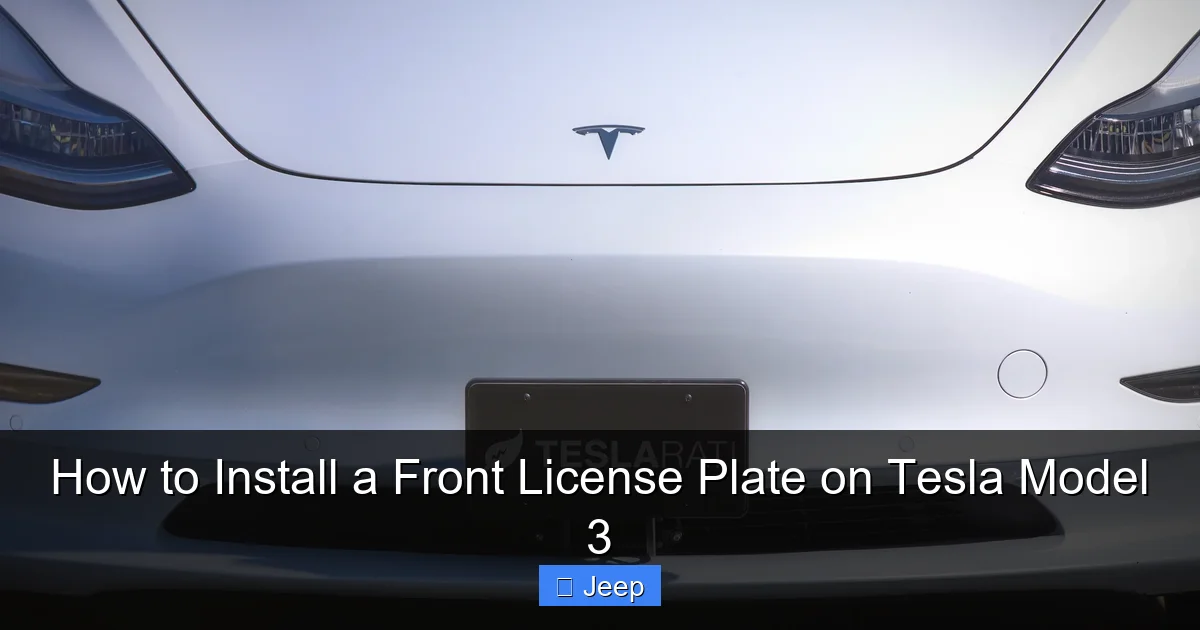
Step 1: Locate and Remove the Plastic Hole Covers
Look at the very center of your front bumper, just below the solid black panel. You should see two small, round, black plastic caps. They are held in place by plastic clips. Using your plastic trim tool, insert it into the seam around the edge of one cap. Gently work the tool around the circumference, prying upwards. The goal is to release the clips. It may feel stiff at first. Do not use excessive force. Once the clips release, the cap should pop off easily. Repeat for the second cap. Place the caps somewhere safe; you will not be reusing them.
Step 2: Prepare the Mounting Surface
With the covers off, you’ll see two large holes. Inside each, you’ll see the threaded inserts (the part the screws will go into). Use your microfiber cloth to wipe away any dust, debris, or plastic flash from around these holes. If there’s any adhesive residue from the caps, carefully pick it off. A clean surface ensures the bracket sits flush and prevents squeaks.
Step 3: Position and Attach the Bracket
This is the trickiest part. Hold the bracket up to the bumper. It has two slots that align with the two holes. The bracket is usually symmetrical, but note which way the “top” is—it should curve slightly to match the bumper’s contour. It’s easiest to start with one screw. With your helper holding the bracket in perfect alignment, insert one M6x20mm screw through the bracket slot and into the threaded hole in the bumper. Start it by hand, turning clockwise until it catches. Do not tighten it fully yet. Now, loosely insert the second screw. The bracket may shift. Gently wiggle it until it sits perfectly flush against the bumper with no gaps. Now, using your torque wrench set to 8-10 Nm, tighten the first screw in a criss-cross pattern if applicable, then the second. The bracket should be secure but not deformed.
Step 4: Mount the License Plate
Place your license plate against the bracket. Most brackets have two holes that align with the standard plate mounting holes. Insert the plate screws (usually provided with the bracket or your plate) through the plate and into the bracket. Tighten them securely. Again, don’t over-tighten, as you can crack the plastic plate. Use a screwdriver if needed, but be careful. Step back and check the alignment. The plate should be centered and parallel to the ground and the car’s body lines.
Alternative Methods and Common Pitfalls
Not everyone wants to use the factory holes. And even with the right parts, things can go wrong. Let’s cover your options and how to avoid headaches.
The No-Drill Tow Hook Method
Many owners, especially those who want to preserve the pristine factory look or avoid any modification to the bumper, opt for a no-drill bracket. These brackets utilize the existing tow hook mounting holes located behind a small rectangular cover in the lower center of the bumper. You remove that cover, bolt the bracket to the tow hook studs, and the plate mounts to the bracket. The plate sits slightly lower and further forward than the factory method. Pros: No holes drilled in the main bumper, completely reversible. Cons: Plate position is different, may not be legal in all jurisdictions (check local laws), can look less integrated. This method is very popular and a great solution if your state is flexible about plate location.
What NOT To Do: Drilling and Adhesives
Never drill your own holes in the bumper. You have no idea what’s behind the plastic—wiring harnesses for sensors, the radar module, or air conditioning lines. Drilling risks catastrophic and expensive damage. Similarly, avoid heavy-duty adhesives or double-sided tape as a permanent solution. The vibration and wind forces at highway speeds can cause the plate to peel off, potentially damaging the bumper or becoming a hazardous projectile. These methods are also almost always illegal, as plates must be “securely fastened.”
Diagnosing a Wobbly or Loose Plate
If your plate rattles after installation, the cause is usually one of two things. First, the bracket may not be tightened enough against the bumper. Re-check your torque on the M6 screws. Second, the plate itself may be loose on the bracket. Ensure you’re using the correct plate screws and that they are tight. A small piece of rubber washer between the plate and bracket can often eliminate vibration noise. If the rattle persists, the bracket may have been bent during installation or is the wrong part for your specific model year.
Installing a front plate is one of many small modifications Tesla owners consider. If you’re looking at other upgrades, cost is always a factor. For instance, if you’re curious about the investment for a full color change, our article on how much a Tesla Model 3 wrap costs breaks down materials and labor for that larger project.
Sensor Considerations and Post-Installation Checks
Your Tesla’s safety systems are watching the road ahead. A license plate is a physical object in their line of sight. Proper installation mitigates any interference.
Verifying No Sensor Obstruction
After installation, sit in the driver’s seat and look at the front view. The top edge of the license plate should be well below the base of the windshield where the forward-facing cameras are housed. You should have a clear, unobstructed view of the road from the camera’s perspective. Start the car and navigate to the Service > Controls > Safety & Security menu on the touchscreen. Look for any warnings about “Front Camera Obstructed” or “Radar Sensor Obstructed.” If you see these warnings immediately after installation, your plate is likely too high. Loosen the bracket and reposition it lower if possible, or you may need a different bracket style.
Calibration and Real-World Driving
In most cases, a properly mounted plate will not require a sensor recalibration. However, after any work near the front end, it’s good practice to perform a camera calibration. Park the car in a safe, open area with clear road markings (like a straight, quiet street). Go to Service > Camera Calibration and follow the on-screen prompts. The car will drive slowly, aligning its cameras. Also, take a short test drive. Ensure Autopilot engages normally (on a closed course or safe highway), and that you don’t get any false forward collision warnings from the plate itself.
Interestingly, windshield damage is another common concern for Tesla owners due to sensor integration. If your plate installation ever leads to a cracked windshield (unlikely from this job, but possible in an accident), knowing replacement costs is useful. See our report on Tesla Model 3 windshield cost for what to expect.
Maintenance, Aesthetics, and Final Thoughts
You’ve done it! Your plate is on, legal, and your sensors are happy. But the job isn’t quite over.
Long-Term Care for Your Bracket and Plate
Check the bracket screws and plate screws during your regular tire pressure or car wash routine. Vibration can gradually loosen things. Re-torque them to spec every 6 months. Wash the area around the bracket normally. The bracket is painted to match your bumper, but stone chips and road salt can still cause corrosion over many years. A quick rinse after driving in winter conditions helps.
Aesthetic Integration
The factory black bracket is designed to blend in. However, some owners prefer to paint it to match their car’s exact color (if they have a non-black car) or wrap it in matching vinyl for a seamless look. This is an advanced cosmetic step. If you do this, ensure you use automotive-grade paint/vinyl and mask off the sensor areas meticulously. For those who love customizing their Tesla’s exterior, a front plate bracket is just the start. Our ultimate guide to wrapping a Tesla Model Y (which shares many principles with the Model 3) can inspire your next project, showing how vinyl can transform every panel.
When to Call a Professional
This is a DIY-friendly task for most people with patience and the right tools. However, call a professional if: you are uncomfortable working near the bumper/sensors, you cannot locate the correct parts, your car has a unique front-end modification (like a front lip spoiler that interferes), or you simply want a perfect, warranty-safe job. A Tesla Service Center will do it for a fee, and it’s often faster than ordering parts yourself. Independent body shops familiar with Teslas are also excellent and sometimes more affordable.
Frequently Asked Questions
Does my Tesla Model 3 really need a front license plate?
It depends on your state or country’s laws. Many states in the U.S. do not require a front plate, while others do. You must check your local DMV regulations. Failure to comply can result in tickets and failed vehicle inspections.
Can I install the front plate myself without damaging the car?
Yes, absolutely. With the correct Tesla-specific bracket, M6 screws, and plastic trim tools, you can install it without any risk of damage. The key is to use the factory mounting holes and never drill into the bumper.
What happens if I install the plate too high and block a sensor?
The car will likely display a warning message on the touchscreen about an obstructed camera or radar. Autopilot and safety features like collision warning may be disabled or function poorly. You will need to reposition the bracket lower immediately.
Why doesn’t Tesla just include the front plate bracket with the car?
>Tesla designs cars for global markets. Since many regions (like most of Europe and parts of the U.S.) don’t require front plates, they omit the bracket to maintain the clean aesthetic and reduce cost for those owners. It’s left as an accessory for regions that require it.
Is the no-drill tow hook method as secure as the factory holes?
Yes, when using a proper, high-quality bracket that bolts to the tow hook studs. It is a very secure method. The main difference is the plate’s final position, which may be slightly lower and more forward. Always verify this position is legal in your area.
How much will this cost me at a Tesla Service Center?
Costs vary by location, but expect to pay for the parts (bracket and screws, typically $30-$60) plus labor (usually 0.5 to 1 hour at their hourly rate). Total can range from $80 to $150. Calling your local Service Center for a quote is the best way to get an exact price.


