
How to Install a Cargo Net in a Toyota Rav4
Contents
- 1 Key Takeaways
- 2 📑 Table of Contents
- 3 Why You Need a Cargo Net in Your Toyota RAV4
- 4 Types of Cargo Nets for the Toyota RAV4
- 5 Tools and Materials You’ll Need
- 6 Step-by-Step Installation Guide
- 7 Tips for Maintaining Your Cargo Net
- 8 Troubleshooting Common Installation Issues
- 9 Conclusion
- 10 Frequently Asked Questions
Installing a cargo net in your Toyota RAV4 is a simple way to keep groceries, luggage, and gear from sliding around in the trunk. This guide walks you through choosing the right net, locating anchor points, and securing it properly—whether you’re using factory hooks or aftermarket solutions.
Key Takeaways
- Choose the right cargo net: Select a net designed specifically for the Toyota RAV4 to ensure proper fit and secure attachment.
- Locate factory anchor points: Most RAV4 models come with built-in tie-down hooks in the cargo area for easy net installation.
- Use aftermarket hooks if needed: If your model lacks anchor points, adhesive or screw-in hooks can provide secure mounting options.
- Install in under 10 minutes: With the right tools and instructions, most cargo nets can be installed quickly and without drilling.
- Test the tension: Always check that the net is taut and secure before loading items to prevent sagging or failure.
- Maintain regularly: Inspect hooks and net material periodically for wear, especially after heavy use or long trips.
- Enhance safety and organization: A properly installed cargo net reduces clutter and helps prevent injuries from shifting cargo.
📑 Table of Contents
Why You Need a Cargo Net in Your Toyota RAV4
If you own a Toyota RAV4, you already know it’s one of the most versatile compact SUVs on the road. Whether you’re hauling groceries, sports gear, camping equipment, or luggage for a weekend getaway, the RAV4 offers plenty of cargo space. But that space can quickly become chaotic without proper organization. That’s where a cargo net comes in.
A cargo net is a simple yet effective accessory that helps keep your belongings secure and organized in the trunk area. It acts like a flexible barrier, preventing items from rolling around, spilling, or shifting during sudden stops or sharp turns. This is especially important if you frequently transport fragile items like glass containers, electronics, or pet supplies. Without a net, even a short drive can turn into a messy situation when a bag tips over or a suitcase slides into the back seat.
Beyond just keeping things tidy, a cargo net enhances safety. Loose items in the cargo area can become dangerous projectiles in the event of a sudden stop or accident. By securing your load, you reduce the risk of injury to passengers and protect your belongings from damage. Plus, a well-organized trunk makes it easier to find what you need quickly—no more digging through a jumble of bags and boxes.
Installing a cargo net in your Toyota RAV4 is easier than you might think. Most models come equipped with built-in anchor points, and many aftermarket nets are designed to snap or hook into place in seconds. Whether you’re a weekend adventurer, a busy parent, or just someone who likes a neat car, a cargo net is a small investment that delivers big benefits.
Types of Cargo Nets for the Toyota RAV4
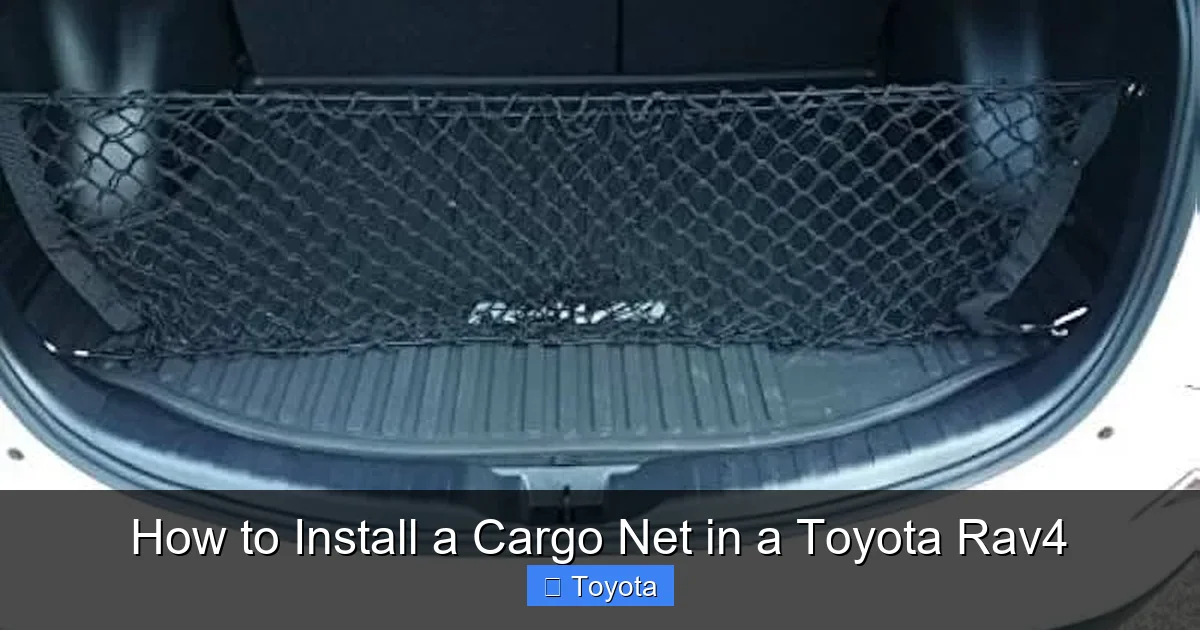
Visual guide about How to Install a Cargo Net in a Toyota Rav4
Image source: m.media-amazon.com
Before you install a cargo net, it’s important to choose the right one for your needs. Not all cargo nets are created equal, and selecting the wrong type can lead to frustration or even damage to your vehicle. Let’s break down the main types of cargo nets available for the Toyota RAV4.
Elastic Mesh Nets
Elastic mesh nets are the most common type and are often included as factory accessories by Toyota. These nets are made from durable, stretchable fabric with reinforced edges and built-in hooks or clips. They’re lightweight, easy to install, and perfect for holding smaller items like groceries, backpacks, or gym bags.
One of the biggest advantages of elastic mesh nets is their flexibility. The stretchable material conforms to the shape of your cargo, providing a snug fit without requiring precise measurements. They’re also easy to remove and store when not in use. However, they may not be strong enough for heavy or bulky items, so keep that in mind if you frequently haul larger loads.
Rigid or Semi-Rigid Cargo Nets
For heavier-duty use, consider a rigid or semi-rigid cargo net. These nets often feature a combination of elastic webbing and rigid plastic or metal frames. They provide more structure and support, making them ideal for securing larger items like coolers, toolboxes, or luggage.
Semi-rigid nets are especially useful if you want to divide your cargo area into sections. Some models come with adjustable dividers or multiple attachment points, allowing you to customize the layout based on your load. While they’re more durable than mesh nets, they can be bulkier and harder to store when not in use.
Trunk Liner-Integrated Nets
Some cargo nets are designed to attach directly to a trunk liner or cargo mat. These systems often use Velcro, snap buttons, or hook-and-loop fasteners to secure the net to the floor or sides of the cargo area. They’re great for people who want a clean, integrated look and don’t want to deal with visible hooks or clips.
One popular example is the Toyota Genuine Cargo Net, which is specifically designed for RAV4 models and attaches to the factory-installed anchor points. It’s made from high-quality elastic mesh and includes four attachment hooks for a secure fit. This type of net is perfect if you want a factory-like appearance and reliable performance.
Universal vs. Model-Specific Nets
When shopping for a cargo net, you’ll come across both universal and model-specific options. Universal nets are designed to fit a wide range of vehicles and often use adjustable straps or bungee cords to secure them in place. While they’re more affordable and widely available, they may not fit your RAV4 as snugly as a model-specific net.
Model-specific nets, on the other hand, are engineered to match the exact dimensions and anchor points of your vehicle. They typically offer a better fit, easier installation, and more reliable performance. For the Toyota RAV4, it’s usually worth investing in a net that’s designed specifically for your model year to ensure compatibility and ease of use.
Tools and Materials You’ll Need
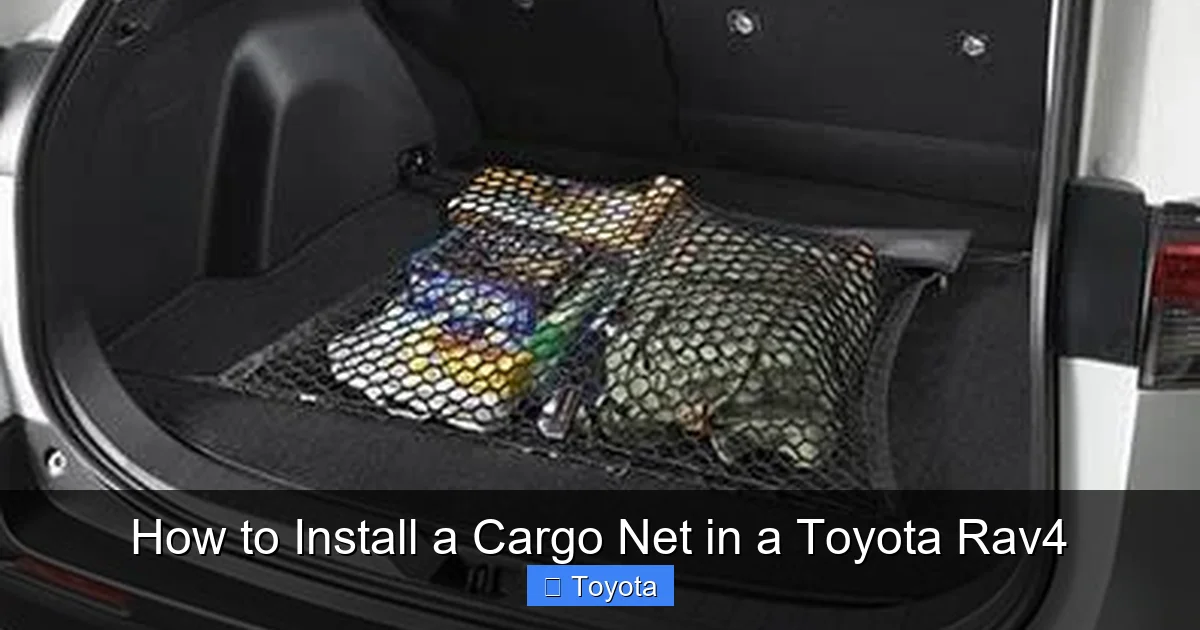
Visual guide about How to Install a Cargo Net in a Toyota Rav4
Image source: images.simplepart.com
Installing a cargo net in your Toyota RAV4 is a straightforward process, but having the right tools and materials on hand will make it even easier. The good news is that you probably already have most of what you need at home.
Basic Tools
For most installations, you won’t need anything more than your hands. Many cargo nets, especially those designed for the RAV4, use snap hooks or carabiners that attach directly to factory anchor points. These require no tools and can be installed in seconds.
However, if your RAV4 doesn’t have built-in anchor points—or if you’re using an aftermarket net that requires additional mounting—you may need a few basic tools. A Phillips-head screwdriver is useful for installing screw-in hooks, while a drill may be necessary for more permanent installations (though this is rarely recommended unless absolutely necessary).
Optional Accessories
Depending on your setup, you might also want to consider a few optional accessories to improve the installation:
– Adhesive hook mounts: These stick-on hooks are great for vehicles without factory anchor points. They’re easy to install and remove, and many are strong enough to hold a cargo net securely.
– Extension straps: If your net doesn’t reach all the way to the anchor points, extension straps can help bridge the gap. Look for straps with carabiners or S-hooks for easy attachment.
– Cargo area liner: While not required, a rubber or carpeted cargo liner can protect your trunk from scratches and spills, especially if you’re transporting messy or heavy items.
What to Avoid
While it’s tempting to use whatever hooks or straps you have lying around, it’s important to avoid makeshift solutions that could damage your vehicle or fail under pressure. For example, using zip ties to attach a cargo net can weaken over time and may tear through the net or damage your interior trim.
Similarly, avoid using hooks that are too large or too small for your anchor points. A hook that’s too big may not fit securely, while one that’s too small could slip off during driving. Always use hardware that’s designed for automotive use and rated for the weight you plan to carry.
Step-by-Step Installation Guide
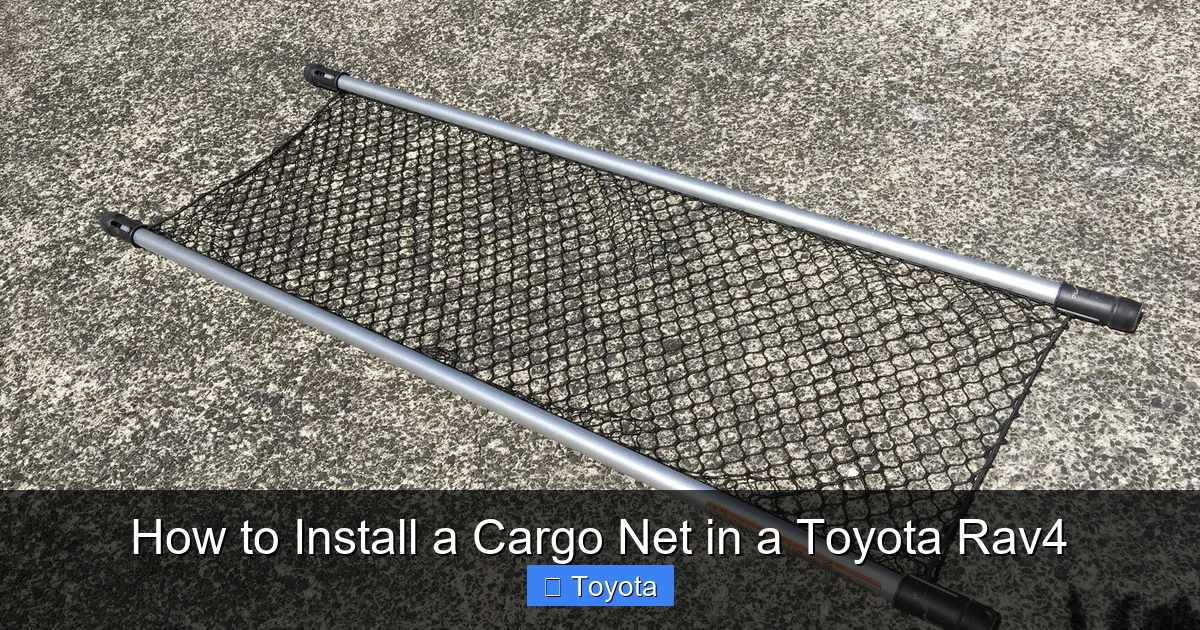
Visual guide about How to Install a Cargo Net in a Toyota Rav4
Image source: i.pinimg.com
Now that you’ve chosen the right cargo net and gathered your tools, it’s time to install it in your Toyota RAV4. The process is quick and easy, and once you’ve done it once, you’ll be able to repeat it in under a minute.
Step 1: Locate the Anchor Points
The first step is to find the anchor points in your RAV4’s cargo area. Most models from 2013 onward come with four built-in tie-down hooks—two on the sides and two near the rear bumper. These are usually located just above the floor mat and are marked with a small plastic cap or metal ring.
To access them, open the rear hatch and look along the sides of the cargo area. You may need to lift the floor mat or remove a small cover to reveal the hooks. If you can’t find them, consult your owner’s manual—Toyota often includes diagrams showing the exact location of anchor points.
Step 2: Prepare the Cargo Net
Unpack your cargo net and lay it flat on the floor of the cargo area. Check that all hooks, clips, or straps are intact and functioning properly. If your net has elastic sides, make sure they’re not twisted or tangled.
Some nets come with labeled hooks (e.g., “front left,” “rear right”) to help with installation. If yours does, take a moment to match the hooks to the correct anchor points. This will save time and ensure a proper fit.
Step 3: Attach the Hooks
Start by attaching the hooks to the anchor points. Begin with the two hooks on one side of the net and work your way across. Most nets use snap hooks or carabiners that simply clip onto the metal rings.
Push each hook firmly onto the anchor point until you hear or feel it click into place. Give it a gentle tug to make sure it’s secure. Repeat this process for all four hooks.
If your net has adjustable straps, tighten them until the net is taut but not overly stretched. A properly tensioned net should have a little give—enough to accommodate your cargo, but not so much that it sags or slips.
Step 4: Test the Installation
Once all hooks are attached, give the net a few firm tugs to test its stability. It should feel solid and not shift or come loose. If any hook feels loose, double-check that it’s fully seated on the anchor point.
Now, load a few items into the cargo area—like a grocery bag or backpack—and see how the net holds up. The items should stay in place without pushing the net out of position. If the net sags or the hooks slip, you may need to adjust the tension or reposition the hooks.
Step 5: Final Adjustments
If everything looks good, you’re all set! Your cargo net is now installed and ready to use. However, it’s a good idea to make a few final adjustments to ensure long-term performance.
Check that the net isn’t rubbing against any sharp edges or trim pieces, as this could cause wear over time. If necessary, use a small piece of felt or rubber padding to protect the net and your vehicle’s interior.
Also, make sure the net doesn’t interfere with the rear seats when they’re folded down. Some nets are designed to be removable or repositionable, so you can adjust them based on your cargo needs.
Tips for Maintaining Your Cargo Net
A cargo net is a durable accessory, but like any part of your vehicle, it requires a little maintenance to keep it in top condition. With proper care, your net can last for years and continue to protect your cargo effectively.
Regular Inspections
Make it a habit to inspect your cargo net every few months—or after long trips or heavy use. Look for signs of wear such as frayed edges, stretched elastic, or loose stitching. Check the hooks and clips for rust, cracks, or deformation.
If you notice any damage, replace the net or repair it as soon as possible. A compromised net can fail unexpectedly, putting your cargo and passengers at risk.
Cleaning the Net
Over time, your cargo net can accumulate dirt, dust, and spills—especially if you frequently transport food, pets, or outdoor gear. To clean it, remove the net from your RAV4 and shake it out to remove loose debris.
For deeper cleaning, hand wash the net in warm, soapy water using a mild detergent. Avoid harsh chemicals or bleach, as they can weaken the elastic fibers. Rinse thoroughly and allow the net to air dry completely before reinstalling it.
Proper Storage
When not in use, store your cargo net in a cool, dry place. Avoid leaving it in direct sunlight or extreme temperatures, as this can degrade the elastic material over time. If your net comes with a storage bag, use it to keep the net clean and tangle-free.
If you remove the net frequently, consider labeling the hooks or taking a photo of the installation setup. This will make reinstallation faster and easier the next time you need it.
Avoid Overloading
While cargo nets are designed to hold a significant amount of weight, it’s important not to overload them. Check the manufacturer’s weight rating and stay within the recommended limits. Overloading can stretch the net, damage the hooks, or cause the anchor points to fail.
If you regularly carry heavy items, consider upgrading to a heavy-duty net or using additional restraints like cargo straps or bungee cords for extra security.
Troubleshooting Common Installation Issues
Even with the best preparation, you might run into a few hiccups when installing your cargo net. Here are some common issues and how to fix them.
Hooks Won’t Stay Attached
If your hooks keep coming loose, the first thing to check is whether they’re fully seated on the anchor points. Sometimes a hook can appear attached but isn’t locked in place.
Try removing and reattaching each hook, making sure it clicks securely. If the problem persists, the anchor points may be worn or damaged. In that case, consider using adhesive backup hooks or consulting a Toyota dealer for replacement parts.
Net Is Too Loose or Too Tight
A net that’s too loose won’t hold your cargo securely, while one that’s too tight can stretch or tear. To adjust the tension, look for adjustable straps or elastic sections on the net.
If your net doesn’t have built-in adjustments, you can use extension straps or reposition the hooks to achieve the right fit. Just make sure the net still covers the entire cargo area and doesn’t interfere with other components.
Net Doesn’t Fit Your Model Year
Not all cargo nets are compatible with every RAV4 model year. If your net doesn’t fit properly, double-check that it’s designed for your specific year and trim level.
If you’re using a universal net, you may need to modify the installation or purchase a different model. When in doubt, opt for a Toyota Genuine Accessory—these are guaranteed to fit and perform as intended.
Anchor Points Are Missing or Damaged
Some older RAV4 models or base trims may not come with factory anchor points. If yours doesn’t, you can install aftermarket hooks using adhesive mounts or screw-in brackets.
Adhesive hooks are easy to install and remove, but make sure the surface is clean and dry before applying. Screw-in hooks are more permanent but offer a stronger hold. Always use hardware rated for automotive use and avoid drilling into structural components.
Conclusion
Installing a cargo net in your Toyota RAV4 is a smart, simple upgrade that can make a big difference in how you use your vehicle. Whether you’re hauling groceries, gear, or luggage, a cargo net keeps everything secure, organized, and safe.
From choosing the right type of net to locating anchor points and making final adjustments, this guide has walked you through every step of the process. With just a few minutes of your time, you can enjoy the peace of mind that comes from knowing your cargo is protected.
Remember to inspect and maintain your net regularly, and don’t hesitate to upgrade if your needs change. A well-installed cargo net isn’t just a convenience—it’s an essential part of responsible vehicle ownership.
So go ahead, grab your net, and get installing. Your RAV4—and your next road trip—will thank you.
Frequently Asked Questions
Can I install a cargo net in any Toyota RAV4 model?
Most Toyota RAV4 models from 2013 onward come with built-in anchor points that support cargo net installation. Older models or base trims may require aftermarket hooks, but a net can still be installed with the right accessories.
Do I need to drill holes to install a cargo net?
No, drilling is usually not necessary. Most RAV4 models have factory anchor points, and many aftermarket nets use adhesive or snap-in hooks that don’t require permanent modifications.
How much weight can a cargo net hold?
Weight capacity varies by model, but most elastic mesh nets can hold 20–50 pounds. Check the manufacturer’s specifications and avoid overloading to prevent damage or failure.
Can I use a cargo net with the rear seats folded down?
It depends on the net design. Some nets are removable or adjustable, allowing you to fold the seats. Others may interfere, so check compatibility before installation.
Are Toyota Genuine cargo nets worth the extra cost?
Yes, if you want a perfect fit and factory-like appearance. Toyota Genuine nets are designed specifically for the RAV4 and often include better materials and easier installation.
How do I clean my cargo net?
Remove the net and hand wash it in warm, soapy water. Rinse thoroughly and air dry completely before reinstalling. Avoid harsh chemicals or machine washing.


