
How to Replace the Clutch Master Cylinder on a Toyota Corolla
Contents
- 1 Key Takeaways
- 2 📑 Table of Contents
- 3 Introduction: Why Your Clutch Master Cylinder Matters
- 4 Understanding the Clutch Master Cylinder
- 5 Tools and Materials You’ll Need
- 6 Step-by-Step Replacement Guide
- 7 How to Bleed the Clutch System
- 8 Testing and Final Checks
- 9 Conclusion: Save Money and Gain Confidence
- 10 Frequently Asked Questions
Replacing the clutch master cylinder on a Toyota Corolla is a manageable DIY task if you have basic tools and patience. This guide walks you through the entire process—from diagnosing the issue to bleeding the system—so you can restore smooth clutch operation safely and affordably.
Key Takeaways
- Identify symptoms early: Spongy clutch pedal, fluid leaks, or difficulty shifting are signs your clutch master cylinder may be failing.
- Gather the right tools: You’ll need a wrench set, brake fluid, a bleed kit, and safety gear like gloves and goggles.
- Work in a clean, well-lit space: Clutch fluid is corrosive and messy, so protect your workspace and avoid spills.
- Follow proper bleeding procedure: Air in the hydraulic system will prevent clutch engagement—bleed thoroughly after installation.
- Use OEM or high-quality replacement parts: A reliable clutch master cylinder ensures long-term performance and safety.
- Test before driving: Always test the clutch pedal feel and check for leaks before hitting the road.
- Consider professional help if unsure: If you’re not confident, consult a mechanic to avoid costly mistakes.
📑 Table of Contents
Introduction: Why Your Clutch Master Cylinder Matters
If you drive a manual Toyota Corolla, you know how essential the clutch is for smooth gear changes. But what happens when the clutch pedal feels spongy, sinks to the floor, or you notice fluid near the firewall? That’s often a sign that your clutch master cylinder is on its last legs. The clutch master cylinder is a critical part of your car’s hydraulic clutch system—it converts the pressure from your foot into hydraulic force that disengages the clutch. When it fails, shifting becomes difficult or even impossible.
Replacing the clutch master cylinder might sound intimidating, but with the right guidance, it’s a job many Corolla owners can tackle in their driveway. This guide will walk you through every step, from diagnosing the problem to installing the new part and bleeding the system. Whether you’re a weekend mechanic or just looking to save on repair costs, this DIY project can be both rewarding and cost-effective. Plus, understanding how your car works builds confidence and helps you spot future issues early.
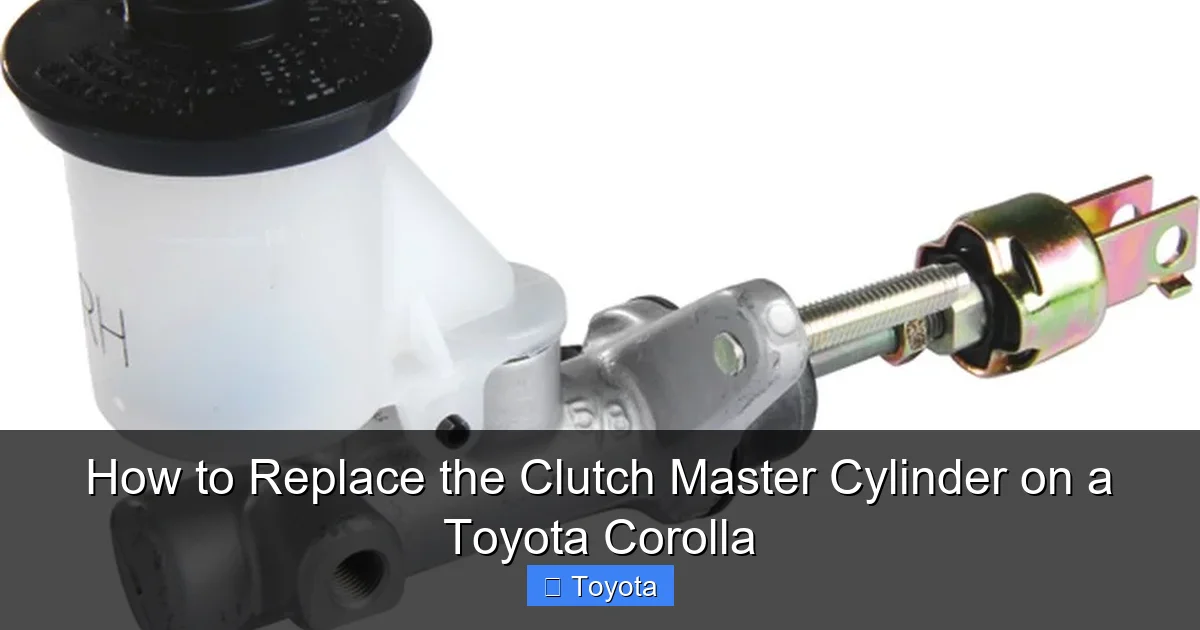
Understanding the Clutch Master Cylinder
Visual guide about How to Replace the Clutch Master Cylinder on a Toyota Corolla
Image source: aftermarketcarparts.co.uk
Before diving into the replacement, it helps to understand what the clutch master cylinder does and why it fails. In a manual transmission Toyota Corolla, the clutch system is hydraulic, meaning it uses fluid to transfer force—just like your brakes. When you press the clutch pedal, it pushes a piston inside the master cylinder, which forces brake fluid through a line to the clutch slave cylinder. The slave cylinder then pushes the clutch fork, disengaging the clutch so you can shift gears.
Over time, the seals inside the master cylinder can wear out, allowing fluid to leak internally or externally. This leads to a loss of hydraulic pressure, which causes symptoms like a soft or sinking pedal. External leaks are easier to spot—look for wet spots or drips under the driver’s side of the car, near the firewall. Internal leaks are trickier; the fluid doesn’t escape the system but bypasses the piston, reducing pressure.
Common causes of failure include age, contamination in the fluid, and excessive heat. Toyota Corollas from the 2000s to 2010s are especially prone to this issue due to the design and materials used in earlier models. If you’re driving a Corolla with over 100,000 miles, it’s not uncommon to see clutch master cylinder problems arise.
How It Differs from the Slave Cylinder
It’s easy to confuse the master cylinder with the slave cylinder, but they serve different roles. The master cylinder is located under the hood, near the brake booster, and is connected directly to the clutch pedal via a pushrod. The slave cylinder, on the other hand, is mounted on the transmission and receives fluid from the master cylinder. While both can fail, the master cylinder is more accessible and often easier to replace.
Signs of a Failing Clutch Master Cylinder
Knowing when to replace the clutch master cylinder can save you from being stranded. Here are the most common symptoms:
- Spongy or soft clutch pedal: If the pedal feels mushy or doesn’t return properly, air or fluid loss may be the cause.
- Clutch pedal sinks to the floor: This indicates a severe internal leak—press the pedal and hold it; if it slowly sinks, the master cylinder is likely failing.
- Difficulty shifting gears: If you can’t get into gear, especially first or reverse, the clutch isn’t disengaging fully.
- Fluid leaks under the car: Look for wet spots near the driver’s side firewall or under the transmission.
- Low clutch fluid: Check the reservoir under the hood—if it’s consistently low, there’s a leak somewhere in the system.
If you notice any of these signs, it’s time to inspect the clutch master cylinder. Ignoring the problem can lead to complete clutch failure, leaving you unable to drive.
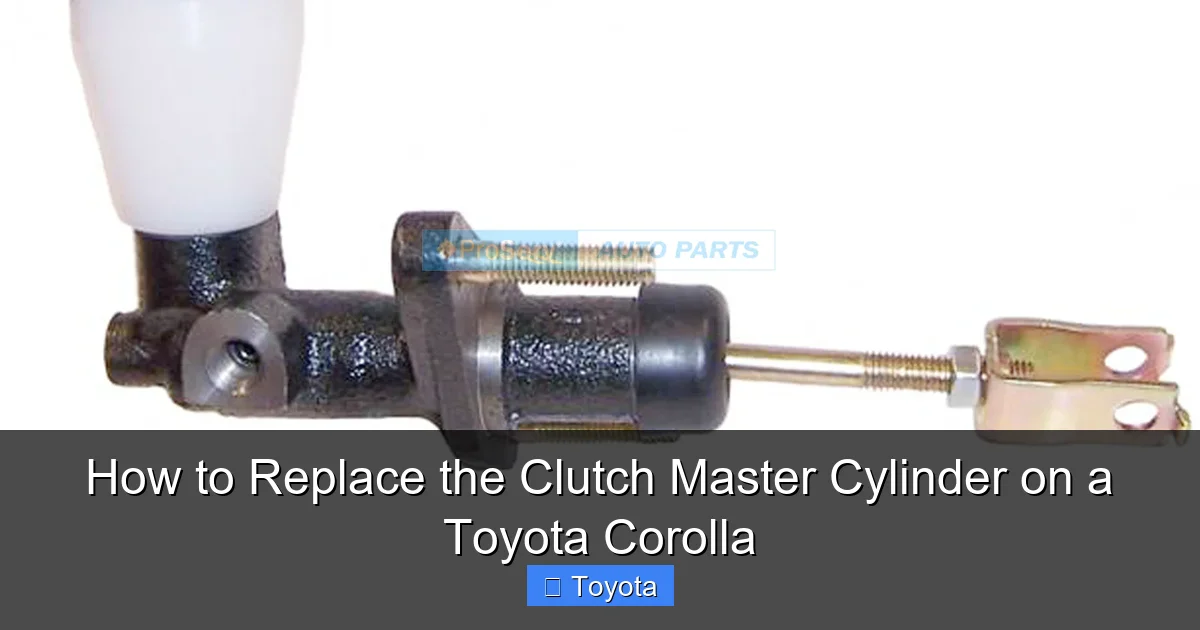
Tools and Materials You’ll Need
Visual guide about How to Replace the Clutch Master Cylinder on a Toyota Corolla
Image source: proservauto.com.au
Before starting the replacement, gather all the necessary tools and parts. Having everything ready will make the job smoother and prevent frustrating delays.
Essential Tools
- Wrench set (metric): You’ll need 10mm, 12mm, and 14mm wrenches for most connections.
- Socket set with ratchet: A 10mm socket is commonly used for the master cylinder mounting bolts.
- Flathead and Phillips screwdrivers: For removing clips and accessing tight spaces.
- Brake fluid (DOT 3 or DOT 4): Check your owner’s manual—most Corollas use DOT 3. Never mix types.
- Clutch bleed kit or vacuum pump: Essential for removing air from the system after installation.
- Clean rags and paper towels: Clutch fluid is corrosive and can damage paint—clean up spills immediately.
- Safety gear: Wear gloves and safety goggles to protect your skin and eyes.
- Jack and jack stands (optional): Useful for better access, though not always necessary.
- Container for old fluid: A small plastic bottle or jar to catch drained fluid.
Replacement Parts
- New clutch master cylinder: Choose an OEM (Original Equipment Manufacturer) part or a high-quality aftermarket brand like Aisin, Dorman, or Beck/Arnley. OEM parts are more expensive but offer the best fit and reliability.
- New clutch fluid: Buy a fresh bottle—old or contaminated fluid can cause problems.
- New copper washers (if applicable): Some models use washers on the hydraulic line connection—replace them to prevent leaks.
Optional but Helpful
- Line wrench: Prevents rounding off the hydraulic line nut.
- Funnel: Helps pour fluid without spills.
- Shop vacuum or turkey baster: For removing old fluid from the reservoir.
- Torque wrench: Ensures bolts are tightened to specification.
Safety First
Always work in a well-ventilated area and avoid smoking or open flames—brake fluid is flammable. Never reuse old fluid, and dispose of it properly at a recycling center. If fluid gets on your skin, wash it off immediately with soap and water.
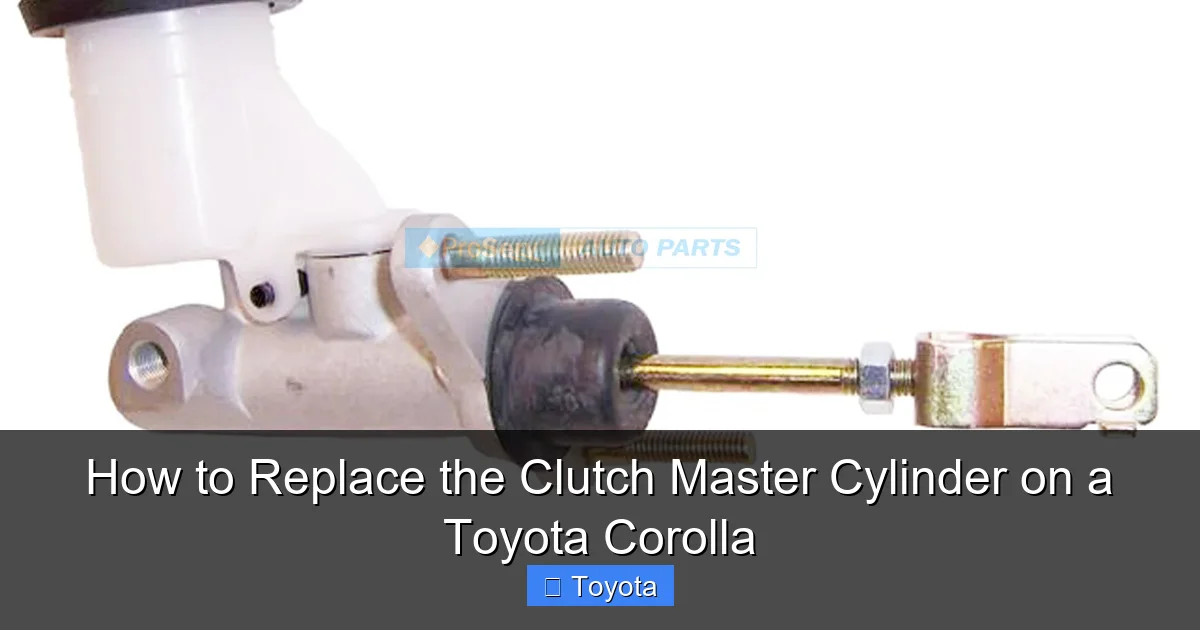
Step-by-Step Replacement Guide
Visual guide about How to Replace the Clutch Master Cylinder on a Toyota Corolla
Image source: proservauto.com.au
Now that you’re prepared, let’s get to the actual replacement. This process typically takes 1.5 to 3 hours, depending on your experience and the Corolla model. We’ll focus on common models like the 2003–2013 Corolla, but the steps are similar for most years.
Step 1: Prepare the Vehicle
Start by parking your Corolla on a flat, level surface. Engage the parking brake and place wheel chocks behind the rear tires for extra safety. Open the hood and locate the clutch master cylinder—it’s usually on the driver’s side, near the brake booster, with a small fluid reservoir attached.
Before disconnecting anything, take a photo of the setup. This will help you remember how everything connects, especially if you’re new to this.
Step 2: Drain the Old Fluid
Use a turkey baster or syringe to remove as much fluid as possible from the reservoir. Place a container underneath to catch any drips. Don’t worry about getting every drop—just remove the majority to minimize spills during disassembly.
Step 3: Disconnect the Hydraulic Line
Locate the hydraulic line connected to the side of the master cylinder. It’s usually held by a 10mm or 12mm flare nut. Use a line wrench or open-end wrench to loosen it—don’t use pliers, as they can damage the fitting. Once loose, carefully unscrew it by hand and cap the line with a rubber stopper or tape to prevent fluid loss and contamination.
Step 4: Remove the Pushrod from the Clutch Pedal
Inside the car, under the dashboard, locate the clutch pedal. The master cylinder pushrod connects to the pedal via a pin and clip. Use a screwdriver to remove the clip, then pull out the pin. You may need to wiggle the pushrod slightly to free it. Be gentle—forcing it can damage the pedal or rod.
Step 5: Unbolt the Master Cylinder
Back under the hood, remove the two mounting bolts that secure the master cylinder to the firewall. These are typically 10mm bolts. Once removed, carefully pull the old cylinder away from the firewall. Be ready for a little fluid to drip out—have a rag handy.
Step 6: Install the New Master Cylinder
Before installing the new cylinder, bench-bleed it if required. Some models come pre-filled, but many need to be bled on the workbench to remove air. Follow the manufacturer’s instructions—usually, you’ll attach a hose to the outlet, submerge it in fluid, and pump the piston until no bubbles appear.
Once bled, position the new cylinder against the firewall and hand-tighten the mounting bolts. Then, reconnect the pushrod to the clutch pedal using the pin and clip. Make sure it’s secure—you don’t want it coming loose while driving.
Step 7: Reconnect the Hydraulic Line
Attach the hydraulic line to the new master cylinder and tighten the flare nut with a wrench. Don’t overtighten—snug is enough. Replace any copper washers if your model uses them.
Step 8: Fill the Reservoir
Pour fresh DOT 3 or DOT 4 brake fluid into the reservoir until it reaches the “MAX” line. Use a funnel to avoid spills. Replace the cap loosely—don’t tighten it yet, as you’ll need access for bleeding.
How to Bleed the Clutch System
Bleeding is the most critical step after replacing the master cylinder. Air in the hydraulic system will prevent the clutch from working properly. There are two common methods: manual bleeding and vacuum bleeding. We’ll cover both.
Manual Bleeding (Two-Person Method)
This method requires a helper. Here’s how it works:
- Have your helper sit in the driver’s seat and press the clutch pedal slowly to the floor.
- While the pedal is down, open the bleed valve on the slave cylinder (located on the transmission) using a wrench.
- Fluid and air will flow out. Close the valve before your helper releases the pedal.
- Repeat this process 10–15 times until no air bubbles come out and the pedal feels firm.
- Top off the reservoir as needed—don’t let it run dry.
Vacuum Bleeding (One-Person Method)
If you’re working alone, a vacuum bleed kit is your best friend. Attach the kit to the bleed valve on the slave cylinder, open the valve, and pump the vacuum to draw fluid through the system. Keep an eye on the reservoir and refill as needed. Continue until the fluid flows clean and bubble-free.
Tips for Effective Bleeding
- Work slowly: Rushing can trap air in the system.
- Use clear tubing: So you can see air bubbles exiting.
- Don’t let the reservoir go empty: Air will enter the master cylinder and restart the process.
- Test the pedal: After bleeding, press the clutch—it should feel firm and return smoothly.
Testing and Final Checks
Once bleeding is complete, it’s time to test your work. Start the engine and press the clutch pedal several times. It should feel solid and engage at the same point each time. Try shifting through the gears—first, reverse, and others—to ensure the clutch disengages fully.
Check under the car and around the master cylinder for leaks. If you see any drips, tighten the connections or re-bleed the system. Also, inspect the reservoir cap to make sure it’s sealed properly.
Take the car for a short test drive in a safe area. Pay attention to how the clutch feels—especially during starts and shifts. If everything works smoothly, you’ve successfully replaced the clutch master cylinder.
What If It Still Doesn’t Work?
If the clutch still feels soft or won’t disengage, double-check your work. Common issues include:
- Air still in the system: Re-bleed more thoroughly.
- Loose connections: Tighten the hydraulic line and mounting bolts.
- Faulty slave cylinder: If the master cylinder is new but the problem persists, the slave cylinder may also be bad.
- Incorrect fluid: Ensure you’re using the right type of brake fluid.
When in doubt, consult a professional mechanic.
Conclusion: Save Money and Gain Confidence
Replacing the clutch master cylinder on your Toyota Corolla might seem daunting at first, but it’s a job well within reach for most DIYers. By following this guide, you’ve not only saved hundreds of dollars in labor costs but also gained valuable mechanical knowledge. Understanding how your car’s systems work empowers you to maintain it better and spot problems early.
Remember, regular maintenance—like checking fluid levels and inspecting for leaks—can prevent future issues. And if you ever feel unsure, don’t hesitate to seek help. Safety always comes first.
With a little patience and the right tools, you can keep your Corolla running smoothly for years to come. Now go enjoy that firm, responsive clutch pedal—you’ve earned it.
Frequently Asked Questions
How much does it cost to replace a clutch master cylinder on a Toyota Corolla?
The part typically costs between $50 and $150, depending on whether you choose OEM or aftermarket. If you do it yourself, labor is free—dealerships or mechanics may charge $200–$400 for the job.
Can I drive with a bad clutch master cylinder?
It’s not recommended. A failing master cylinder can lead to complete clutch failure, leaving you unable to shift gears or drive safely.
How often should the clutch master cylinder be replaced?
There’s no set interval, but most last 100,000 to 150,000 miles. Replace it when you notice symptoms like a spongy pedal or fluid leaks.
Do I need to bleed the clutch after replacing the master cylinder?
Yes, bleeding is essential. Air in the hydraulic system will prevent the clutch from working properly, so always bleed thoroughly after installation.
Can I use brake fluid for the clutch system?
Yes, most Toyota Corollas use DOT 3 or DOT 4 brake fluid in the clutch system. Check your owner’s manual to confirm the correct type.
Is it better to replace the master and slave cylinder together?
Not always, but if the slave cylinder is old or leaking, replacing both at the same time can save time and prevent future issues. It’s a common preventative measure.


