Station How to Read Tire Pressure Gauge
Contents
- 1 Key Takeaways
- 2 📑 Table of Contents
- 3 Why Checking Tire Pressure Matters
- 4 Understanding Tire Pressure Basics
- 5 Types of Tire Pressure Gauges at Gas Stations
- 6 Step-by-Step Guide: How to Read a Tire Pressure Gauge at the Station
- 7 Common Mistakes to Avoid
- 8 When to Check Tire Pressure
- 9 Maintaining Your Tires Beyond Pressure
- 10 Conclusion
- 11 Frequently Asked Questions
Knowing how to read a tire pressure gauge at a gas station is a simple but essential skill for every driver. It helps maintain proper tire inflation, improves fuel efficiency, and enhances safety on the road. This guide walks you through the process step by step, so you can confidently check your tires anytime.
Key Takeaways
- Proper tire pressure improves safety: Underinflated or overinflated tires can lead to blowouts, poor handling, and longer braking distances.
- Use the correct PSI: Always refer to your vehicle’s recommended tire pressure, found on the driver’s side door jamb or in the owner’s manual.
- Check tires when cold: For accurate readings, measure tire pressure before driving or after the car has been parked for at least three hours.
- Know your gauge type: Station air pumps typically use analog (dial) or digital gauges—learn how to read both correctly.
- Don’t rely on visual inspection: Tires can look fine even when underinflated by 20% or more.
- Adjust pressure as needed: Add or release air using the station pump, then recheck until the correct PSI is reached.
- Make it a monthly habit: Regular checks prevent wear, save fuel, and extend tire life.
📑 Table of Contents
Why Checking Tire Pressure Matters
You’ve probably heard it before: “Check your tire pressure regularly.” But how often do you actually do it? If you’re like most drivers, the answer might be “not enough.” Yet, maintaining the right tire pressure is one of the simplest and most effective ways to keep your car safe, efficient, and reliable.
Tires are the only part of your vehicle that touch the road. When they’re properly inflated, they provide optimal grip, handling, and braking performance. But when they’re underinflated—even slightly—they can overheat, wear unevenly, and increase the risk of a blowout. Overinflated tires, on the other hand, reduce traction and make your ride harsher. Both scenarios can lead to dangerous driving conditions, especially in wet or icy weather.
Beyond safety, proper tire pressure also affects your wallet. Underinflated tires create more rolling resistance, which means your engine has to work harder. This leads to lower fuel efficiency—sometimes by as much as 3% per pound of pressure below the recommended level. Over time, that adds up. And let’s not forget tire wear: incorrect pressure causes uneven tread wear, shortening the life of your tires and forcing you to replace them sooner.
Understanding Tire Pressure Basics

Visual guide about Station How to Read Tire Pressure Gauge
Image source: ourhometools.com
Before you head to the gas station, it’s important to understand what tire pressure actually means. Tire pressure is measured in pounds per square inch (PSI), which tells you how much air is inside the tire. Every vehicle has a recommended PSI range, and it’s not the same as the maximum pressure printed on the tire sidewall. That number is the tire’s maximum safe pressure under ideal conditions—not what your car needs.
So where do you find the correct PSI for your vehicle? The best source is the sticker located on the driver’s side door jamb. It lists the recommended front and rear tire pressures for your specific make, model, and trim. You can also find this information in your owner’s manual. For example, a 2022 Honda Civic might recommend 32 PSI for all four tires, while a Ford F-150 could require 35 PSI in the front and 40 PSI in the rear.
It’s also crucial to check tire pressure when the tires are “cold.” This means the car hasn’t been driven for at least three hours, or no more than one mile at low speed. Why? Because driving heats up the tires, which increases the air pressure inside. If you measure pressure when the tires are warm, you’ll get a falsely high reading. For instance, a tire that shows 36 PSI after a long drive might actually be at 32 PSI when cold—right where it should be.
Common Misconceptions About Tire Pressure
Many drivers assume they can tell if a tire is underinflated just by looking at it. Unfortunately, that’s not true. A tire can lose up to 20% of its recommended pressure and still appear normal. Only a gauge can give you an accurate measurement.
Another myth is that all tires should have the same pressure. While some vehicles do recommend equal pressure for all four tires, many—especially trucks and SUVs—require different PSI levels for the front and rear axles. Always follow your vehicle’s specifications, not a one-size-fits-all approach.
Some people also believe that overinflating tires improves fuel economy. While slightly higher pressure can reduce rolling resistance, going too high compromises handling and increases the risk of blowouts. Stick to the recommended PSI for the best balance of safety, comfort, and efficiency.
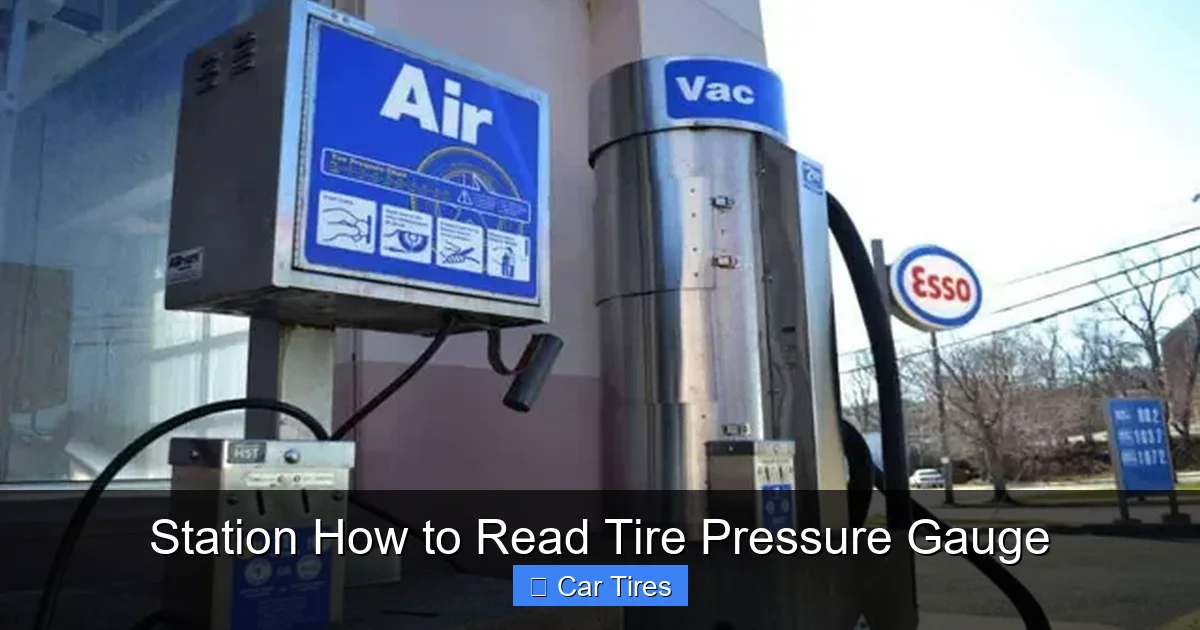
Types of Tire Pressure Gauges at Gas Stations
Visual guide about Station How to Read Tire Pressure Gauge
Image source: images.simpletire.com
When you pull up to a gas station air pump, you’ll usually find one of two types of tire pressure gauges: analog (also called dial or stick gauges) or digital gauges. Both are designed to measure PSI, but they work differently and require slightly different techniques to read accurately.
Analog gauges are the most common at service stations. They feature a round dial with a needle that points to the current pressure. Some have a sliding scale or color-coded zones (green for good, yellow for caution, red for danger), but you should always rely on the numbers, not the colors. To use an analog gauge, simply press it firmly onto the tire’s valve stem. The needle will move to show the pressure. Wait a few seconds for it to stabilize, then read the number where the needle stops.
Digital gauges, on the other hand, display the pressure on a small LCD screen. They’re often more precise and easier to read, especially in low light. To use one, press the gauge onto the valve stem and hold it steady until the screen shows a stable number. Some digital models even have a built-in light or backlight for nighttime use.
How to Identify the Gauge Type
If you’re unsure which type of gauge you’re using, look for these clues:
– **Analog:** Has a round face with a needle and numbers around the edge. May have a retractable hose.
– **Digital:** Features a small screen with digits. Often has buttons for power or unit selection (PSI, BAR, kPa).
Most modern gas stations are upgrading to digital gauges because they’re more accurate and user-friendly. However, analog gauges are still widely used, especially at older or rural stations. The good news? Once you learn how to read one, the other is easy to figure out.
Tips for Accurate Readings
No matter which gauge you use, follow these tips for the most accurate results:
1. **Remove the valve cap completely.** Don’t just loosen it—take it off and set it aside so it doesn’t get lost.
2. **Press the gauge straight onto the valve stem.** Angling it can cause air to leak, giving a false low reading.
3. **Hold it steady for 3–5 seconds.** This allows the gauge to stabilize.
4. **Listen for hissing.** If you hear air escaping, the seal isn’t tight—reposition the gauge and try again.
5. **Check all four tires.** Don’t assume they’re all the same. Front and rear tires often have different pressures, and one tire might be leaking.
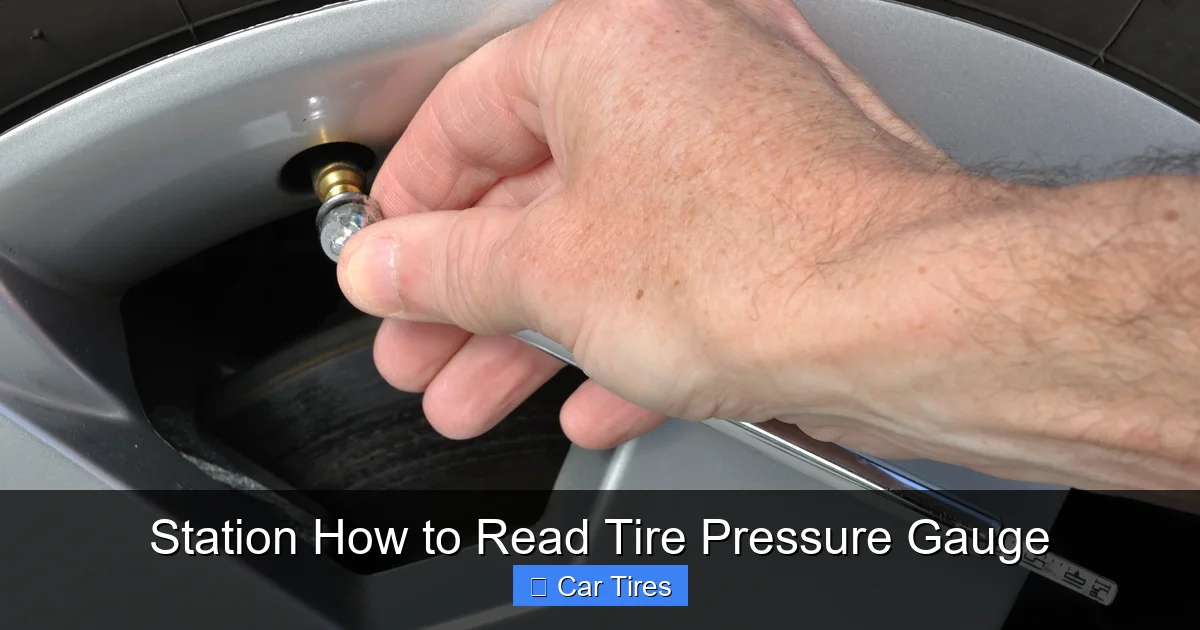
Step-by-Step Guide: How to Read a Tire Pressure Gauge at the Station
Visual guide about Station How to Read Tire Pressure Gauge
Image source: ourhometools.com
Now that you know the basics, let’s walk through the process of checking and adjusting your tire pressure at a gas station. It’s easier than you think—and takes less than five minutes.
Step 1: Park Close to the Air Pump
Pull up so that all four tires are within reach of the air hose. Most pumps have a 10- to 15-foot hose, but it’s best to position your car so you don’t have to stretch or strain. Turn off the engine and set the parking brake for safety.
Step 2: Locate the Recommended PSI
Before you start, check your vehicle’s recommended tire pressure. Look for the sticker on the driver’s side door jamb—it’s usually near the latch. Note the front and rear PSI values. If you can’t find the sticker, check the owner’s manual or look it up online using your car’s make, model, and year.
For example, let’s say your car recommends 32 PSI for all four tires. That’s your target.
Step 3: Remove the Valve Caps
Twist off the valve cap from the first tire (usually the front driver’s side). Set it in a safe place—like your pocket or cup holder—so you don’t lose it. Repeat for all four tires.
Step 4: Check the Current Pressure
Take the gauge from the air pump and press it firmly onto the valve stem. You’ll hear a brief hiss as air enters the gauge—that’s normal. Hold it steady for a few seconds until the reading stabilizes.
– **On an analog gauge:** Read the number where the needle points.
– **On a digital gauge:** Wait for the screen to stop changing, then note the number.
Let’s say the gauge shows 28 PSI. That’s 4 PSI below the recommended level. Time to add air.
Step 5: Add Air (If Needed)
If the pressure is too low, use the air pump to add air. Most station pumps have a lever or button you press to release air. Hold it down while the gauge monitors the pressure.
Add air in short bursts—about 2–3 seconds at a time—then recheck with the gauge. This prevents overinflation. For our example, you’d add air until the gauge reads 32 PSI.
If you accidentally go over, don’t panic. Most pumps have a release valve or a way to let air out. Simply press the release button or use the gauge itself (some have a small pin you can press to bleed air). Recheck until you hit the target.
Step 6: Repeat for All Tires
Move to the next tire and repeat the process. Check the pressure, add or release air as needed, and recheck. Don’t assume all tires are the same—one might be low while the others are fine.
Step 7: Replace the Valve Caps
Once all tires are at the correct pressure, screw the valve caps back on tightly. This keeps dirt and moisture out of the valve stem, which can cause leaks over time.
Step 8: Record the Date and Pressure (Optional)
For extra diligence, jot down the date and pressure readings in a notebook or phone app. This helps you track changes over time and spot slow leaks early.
Common Mistakes to Avoid
Even experienced drivers make mistakes when checking tire pressure. Here are some common pitfalls and how to avoid them:
Checking Tires After Driving
As mentioned earlier, always check tire pressure when the tires are cold. If you’ve just driven 20 minutes to the gas station, wait at least three hours before checking—or drive less than a mile and check immediately. Otherwise, your readings will be inflated.
Using the Wrong PSI
Don’t rely on the number printed on the tire sidewall. That’s the maximum pressure, not the recommended one. Always use the PSI from your door jamb or manual.
Ignoring the Spare Tire
Many drivers forget about the spare tire. But if you ever need it, you’ll want it properly inflated. Check it every few months—especially before long trips.
Overinflating to “Be Safe”
Some people think more air equals better performance. But overinflated tires wear out faster in the center and provide less grip. Stick to the recommended PSI.
Not Checking Regularly
Tire pressure can drop due to temperature changes, punctures, or natural leakage. Check your tires at least once a month—and before long trips.
When to Check Tire Pressure
While monthly checks are a good rule of thumb, there are certain times when you should definitely check your tire pressure:
– **Before long trips:** Ensures safety and fuel efficiency over hundreds of miles.
– **During seasonal changes:** Cold weather can drop tire pressure by 1 PSI for every 10°F decrease in temperature.
– **After a puncture or repair:** To confirm the fix held and pressure is stable.
– **When the TPMS light comes on:** Your car’s Tire Pressure Monitoring System alerts you to low pressure—don’t ignore it.
– **After loading heavy cargo:** Extra weight may require slightly higher pressure (check your manual).
Maintaining Your Tires Beyond Pressure
While proper inflation is crucial, it’s just one part of tire care. To get the most out of your tires, also:
– **Rotate them every 5,000 to 7,000 miles** to ensure even wear.
– **Check tread depth regularly** using the penny test (insert a penny into the tread with Lincoln’s head upside down—if you can see the top of his head, it’s time for new tires).
– **Align and balance wheels** if you notice uneven wear or vibrations.
– **Inspect for damage** like cuts, bulges, or nails during each pressure check.
Taking these steps not only extends tire life but also improves overall vehicle performance and safety.
Conclusion
Learning how to read a tire pressure gauge at the station is a small skill with big benefits. It takes just a few minutes, costs nothing, and can save you money, improve fuel efficiency, and keep you safer on the road. Whether you’re using an analog dial or a digital display, the process is straightforward once you know the steps.
Make it a habit to check your tire pressure monthly—and especially before long drives or during temperature swings. Keep your vehicle’s recommended PSI handy, always check when tires are cold, and don’t skip the spare. With a little attention, your tires will last longer, perform better, and give you peace of mind every time you hit the road.
Remember: a well-inflated tire isn’t just about numbers on a gauge. It’s about control, safety, and confidence behind the wheel. So next time you’re at the gas station, grab that gauge and give your tires the check-up they deserve.
Frequently Asked Questions
How often should I check my tire pressure?
You should check your tire pressure at least once a month and before long trips. Tires can lose pressure gradually due to temperature changes or small leaks, so regular checks help maintain safety and efficiency.
Can I use a gas station gauge instead of buying my own?
Yes, gas station gauges are generally accurate and convenient for quick checks. However, having your own handheld gauge ensures you can check pressure anytime, even when stations are closed or out of service.
What happens if I drive with underinflated tires?
Underinflated tires increase rolling resistance, reduce fuel economy, cause uneven tread wear, and raise the risk of overheating and blowouts—especially at high speeds or in hot weather.
Is it okay to slightly overinflate my tires for better mileage?
No. Overinflating tires reduces traction, makes the ride harsher, and increases the risk of blowouts. Always follow your vehicle’s recommended PSI for the best balance of safety and efficiency.
Why does my tire pressure drop in cold weather?
Air contracts when it gets colder, reducing pressure inside the tire. For every 10°F drop in temperature, tire pressure can decrease by about 1 PSI. That’s why it’s important to check tires in winter.
Do I need to check the spare tire too?
Yes. Spare tires can lose pressure over time and are often forgotten. Check your spare every few months and before long trips to ensure it’s ready if you ever need it.