Changing Back Tire on Bike
Contents
Changing a back tire on a bike might seem intimidating, but with the right tools and guidance, it’s a manageable task. This guide walks you through every step—from removing the wheel to reinstalling it—so you can get back on the road quickly and safely.
Changing a back tire on a bike is one of those essential skills every cyclist should master. Whether you’re commuting to work, exploring mountain trails, or enjoying a weekend ride, a flat tire can happen at any time. And while it might seem like a daunting task—especially if you’re new to cycling—changing a rear tire is actually quite doable with a little know-how and the right approach.
Unlike car tires, which require heavy machinery and professional help, bike tires are designed to be user-serviceable. That means you can fix a flat on the go, often in under 15 minutes. The rear tire is a bit trickier than the front because of the chain, derailleur, and gears, but once you understand the process, it becomes second nature. This guide will walk you through every step, from preparing your bike to reassembling everything safely. By the end, you’ll feel confident tackling a flat—no matter where your ride takes you.
Key Takeaways
- Gather the right tools: You’ll need tire levers, a pump, a wrench (if needed), and possibly a spare tube or patch kit.
- Shift into the smallest gear: This reduces chain tension and makes removing the rear wheel easier.
- Release the brake (if applicable): Most rim brakes must be opened to allow the tire to pass through.
- Use tire levers carefully: Avoid pinching the inner tube when prying the tire off the rim.
- Check for debris: Inspect the tire and rim for sharp objects before installing a new tube.
- Inflate gradually: Pump the tire to the recommended PSI to avoid overinflation or pinch flats.
- Practice makes perfect: The more you do it, the faster and more confident you’ll become.
📑 Table of Contents
Why Knowing How to Change a Back Tire Matters
Flat tires are one of the most common issues cyclists face. According to cycling forums and repair shops, flats account for over 60% of roadside bike breakdowns. While some flats are caused by punctures from glass, thorns, or nails, others result from wear and tear, underinflation, or pinch flats from hitting potholes. Regardless of the cause, being stranded with a flat tire can turn a fun ride into a frustrating ordeal.
Learning how to change a back tire on a bike gives you independence and peace of mind. You won’t have to rely on others or wait for help. Plus, it saves time and money—no need to call a bike shop or tow service for a simple fix. Whether you’re on a remote trail or stuck in traffic, knowing how to handle a flat means you can get back on the road quickly. It’s also a valuable skill for group rides, where helping others builds camaraderie and trust.
Tools and Supplies You’ll Need
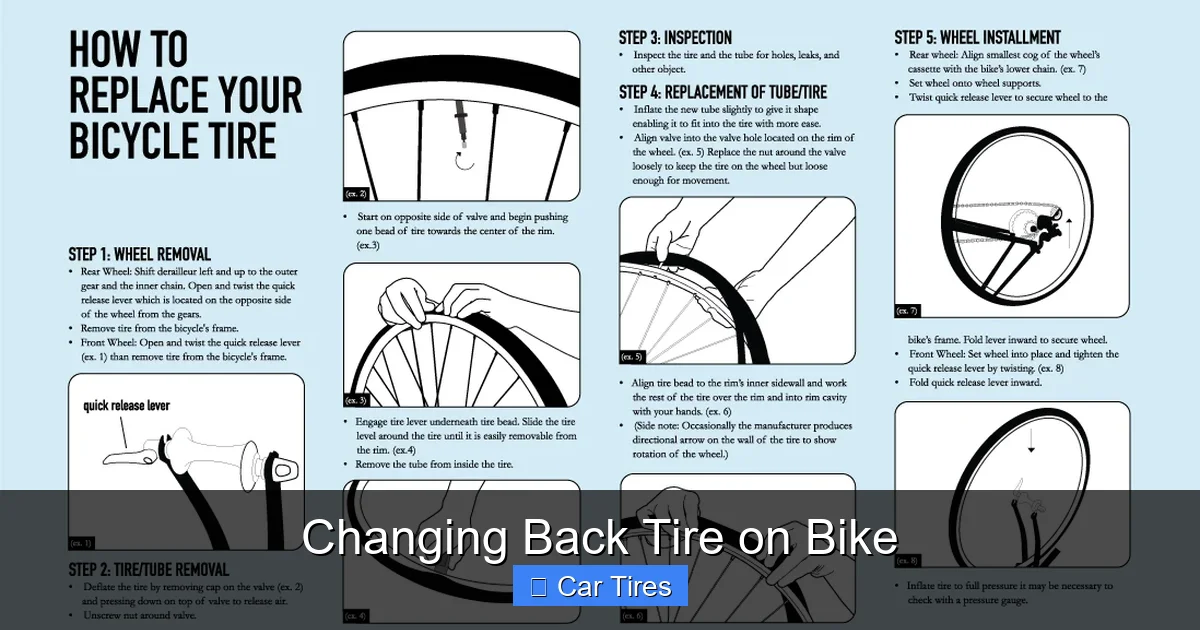
Visual guide about Changing Back Tire on Bike
Image source: i.pinimg.com
Before you start, make sure you have the right tools on hand. You don’t need a full mechanic’s workshop, but a few essentials will make the job much easier. Here’s what to gather:
Essential Tools
- Tire levers (2–3): These plastic or metal tools help pry the tire bead over the rim. Plastic levers are gentler on rims and tubes.
- Bike pump: A portable hand pump or CO2 inflator is ideal for on-the-go repairs. Make sure it’s compatible with your valve type (Presta or Schrader).
- Spare inner tube: Carry a tube that matches your tire size. Check the sidewall of your tire for the correct dimensions (e.g., 700x25c).
- Patch kit (optional): If you prefer to repair rather than replace, a patch kit can fix small punctures. It’s lighter than a spare tube but takes longer.
- Wrench (if needed): Some bikes use nuts instead of quick-release levers. A 15mm wrench is common for rear wheels.
Optional but Helpful Items
- Gloves: Keep your hands clean and protected from grease and sharp edges.
- Multitool: Many multitools include hex keys, screwdrivers, and chain tools—great for unexpected adjustments.
- Reflective vest or lights: If you’re fixing a flat at night, visibility is crucial for safety.
- Small rag or cloth: Useful for wiping grease, checking for debris, or drying your hands.
Having these tools in your saddlebag or backpack means you’re always prepared. Many cyclists invest in a compact repair kit that includes a tube, levers, and a mini pump. It’s a small investment that pays off every time you avoid a long walk home.
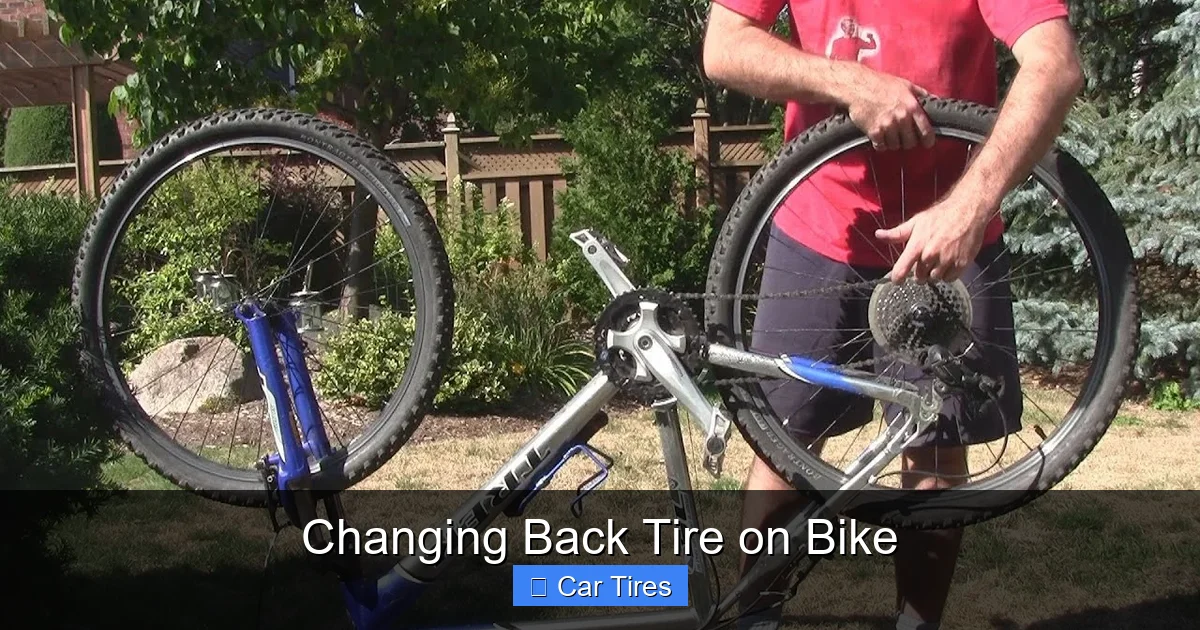
Step-by-Step Guide to Changing the Back Tire
Visual guide about Changing Back Tire on Bike
Image source: i.ytimg.com
Now that you’re equipped, let’s walk through the process of changing a back tire on a bike. Follow these steps carefully, and you’ll have your bike rolling again in no time.
Step 1: Prepare Your Bike
Start by finding a safe, flat spot to work. Avoid busy roads or uneven ground. If you’re on a trail, move to the side to let other riders pass. Flip your bike upside down so it rests on the handlebars and seat—this gives you easy access to the rear wheel.
Next, shift the chain onto the smallest rear cog (the hardest gear). This reduces tension on the derailleur and makes it easier to remove the wheel. If your bike has a rear derailleur with a clutch, disengage it if possible (check your manual). This prevents the derailleur from flopping around while you work.
Step 2: Release the Brakes
If your bike has rim brakes (like V-brakes or caliper brakes), you’ll need to open them to allow the tire to pass through. Most brakes have a quick-release lever or a cable pinch bolt. Squeeze the brake arms together and flip the quick-release lever to open the brake pads. For bikes with cantilever or V-brakes, you may need to unhook the cable from the brake arm.
Tip: If you can’t open the brakes wide enough, you might need to deflate the tire completely before removing it. This gives you more clearance.
Step 3: Remove the Wheel
Now it’s time to take off the rear wheel. Most modern bikes use a quick-release skewer, which you can open by flipping the lever. Loosen it by turning counterclockwise until the wheel is free. If your bike uses nuts, use a wrench to loosen both sides evenly.
Once the skewer or nuts are loose, gently pull the wheel downward and backward to free it from the dropouts. The chain will still be on the cassette, so guide it carefully over the derailleur cage. Don’t force it—take your time to avoid damaging the derailleur or chain.
Step 4: Remove the Tire and Tube
With the wheel off, lay it flat on the ground. Use your tire levers to pry one side of the tire bead over the rim. Insert one lever under the bead and hook it to a spoke. Insert a second lever a few inches away and slide it along the rim to lift the entire side of the tire off.
Once one side is off, pull out the inner tube. Start at the valve stem and gently pull the tube out from under the tire. Inspect the tube for the puncture—look for holes, burns, or tears. If you’re using a patch kit, mark the hole and follow the kit instructions. Otherwise, replace it with a new tube.
Step 5: Inspect the Tire and Rim
Before installing a new tube, always check the tire and rim for debris. Run your fingers along the inside of the tire, feeling for glass, thorns, or sharp edges. Even a small piece can cause another flat. Also, check the rim tape—the strip that covers the spoke holes—to make sure it’s intact and not exposing the tube to sharp edges.
Pro tip: If you find a thorn or nail, remove it carefully with pliers. Don’t just pull it out blindly—trace its path to ensure it’s fully removed.
Step 6: Install the New Tube and Tire
Start by inflating the new tube slightly—just enough to give it shape. This prevents it from getting pinched when you install the tire. Insert the valve stem into the rim hole and tuck the tube inside the tire.
Now, work the tire bead back onto the rim. Start at the valve and use your hands to push the bead over the edge. If it gets tight near the end, use a tire lever—but be gentle to avoid pinching the tube. Never use metal levers for this step unless absolutely necessary.
Once the tire is fully seated, check that the tube isn’t pinched between the tire and rim. Spin the wheel to make sure the tire is evenly seated on both sides.
Step 7: Inflate the Tire
Attach your pump to the valve and inflate the tire gradually. Check the sidewall for the recommended PSI (pounds per square inch). Most road bikes use 80–130 PSI, while mountain bikes use 30–50 PSI. Overinflation can cause blowouts; underinflation increases the risk of pinch flats.
As you pump, listen for hissing sounds that might indicate a leak. If the tire isn’t holding air, deflate it and recheck for pinches or improper seating.
Step 8: Reinstall the Wheel
With the tire inflated, it’s time to put the wheel back on. Guide the chain back onto the smallest cog and slide the wheel into the dropouts. Make sure it’s centered and seated properly.
Tighten the quick-release skewer or nuts securely. For quick-release, the lever should be firm—when closed, it should leave a slight imprint on your palm. Never ride with a loose rear wheel.
Step 9: Reconnect the Brakes
Close the brake quick-release or reattach the cable. Squeeze the brake lever to ensure the pads grip the rim evenly. If the brakes feel loose, adjust the cable tension using the barrel adjuster.
Step 10: Test Your Work
Flip your bike back over and spin the rear wheel. Make sure it turns freely without rubbing against the brake pads or frame. Shift through the gears to ensure the chain moves smoothly. Take a short test ride to confirm everything is working properly.
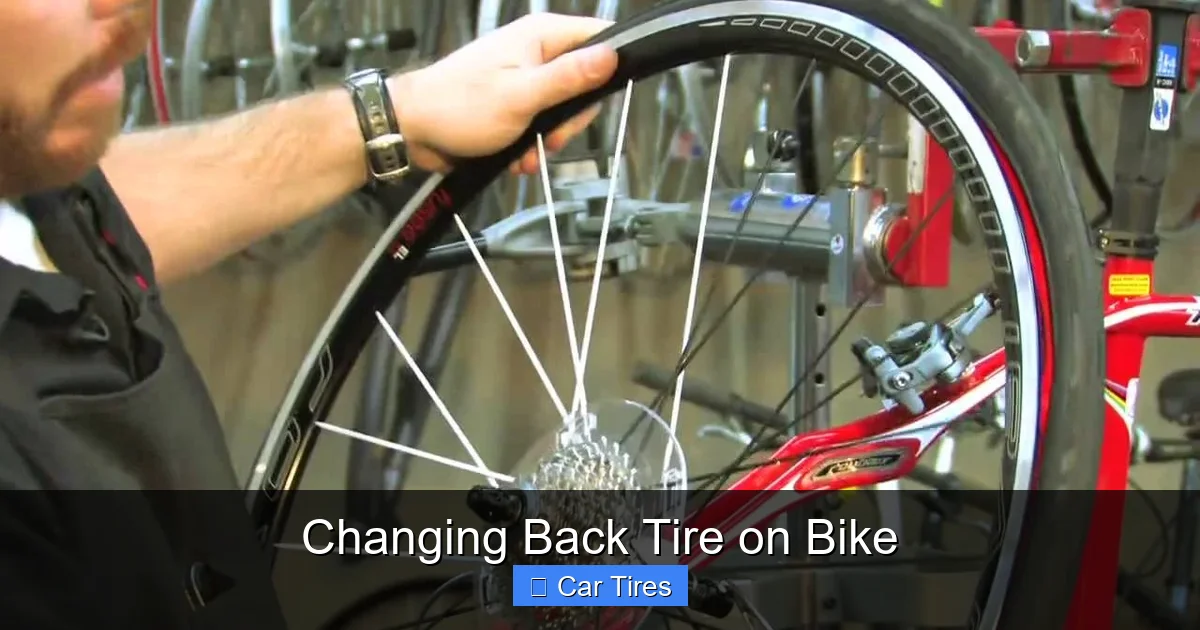
Common Mistakes to Avoid
Visual guide about Changing Back Tire on Bike
Image source: i.ytimg.com
Even experienced cyclists make mistakes when changing a back tire. Here are some common pitfalls and how to avoid them:
Pinching the Tube
Using tire levers too aggressively can pinch the inner tube, causing a new flat. Always use plastic levers and work slowly. If you must use metal levers, be extra careful near the valve and bead.
Forgetting to Check for Debris
Installing a new tube without inspecting the tire is a recipe for another flat. Always run your fingers along the inside of the tire and check the rim tape.
Over-tightening the Skewer
While the wheel must be secure, over-tightening the quick-release can damage the dropout or skewer. Tighten just enough to prevent movement—don’t use excessive force.
Ignoring Brake Alignment
After reinstalling the wheel, the brake pads might not align properly. If the wheel rubs or the brakes feel weak, adjust the pad position using the brake’s mounting bolt.
Using the Wrong Tube Size
Always match the tube to your tire size. A tube that’s too small will stretch and burst; one that’s too large will wrinkle and cause pinch flats.
Tips for Preventing Future Flats
While knowing how to change a back tire on a bike is essential, preventing flats is even better. Here are some proactive steps to reduce your risk:
Maintain Proper Tire Pressure
Check your tire pressure before every ride. Underinflated tires are more prone to pinch flats and punctures. Use a pressure gauge to ensure accuracy.
Inspect Tires Regularly
Look for cuts, cracks, or worn tread. Replace tires that show signs of aging or damage. A worn tire is more likely to fail.
Use Puncture-Resistant Tires
Consider upgrading to tires with built-in puncture protection, such as Kevlar belts or thicker casings. They cost more but offer better durability.
Install Tire Liners
Tire liners are strips of material placed between the tube and tire to block sharp objects. They’re especially useful for commuters in urban areas.
Avoid Road Debris
Stay alert for glass, thorns, and potholes. Ride in the center of the lane where debris is less common, and avoid freshly paved roads with loose gravel.
Carry a Repair Kit
Always have a spare tube, levers, and pump with you. Even if you don’t use it often, it’s peace of mind on every ride.
When to Seek Professional Help
While most flats can be fixed at home, some issues require a bike shop. If you notice repeated flats in the same spot, it could indicate a problem with the rim, spoke, or tire casing. Also, if the wheel is bent or the hub is damaged, professional repair is necessary.
Additionally, if you’re unsure about reassembling components—like the derailleur or brake cables—don’t hesitate to visit a mechanic. It’s better to be safe than risk further damage or injury.
Final Thoughts
Changing a back tire on a bike is a skill that every cyclist should have in their toolkit. It’s not just about fixing a flat—it’s about independence, confidence, and enjoying your ride without fear of being stranded. With practice, what once seemed complicated becomes quick and routine.
Remember, preparation is key. Carry the right tools, know your bike’s components, and stay calm when trouble strikes. Whether you’re a weekend warrior or a daily commuter, mastering this skill will make you a more capable and resilient rider.
So the next time you hear that dreaded hiss, don’t panic. Grab your levers, take a deep breath, and get to work. You’ve got this.
Frequently Asked Questions
How long does it take to change a back tire on a bike?
For a beginner, it might take 15–20 minutes. With practice, experienced cyclists can do it in under 10 minutes. The key is familiarity with your bike and having the right tools ready.
Can I change a back tire without removing the wheel?
No, you must remove the rear wheel to access the inner tube. The chain and derailleur make it impossible to change the tube while the wheel is still attached.
What if my bike has disc brakes?
Disc brakes don’t need to be opened like rim brakes. However, you still need to remove the wheel carefully to avoid damaging the rotor. Make sure the rotor isn’t bent and the caliper has enough clearance.
Do I need a new tube every time I get a flat?
Not necessarily. Small punctures can often be patched with a repair kit. However, if the tube is torn, burned, or has multiple holes, replacing it is safer and more reliable.
How do I know if my tire is the right size for my tube?
Check the sidewall of your tire for markings like “700x25c” or “26×2.1.” Your tube should match these dimensions. Most tubes are labeled with a range (e.g., 700c) to fit multiple widths.
What should I do if the tire won’t go back on the rim?
This usually happens when the tube is pinched or the tire bead isn’t seated properly. Deflate the tube completely, check for pinches, and use your hands to work the bead over the rim. Avoid using excessive force.