Which Is the Negative Terminal on a Car Battery
Contents
- 1 Key Takeaways
- 2 📑 Table of Contents
- 3 Which Is the Negative Terminal on a Car Battery?
- 4 Understanding Car Battery Basics
- 5 How to Identify the Negative Terminal
- 6 Safety Tips When Working with Car Batteries
- 7 Common Mistakes and How to Avoid Them
- 8 Jump-Starting a Car: The Right Way
- 9 Maintaining Your Car Battery
- 10 Conclusion
- 11 Frequently Asked Questions
Knowing which is the negative terminal on a car battery is crucial for safe maintenance and jump-starting. This guide explains how to spot it, why it matters, and how to work with your battery without risking damage or injury.
Key Takeaways
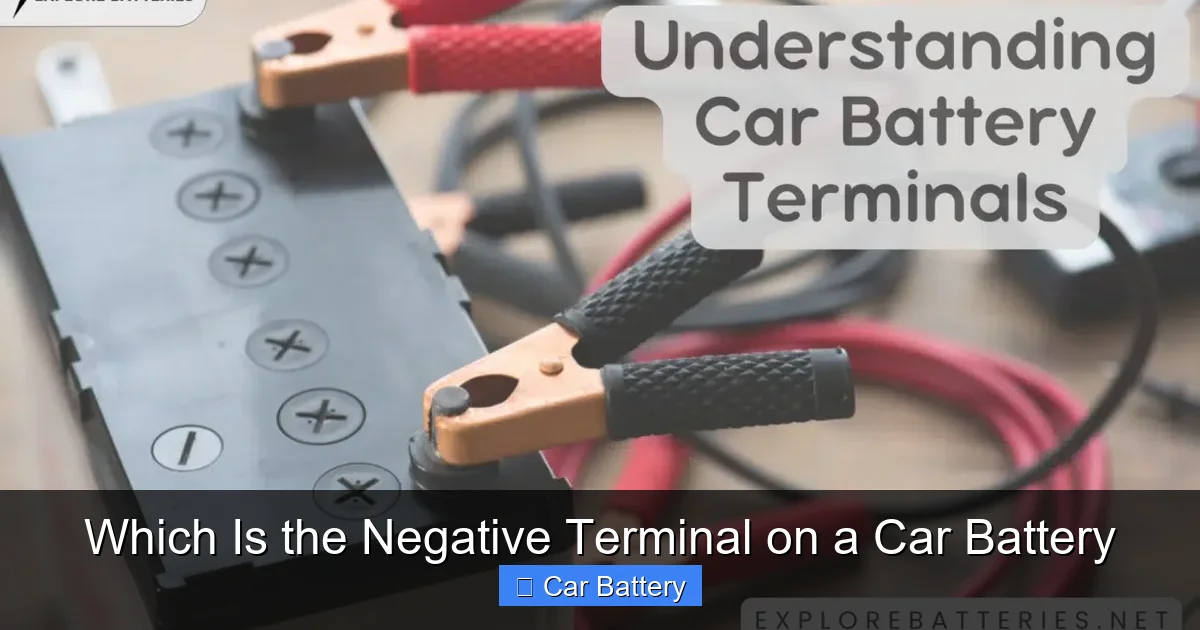
- Color coding matters: The negative terminal is usually black or marked with a minus (-) sign, while the positive is red with a plus (+).
- Cable size can help: The negative cable often connects directly to the car’s chassis, making it slightly thicker or easier to trace.
- Safety first: Always disconnect the negative terminal first when removing a battery to reduce the risk of short circuits.
- Jump-starting correctly: When jump-starting, connect the negative jumper cable to the dead battery’s negative terminal or an unpainted metal surface on the engine block.
- Misidentification risks: Connecting cables to the wrong terminals can damage electronics, cause sparks, or even lead to battery explosion.
- Modern batteries may vary: Some newer models use side terminals or sealed designs, so always check the labels or owner’s manual.
- Regular inspection helps: Corrosion, loose connections, or damaged cables near the negative terminal can affect performance and safety.
📑 Table of Contents
Which Is the Negative Terminal on a Car Battery?
If you’ve ever popped the hood of your car and stared at the battery like it’s a puzzle from another planet, you’re not alone. Car batteries might look intimidating, but once you know what you’re looking at, they’re actually pretty straightforward. One of the most common questions drivers—especially new ones—ask is: *Which is the negative terminal on a car battery?* It’s a simple question, but getting the answer right can save you from costly mistakes, electrical damage, or even personal injury.
Understanding your car battery isn’t just for mechanics or gearheads. Whether you’re jump-starting a dead battery, cleaning corrosion, replacing the battery, or just doing routine maintenance, knowing which terminal is negative is essential. The negative terminal plays a critical role in your vehicle’s electrical system, acting as the return path for current. Getting it wrong—like connecting jumper cables to the wrong terminals—can fry your car’s electronics, cause sparks, or worse, lead to a battery explosion.
In this guide, we’ll walk you through everything you need to know about identifying the negative terminal on a car battery. We’ll cover visual clues, safety tips, common mistakes, and real-world scenarios where this knowledge makes all the difference. By the end, you’ll feel confident under the hood and ready to handle your battery like a pro.
Understanding Car Battery Basics
Visual guide about Which Is the Negative Terminal on a Car Battery
Image source: explorebatteries.net
Before we dive into identifying the negative terminal, let’s take a quick step back and understand how a car battery works. Most vehicles use a 12-volt lead-acid battery, which stores chemical energy and converts it into electrical energy to start the engine and power accessories when the engine is off.
A standard car battery has two main terminals: positive (+) and negative (-). These terminals are the connection points for the electrical system. The positive terminal supplies power to the vehicle, while the negative terminal completes the circuit by returning the current to the battery. Think of it like a loop: electricity flows out from the positive side, powers your car’s systems, and returns through the negative side.
The battery is connected to the car’s chassis (the metal frame) via the negative cable. This setup is called a “grounded” system, and it’s why the negative terminal is often referred to as the “ground” terminal. Because the chassis acts as a conductor, the negative side doesn’t need a separate wire running back to the battery for every component—this simplifies wiring and reduces weight.
Now, here’s the key: the negative terminal is always connected to the car’s ground. That means if you touch the negative terminal and any unpainted metal part of the car (like the engine block), you’re completing a circuit. This is why it’s so important to be careful when working around the battery—accidentally touching the positive terminal to grounded metal can cause a short circuit, sparks, or even a fire.
How Car Batteries Power Your Vehicle
When you turn the key or press the start button, the battery sends a surge of electricity to the starter motor. This motor spins the engine, allowing it to start. Once the engine is running, the alternator takes over, generating electricity to recharge the battery and power the car’s systems.
The battery also provides backup power when the alternator can’t keep up—like when you’re idling with the headlights, AC, and radio on. Without a properly functioning battery, your car simply won’t start.
The flow of electricity depends on the correct connection between the positive and negative terminals. If either terminal is loose, corroded, or connected incorrectly, the circuit breaks, and your car won’t get the power it needs.
Why the Negative Terminal Is Grounded
You might wonder why the negative side is grounded to the chassis instead of the positive. It’s mostly a matter of convention and safety. Grounding the negative terminal reduces the risk of electrical shock and minimizes corrosion on the battery posts. It also simplifies wiring—since the chassis acts as a return path, fewer wires are needed throughout the vehicle.
This design also helps protect sensitive electronics. Modern cars have dozens of computers and sensors. A grounded negative system helps stabilize voltage and reduce electrical noise, which can interfere with these systems.
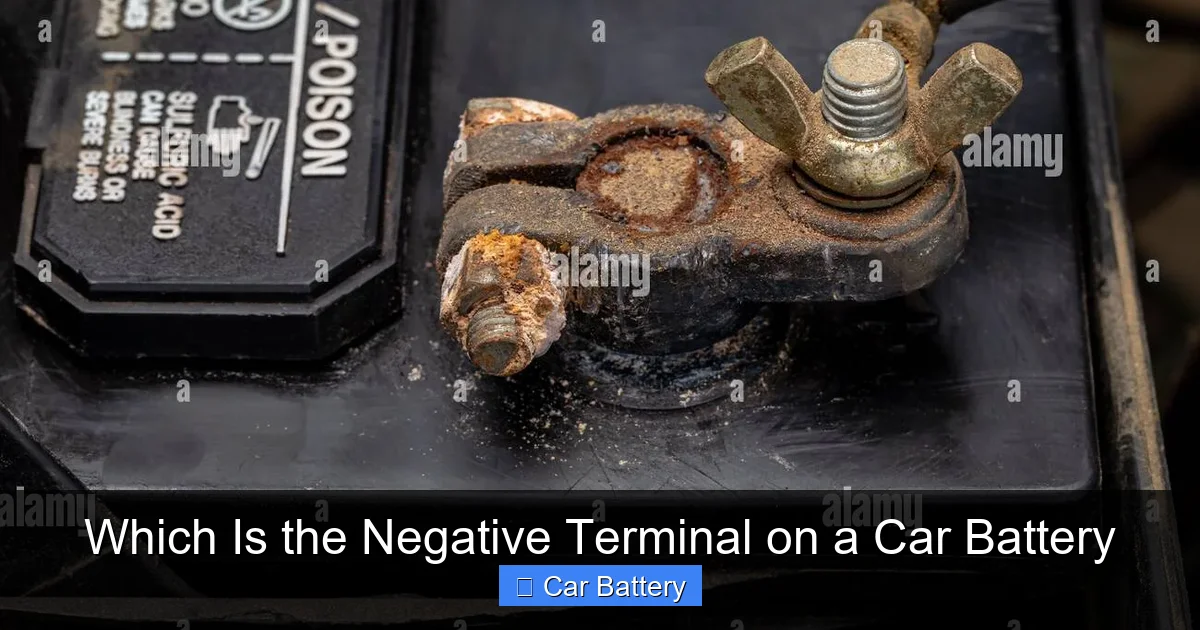
How to Identify the Negative Terminal
Visual guide about Which Is the Negative Terminal on a Car Battery
Image source: c8.alamy.com
Now that you understand the basics, let’s get practical. How do you actually find the negative terminal on your car battery? There are several reliable ways to identify it, and using a combination of methods will give you the most confidence.
Look for the Minus (-) Symbol
The most obvious clue is the symbol on the battery itself. The negative terminal is almost always marked with a minus sign (-). This symbol is usually stamped or printed directly on the battery casing near the terminal post. It might be small, but it’s there.
Some batteries also have the word “NEG” or “NEGATIVE” printed nearby. If you’re having trouble seeing the symbol, try shining a flashlight at an angle—the contrast can make it easier to spot.
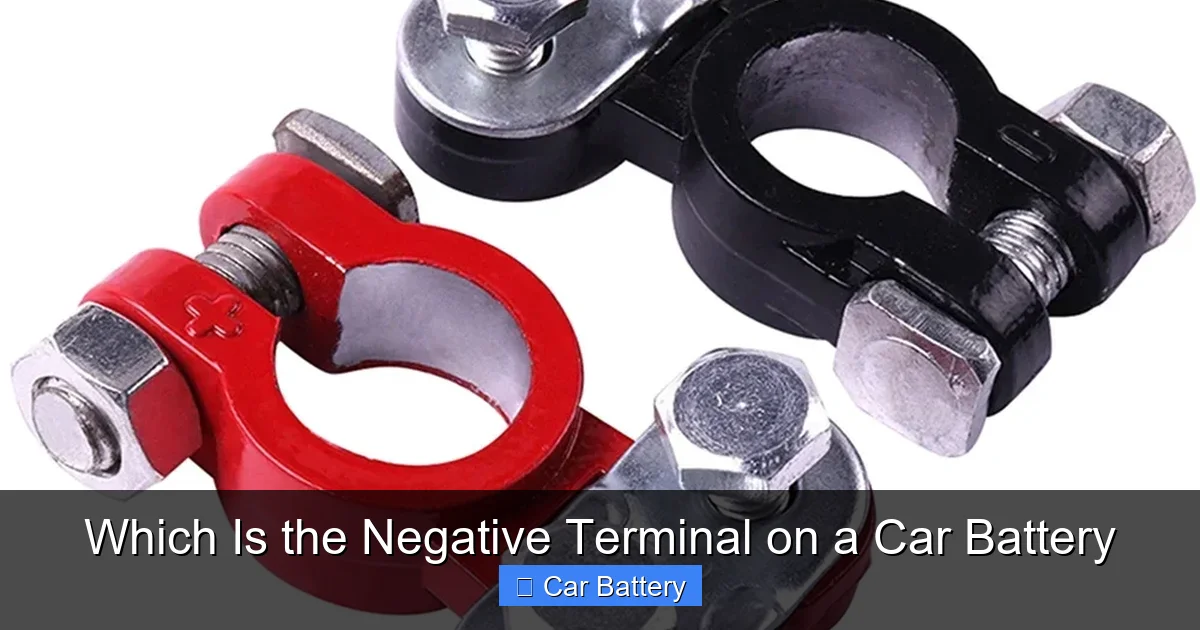
Check the Color of the Cable
Another easy way to identify the negative terminal is by looking at the color of the cable connected to it. In most vehicles, the negative cable is black. This is a universal standard in automotive wiring.
The positive cable, by contrast, is typically red. You’ll often see red and black cables running from the battery to the starter and other components. If you see a thick black cable clamped to one of the terminals, that’s almost certainly the negative side.
Keep in mind that over time, cables can fade or get dirty, so color alone isn’t always foolproof. But when combined with other clues, it’s a strong indicator.
Trace the Cable to the Chassis
Since the negative terminal is grounded to the car’s chassis, you can often identify it by following the cable. The negative cable usually runs from the battery terminal directly to a bolt on the engine block or frame. This connection point is often unpainted metal and may have a grounding symbol (a downward arrow or the word “GROUND”).
If you trace the black cable and see it bolted to the engine or frame, you’ve found the negative side. The positive cable, on the other hand, typically runs to the starter motor or a fuse box, and it won’t be grounded to the chassis.
Use the Battery Label or Owner’s Manual
If you’re still unsure, check the battery label. Most batteries have a diagram or labeling that shows which terminal is positive and which is negative. This is especially helpful on newer batteries or those with side terminals.
You can also consult your vehicle’s owner’s manual. It often includes a section on battery maintenance with diagrams showing the correct terminal layout. If you’ve lost the manual, you can usually find a digital copy online by searching your car’s make, model, and year.
Modern Batteries and Side Terminals
Some newer vehicles, especially luxury or high-performance models, use batteries with side terminals instead of the traditional top posts. These batteries have terminals on the side, and the cables connect via bolts or clamps.
In these cases, the same rules apply: look for the minus (-) sign, check the cable color, and refer to the label. Side-terminal batteries often have clear markings, but it’s still easy to mix them up if you’re not paying attention.
Another trend is sealed or maintenance-free batteries, which may have covers or caps over the terminals. These are designed to reduce corrosion and prevent spills, but they can make identification a bit trickier. Always lift the cover carefully and look for markings underneath.
Safety Tips When Working with Car Batteries
Visual guide about Which Is the Negative Terminal on a Car Battery
Image source: i5.walmartimages.com
Working with car batteries isn’t dangerous if you follow basic safety rules—but it can be risky if you don’t. The battery contains sulfuric acid and produces hydrogen gas, both of which are hazardous. Plus, the electrical current can cause sparks or shocks if mishandled.
Always Disconnect the Negative Terminal First
One of the most important safety rules is to disconnect the negative terminal first when removing a battery. Why? Because the negative side is grounded to the chassis. If you disconnect the positive terminal first and your wrench touches both the terminal and any metal part of the car, you’ll create a short circuit. This can cause sparks, damage electronics, or even start a fire.
By disconnecting the negative side first, you break the ground connection, reducing the risk of accidental shorts. When reinstalling the battery, reverse the process: connect the positive terminal first, then the negative.
Wear Protective Gear
Always wear safety glasses and gloves when working with a car battery. Acid can splash during removal or if the battery is damaged, and it can cause serious burns to your skin and eyes. Gloves also protect against electrical shocks and help you get a better grip on tools.
If you do get battery acid on your skin, rinse it off immediately with plenty of water. For eye exposure, flush with water for at least 15 minutes and seek medical attention.
Keep Sparks and Flames Away
Never smoke, use a lighter, or create sparks near a car battery. The battery emits hydrogen gas, especially when charging, and hydrogen is highly flammable. A single spark can ignite the gas, leading to an explosion.
This is also why you should avoid placing metal tools across both terminals. Even a small spark can trigger a dangerous reaction.
Work in a Well-Ventilated Area
Always work on your battery in a well-ventilated space, preferably outdoors or in a garage with the door open. This helps disperse any hydrogen gas and reduces the risk of buildup.
Use the Right Tools
Use insulated wrenches or socket sets when working on battery terminals. These tools reduce the risk of short circuits and electrical shocks. Avoid using tools with exposed metal handles or damaged insulation.
Also, make sure your tools fit the terminal bolts properly. A loose fit can slip and cause sparks or damage the terminal.
Common Mistakes and How to Avoid Them
Even experienced drivers can make mistakes when working with car batteries. Here are some of the most common errors and how to avoid them.
Mixing Up the Terminals
The most common mistake is connecting jumper cables or battery chargers to the wrong terminals. This can cause reverse polarity, which damages the car’s electrical system. Symptoms include blown fuses, fried computers, and non-functional electronics.
To avoid this, always double-check the symbols and cable colors before connecting anything. If you’re jump-starting, remember: red to positive, black to negative—or to a grounded metal surface if the negative terminal is inaccessible.
Touching Both Terminals at Once
Never touch both terminals with your hands or tools at the same time. Your body can complete the circuit, leading to a shock. While 12 volts isn’t usually enough to cause serious injury, it can still give you a painful jolt.
Over-Tightening Terminal Bolts
When reinstalling a battery, don’t over-tighten the terminal bolts. This can strip the threads or crack the terminal post, making future maintenance difficult. Tighten just enough to secure the connection—snug, but not forced.
Ignoring Corrosion
Corrosion around the terminals is common and can interfere with electrical flow. It usually appears as a white, green, or blue powdery substance. If you see corrosion, clean it with a mixture of baking soda and water, then rinse and dry the terminals.
Leaving Tools on the Battery
Always remove tools, rags, or other objects from the battery area when you’re done. A metal tool left across the terminals can cause a short circuit, even when the engine is off.
Jump-Starting a Car: The Right Way
Jump-starting a dead battery is one of the most common reasons people need to identify the negative terminal. Doing it wrong can damage your car or put you in danger. Here’s how to do it safely.
Step-by-Step Jump-Start Guide
1. **Park the working car close to the dead one**, but don’t let them touch.
2. **Turn off both engines** and remove the keys.
3. **Connect the red (positive) jumper cable** to the positive terminal of the dead battery.
4. **Connect the other red clamp** to the positive terminal of the good battery.
5. **Connect the black (negative) clamp** to the negative terminal of the good battery.
6. **Connect the other black clamp** to an unpainted metal surface on the dead car’s engine block—not the negative terminal. This reduces the risk of sparks near the battery.
7. **Start the working car** and let it run for a few minutes.
8. **Try starting the dead car**. If it starts, leave it running and disconnect the cables in reverse order.
9. **Drive the revived car** for at least 15–30 minutes to recharge the battery.
Why Connect the Negative to Ground?
You might wonder why the final negative connection isn’t made to the dead battery’s negative terminal. It’s a safety precaution. When the circuit is completed, a small spark can occur. If there’s any hydrogen gas around the battery, that spark could ignite it.
By connecting the negative cable to a grounded metal surface away from the battery, you reduce the risk of explosion. This is especially important if the battery is old, damaged, or leaking.
Maintaining Your Car Battery
Knowing which is the negative terminal on a car battery is just the first step. Regular maintenance helps extend battery life and prevents unexpected failures.
Inspect Terminals Monthly
Check the terminals for corrosion, loose connections, or damage. Clean any buildup with a wire brush and baking soda solution. Apply a thin layer of petroleum jelly or terminal protector spray to prevent future corrosion.
Check Battery Voltage
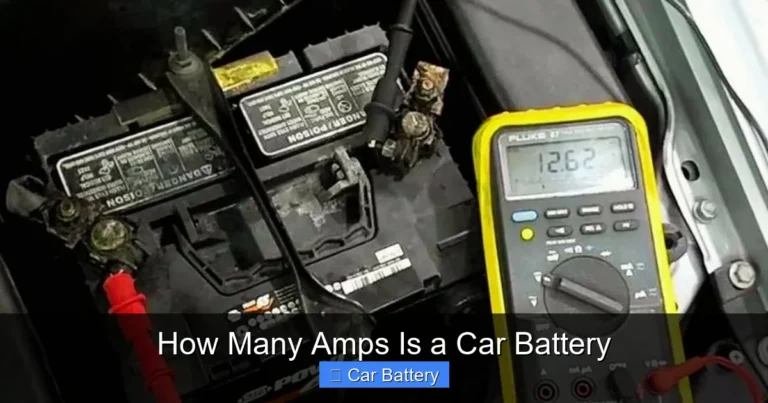
Use a multimeter to check your battery’s voltage. A fully charged battery should read around 12.6 volts when the car is off. If it’s below 12.4 volts, it may need charging or replacement.
Secure the Battery
Make sure the battery is properly secured in its tray. A loose battery can vibrate, damage terminals, or short out against the chassis.
Replace When Needed
Most car batteries last 3–5 years. If your car is slow to start, the lights are dim, or the battery is more than four years old, consider having it tested or replaced.
Conclusion
Identifying the negative terminal on a car battery is a fundamental skill every driver should have. It’s not just about knowing which side is which—it’s about safety, preventing damage, and keeping your vehicle running smoothly. Whether you’re jump-starting, cleaning, or replacing your battery, getting the terminals right makes all the difference.
Remember: the negative terminal is usually marked with a minus (-) sign, connected to a black cable, and grounded to the car’s chassis. Always disconnect it first when removing the battery, and connect it last when reinstalling. Use proper safety gear, avoid sparks, and double-check your connections.
With this knowledge, you’ll feel more confident under the hood and ready to handle common battery issues. And the next time someone asks, “Which is the negative terminal on a car battery?”—you’ll have the answer.
Frequently Asked Questions
How can I tell which terminal is negative on a car battery?
The negative terminal is usually marked with a minus (-) sign and connected to a black cable. It’s also grounded to the car’s chassis, so the cable often runs to the engine block or frame.
What happens if I connect the jumper cables to the wrong terminals?
Connecting cables to the wrong terminals can cause reverse polarity, which may damage your car’s electrical system, blow fuses, or even cause the battery to explode.
Can I jump-start a car by connecting the negative cable to the negative terminal?
It’s safer to connect the final negative clamp to an unpainted metal surface on the engine block, not the dead battery’s negative terminal, to reduce the risk of sparks near the battery.
Why is the negative terminal grounded to the chassis?
Grounding the negative terminal simplifies wiring, reduces electrical noise, and improves safety by minimizing the risk of shock and corrosion.
Do all car batteries have the same terminal layout?
Most batteries follow the same standard, but some modern vehicles use side terminals or sealed designs. Always check the markings or owner’s manual to be sure.
How often should I inspect my car battery terminals?
Inspect the terminals monthly for corrosion, loose connections, or damage. Clean and tighten as needed to ensure reliable performance.