How Much Oil To Put In A Car Explained Clearly For Proper Maintenance
Contents
- 1 Determining the Correct Oil Capacity
- 2 How to Measure Oil Levels
- 3 Steps for Adding Oil to Your Car
- 4 Symptoms of Incorrect Oil Levels
- 5 Factors Affecting Oil Requirements
- 6 Oil Change vs. Oil Top-Up
- 7 Common Mistakes When Adding Oil
- 8 Tools and Supplies Needed
- 9 Post-Oil Addition Checks
- 10 Environmental Considerations
- 11 FAQs
- 12 Conclusion
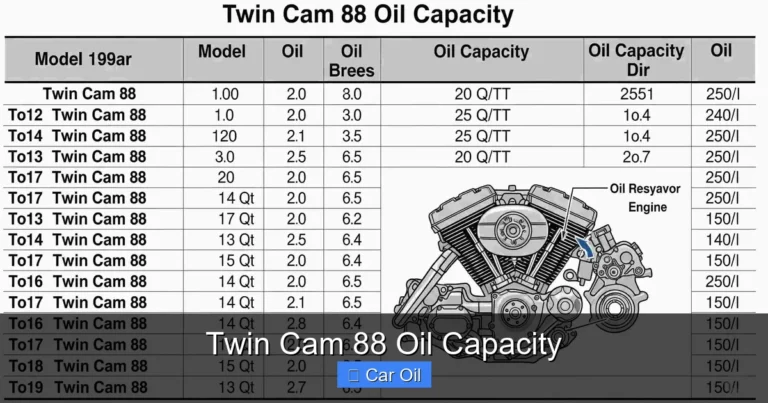
Knowing how much oil to put in your car is important for keeping your engine healthy. Most cars need between 3 to 8 liters of oil, but the exact amount depends on your car’s model and engine size. Adding the right amount prevents engine damage and keeps everything running smoothly.
I’ll help you figure out how to check your oil level and add the right amount safely. This way, you can avoid common mistakes like overfilling or running low, which can hurt your engine or cause leaks.
Getting the oil right isn’t hard, but it does take some attention and care. Understanding your car’s needs will save you time, money, and trouble on the road.
Key Takeways
- Use your car manual to find the exact oil capacity.
- Check oil levels carefully before adding more.
- Avoid overfilling to prevent engine problems.
Determining the Correct Oil Capacity
Knowing the exact amount of oil your car needs is essential. Using too little or too much oil can harm the engine. I rely on specific information sources to find the right capacity for each vehicle.
Using the Owner’s Manual
The owner’s manual is the most direct source for oil capacity. It lists the exact amount of oil recommended for the engine. This number is based on the engine size, type, and design.
I always check my manual because it also tells me the right oil viscosity and oil type. Following these recommendations keeps the engine running smoothly. Manuals often include tips on how to check and add oil correctly.
If you don’t have your manual, many car manufacturers offer digital versions online. The manual saves you time and prevents guesswork when adding oil.
Checking Manufacturer Specifications
Manufacturers publish detailed specifications that cover oil capacity. These specs are found in service guides or technical sheets they produce. They may also explain how the oil capacity changes with a filter replacement or for different engine models.
I trust these specs because they come directly from the source that built the engine. They often include important details like whether to include the oil filter in the oil capacity count.
You can request these specs at dealerships or find them through service centers. Knowing the exact specs helps prevent underfilling or overfilling, which can cause engine damage.
Consulting Online Resources
Online resources can be very helpful once you know your car’s make and model. There are oil capacity charts, forums, and databases that compile data from manufacturer manuals and user experience.
I use verified websites that pull information from official sources. Some sites have quick search tools where you enter your car’s year, make, and model to get oil capacity instantly. These can also suggest the proper oil type and viscosity.
When using online tools, be sure the source is credible. Cross-check the information with your manual or manufacturer specs if possible to avoid mistakes.
How to Measure Oil Levels
Measuring oil levels involves a few clear steps. I need to find the dipstick, check the oil marks carefully, and know the best times to check the oil.
Using the Dipstick
First, I open the car’s hood and locate the dipstick, which usually has a brightly colored handle. I pull it out and wipe it clean with a rag or paper towel to remove any old oil.
Next, I fully reinsert the dipstick and pull it out again. This second reading shows the true oil level. It’s important to do this on a level surface when the engine is cool or just after it’s been off for a few minutes.
Checking this regularly ensures the engine has the right amount of oil to run smoothly. It only takes a minute, but it protects the engine from damage.
Interpreting Oil Marks
The dipstick has two marks: usually labeled as “Min” and “Max.” When I pull out the dipstick, the oil should be between these two lines. If it’s below the minimum mark, it means I need to add oil.
If the oil reaches or is above the maximum mark, it could cause engine problems, so I try not to overfill. The oil should look clean and smooth, not thick, dirty, or milky. This can tell me if the oil needs to be changed or if there’s another issue.
When to Check Oil
I check oil levels regularly, at least once a month. It’s especially important before long trips or heavy use, like driving in hot weather or towing.
Checking oil when the engine is cold or has been off for a few minutes gives the most accurate reading. Avoid checking right after driving because oil will be spread inside the engine, making the level look lower than it really is.
Keeping a habit of checking oil prevents damage and keeps the engine running well.
Steps for Adding Oil to Your Car
Adding oil correctly means having the right tools, pouring carefully, and making sure not to add too much. I focus on these points to keep my engine running smoothly and safely.
Gathering the Required Tools
Before I begin, I make sure I have everything ready. I gather a new bottle of the correct engine oil for my car, a clean funnel, and a rag or paper towels. A funnel helps me pour the oil without spilling any around the engine. I also keep a flashlight handy if it’s dark under the hood.
Having the owner’s manual nearby is important. It tells me the right type and amount of oil my engine needs. I check the oil cap to confirm the oil grade before starting. Being prepared with these simple tools makes the process quick and clean.
Filling the Oil
I start by parking the car on a level surface and turning off the engine for a few minutes. This lets the oil settle. I open the hood and unscrew the oil fill cap. Using the funnel, I slowly pour the oil into the engine.
I add oil in small amounts and check the dipstick regularly. The dipstick shows the oil level between the “Add” and “Full” marks. Usually, that space equals about one quart of oil. This way, I avoid pouring too fast or too much at once.
Avoiding Overfilling
It’s important not to overfill the engine with oil. Too much oil can cause pressure build-up, leaks, or damage to the engine. After each pour, I wait a few seconds and recheck the dipstick. If the oil level is close to or just below the “Full” mark, I stop adding oil.
I never fill past the “Full” line. If I think I added too much, I drain the excess or visit a mechanic. Keeping oil at the right level protects the engine and improves its performance over time.
Symptoms of Incorrect Oil Levels
I know how important it is to keep the oil level just right in your car. Too little oil and your engine can suffer from lack of lubrication. Too much oil can cause other problems like leaks and poor performance. Watching for clear signs helps you catch oil issues early and avoid costly damage.
Signs of Low Oil
When the oil level is too low, the engine parts don’t get enough lubrication. You might notice a knocking or ticking noise from the engine. This happens because metal parts rub together without enough oil to protect them.
Other signs include engine overheating, which feels like your car is working harder than usual. Your oil pressure warning light may also come on. Low oil can even cause the engine to seize if you don’t act fast.
Regularly checking the oil with a dipstick helps prevent these issues. If you see the oil level is below the minimum mark, add oil immediately.
Consequences of Overfilling
Putting too much oil can be just as harmful. Excess oil can cause the crankshaft to hit the oil and create foam. Foamy oil doesn’t lubricate well, which can lead to engine damage.
You might see smoke coming from the exhaust or notice oil leaks around the engine. The increased pressure may also cause seals and gaskets to wear out faster.
Too much oil can also cause the engine to run roughly or lose power. If you suspect overfilling, it’s best to drain the extra oil or have a mechanic handle it. Driving with too much oil increases the risk of damage over time.
Factors Affecting Oil Requirements
Many factors influence how much oil a car needs. These include the engine’s design, where and how you drive, and the type of oil you use. Knowing these details helps me choose the right amount and kind of oil for my vehicle.
Engine Type
The size and design of an engine directly affect oil capacity. Larger engines usually need more oil to reach all their parts and keep everything running smoothly. For example, a four-cylinder engine often requires less oil than a V6 or V8 engine.
High-performance or turbocharged engines usually demand specific oil types and precise amounts. These engines run hotter and under more stress, so using the right oil viscosity is critical for proper lubrication. I always check my owner’s manual for exact oil capacity and type to avoid problems like engine damage or leaks.
Climate and Driving Conditions
Where and how I drive can change my car’s oil needs. In cold climates, oil thickens, so engines might need oil that flows better at low temperatures. Hot climates may require oil that can handle high heat without breaking down.
If I drive mostly in stop-and-go traffic or tow heavy loads, my engine works harder. This can increase oil consumption or wear. Under these conditions, I monitor oil levels more often and may need to add oil sooner than normal. Highway driving at steady speeds usually means oil lasts longer between changes.
Synthetic vs. Conventional Oil
Choosing synthetic or conventional oil affects how much oil my car uses and needs. Synthetic oils are designed to last longer and resist breakdown better than conventional oils. They flow more easily in cold weather and protect engines at high heat.
Because synthetic oil stays thicker and cleaner longer, I can usually extend the time between oil changes. However, synthetic oils sometimes cause higher oil consumption in older engines, meaning I might need to add oil more often. Conventional oils are cheaper but may need more frequent changes. I always follow my car manual’s recommendation on oil type and change intervals.
Oil Change vs. Oil Top-Up
Knowing how much oil to put in your car means understanding the difference between changing oil and topping it up. Each has its place depending on your car’s condition. The timing and method affect engine health and performance.
When to Change Oil
I change my oil based on the car’s mileage and time since the last change. Most manufacturers recommend an oil change every 7,000 to 10,000 miles or about once a year. If the oil looks dark, dirty, or smells burnt, it’s time to replace it.
Oil changes remove old oil and contaminants that build up inside the engine. This prevents wear and helps the engine run smoothly. Waiting too long can cause engine damage and poor fuel efficiency. If I notice any warning lights or reduced engine performance, I schedule an oil change immediately.
When to Top Up Oil
I top up oil when the level is low between changes. This usually happens if there’s a small leak or the engine is burning oil. Checking the dipstick every month helps me spot this early.
Topping up adds oil to the existing supply but doesn’t replace old oil or contaminants. It can prevent the engine from running dry but should not replace regular oil changes. I only add oil if the level is below the minimum mark and never overfill, which can harm the engine.
Differences in Procedure
An oil change involves draining all old oil, replacing the oil filter, and refilling with new oil. It takes more time and usually requires professional tools or a service center.
Topping up is simpler: I check the oil level and add the right type and amount through the oil filler cap. It takes just a few minutes and can be done anywhere. However, topping up is a temporary fix, not a substitute for changing oil.
| Step | Oil Change | Oil Top-Up |
|---|---|---|
| Oil removed | Yes | No |
| Oil filter replaced | Yes | No |
| Time required | 20–30 minutes or more | 5 minutes or less |
| Tools needed | Drain pan, wrench, new filter | Just the correct oil bottle |
| Frequency | Every 7,000-10,000 miles | As needed between changes |
Common Mistakes When Adding Oil
When adding oil to a car, it’s easy to make errors that harm the engine or reduce performance. Two big issues I watch for are using the wrong kind of oil and failing to check for leaks before topping up. Both can cause serious problems if not handled right.
Using the Wrong Oil Type
Using the right oil type matters because every engine needs a specific formula to work well. I always check my car’s owner’s manual to find the correct viscosity, like 5W-30 or 10W-40. Using oil that’s too thick or too thin can make the engine run poorly.
For example, synthetic oils work better in high-performance engines because they flow better at extreme temperatures. But switching to synthetic in an older car that calls for conventional oil can cause leaks or other issues.
If you pick the wrong type, it can lead to poor lubrication, increased wear, or even engine damage. To avoid this, I keep a note of the recommended oil type and brand.
Not Checking for Leaks
Before I add more oil, I always inspect the engine for leaks. If oil is leaking somewhere, topping off won’t fix the real problem. Instead, it just acts like a bandage, and the engine could still run low on oil.
Signs of leaks include oily spots under the car or a smell of burning oil. I also check around the oil filter, drain plug, and oil pan for fresh oil drips.
Ignoring leaks risks running the engine without enough oil, which can cause serious damage. So, I fix any leaks before adding oil to keep my car safe and running smoothly.
Tools and Supplies Needed
To get the oil level right, you need specific tools that make measuring and pouring easy and safe. Using the right containers and safety equipment helps avoid spills and protects you while working.
Recommended Measuring Containers
I always use a clear measuring container marked in quarts or liters. This lets me pour the exact amount of oil my car needs, avoiding overfilling or underfilling. Funnels also come in handy to pour oil cleanly without making a mess.
A container with a narrow spout gives better control when adding oil. Some people use graduated jugs made of plastic because they are lightweight and easy to handle. I never rely on guessing amounts; precise measurement tools make a difference in keeping the engine safe.
Keep a clean rag or paper towels nearby for quick cleanup in case of spills. This simple setup reduces the chance of wasting oil or damaging engine parts.
Essential Safety Equipment
Wearing gloves is a must for me when handling motor oil. Latex or nitrile gloves protect my skin from oils and chemicals that can cause irritation. Plus, gloves help keep my hands clean, which is useful when checking the oil level.
Eye protection is another important safety step. I use safety glasses to keep oil splashes out of my eyes, especially when loosening the oil drain plug or filter.
Having a drain pan under the car to catch used oil prevents spills and protects the ground. I also work on level ground and use jack stands or ramps to safely raise the car. This prevents accidents and keeps the workspace secure.
Post-Oil Addition Checks
After adding oil to my car, I always take a few careful steps to ensure the level is right and the engine runs smoothly. It’s important to check the oil again, let the engine run briefly, and watch for any warning signs to avoid damage.
Inspecting Oil Level After Filling
Once I add oil, I wait a moment before checking the level again with the dipstick. I wipe the dipstick clean, reinsert it fully, and pull it out to see where the oil marks fall between the minimum and maximum marks.
If the oil doesn’t yet reach the full mark, I add a bit more—never filling past the maximum line. Overfilling can cause engine problems, so I add oil slowly and check often.
Keeping the oil level within this range protects the engine parts and ensures proper lubrication.
Running the Engine
After confirming the oil level, I start the engine and let it run for a few minutes. This helps the new oil circulate through the engine and allows me to hear or feel anything unusual.
During this time, I listen for strange noises like knocking or ticking. If everything sounds normal, I shut the engine off and recheck the oil level to make sure it hasn’t dropped below the recommended range.
This step is key because oil settles after circulation, and the level might change slightly.
Monitoring for Warning Lights
I always watch the dashboard for oil pressure or engine warning lights after adding oil. These lights can signal if the oil level is still too low or if there’s another issue.
If a warning light appears, I turn off the engine immediately and check the oil level again. Continuing to drive with a warning light on can cause serious engine damage.
If the light stays on despite correct oil levels, I consider getting a professional inspection to diagnose any underlying problems.
Environmental Considerations
When dealing with car oil, I focus on how to handle used oil properly and prevent spills that can harm the environment. Both steps are key to reducing pollution and protecting water and soil from toxic chemicals.
Disposing of Used Oil Safely
Used oil contains harmful substances like heavy metals and hydrocarbons. If disposed of incorrectly, it can pollute groundwater and surface water. I always take my used oil to a recycling center or a designated drop-off point. Many repair shops and auto parts stores offer this service for free.
Never pour used oil down drains, onto the ground, or in the trash. Even small amounts can cause damage. Proper disposal helps protect public health and local ecosystems.
I also make sure to store used oil in clean, sealed containers that won’t leak. Labeling the containers can avoid confusion and accidental spills before disposal.
Preventing Spills
Spills from oil changes are a big risk. A small spill can spread and contaminate soil and water. I take several precautions to prevent spills during oil changes.
I always use a catch pan to collect draining oil and work on a surface that won’t let oil seep into the ground. If a spill happens, I clean it immediately using absorbent materials like kitty litter or commercial oil absorbents.
Storing oil in sturdy containers with tight lids is important when transporting it. This reduces the chance of leaks or accidental spills in my garage or vehicle.
Being careful during each step of handling oil keeps the environment safer and avoids costly cleanup later.
FAQs
How do I know how much oil my car needs?
I always check the owner’s manual first. It tells you the exact amount and type of oil your car requires. If you don’t have the manual, you can look online for your car’s make and model.
Can I put too much oil in my car?
Yes, overfilling can harm the engine. Too much oil can cause pressure build-up and damage seals or other parts. I add oil slowly and check the dipstick to avoid this.
Is it okay to just top off the oil instead of doing a full change?
Topping off is fine if your oil level is just a little low. But I recommend changing the oil regularly, according to your car’s schedule, to keep the engine clean and running well.
What type of oil should I use?
I use the oil grade recommended by the manufacturer. This is found in the manual or on labels under the hood. Using the right oil keeps the engine protected and efficient.
How often should I check my oil level?
I check it at least once a month or before long trips. This helps me catch leaks or burning oil early, preventing bigger problems.
What if the engine is completely out of oil?
If it’s empty, never pour in the full amount at once. I add oil gradually, checking the level each time, to avoid damaging the engine with sudden pressure.
| Oil Amount | Typical Range | Notes |
|---|---|---|
| Small cars | 4 to 5 quarts (3.8-4.7 L) | Check the manual for exact needs |
| Larger vehicles | 5 to 8 quarts (4.7-7.6 L) | Depends on engine size |
| Trucks & SUVs | 6 to 10 quarts (5.7-9.5 L) | Usually more oil needed |
Conclusion
Knowing how much oil to put in your car is essential for keeping your engine healthy. Too little oil can cause damage by not lubricating the engine properly. Too much oil can lead to leaks or engine problems.
I always check my car’s manual to find the right oil amount. This is the safest and most accurate way to avoid mistakes. Using the recommended oil type and amount helps protect your engine and saves money on repairs.
Maintaining the proper oil level is also good for the environment. A well-lubricated engine runs more efficiently, which reduces harmful emissions and conserves fuel.
Here are some key tips to remember:
- Check oil level regularly with the dipstick.
- Use the right oil type for your vehicle.
- Add oil slowly and recheck to avoid overfilling.
Choosing a reliable oil product and keeping the right amount in your car will pay off in the long run. It keeps your car running smoothly and helps avoid unexpected breakdowns.
I recommend making oil checks part of your routine car care. It’s a simple step that protects your investment and gives you peace of mind on the road.