
How to Fix a Leaking Car Cover: A Step-by-Step DIY Guide

Quick Answer
To fix a leaking car cover, first dry the cover and vehicle, then identify whether water is entering through a seam, tear, worn fabric, or loose edge. Clean the cover according to its care instructions, repair small holes with a material-compatible patch, correct the fit, and only use seam sealer or water-repellent treatment if the manufacturer approves it for that fabric. Manufacturer-specific car cover cleaning instructions should always take priority over generic repair advice.
Quick Steps to Fix the Leak
- Dry everything: Remove the cover and let both sides dry before troubleshooting.
- Locate the leak: Use a gentle hose test on one small area at a time.
- Check the fit: Make sure wind is not pushing rain beneath loose hems.
- Repair damage: Patch small holes or tears using a product approved for the cover material.
- Inspect seams: Treat leaking stitching only when your cover manufacturer permits seam sealing.
- Clean correctly: Dirt and residue can reduce the cover’s ability to shed rain.
- Replace if necessary: Widespread fabric deterioration usually isn’t worth repeatedly patching.
A leaking car cover doesn’t always mean the entire cover has failed. I’ve seen everything from one worn seam to a loose rear hem make a perfectly usable cover look ruined.
In this 2026 guide, I’ll show you how I troubleshoot the problem before spending money. The goal is to identify the water’s path, make the right repair, and avoid treatments that can create new problems.
In This Guide
Why Is My Car Cover Leaking?
A car cover leaks when rain passes through damaged or weakened material, enters through stitching, or blows underneath an opening. Moisture underneath can also be condensation rather than a true leak.
A car cover leak is unwanted water reaching the vehicle from outside the installed cover. That distinction matters because condensation forms underneath without rain penetrating the fabric.
Common causes of water underneath a car cover
- Worn seams: Water repeatedly appears directly below a stitched area.
- Small holes: Abrasion, sharp trim, or aging creates localized entry points.
- Loose hems: Wind pushes rain beneath the front, rear, or side edges.
- Dirty fabric: Contamination can interfere with how some materials shed water.
- Aged material: Outdoor exposure gradually weakens fabrics, coatings, and seam treatments.
- Water pooling: Sagging areas hold rain instead of allowing it to run off.
- Condensation: Humid air forms droplets on cooler vehicle surfaces beneath the cover.
Don’t assume that every outdoor car cover should behave like a plastic tarp. Some manufacturers intentionally use breathable, water-resistant materials so trapped humidity has a way to escape.
Covercraft, for example, explains why it favors breathable water-resistant car cover materials instead of completely non-breathable construction.
Leak versus condensation
Condensation tends to create general dampness or fine droplets across several panels. A true leak often creates a repeatable wet patch near a seam, hole, or exposed edge.
| What You See | Likely Cause | First Check |
|---|---|---|
| Wet line beneath stitching | Seam leakage | Inspect the matching seam |
| One isolated wet patch | Hole or worn fabric | Check for pinholes and abrasion |
| Water near lower doors | Wind-driven rain | Check hems and straps |
| Fine droplets across roof and glass | Condensation | Check humidity and starting moisture |
| Large sagging wet area | Water pooling | Check cover fit and support |
The National Weather Service defines the dew point and condensation process as the point where water vapor begins turning into liquid droplets. That explains why moisture can appear beneath a cover even without rainfall passing through it.
How Do I Find Where My Car Cover Is Leaking?
The best way to locate a leak is to test a completely dry cover one section at a time with gentle water. This prevents several wet areas from confusing your diagnosis.
1. Start with a dry vehicle and cover
Remove the cover and let it dry completely. Dry the vehicle too, including mirrors, trim, weatherstripping, and panel gaps.
Starting dry gives you a clean baseline. Otherwise, leftover moisture can look like new leakage.
2. Inspect the material in daylight
- Look for small tears and pinholes.
- Check thinning material around sharp body contours.
- Inspect mirror pockets and antenna openings.
- Look for separated or stretched stitching.
- Check areas that rub against spoilers, racks, mirrors, or trim.
I like holding suspicious material toward daylight. Thin sections and tiny holes can become much easier to see.
3. Test one section with a gentle hose
Install and secure the cover normally. Apply a gentle stream of water to a small roof section for several minutes.
Then lift that section and inspect underneath. Move to the next area only after you’ve checked the first one.
Don’t use a pressure washer. Its concentrated force can push water through areas that ordinary rainfall might not penetrate.
4. Test the seams separately
Run water across one suspect seam while keeping the surrounding fabric relatively dry. Check the vehicle directly beneath it.
If the same seam produces the same wet line repeatedly, you’ve probably found the entry point.
5. Check the lower edges
A loose hem can imitate a fabric leak. Wind may lift the cover and drive rain underneath despite the upper material working correctly.
- Seat the front hem beneath the bumper area.
- Seat the rear hem correctly.
- Secure the intended straps or tie-downs.
- Check that mirror pockets aren’t pulling one side upward.
- Confirm the cover isn’t oversized for the vehicle.
I’ve chased a supposed fabric leak before only to find the lower edge lifting in gusts. Correcting the fit solved it without patching anything.
How Do I Fix a Leaking Car Cover?
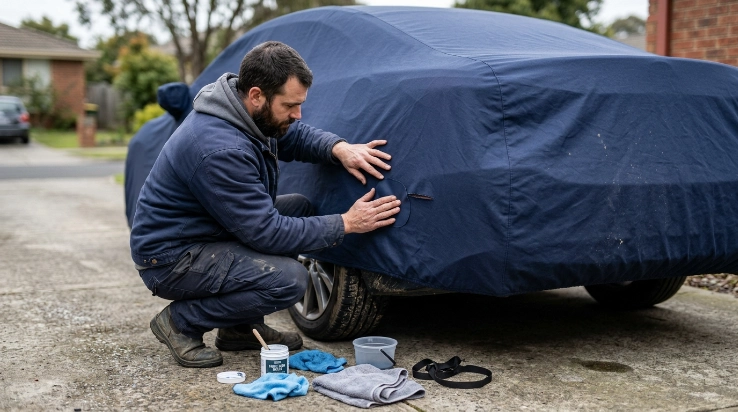
Fix the specific failure you found instead of treating the entire cover. Small tears, loose edges, dirty material, and leaking seams each need a different solution.
Fix 1: Correct a loose or poorly fitted cover
Re-center the cover before changing anything else. Make sure the front and rear are oriented correctly.
- Seat the elastic hems properly.
- Secure factory-supplied straps or buckles.
- Untwist straps before tightening them.
- Reposition mirror pockets without overstretching them.
- Replace a badly oversized cover with the correct size.
A snug fit also limits flapping. That helps prevent additional abrasion against both the cover and vehicle.
Fix 2: Clean a cover that has stopped shedding water well
Dirty material may behave differently from clean material. Pollen, road film, oils, and residue can build up during outdoor use.
Follow your manufacturer’s washing method because fabrics vary. Never assume one detergent or washing-machine setting is safe for every cover.
- Shake away loose grit before washing.
- Use the recommended cleaner or detergent.
- Avoid bleach unless specifically permitted.
- Skip fabric softener when the care instructions prohibit it.
- Rinse thoroughly.
- Dry the cover using the approved method.
- Do not store or reinstall it while damp.
Fix 3: Patch a small hole or tear
A small isolated tear may be repairable. Use a patch or repair tape compatible with the exact cover material whenever possible.
- Clean and dry the repair area.
- Trim loose fibers without enlarging the hole.
- Cut the patch with rounded corners if the product allows it.
- Extend the patch beyond the damaged area.
- Press or apply it according to the repair-product instructions.
- Allow the adhesive or coating to cure before reinstalling the cover.
Keep rough repair edges away from painted surfaces. I also avoid ordinary duct tape because its adhesive can soften, leave residue, and create stiff edges.
Fix 4: Address a leaking seam
If water consistently follows one stitched line, the seam may need repair. First check whether the stitching itself has separated.
A separated structural seam is different from minor water seepage through intact stitching. Repairing failed stitching may require professional sewing or manufacturer service.
If the stitching is intact, ask the cover manufacturer whether a seam-sealing product is approved. Apply nothing until you know it is compatible with the fabric.
Fix 5: Stop water from pooling
Standing water keeps one area wet longer and increases stress on sagging fabric. Correct the shape rather than repeatedly treating that wet spot.
- Re-center the cover.
- Tighten approved tie-downs correctly.
- Remove folds that create low spots.
- Use only manufacturer-approved cover supports.
- Make sure accessories aren’t creating deep pockets in the fabric.
Fix 6: Dry condensation instead of repairing a nonexistent leak
If moisture is widespread rather than localized, remove the cover and dry both surfaces. Check the weather pattern before assuming rain crossed the fabric.
Never install the cover immediately after washing the vehicle if water remains trapped around mirrors, seals, badges, or trim.
Fix 7: Replace badly deteriorated material
Repairs make sense when the damage is isolated. They make less sense when several areas have become thin, brittle, stretched, or porous.
Section Takeaway: Diagnose first and repair only the failed area. Cleaning and correcting fit solve different problems than patching holes or treating seams, so one universal “waterproofing” fix doesn’t exist.
Can I Reseal a Car Cover Without Ruining It?
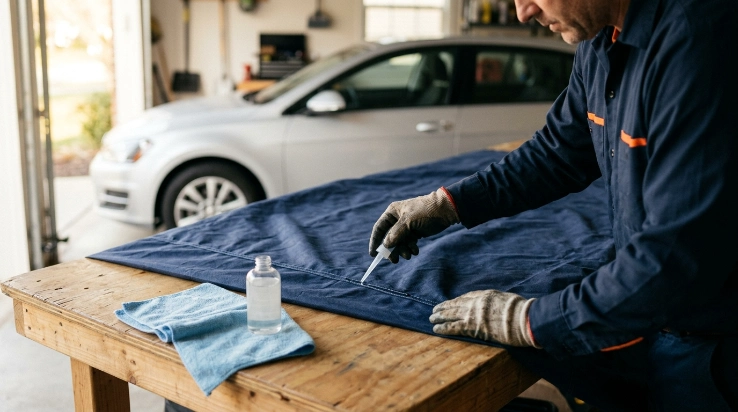
You can sometimes restore water repellency or seal a seam, but only with products approved for that specific cover material. Random waterproofing sprays can change how a breathable fabric handles moisture.
Why I don’t automatically spray the whole cover
A breathable outdoor cover has to balance rain protection with moisture escape. Applying an incompatible coating can alter that balance.
Some sprays can also discolor fabric or leave a different surface texture. Overspray may reach nearby paint, glass, or trim.
When a water-repellent treatment may make sense
- The manufacturer recommends retreatment.
- The fabric is structurally sound.
- Water no longer beads as expected after proper cleaning.
- The treatment is specifically compatible with the cover material.
- You can apply it to a clean, fully dry cover away from the vehicle.
Follow the product’s stated coverage and curing instructions. More product isn’t automatically better.
When seam sealer may make sense
Seam treatment is worth considering when an intact seam repeatedly leaks during controlled testing. Manufacturer approval still matters.
Apply the product with the cover removed from the vehicle. Let it cure fully before letting the repaired area touch paint.
Mechanic Alert: If you’re unsure whether a chemical treatment is safe for your vehicle’s paint or the cover’s inner lining, contact the cover manufacturer or a qualified detailing professional before applying it.
When Should I Replace a Leaking Car Cover?
Replace the cover when leakage comes from widespread deterioration rather than one repairable defect. Multiple weak areas usually signal that the material has reached the end of its useful service life.
Signs replacement makes more sense
- Several seams are separating.
- Large areas stay saturated or visibly thin.
- The fabric tears easily when handled normally.
- Elastic hems no longer hold the cover securely.
- Multiple patches are already failing.
- The inner surface has become rough enough to concern you around paint.
- The cover no longer fits the vehicle securely.
The cost of endless patching can exceed the value of an aging cover. More importantly, a failing cover may no longer provide predictable protection.
If the vehicle will sit for long periods, the cover is only one part of storage preparation. Consumer Reports also recommends broader long-term vehicle storage preparation for cars that will remain parked.
Repair versus replace
| Condition | Repair Usually Makes Sense | Replacement Usually Makes Sense |
|---|---|---|
| One small tear | Yes | Usually no |
| One leaking seam | Often | If seam structure has failed badly |
| Loose installation | Adjust fit | If wrong size cannot be secured |
| Several thin areas | Rarely | Yes |
| Widespread material failure | No | Yes |
How Can I Prevent Future Car Cover Leaks?
Prevent leaks by keeping the cover clean, dry, correctly fitted, and protected from avoidable abrasion. Regular inspection catches small defects before they become larger openings.
Use this routine before covering your car
- Make sure the vehicle is reasonably clean.
- Let the paint and hidden water pockets dry.
- Check that the cover’s inner surface is clean.
- Install the cover in the correct orientation.
- Seat the hems fully.
- Secure the designed straps or fasteners.
- Remove folds that can collect water.
Inspect high-wear locations regularly
Pay special attention to mirrors, spoilers, roof accessories, antenna areas, sharp trim, and stitched corners. Those points can experience more tension or rubbing than broad flat panels.
Look inside the cover too. Wear isn’t always obvious from the exterior.
Store the cover dry
Don’t fold a soaked cover straight into a storage bag. Let it dry completely first.
A damp cover can transfer moisture back to the vehicle during the next installation. It can also make future leak diagnosis harder.
Don’t cover a soaking-wet vehicle
After rain or washing, water often remains inside mirrors, door seams, hatch channels, and trim. Dry those areas before installing the cover.
This simple habit prevents many false leak alarms. It also gives trapped moisture less work to do.
Frequently Asked Questions
Can I use waterproof spray on a leaking car cover?
Only if the cover manufacturer approves that treatment for the exact material. An incompatible waterproofing spray may alter breathability, stain the fabric, or leave residue, so cleaning and leak diagnosis should come first.
Why does my car cover leak only during heavy rain?
Longer or heavier rain can expose weak seams, worn areas, sagging sections, or loose edges that aren’t obvious during light rain. Use a controlled hose test afterward to determine whether the water came through the fabric or beneath the hem.
How do I fix a leaking seam on a car cover?
Dry the cover and confirm the seam is the source with a gentle water test. If the stitching is intact, ask the manufacturer whether a compatible seam sealer is allowed; separated stitching may require sewing or professional repair.
Can duct tape repair a hole in a car cover?
It may work temporarily, but I don’t recommend it as the normal repair. Duct tape can leave adhesive residue, create stiff edges, and perform poorly as conditions change, so a material-specific repair patch is the safer choice.
Why is my car wet underneath a cover when it didn’t rain?
Condensation is a common possibility. Humid air can form droplets when the vehicle surface cools to the dew point, especially overnight, so widespread moisture doesn’t automatically mean the fabric is leaking.
Should I cover my car while the cover is still damp?
No. Let the cover dry before reinstalling it whenever possible, because a damp inner surface can transfer moisture directly onto the vehicle and make it difficult to tell whether a new leak exists.
Is a leaking car cover worth repairing?
Yes, when the problem is limited to a small tear, one seam, or poor fit. Replacement usually makes more sense when the fabric has several weak areas, widespread deterioration, failing elastic, or multiple damaged seams.
What Should You Do With a Leaking Car Cover?
Start by proving where the water comes from. Dry everything, test one section at a time, and inspect seams, holes, hems, fit, and water-pooling areas before buying repair products.
For isolated damage, a compatible patch, corrected fit, proper cleaning, or manufacturer-approved seam treatment can extend the cover’s life. If deterioration is widespread, replacing the cover is usually the cleaner solution.
I would rather spend fifteen careful minutes finding the real problem than coat an entire cover and hope for the best. Diagnose first, repair second, and keep both the vehicle and cover dry whenever you install it.