When to Change Oil in a Haval
Contents
- 1 Key Takeaways
- 2 📑 Table of Contents
- 3 Introduction: Your Haval’s Lifeline
- 4 Decoding the Manufacturer’s Recommendation
- 5 The Critical Impact of “Severe” Driving Conditions
- 6 Choosing the Right Oil: Viscosity and Specifications
- 7 How to Check Your Oil and Monitor System Health
- 8 Resetting the Oil Change Light and What It Means
- 9 Professional Service vs. DIY: Weighing Your Options
- 10 Conclusion: A Simple Habit for a Healthy Haval
- 11 Frequently Asked Questions

Car Wireless Charger Mount

Car Seat Cover (Universal Fit)

Car Hydraulic Jack

Car Storage Net
Knowing when to change your Haval’s oil is non-negotiable for engine health. Haval provides specific intervals in your owner’s manual, typically ranging from 5,000 to 10,000 miles, but your actual schedule depends heavily on driving conditions. Severe driving, like constant short trips or dusty environments, often requires more frequent changes. Always use the recommended oil viscosity and type, and never ignore the oil change warning light or a significant drop in oil level between services.
Key Takeaways
- Follow Your Manual First: Your Haval owner’s manual provides the baseline oil change interval specific to your model and engine type. This is your primary guide.
- “Severe Service” Means More Changes: Driving in extreme temperatures, heavy traffic, dusty areas, or making frequent short trips (under 5 miles) qualifies as severe service and shortens oil life.
- Synthetic Oil Extends Intervals: If your Haval recommends or allows full synthetic oil, you can often safely extend the change interval to the manufacturer’s maximum (often 7,500-10,000 miles).
- Heed the Warning Light & Monitor: The oil change reminder light is a critical alert. Additionally, manually check your oil level monthly and look for signs of degradation (dark, gritty oil).
- Use the Correct Oil Specification: Haval engines are designed for specific API and ACEA standards. Using the wrong oil, even if changed on time, can cause long-term damage.
- Neglecting Oil Changes is Costly: Skipping an oil change leads to sludge, increased wear, and potentially catastrophic engine failure, costing far more than the service itself.
- Professional vs. DIY: Changing oil yourself can save money but requires proper disposal and tools. A professional service ensures correct oil, filter, and disposal, often with a multi-point inspection.
📑 Table of Contents
- Introduction: Your Haval’s Lifeline
- Decoding the Manufacturer’s Recommendation
- The Critical Impact of “Severe” Driving Conditions
- Choosing the Right Oil: Viscosity and Specifications
- How to Check Your Oil and Monitor System Health
- Resetting the Oil Change Light and What It Means
- Professional Service vs. DIY: Weighing Your Options
- Conclusion: A Simple Habit for a Healthy Haval
Introduction: Your Haval’s Lifeline
Let’s talk about the lifeblood of your Haval’s engine: engine oil. It’s easy to forget about it until a warning light pops on, but understanding when to change oil in a Haval is one of the most fundamental—and impactful—pieces of maintenance you can master. This isn’t just about checking a box; it’s about protecting a significant investment, ensuring reliability, and avoiding wallet-draining repairs. Haval, as a modern automotive brand, engineers its vehicles with specific maintenance schedules, but those are starting points. Your personal driving habits and environment play a massive role in determining the true, safe interval for your Haval H6, Haval Jolion, or any other model in the lineup.
In this complete guide, we’ll cut through the confusion. We’ll decode the manufacturer’s recommendations, explain what “severe driving” really means for your Haval, help you choose the right oil, and give you practical tips to monitor your engine’s health between visits. Whether you’re a DIY enthusiast or prefer to leave it to the pros, knowing the “why” and “when” behind an oil change empowers you to make smart decisions for your vehicle’s longevity. Think of this as your friendly, no-nonsense handbook for keeping your Haval’s heart beating smoothly.
Decoding the Manufacturer’s Recommendation
The absolute best place to start your search for the correct oil change interval is the driver’s seat: specifically, your Haval’s owner’s manual. This isn’t just a suggestion booklet; it’s the engineering blueprint for your specific vehicle. Haval provides a maintenance schedule that considers the engine design, tolerances, and the oil formulations available when your car was built. For many newer Haval models equipped with efficient turbocharged engines, the factory recommendation under “normal” driving conditions is often every 7,500 to 10,000 miles or 12 months, whichever comes first, when using full synthetic oil. Older models or those using conventional oil might have a shorter 5,000-mile interval.

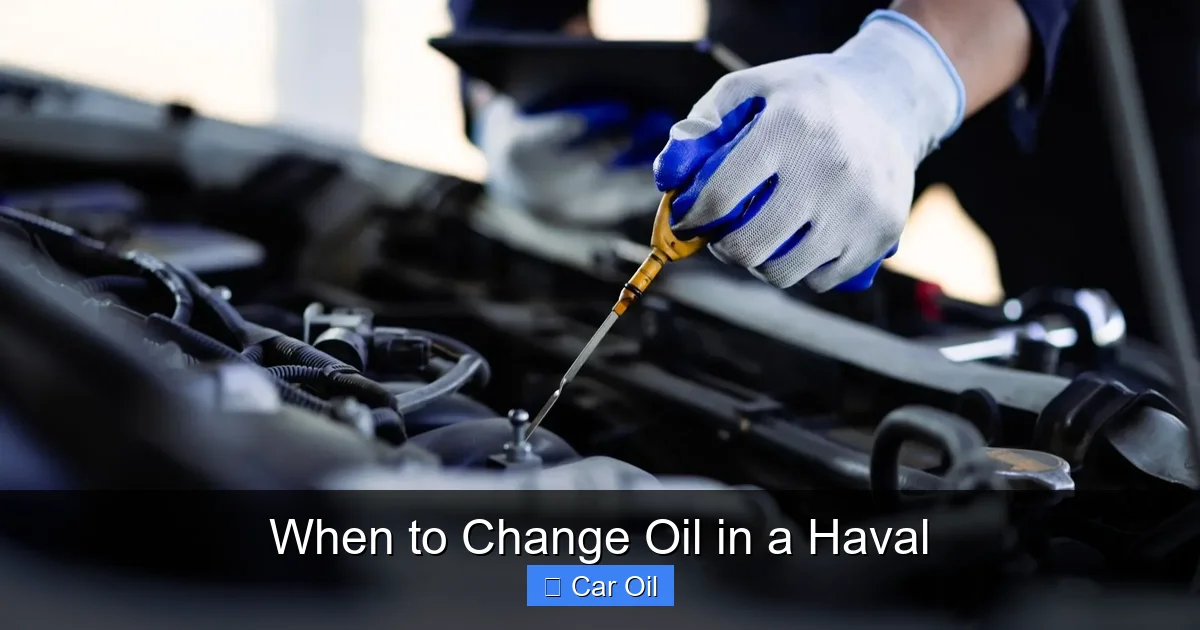
Visual guide about When to Change Oil in a Haval
Image source: cargarageexpert.com
How to Find Your Specific Interval
Open your manual to the “Maintenance Schedule” or “Lubrication and Capacities” section. Look for tables that list mileage/time intervals for services like “Engine Oil and Filter Change.” Pay close attention to the two columns: one for “Normal Driving” and one for “Severe Driving.” This distinction is critical. If your daily commute involves battling stop-and-go traffic for an hour, you’re likely in the “severe” category, which typically recommends changes every 5,000 miles or 6 months. Don’t guess—look it up. You can also often find this information on the manufacturer’s official website or through your local Haval dealer’s service department.
Many modern Havals also come equipped with an Intelligent Oil Life Monitor or maintenance reminder system. This system uses algorithms based on engine revolutions, temperature, and run time to calculate oil degradation. When it displays “Oil Change Required” or a percentage dropping to 15-20%, it’s time to schedule service. This system is a fantastic tool, but it’s calibrated for “average” conditions. If you drive under severe conditions, you may still need to change the oil sooner than the reminder indicates. Understanding how to know when do you change oil in a car involves balancing the manual’s advice, the onboard monitor, and your own assessment of driving style.
The Critical Impact of “Severe” Driving Conditions
Here’s where most drivers get it wrong. You might look at your odometer and think, “I’m only at 6,000 miles, I have plenty of time.” But if your driving fits Haval’s definition of “severe service,” that oil may be seriously degraded long before the mileage or time limit. Severe service isn’t just about off-roading; it’s about common, everyday driving patterns that stress your engine and the oil. The oil life monitor in your car is designed to account for some of this, but it’s not infallible. Recognizing these conditions is key to protecting your engine.

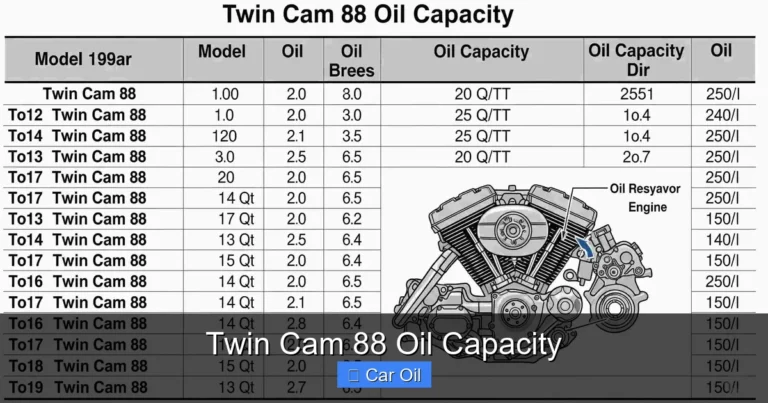
Visual guide about When to Change Oil in a Haval
Image source: eliteparts.org
What Qualifies as Severe Driving for Your Haval?
- Frequent Short Trips: Driving less than 5-10 miles repeatedly, especially in cold weather. The engine never fully warms up, allowing fuel dilution and moisture to contaminate the oil without burning off.
- Extreme Temperatures: Consistently driving in very hot (above 90°F/32°C) or very cold (below 0°F/-18°C) climates. Heat thins oil and accelerates oxidation; cold makes oil thicker and reduces lubrication during warm-up.
- Heavy Traffic & Idling: Spending hours in stop-and-go congestion or excessive idling (like a taxi or delivery service). This causes high engine load at low speeds, generating more heat and contaminants.
- Dusty, Sandy, or Muddy Conditions: Driving on unpaved roads or in areas with high airborne particulates. These can bypass the air filter and enter the crankcase, abrading engine parts and dirtying the oil quickly.
- Towing or High Load: Regularly hauling a trailer, a large camper, or carrying heavy cargo in your Haval. This puts the engine under constant high stress and load, increasing thermal stress on the oil.
- Aggressive Driving: Regular high-RPM acceleration and hard braking. This increases engine wear and temperature.
If your Haval sees a combination of these conditions weekly, you should lean toward the shorter end of the manufacturer’s interval spectrum, or even shorten it by 20-30%. For instance, if the manual says 7,500 miles for normal driving, aim for 5,000-6,000 miles under severe conditions. It’s a small extra cost for massive protection against premature engine wear.
Choosing the Right Oil: Viscosity and Specifications
Changing the oil is only half the battle; using the correct oil is equally important. Haval engines are precision instruments, and the specified oil viscosity (like 5W-30 or 0W-20) is carefully chosen to ensure proper lubrication from a cold start to operating temperature. The “W” stands for winter, and the number before it indicates cold-flow performance. The second number indicates thickness at operating temperature. Always use the viscosity grade listed in your owner’s manual. Using a thicker oil (e.g., 10W-40 instead of 5W-30) can cause harder cold starts and reduced fuel economy. Using a thinner oil might not provide enough film strength at high temperatures, leading to wear.

Visual guide about When to Change Oil in a Haval
Image source: cdn.autopapo.com.br
Conventional, Synthetic Blend, or Full Synthetic?
For most modern Havals, especially turbocharged models, full synthetic oil is the required or strongly recommended choice. Synthetic oils are engineered molecule-by-molecule to be more stable, resist breakdown at high temperatures, and flow better in the cold. They typically allow for the longer drain intervals (7,500-10,000 miles) mentioned by the manufacturer.
Conventional oil is refined from crude oil and has a more inconsistent molecular structure. It breaks down faster and is more susceptible to sludge formation, especially under severe conditions. It’s generally only suitable for older, non-turbo engines if specified. A synthetic blend offers a middle ground but is becoming less common as full synthetics become the standard. Look for the oil to meet the specific API (American Petroleum Institute) and ACEA (European) standards listed in your manual, such as API SP or ACEA C5. These certifications ensure the oil has the right additive packages for wear protection, sludge prevention, and fuel economy. Using the wrong specification oil, even with the right viscosity, can invalidate your warranty and harm your engine over time.
How to Check Your Oil and Monitor System Health
Relying solely on mileage or a reminder light is passive maintenance. Taking a few minutes to check your oil yourself once a month is the single best way to get a real-time health report on your engine. It’s a simple habit that can catch problems before they become disasters. You don’t need to be a mechanic to do this basic check.
The Proper Way to Check Your Haval’s Oil
First, ensure your Haval is on level ground and the engine is turned off. Wait at least 10-15 minutes for the oil to drain back into the sump for an accurate reading (consult your manual; some cars recommend a slightly warm engine). Pop the hood, locate the dipstick (usually with a yellow or orange loop), pull it out, wipe it clean with a lint-free cloth, and fully reinsert it. Pull it out again and read the level. The oil should be between the “MIN” and “MAX” or “L” and “F” marks. If it’s at or below the MIN mark, add the correct oil immediately. Don’t overfill—this can cause aeration and foaming, which is just as bad as low oil.
While you have the dipstick out, also examine the oil’s condition. Fresh synthetic oil is typically amber and translucent. As it ages, it darkens to a deep brown or black, which is normal. However, if it looks milky or frothy, that could indicate coolant leakage (a serious problem). If it feels gritty when rubbed between your fingers or has a burnt smell, it’s severely degraded and needs changing immediately, regardless of mileage. This hands-on check complements the electronic reminders and gives you ultimate peace of mind. For more detailed guidance on how to check the oil in a car, our comprehensive guide walks you through the process for all vehicle types.
Resetting the Oil Change Light and What It Means
After you’ve completed an oil change—whether you did it yourself or had a shop do it—the oil change reminder light on your Haval’s dashboard will still be illuminated. This light is based on a mileage or algorithm timer and must be manually reset to start counting down to the next service. Failing to reset it means you’ll get a false warning, and you’ll lose the tracking benefit. The reset procedure varies slightly by Haval model and year.
General Reset Procedure for Haval Vehicles
While the exact steps should be verified in your manual, a common method for many Haval models is as follows: Turn the ignition to the “ON” position (do not start the engine). Using the steering wheel controls or the trip button on the instrument cluster, navigate to the “Settings” or “Vehicle Settings” menu. Look for an option like “Maintenance,” “Service,” or “Oil Life.” Select it and choose “Reset” or confirm with a long press. You may see a confirmation message like “Reset Done” or the oil life percentage return to 100%. If you cannot find it, your Haval’s manual is the definitive source. Some models may require a specific sequence of button presses on the odometer reset button. If you’re ever unsure, a quick call to your Haval dealer’s service department can provide the exact steps for your VIN. Remember, resetting the light only resets the timer; it does not change the oil. That must be done first!
Professional Service vs. DIY: Weighing Your Options
Once you’ve determined the correct interval and oil specification, you face the next decision: perform the oil change yourself or entrust it to a professional. Both have merits, and the right choice depends on your comfort, tools, and time.
The Case for Professional Service
A professional oil change at a Haval dealership, a trusted independent mechanic, or a reputable quick-lube chain offers several advantages. Technicians use the correct oil filter (a critical component often overlooked in DIY), the proper amount of oil, and dispose of the used fluid and filter responsibly. They also perform a multi-point inspection, checking things like tire pressure, brake fluid, coolant, belts, and for any leaks—services that add tremendous value. For newer Havals under warranty, having the service done by a certified technician (or keeping meticulous receipts for DIY) helps maintain warranty coverage. The convenience of dropping the car off and having it done in an hour is a major plus for busy schedules. Of course, this comes at a higher cost. Understanding how much does it cost to change oil in a car will help you budget; for a Haval with synthetic oil, you’re typically looking at $70-$120 at an independent shop and $100-$180 at a dealership.
The DIY Approach: Savings and Satisfaction
For the hands-on car owner, changing your own oil is a deeply satisfying and cost-effective task. You save significantly on labor, often by 50% or more, and have complete control over the oil and filter brand you use. You’ll need a socket set, a drain pan, a filter wrench, jack stands or ramps (for safety!), and the correct oil and filter. The process involves warming the engine slightly, draining the old oil, replacing the drain plug with a new washer, changing the filter (pre-filled with new oil), and refilling with the correct amount of new oil. It’s crucial to properly dispose of the used oil at a recycling center—never pour it down a drain. The main drawbacks are the time, the mess, and the need for a safe workspace. A mistake, like over-tightening the drain plug or filter, can lead to catastrophic leaks. If you’re new to car maintenance, having someone experienced show you the first time is highly recommended.
Conclusion: A Simple Habit for a Healthy Haval
Ultimately, knowing when to change oil in a Haval boils down to a simple formula: Owner’s Manual + Your Driving Reality + Active Monitoring. Start with the manufacturer’s interval for your specific model and engine. Then, honestly assess your driving. If you regularly face the “severe service” conditions we discussed—short trips, extreme temps, heavy traffic—actively shorten that interval. Don’t ignore the oil life monitor, but use it as a helpful tool, not the sole authority. Make a monthly date with your dipstick to check level and condition. And when the time comes, choose the correct oil specification without compromise.
This single maintenance task is your best defense against engine wear, sludge buildup, and expensive repairs. It’s the easiest and most affordable way to ensure your Haval delivers the performance, reliability, and longevity you expect. Whether you DIY or schedule a professional appointment, make the commitment to stick to a proper schedule. Your Haval’s engine will thank you with thousands of miles of smooth, trouble-free driving. For more foundational knowledge on engine maintenance, exploring our guide on what happens to your car when you need an oil change can provide a stark reminder of why this simple service is so critical.
Frequently Asked Questions
What is the standard oil change interval for a Haval?
For most newer Haval models using full synthetic oil, the standard interval under “normal” driving is 7,500 to 10,000 miles or 12 months. Always confirm your specific model’s interval in the owner’s manual, as older models or those using conventional oil may require changes every 5,000 miles.
Can I extend my oil change interval if I use full synthetic oil?
Yes, full synthetic oil is engineered to last longer and withstand higher temperatures, which is why Haval often specifies longer intervals (up to 10,000 miles) when it’s used. However, this extended interval is only valid under ideal “normal” driving conditions. If you drive under severe conditions, you should still shorten the interval, even with synthetic oil.
What happens if I go too long without an oil change in my Haval?
Oil breaks down over time, losing its ability to lubricate and clean. Going too long leads to sludge formation, increased metal-on-metal friction, and accelerated engine wear. This can cause reduced performance, poor fuel economy, and eventually, catastrophic engine failure, which is far more expensive to repair than a routine oil change.
How do I reset the oil change light on my Haval?
The reset procedure varies by model year. Generally, turn the ignition to “ON” (engine off), navigate the dashboard menu to “Settings” or “Vehicle Settings,” find the “Maintenance” or “Oil Life” option, and select “Reset.” Always consult your owner’s manual for the exact steps for your specific Haval to ensure you do it correctly.
What type of oil should I use in my Haval?
You must use the oil viscosity and specification listed in your owner’s manual, typically something like 5W-30 or 0W-20 that meets API SP and/or ACEA C5 standards. Using the correct oil is as important as changing it on time. Your manual or the oil cap under the hood will specify the requirements for your engine.
Is it worth changing my Haval’s oil myself?
DIY oil changes can save you 40-60% on labor costs and give you control over the products used. However, you need the correct tools, a safe workspace, and knowledge to do it properly without leaks or over/under-filling. You must also dispose of the used oil legally. If you’re comfortable with basic mechanics, it’s a rewarding task. Otherwise, professional service offers convenience, a multi-point inspection, and guaranteed proper disposal.