How to Vinyl Wrap a Car
Contents
- 1 Key Takeaways
- 2 📑 Table of Contents
- 3 Why Choose Vinyl Wrapping Over Paint?
- 4 Choosing the Right Vinyl Wrap
- 5 Tools and Materials You’ll Need
- 6 Step-by-Step Guide to Vinyl Wrapping Your Car
- 7 Common Mistakes and How to Avoid Them
- 8 Caring for Your Vinyl-Wrapped Car
- 9 When to Call a Professional
- 10 Frequently Asked Questions
Vinyl wrapping your car is an affordable, reversible way to change its look or protect the original paint. With the right tools, patience, and technique, you can achieve a professional finish at home—no body shop required.
So, you’ve been eyeing that sleek matte black finish or maybe a bold racing stripe for your ride—but repainting sounds expensive, permanent, and risky. Enter vinyl wrapping: the stylish, budget-friendly alternative that lets you completely transform your car’s appearance without touching the original paint. Whether you’re going for a full color change, a protective clear coat, or a custom graphic, learning how to vinyl wrap a car opens up a world of creative possibilities.
But here’s the truth: while it looks simple in YouTube videos, doing it right takes more than just slapping on some sticky plastic. It’s part art, part science, and 100% patience. Done poorly, you’ll end up with bubbles, wrinkles, or peeling edges that scream “DIY disaster.” Done well? Your car looks like it rolled straight out of a high-end customization shop—and you saved thousands. The good news? With the right prep, tools, and mindset, you can absolutely master how to vinyl wrap a car at home. This guide walks you through every step, from choosing materials to finishing touches, so you get that flawless, factory-fresh look without the factory price tag.
Key Takeaways
- Choose the right vinyl: High-quality cast vinyl lasts longer and conforms better to curves than cheaper calendered options.
- Clean thoroughly: Any dirt, wax, or grease will prevent proper adhesion and ruin the finish.
- Use heat wisely: A heat gun or torch helps stretch and mold vinyl over complex contours without tearing.
- Work in sections: Tackle one panel at a time to maintain control and avoid wrinkles or bubbles.
- Practice on small areas first: Start with mirrors or door handles before attempting full panels.
- Post-install care matters: Avoid car washes for 48 hours and use pH-neutral cleaners to preserve the wrap.
- Professional help is okay: If you’re unsure, consult a certified installer—especially for full wraps or intricate designs.
📑 Table of Contents
Why Choose Vinyl Wrapping Over Paint?
Let’s start with the big “why.” Why would anyone choose vinyl over traditional paint? The answer comes down to three key advantages: cost, reversibility, and protection.
First, cost. A full professional paint job can easily run $3,000–$8,000 depending on quality and vehicle size. Even a partial repaint (like just the hood or doors) isn’t cheap. In contrast, a full vinyl wrap typically costs between $2,000 and $5,000 professionally—and if you DIY, you can bring that down to under $500 for materials. That’s a huge savings, especially if you’re experimenting with a new look.
Second, reversibility. Paint is permanent (or at least semi-permanent). Once you commit, removing it means sanding, priming, and more expense. Vinyl, however, peels off cleanly—usually in one piece—if you decide you don’t like the color or want to sell the car. This makes it ideal for lease vehicles, temporary promotions, or just trying out a bold new style without long-term commitment.
Third, protection. High-quality vinyl acts as a shield against rock chips, UV rays, minor scratches, and even acid rain. Think of it as a giant, stylish screen protector for your car. Over time, this can actually preserve your original paint, potentially increasing resale value when you remove the wrap.
Of course, vinyl isn’t perfect. It won’t hide major dents or rust, and low-quality wraps can fade or crack in extreme climates. But for most drivers, the benefits far outweigh the drawbacks—especially when you consider how easy it is to update your look every few years.
Choosing the Right Vinyl Wrap
Visual guide about How to Vinyl Wrap a Car
Image source: raxtify.com
Not all vinyl is created equal. If you skimp here, you’ll pay for it later with bubbling, peeling, or a finish that looks cheap. So let’s break down what to look for when selecting your wrap material.
Cast vs. Calendered Vinyl
The two main types of automotive vinyl are cast and calendered. Understanding the difference is crucial.
Cast vinyl is made by pouring liquid vinyl onto a casting sheet, then curing it. This process creates a thinner, more flexible film that conforms beautifully to curves, recesses, and complex body lines—like around door handles, mirrors, or wheel arches. It’s also more durable, with lifespans of 5–7 years or more under proper care. Premium brands like 3M, Avery Dennison, and KPMF use cast technology.
Calendered vinyl, on the other hand, is made by rolling heated vinyl through rollers. It’s thicker, stiffer, and less expensive—but it doesn’t stretch as well and tends to shrink over time, especially in heat. It’s fine for flat surfaces or short-term projects, but avoid it for full wraps or cars with lots of contours.
For most DIYers, we strongly recommend cast vinyl. Yes, it costs more upfront (around $2–$4 per square foot), but the ease of application and longevity make it worth every penny.
Finish Options
Vinyl comes in a dizzying array of finishes—and choosing the right one can make or break your project.
– Gloss: Classic, shiny, and reflective. Great for mimicking factory paint. Easy to clean but shows fingerprints and swirl marks.
– Matte: Sleek, modern, and fingerprint-resistant. Hides imperfections well but requires special cleaners (regular wax will ruin it).
– Satin: A middle ground—subtle sheen with low reflectivity. Popular for trucks and SUVs.
– Color-Shift & Chameleon: Changes hue based on viewing angle. Eye-catching but tricky to apply due to pattern alignment.
– Carbon Fiber & Brushed Metal: Textured finishes that add depth. Require extra care during installation to avoid visible seams.
Pro tip: If you’re new to wrapping, start with a solid gloss or matte color. Patterns and textures add complexity because misaligned seams are obvious.
Brand Matters
Stick with reputable brands. Cheap no-name vinyl from unknown sellers may save you $50 now but could cost you $500 in redo work later. Trusted names include:
– 3M 1080 Series (industry standard)
– Avery Dennison Supreme Wrapping Film
– KPMF Supreme Wrap
These offer consistent quality, reliable adhesion, and excellent customer support—even for DIYers.
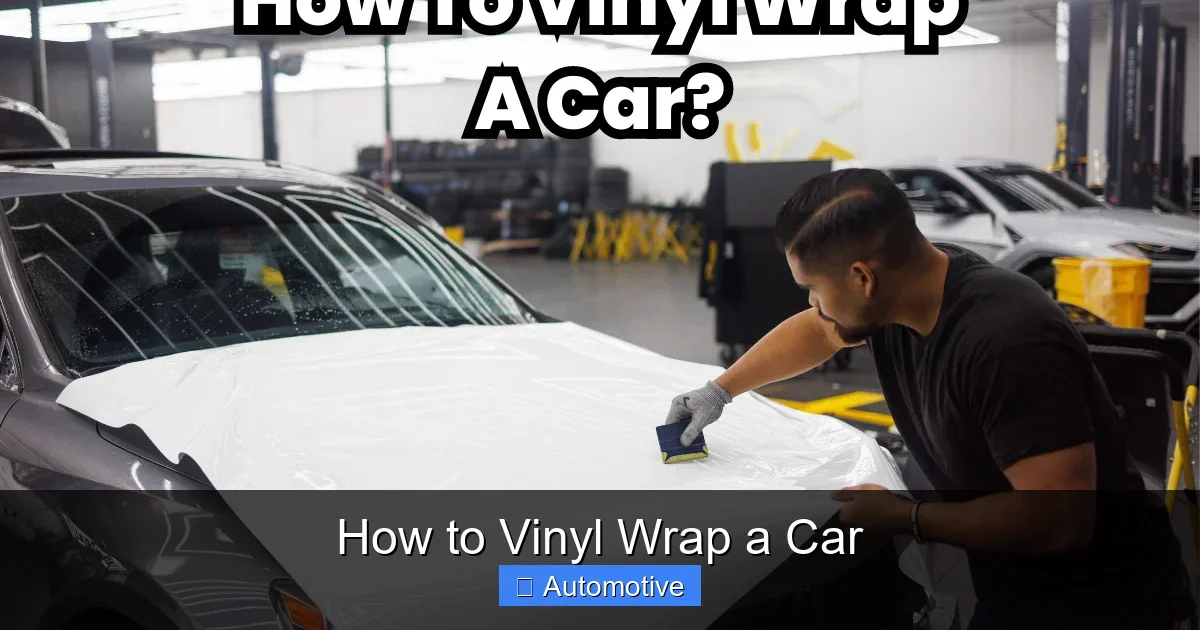
Tools and Materials You’ll Need

Visual guide about How to Vinyl Wrap a Car
Image source: vinylfrog.com
Before you even think about touching your car, gather your toolkit. Skipping tools might seem like a way to save money, but it often leads to frustration and wasted vinyl.
Here’s your essential checklist:
- Vinyl wrap film (enough to cover your project—calculate square footage ahead of time)
- Squeegee set (felt-edged for smoothing, rigid for hard edges)
- Heat gun or torch (a standard hair dryer won’t cut it—you need focused, adjustable heat)
- Microfiber towels (lint-free, for cleaning and final polishing)
- Isopropyl alcohol (70%+) and spray bottle (for surface prep)
- Knifeless tape or razor blades (for trimming edges—be careful!)
- Application fluid (optional but helpful—mix water with a drop of dish soap for slip)
- Gloves (nitrile, to keep oils off the vinyl)
- Measuring tape and marker (for cutting templates)
Bonus tools that make life easier:
– Vinyl cutter or plotter (if doing custom graphics)
– Trim removal tools (to safely take off emblems or trim without scratching paint)
– Work lights (good lighting reveals dust and imperfections)
Invest in quality squeegees—they’re your main tool for smoothing out air bubbles and ensuring adhesion. A cheap one will scratch your vinyl or leave streaks.
Step-by-Step Guide to Vinyl Wrapping Your Car
Visual guide about How to Vinyl Wrap a Car
Image source: images.mrshopplus.com
Now for the fun part: actually wrapping your car. We’ll walk through the process panel by panel, but remember—this isn’t a race. Take your time, stay calm, and don’t rush.
Step 1: Prep Your Workspace
Find a clean, dust-free, well-lit area—ideally a garage with controlled temperature (65–80°F is ideal). Wind, rain, and sunlight can ruin your work. Lay down drop cloths or cardboard to protect the floor and your car’s paint.
Step 2: Wash and Decontaminate
Give your car a thorough wash using a pH-neutral car shampoo. Rinse well. Then, use a clay bar to remove embedded contaminants like tar, tree sap, or industrial fallout. Wipe down with isopropyl alcohol to strip any wax or oils. Any residue will prevent the vinyl from sticking.
Pro tip: Do this the day before wrapping so the car has time to dry completely.
Step 3: Remove Trim and Emblems (If Possible)
Take off anything that creates a hard edge—mirrors, door handles, trim pieces, emblems. Use plastic trim tools to avoid scratching. Label parts so you know where they go later. This step isn’t always necessary, but it makes wrapping edges much cleaner.
Step 4: Measure and Cut Vinyl
Lay the vinyl over the panel you’re wrapping (e.g., hood, door). Leave at least 2–3 inches of excess on all sides. Use a marker to trace rough edges, then cut with scissors or a knife. Don’t worry about precision yet—you’ll trim later.
Step 5: Apply Application Fluid
Spray a light mist of soapy water (1 quart water + 1 drop dish soap) onto the car panel. This gives you “slip” so you can reposition the vinyl before it sticks permanently.
Step 6: Position and Smooth
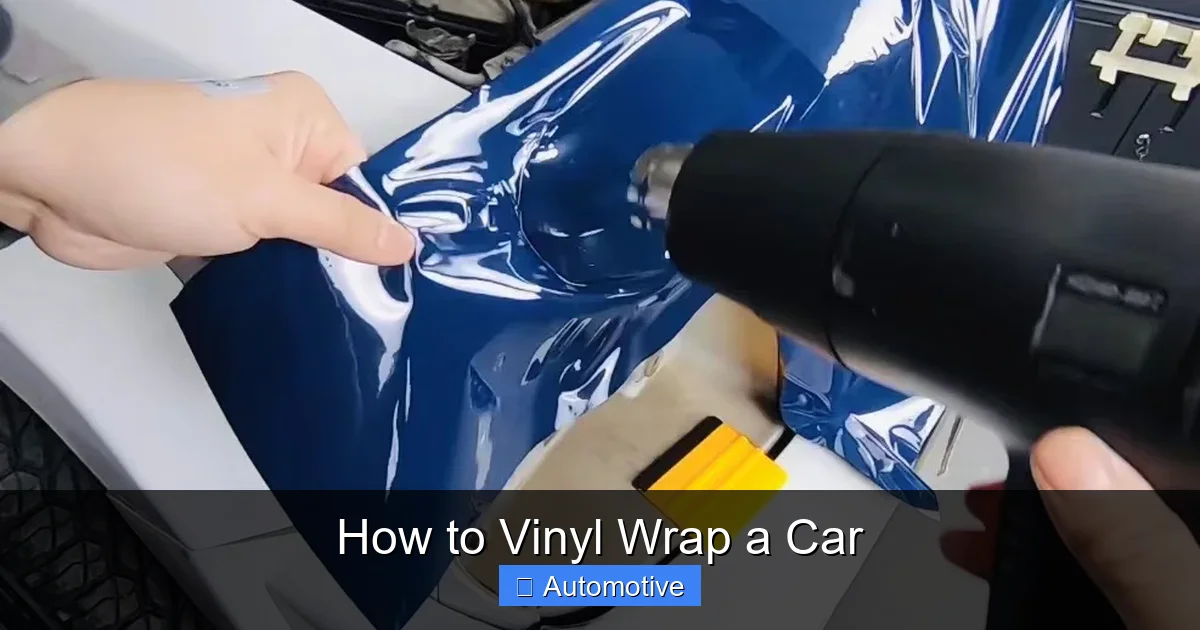
Peel the backing paper about 6 inches at a time, aligning the vinyl with the panel. Use your hands to gently lay it down, then use a felt squeegee to push out air and water from the center outward. Work in small sections, peeling more backing as you go.
For curved areas (like fenders or bumpers), use heat. Gently warm the vinyl with your heat gun (keep it moving!) to make it pliable. Stretch and smooth carefully—don’t overheat or you’ll melt the film.
Step 7: Trim Excess
Once the vinyl is fully adhered, use knifeless tape or a fresh razor blade to trim along edges. Run the blade along the door jamb or panel seam, applying light pressure. Wipe away any residue immediately.
Step 8: Post-Heating and Final Squeegee
Go over the entire panel with heat again, then use a clean squeegee to ensure full adhesion. This step seals the edges and removes any trapped moisture.
Repeat for each panel. Start with flat surfaces (hood, roof), then move to curved ones (doors, fenders). Save complex areas like mirrors or pillars for last.
Common Mistakes and How to Avoid Them
Even experienced wrappers make mistakes—but you don’t have to. Here are the top pitfalls and how to dodge them.
Bubbles and Wrinkles
Caused by trapped air or improper stretching. Solution: Always squeegee from center to edge. If a bubble forms, puncture it with a pin and press out the air. For wrinkles, reheat gently and re-smooth—don’t pull too hard.
Peeling Edges
Usually due to poor cleaning or not post-heating edges. Make sure the surface is spotless and always go over seams with heat and a squeegee.
Tearing Vinyl
Happens when you stretch too aggressively or use dull blades. Use moderate heat and let the vinyl relax into shape. Replace razor blades frequently.
Misaligned Patterns
If using carbon fiber or brushed metal, plan your layout carefully. Cut pieces to align grain direction. Practice on cardboard first.
Rushing the Process
Vinyl wrapping is detail work. Set aside a full weekend—don’t try to do it in one afternoon. Fatigue leads to errors.
Caring for Your Vinyl-Wrapped Car
Your wrap looks amazing—now keep it that way.
– Wait 48 hours before washing.
– Use pH-neutral car wash soap—no wax, polish, or abrasive cleaners.
– Hand wash only for the first month; avoid automatic car washes with brushes.
– For matte finishes, never use wax or glaze—it will create shiny spots.
– Park in the shade or use a car cover to reduce UV exposure.
– Inspect edges monthly and re-heat any lifting spots immediately.
With proper care, your wrap can last 5+ years. When it’s time to remove it, use a heat gun to loosen the adhesive, then peel slowly at a 45-degree angle. Any residue can be cleaned with adhesive remover.
When to Call a Professional
DIY wrapping is rewarding—but not always practical. Consider hiring a pro if:
– You’re doing a full wrap on a complex vehicle (SUV, coupe with tight curves)
– You want intricate designs, color shifts, or dual-tone finishes
– Your car has deep scratches, rust, or poor paint condition (vinyl won’t fix these)
– You’re short on time or patience
A certified installer has specialized tools, experience, and warranties. Plus, many offer removal services if you change your mind.
That said, don’t be intimidated. Start small—wrap your side mirrors or rear spoiler. Build confidence, then tackle bigger projects. Thousands of DIYers have successfully wrapped their cars at home, and you can too.
Transforming your car with vinyl isn’t just about aesthetics. It’s about creativity, control, and smart ownership. You’re not just changing how your car looks—you’re learning a valuable skill that saves money and opens doors to endless customization. So grab your squeegee, clear your schedule, and get ready to turn heads. Your dream ride is just one wrap away.
Frequently Asked Questions
How long does a vinyl wrap last?
A high-quality vinyl wrap can last 5 to 7 years with proper care. Factors like climate, sun exposure, and maintenance affect longevity. Regular hand washing and avoiding harsh chemicals help extend its life.
Can I vinyl wrap a car with bad paint?
Vinyl can hide minor imperfections like light scratches or swirl marks, but it won’t fix deep dents, rust, or peeling paint. The surface should be smooth and intact for the best results. If the paint is severely damaged, consider repairs first.
Will vinyl wrap damage my original paint?
No—when applied and removed correctly, vinyl wrap protects your original paint and doesn’t harm it. In fact, it shields against UV rays, chips, and scratches. Always use quality vinyl and avoid cheap adhesives.
Can I wash my car after wrapping it?
Wait at least 48 hours before washing. After that, use a pH-neutral car shampoo and hand wash only for the first month. Avoid automatic brush washes, which can lift edges or scratch the surface.
Do I need to remove all trim to wrap my car?
Not always, but removing trim, emblems, and mirrors makes the job cleaner and reduces visible seams. If you skip this step, be extra careful around edges and use knifeless tape for precision trimming.
Can I install a vinyl wrap in cold weather?
Avoid wrapping below 60°F (15°C). Cold vinyl is stiff and hard to stretch, increasing the risk of tearing or poor adhesion. Work in a heated garage if possible, and keep your materials warm before application.