How to Tilt Subaru Headrest Back
Contents
- 1 Key Takeaways
- 2 📑 Table of Contents
- 3 Why Tilting Your Subaru Headrest Matters
- 4 Understanding Subaru Headrest Design and Function
- 5 Step-by-Step Guide: How to Tilt Subaru Headrest Back
- 6 Safety Considerations When Tilting Your Headrest
- 7 Maintenance Tips to Keep Your Headrest Tilt Function Working
- 8 Common Mistakes to Avoid
- 9 Conclusion: Small Adjustment, Big Difference
- 10 Frequently Asked Questions

Portable Work Light

Windshield Washer Fluid

OBD2 Scanner Tool

Dashboard Polish
Adjusting your Subaru headrest backward can improve comfort, especially on long drives. This guide walks you through the simple process, safety tips, and model-specific instructions to tilt your headrest safely and effectively.
Key Takeaways
- Check your Subaru model and year: Headrest mechanisms vary by model (e.g., Outback, Forester, Impreza), so always confirm your vehicle’s design before adjusting.
- Use the release button or lever: Most modern Subarus have a spring-loaded button or lever on the headrest post that allows tilting when pressed.
- Never force the headrest: If it doesn’t move easily, double-check the mechanism or consult your owner’s manual to avoid damage.
- Maintain proper safety alignment: Even when tilted, ensure the headrest supports the back of your head to protect against whiplash in a collision.
- Clean and maintain the mechanism: Dust and debris can stiffen the tilt function—regular cleaning keeps it working smoothly.
- Adjust for passenger comfort: Rear-seat passengers may also benefit from tilting headrests for better neck support during travel.
- Consult the owner’s manual: Subaru provides specific instructions for each model—always refer to it for accurate guidance.
📑 Table of Contents
- Why Tilting Your Subaru Headrest Matters
- Understanding Subaru Headrest Design and Function
- Step-by-Step Guide: How to Tilt Subaru Headrest Back
- Safety Considerations When Tilting Your Headrest
- Maintenance Tips to Keep Your Headrest Tilt Function Working
- Common Mistakes to Avoid
- Conclusion: Small Adjustment, Big Difference
Why Tilting Your Subaru Headrest Matters
You’re cruising down the highway in your Subaru Outback, windows down, music playing—but something feels off. Your neck is strained, your head keeps bobbing, and you’re constantly readjusting your seat. Sound familiar? The culprit might not be your seat or posture—it could be your headrest.
Many Subaru owners don’t realize that their headrests aren’t just static safety features. They’re designed to be adjustable, including the ability to tilt backward for improved comfort. Whether you’re tall, short, or just looking for a more relaxed driving position, learning how to tilt Subaru headrest back can make a world of difference. It’s not just about comfort—it’s about proper ergonomics and long-term spinal health.
Subaru vehicles, known for their rugged reliability and driver-focused design, come equipped with advanced seating systems. From the compact Impreza to the spacious Ascent, each model features headrests engineered for both safety and adaptability. But despite this thoughtful engineering, many drivers never explore the full range of adjustments available. Tilting the headrest back can reduce neck fatigue, improve posture, and even enhance visibility in some cases.
So why don’t more people do it? Often, it’s simply because they don’t know how. The mechanism isn’t always obvious, and without clear instructions, it’s easy to assume the headrest is fixed. But with a few simple steps, you can unlock this hidden feature and transform your driving experience. This guide will walk you through everything you need to know—from identifying your headrest type to safely adjusting it for maximum comfort.
Understanding Subaru Headrest Design and Function
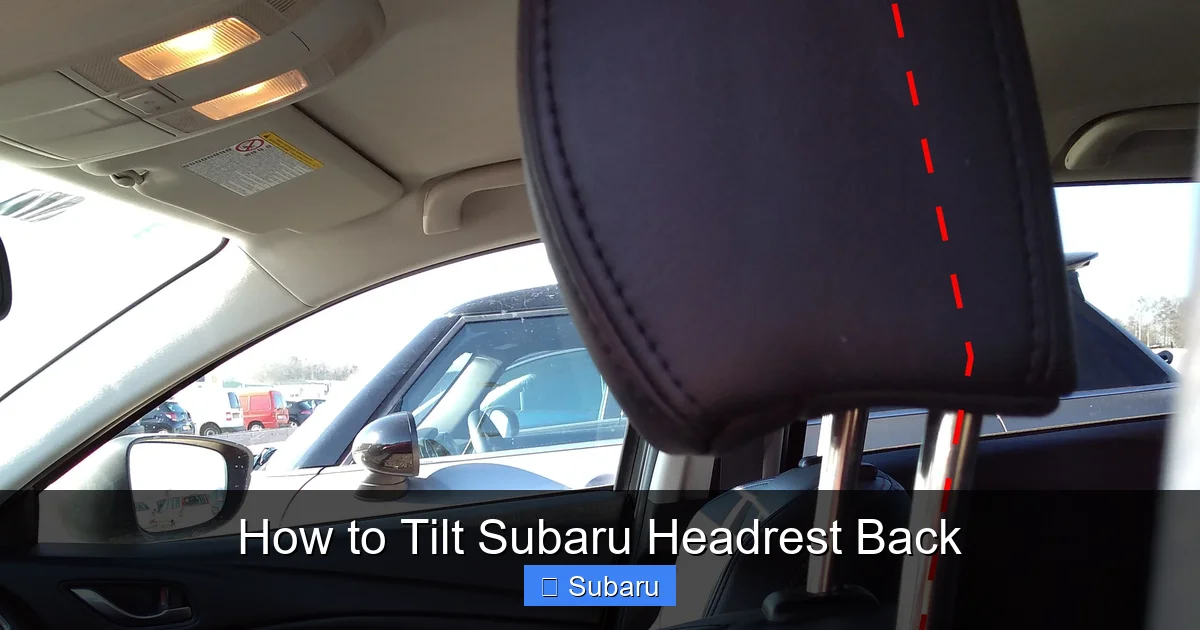
Before you attempt to tilt your Subaru headrest back, it’s important to understand how these components are built and why they matter. Subaru headrests are not just padded blocks—they’re carefully engineered safety devices that play a critical role in protecting occupants during collisions.
Visual guide about How to Tilt Subaru Headrest Back
Image source: kirkhouse.co.uk
The primary purpose of a headrest is to prevent whiplash, a common injury in rear-end accidents. When a vehicle is struck from behind, the body is thrust forward while the head lags behind, causing a sudden snapping motion. A properly positioned headrest limits this movement by supporting the head and neck. Subaru designs its headrests to align with the back of the occupant’s head, ideally at ear level, to provide optimal protection.
But safety isn’t the only consideration. Comfort is equally important, especially on long road trips or daily commutes. That’s where the tilt function comes in. Unlike older models with fixed headrests, many modern Subarus feature headrests that can be tilted forward or backward. This adjustment allows drivers and passengers to find a position that supports the natural curve of the neck and spine.
Subaru uses two main types of adjustable headrests: those with a manual tilt mechanism and those with a push-button release. The tilt function is typically built into the headrest posts—the metal rods that connect the headrest to the seat. These posts slide into guide sleeves and often include a spring-loaded locking system that allows for angular adjustment.
For example, in the 2020–2024 Subaru Outback, the front headrests feature a dual-post design with a tilt mechanism activated by pressing a small button on the side of the headrest base. In contrast, some older models like the 2015 Forester may require you to remove the headrest entirely to access the tilt adjustment. Understanding your specific model’s design is key to making the adjustment safely and effectively.
Types of Subaru Headrest Mechanisms
Subaru has evolved its headrest designs over the years, leading to several different mechanisms across its lineup. Here’s a breakdown of the most common types you’ll encounter:
- Spring-Loaded Tilt Mechanism: Found in newer models like the 2022+ Subaru Crosstrek and Legacy, this system uses a small button or lever on the side of the headrest. Pressing it releases the locking pin, allowing you to tilt the headrest forward or backward. Release the button to lock it in place.
- Manual Slide-and-Tilt: Some mid-2010s models, including certain Forester and Impreza trims, use a simpler system where you lift the headrest slightly and then tilt it by hand. No button is needed—just gentle pressure.
- Removable Headrest with Tilt Adjustment: In older or base-trim models, the headrest may need to be removed to access tilt settings. This involves pressing a release tab at the base of the seatback and lifting the headrest out. Once removed, you can adjust the angle before reinserting it.
- Integrated Active Headrests: High-end trims, such as those in the Subaru Ascent Touring, may feature active headrests that automatically adjust during a collision. These are more complex and should only be adjusted according to the owner’s manual.
Knowing which type your Subaru uses will help you avoid frustration and potential damage. If you’re unsure, a quick glance at your owner’s manual or a visit to a Subaru dealership can clarify the design.
Step-by-Step Guide: How to Tilt Subaru Headrest Back
Now that you understand the basics, let’s get into the practical steps. Tilting your Subaru headrest back is usually a straightforward process, but it varies slightly depending on your model. Below is a universal guide that covers the most common scenarios, with model-specific tips included.

Visual guide about How to Tilt Subaru Headrest Back
Image source: kirkhouse.co.uk
Step 1: Identify the Headrest Type
Before touching anything, determine what kind of headrest you have. Sit in the driver’s seat and examine the base of the headrest where it connects to the seat. Look for a small button, lever, or release tab. If you see a button on the side or front of the headrest base, you likely have a spring-loaded tilt mechanism. If there’s no visible button, you may have a manual or removable system.
For example, in a 2023 Subaru Outback Limited, you’ll find a small black button on the left side of the headrest base. In a 2018 Impreza Sport, the button is on the right side. These small details matter—pressing the wrong area won’t work and could lead to confusion.
Step 2: Locate the Release Button or Lever
Once you’ve identified the mechanism, locate the release button. It’s usually recessed to prevent accidental activation and may be labeled with a small icon or text. On most models, the button is positioned so that it’s accessible when you’re seated, but not so obvious that it gets bumped during normal use.
If you can’t find a button, check the sides of the headrest posts. Some models have a lever that you pull outward to release the tilt function. This is less common but still present in certain trims.
Step 3: Press the Button and Tilt the Headrest
With the button located, press it firmly while gently pushing the top of the headrest backward. You should feel it move smoothly into a new position. Don’t force it—if it doesn’t budge, double-check that you’re pressing the correct button and that the headrest isn’t locked in place due to dirt or debris.
For manual systems, simply lift the headrest slightly and tilt it backward by hand. You’ll feel a slight resistance as the internal mechanism shifts, but it should move with minimal effort.
Step 4: Release and Test the Position
Once the headrest is tilted to your desired angle, release the button or lever. The headrest should lock into place. Sit back and test the position—your head should rest comfortably against the padding, with your neck in a natural, relaxed alignment.
If the headrest feels loose or wobbly, it may not be fully locked. Press the button again and adjust slightly until it clicks into a secure position.
Step 5: Repeat for Other Seats (If Needed)
Don’t forget about your passengers! Rear-seat headrests on models like the Subaru Ascent and Outback also feature tilt adjustments. The process is similar, though access may be trickier. You may need to fold down the center armrest or lean into the seat to reach the release button.
Adjusting rear headrests can significantly improve comfort for passengers, especially children or shorter adults who may struggle with fixed headrests.
Model-Specific Examples
Let’s look at a few real-world examples to illustrate the process:
- 2024 Subaru Forester: Press the small black button on the right side of the headrest base. Tilt the headrest back until it supports the back of your head. Release the button to lock.
- 2021 Subaru Impreza: The button is on the left side. Press and hold while tilting. The headrest has three tilt positions—choose the one that feels most comfortable.
- 2016 Subaru Legacy: This model uses a manual tilt system. Lift the headrest slightly and push it backward. No button required.
- 2023 Subaru Ascent: Front and rear headrests are tilt-adjustable. Use the side button on front seats; rear seats may require reaching under the seatback to access the release.
These examples show how similar the process is across models, with only minor variations in button placement and mechanism type.
Safety Considerations When Tilting Your Headrest
While comfort is important, safety should always come first. Tilting your headrest back can improve ergonomics, but it must be done correctly to maintain protection in the event of a crash.
Visual guide about How to Tilt Subaru Headrest Back
Image source: content.instructables.com
The National Highway Traffic Safety Administration (NHTSA) recommends that headrests be positioned so the top is level with the top of your head, and the back of your head is no more than 2–4 inches away from the headrest. This minimizes the risk of whiplash by reducing the distance your head can travel backward during impact.
When you tilt the headrest back, you’re changing the angle of support, not the distance. As long as the headrest still contacts the back of your head—not the base of your skull or your neck—you’re maintaining safety. Avoid tilting it so far back that it no longer provides support.
Another safety tip: never drive with the headrest removed. Some owners remove headrests to install aftermarket seat covers or child seats, but this leaves you vulnerable in a collision. If you must remove the headrest, reinstall it before driving.
Also, be cautious with aftermarket headrest accessories. While seat cushions and neck pillows can add comfort, they may interfere with the headrest’s function. Choose products that don’t block the tilt mechanism or push your head too far forward.
Finally, remember that headrests are part of a larger safety system. They work in conjunction with seatbelts, airbags, and seat design. Adjusting one component shouldn’t compromise the others. Always ensure your seat is properly positioned—backrest angle, lumbar support, and seat height—before fine-tuning the headrest.
Maintenance Tips to Keep Your Headrest Tilt Function Working
Like any mechanical component, headrest tilt mechanisms can wear out or become stiff over time. Dust, dirt, and moisture can accumulate in the guide sleeves and locking pins, making adjustments difficult. Regular maintenance can prevent these issues and extend the life of your headrest system.
Start by cleaning the headrest posts and guide sleeves. Use a soft brush or compressed air to remove debris. Avoid using water or harsh chemicals, as they can cause rust or damage the internal springs. A small amount of silicone-based lubricant can be applied to the posts if they feel stiff—just be sure to wipe off any excess to prevent staining the upholstery.
Check the release button periodically. If it feels sticky or unresponsive, it may be clogged with dirt. Gently clean around the button with a cotton swab and isopropyl alcohol. Never pry or force the button, as this can break the internal mechanism.
If your headrest becomes loose or won’t stay in place, the locking pin may be worn. This is more common in high-mileage vehicles. In such cases, consult a Subaru service technician. Attempting to repair it yourself could void your warranty or cause further damage.
For vehicles used in harsh environments—like snowy regions or off-road adventures—consider inspecting the headrest mechanism every six months. Salt, sand, and mud can accelerate wear and corrosion.
Lastly, if you’ve recently had your seats reupholstered or repaired, confirm that the headrest was reinstalled correctly. Improper installation can affect both tilt function and safety performance.
Common Mistakes to Avoid
Even with the best intentions, it’s easy to make mistakes when adjusting your headrest. Here are some common pitfalls and how to avoid them:
- Forcing the headrest: If it doesn’t move, don’t yank or twist it. This can bend the posts or break the locking mechanism. Instead, check for obstructions or consult the manual.
- Ignoring the owner’s manual: Subaru provides detailed instructions for each model. Skipping this step can lead to incorrect adjustments or damage.
- Tilting too far back: While a slight backward tilt is fine, extreme angles reduce safety. Keep the headrest within the recommended range.
- Adjusting while driving: Never attempt to tilt your headrest while the vehicle is in motion. Pull over safely first.
- Using excessive force on the button: Press firmly but gently. Over-pressing can wear out the spring or button housing.
- Neglecting rear seats: Passengers deserve comfort too. Make sure rear headrests are properly adjusted, especially for long trips.
Avoiding these mistakes will help you get the most out of your Subaru’s headrest system while keeping you and your passengers safe.
Conclusion: Small Adjustment, Big Difference
Learning how to tilt Subaru headrest back might seem like a minor detail, but it’s one of those small changes that can have a big impact on your driving experience. Whether you’re commuting to work, taking a weekend road trip, or shuttling kids to soccer practice, comfort matters. And comfort starts with proper support for your head and neck.
Subaru has designed its vehicles with adjustability in mind, giving you the tools to customize your seating for maximum comfort and safety. By following the steps in this guide, you can easily tilt your headrest back, reduce fatigue, and enjoy a more relaxed ride. Just remember to prioritize safety, maintain the mechanism, and consult your owner’s manual when in doubt.
So the next time you settle into your Subaru, take a moment to check your headrest. Is it supporting your head properly? Could a slight tilt make a difference? With just a press of a button and a gentle push, you might discover a whole new level of comfort—one that turns every drive into a more enjoyable journey.
Frequently Asked Questions
Can I tilt the headrest on all Subaru models?
Most modern Subaru models, including the Outback, Forester, Impreza, and Ascent, feature tilt-adjustable headrests. However, older or base-trim models may have fixed headrests. Check your owner’s manual or inspect the headrest base for a release button to confirm.
Is it safe to tilt the headrest backward?
Yes, as long as the headrest still supports the back of your head and isn’t tilted so far that it loses contact. The goal is to maintain safety while improving comfort. Always ensure the headrest is locked in place after adjustment.
Why won’t my Subaru headrest tilt?
This could be due to a stuck release button, debris in the mechanism, or a worn locking pin. Try cleaning the area around the button or gently lubricating the posts. If the issue persists, consult a Subaru technician.
Do I need to remove the headrest to tilt it?
Only on certain older models. Most newer Subarus allow tilting without removal. If your model requires removal, follow the instructions in the owner’s manual to avoid damage.
Can I adjust the rear seat headrests too?
Yes, many Subaru models with rear headrests also feature tilt adjustments. The process is similar to the front seats, though access may be more limited. Check your manual for specific guidance.
What if my headrest feels loose after tilting?
A loose headrest may not be fully locked into position. Press the release button again and adjust slightly until you hear or feel a click. If it remains loose, the locking mechanism may be worn and should be inspected by a professional.