
How to Reset the Maintenance Required Light on a 2011 Toyota Corolla
Contents
- 1 Key Takeaways
- 2 📑 Table of Contents
- 3 Understanding Your Corolla’s Maintenance Reminder System
- 4 Essential Preparation Before You Begin
- 5 Method 1: The Standard Odometer Reset Procedure
- 6 Method 2: The Alternate Trip Meter Reset Procedure
- 7 After the Reset: Confirmation and Best Practices
- 8 Common Mistakes and Troubleshooting
- 9 Conclusion: A Simple Act of Ownership
- 10 Frequently Asked Questions


The maintenance required light on a 2011 Toyota Corolla is a friendly reminder that scheduled service is due, typically an oil change. Resetting it is a simple, tool-free process you can do yourself in under a minute using just the odometer button. There are two primary methods: the standard odometer reset and an alternate trip meter reset. It is crucial to only reset this light after you have performed the necessary maintenance, like an oil and filter change, to ensure your engine’s longevity and avoid potential damage.
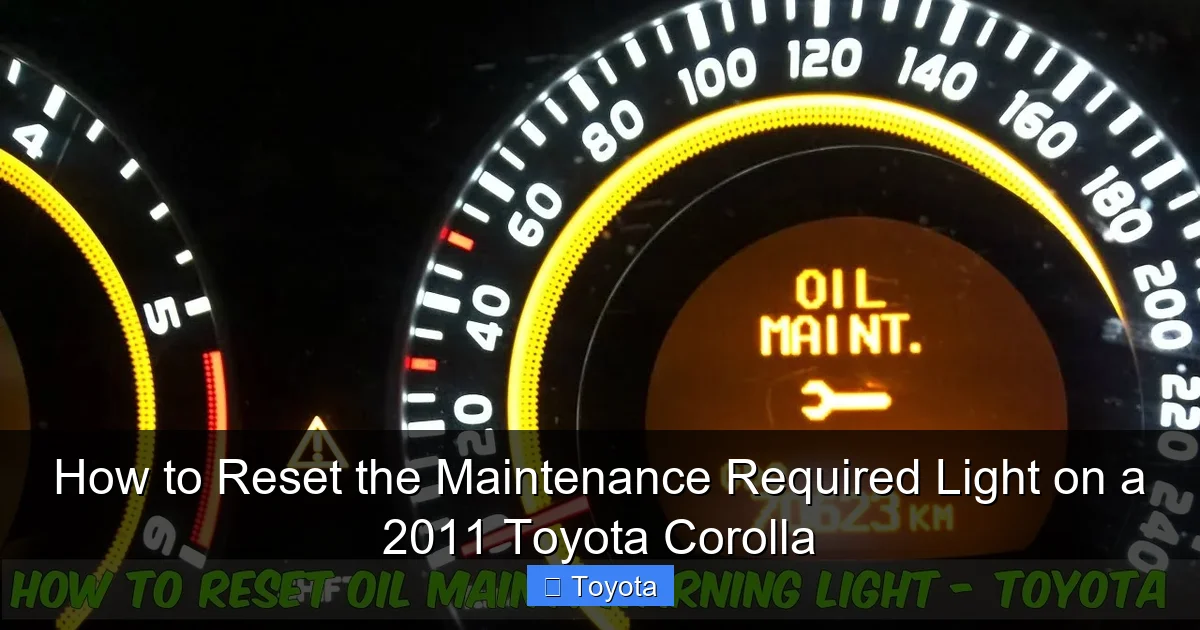
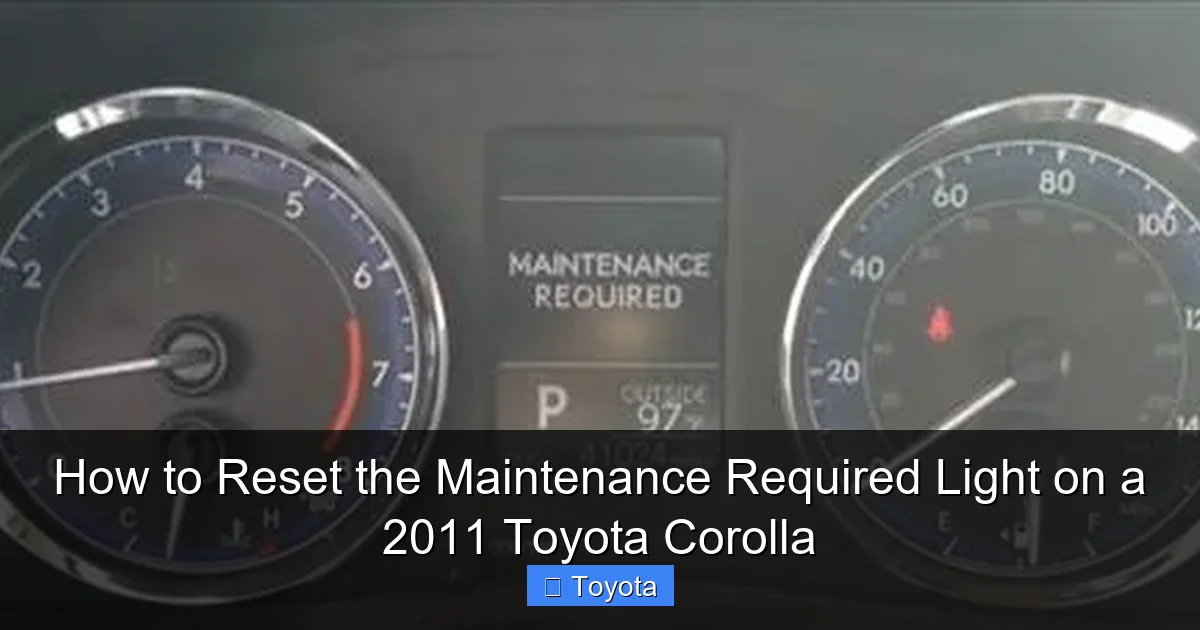
Ah, the little wrench icon that has decided to make itself at home on your dashboard. For a 2011 Toyota Corolla owner, that “MAINTENANCE REQUIRED” light is a familiar sight after a few thousand miles. It’s not a warning of imminent doom; it’s your car’s way of tapping you on the shoulder, saying, “Hey, remember that oil change we talked about?” But now that you’ve (hopefully) taken care of the service, that persistent light needs to go back to sleep. Resetting it is one of the simplest pieces of DIY maintenance you can do. It’s a satisfying, 30-second task that gives you a clean dashboard and confirms your service cycle is officially restarted. Let’s walk through exactly how to do it, why it works, and what to keep in mind so you never have to stare at that wrench again wondering what to do.
Key Takeaways
- The light is a maintenance reminder, not an emergency: It illuminates after a set mileage (usually 5,000 miles) since the last reset, signaling it’s time for routine service like an oil change, not that something is immediately broken.
- Two reliable reset methods exist: You can reset it via the standard odometer display or, if that fails, using the trip meter “A” display method. Both require only the vehicle’s odometer button.
- Reset only after completing service: Never reset the light without performing the required maintenance. Doing so defeats the system’s purpose and can lead to engine wear or damage from neglected oil changes.
- Oil change interval is key: For a 2011 Corolla, the standard interval is every 5,000 miles or 6 months, whichever comes first, using the recommended oil viscosity (typically 0W-20).
- The process takes seconds, not minutes: Once you know the button sequence, the entire reset procedure takes less than 30 seconds and requires no special tools or popping the hood.
- A persistent light may indicate a problem: If the light won’t reset or comes back on immediately after a correct reset, there may be an underlying electrical issue or the system may not have registered the service; consult a professional.
- Other Corolla lights have different meanings: Remember, this is for the “MAINTENANCE REQUIRED” light. A separate, red oil pressure warning light or check engine light requires immediate, different attention.
📑 Table of Contents
- Understanding Your Corolla’s Maintenance Reminder System
- Essential Preparation Before You Begin
- Method 1: The Standard Odometer Reset Procedure
- Method 2: The Alternate Trip Meter Reset Procedure
- After the Reset: Confirmation and Best Practices
- Common Mistakes and Troubleshooting
- Conclusion: A Simple Act of Ownership
Understanding Your Corolla’s Maintenance Reminder System
Before we press any buttons, it’s helpful to understand what that light actually represents. Your 2011 Corolla doesn’t have a simple mileage-based reminder. Instead, it uses an algorithm that calculates when service is due based on engine revolutions, engine temperature, and driving time. This is far more sophisticated than a basic “5,000-mile” sticker. The system is designed to account for severe driving conditions—lots of short trips, extreme temperatures, dusty environments—where engine wear happens faster. When the computer determines the service interval has been met, it illuminates the “MAINTENANCE REQUIRED” light. Resetting it tells the computer, “The service has been performed. Start counting from zero again.” This system is a great tool, but it relies on you, the owner, to actually perform the maintenance and then reset it. If you just reset it without changing the oil, you’ve essentially silenced a helpful alarm while leaving the problem unaddressed.
What Triggers the Light?
For the 2011 model year, the primary trigger is the engine oil change interval. Under normal driving conditions, this is typically set to 5,000 miles or 6 months. However, if your driving habits fall into Toyota’s “severe” category—which includes frequent short trips (less than 5 miles), extensive idling, driving in extremely cold or hot climates, or dusty conditions—the system may calculate a shorter interval. The light will come on steadily, not blinking. It’s a constant, gentle nudge until you acknowledge it by resetting the system after service.
What It Is NOT
This is a critical distinction. The “MAINTENANCE REQUIRED” light is not the same as the red oil pressure warning light (which looks like an oil can) or the check engine light (an engine block icon). Those are urgent warnings of active problems. The maintenance light is a proactive reminder. If you see a different light, especially a red one, stop driving as soon as it is safe and investigate. Our focus here is solely on the yellow/amber wrench icon. For other dashboard warnings on your Corolla, like an electrical issue, you might need to consult resources on how to reset the battery light on a Toyota Corolla, which is a completely different procedure for a different system.
Essential Preparation Before You Begin
Resetting the light is the final step. The most important preparation is, of course, completing the required maintenance. For the vast majority of owners, this means an oil and filter change. Use the oil grade specified in your owner’s manual—for a 2011 Corolla, that’s almost certainly 0W-20 synthetic oil. Using the correct oil is vital for engine health and for the maintenance reminder system to calculate accurately. While you’re under the hood, it’s a perfect time to check other fluid levels: coolant, brake fluid, windshield washer fluid, and power steering fluid (if applicable). Also, quickly inspect your tires for proper inflation and tread wear. Turning a simple reset into a quick holistic check-up is smart ownership.
Visual guide about How to Reset the Maintenance Required Light on a 2011 Toyota Corolla
Image source: i.ytimg.com
Gathering Your “Tools”
Here’s the best part: you need no tools at all. The only “tool” required is your finger and the trip/odometer reset button, usually located on the instrument cluster near the speedometer. It’s typically a small, black plastic stalk or button you can press and turn. You’ll be doing this from the driver’s seat with the ignition in the “ON” position but with the engine off. Make sure your parking brake is set and your doors are closed to avoid any distracting chimes.
Method 1: The Standard Odometer Reset Procedure
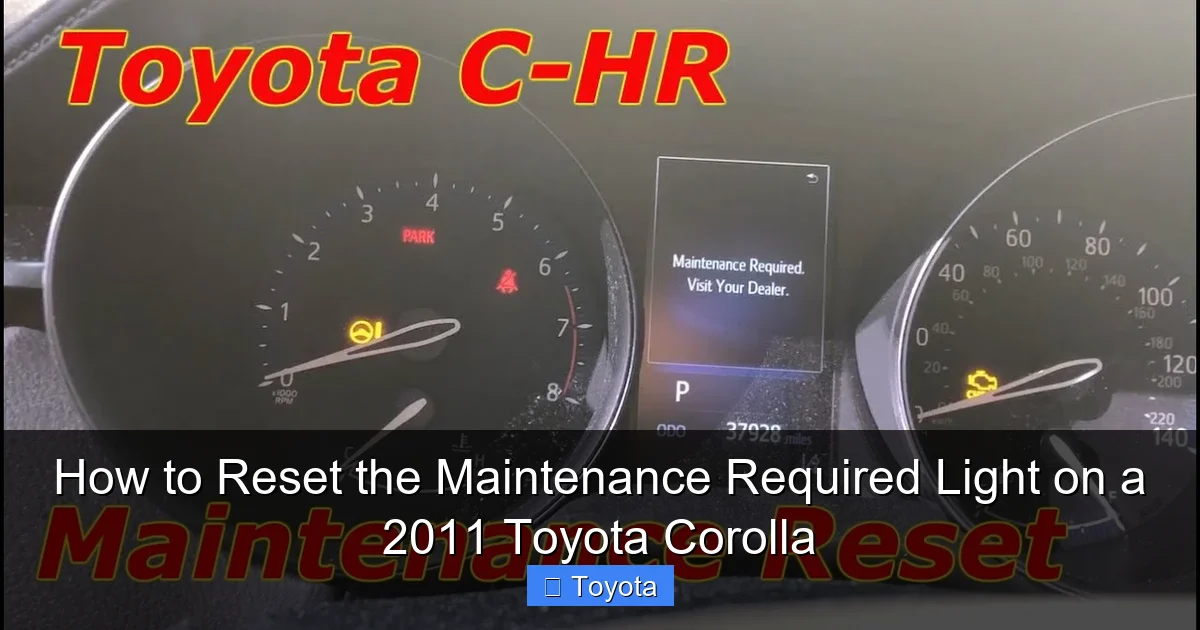
This is the primary and most common method for resetting the maintenance light on a 2011 Toyota Corolla. The sequence is specific but easy to remember once you do it once. The key is to get the multi-function display to show the total odometer reading, not a trip meter. Follow these steps precisely.
Visual guide about How to Reset the Maintenance Required Light on a 2011 Toyota Corolla
Image source: i.ytimg.com
- Turn the ignition to the “ON” position. Do not start the engine. Simply turn the key to the position where the dashboard lights are illuminated, but the engine is off. You’ll see the normal gauge sweep.
- Locate and press the odometer/trip meter button. This is the button you normally use to toggle between odometer and trip meter A/B readings. It’s usually on the end of the turn signal stalk on the left side of the steering column.
- Cycle the display to show the total odometer. Press the button repeatedly until the display shows the total miles on the car (e.g., “12345 miles”). It must NOT show “Trip A,” “Trip B,” or “Avg. MPG.”
- Turn the ignition “OFF.” Now, turn the key completely back to the locked position.
- Press and hold the button. While holding the odometer button down, turn the ignition key back to the “ON” position (the dashboard lights come on, engine still off).
- Continue holding and watch the display. Keep the button held down. After about 5-10 seconds, you should see the odometer display change. It might show dashes “—–” or countdown numbers, and then it will flash several times. Eventually, it will revert to showing the total odometer reading again.
- Release the button. Once the display returns to the normal odometer reading and the wrench icon has disappeared from the dashboard, you can release the button. The reset is complete.
Start your engine to confirm the light is off. It’s a good idea to turn the car off and back on one more time to be absolutely certain the reset took. If the wrench is still there, don’t panic. Ensure you started with the total odometer displayed, not a trip meter. If it still fails, proceed to Method 2.
Method 2: The Alternate Trip Meter Reset Procedure
Some 2011 Corolla owners find this method more reliable, or it works if Method 1 for some reason doesn’t. The steps are very similar, but the starting display is different. This method uses the Trip Meter A display instead of the main odometer.
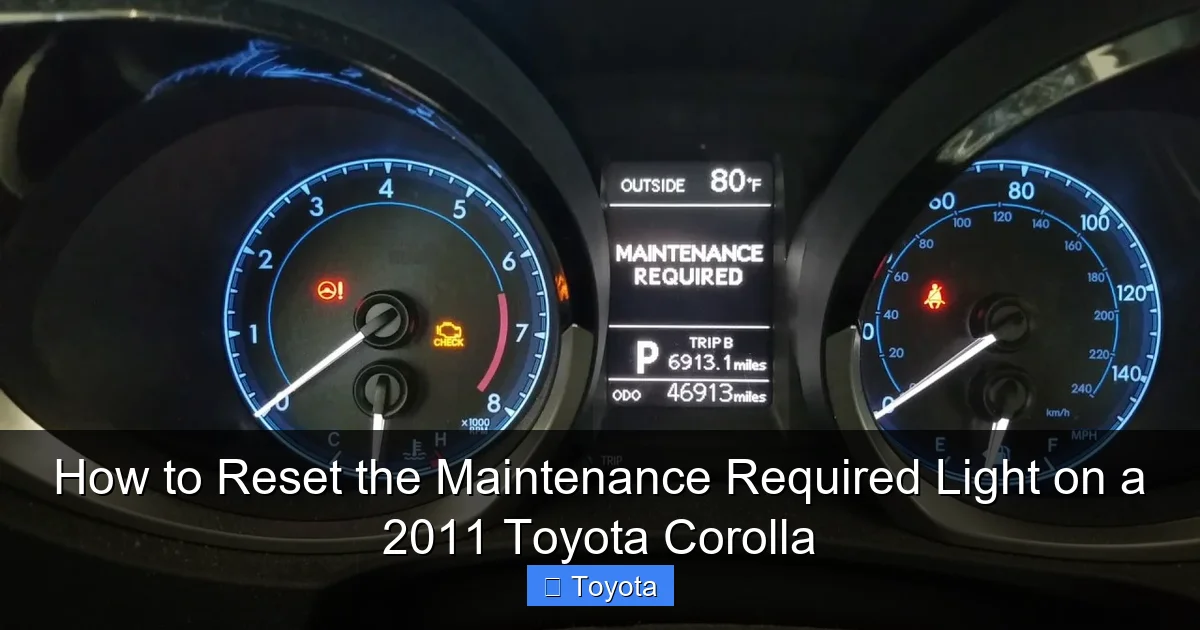
Visual guide about How to Reset the Maintenance Required Light on a 2011 Toyota Corolla
Image source: backyardmechanic.org
- Turn the ignition to the “ON” position. Engine off, dashboard lights on.
- Cycle the display to show “Trip A.” Press the odometer/trip button until the display shows “Trip A” along with a mileage figure (e.g., “Trip A 45.6”).
- Turn the ignition “OFF.” Turn the key back to the locked position.
- Press and hold the button. While holding the odometer button down, turn the ignition key back to the “ON” position.
- Continue holding and observe. After a few seconds, the display will likely change. You may see the trip reading start to blink or the wrench icon may begin to flash. Keep holding the button.
- Wait for the reset confirmation. The display will eventually go through a sequence—blinking, showing zeros, or counting down—and then will return to the normal “Trip A” display (usually showing 0.0 if you hadn’t been using it). The wrench icon on the dash should be extinguished.
- Release the button. Once the dashboard is clear and the display is stable, release the button. Turn the engine on to verify.
This method is equally effective. The computer system just needs a specific sequence from a specific starting display to acknowledge the reset command. If one method doesn’t work, the other almost certainly will. It’s a quirky little system, but once you know both tricks, you’re covered.
After the Reset: Confirmation and Best Practices
You’ve pressed the buttons, watched the displays, and the wrench is gone. Excellent! But your job isn’t quite done. A few quick checks and habits will ensure everything is ship-shape.
Verifying the Reset Was Successful
The proof is in the pudding—or rather, on the dashboard. After releasing the button, the “MAINTENANCE REQUIRED” light should be completely off. Start the engine. The light should not reappear during the start-up sequence (all dash lights come on briefly, then go out). Drive the car for a minute. The light should remain off. If it flickers back on immediately or comes on again after a short drive, the reset may not have been registered. Go back and try the other method (if you did Method 1, try Method 2, and vice-versa). Ensure you are using the correct button and that you are holding it long enough through the entire display change sequence.
Resetting Your Mental Mileage Counter
Now that the light is reset, your car’s computer has started a new service countdown. The light will not come on again until approximately 5,000 miles (or the system’s calculated interval) from the moment you reset it. It’s a good idea to make a note in your owner’s manual, a maintenance log, or a smartphone app of the date and current odometer reading when you performed the service and reset the light. This creates a clear record and helps you anticipate the next service. For a 2011 Corolla, this cycle of oil change and reset is the most common maintenance task you’ll perform.
When to Seek Professional Help
While the reset is DIY, the service should not be skipped. If you are not comfortable changing the oil and filter yourself, take it to a trusted mechanic or quick-lube shop. Always ask them to reset the maintenance light before you leave. Some shops forget this final step. If you have the service done at a dealership, they will always reset it as part of their multi-point inspection. Furthermore, if you have completed the oil change and both reset methods fail to turn the light off, there could be a glitch in the instrument cluster or the maintenance computer. In this rare case, a professional scan tool may be needed to communicate with the vehicle’s computer and force a reset.
Common Mistakes and Troubleshooting
Even with simple instructions, it’s easy to stumble. Here are the most common pitfalls and how to avoid them.
- Starting with the wrong display: This is the #1 error. You must start with either the total odometer (Method 1) or Trip A (Method 2) displayed on the screen. If you start on “Trip B” or “Avg. MPG,” the reset sequence will not initiate. Press the button until you have the correct screen.
- Not holding the button long enough: The sequence requires you to hold the button through the entire display change. Don’t press and release quickly. Hold it firmly until you see the display change and then return to normal, and the light is off. This usually takes 5-10 seconds after turning the key to “ON.”
- Resetting without doing the work: This is the cardinal sin of maintenance reminders. You are not fooling the car; you are fooling yourself. An engine running on old, degraded oil will suffer increased wear, sludge buildup, and potentially catastrophic failure. The $50 for an oil change is cheap insurance against a $5,000 engine replacement.
- Confusing it with other lights: Double-check you are dealing with the yellow wrench icon labeled “MAINTENANCE REQUIRED.” A separate, red oil pressure light (oil can) means stop the engine immediately. A blinking check engine light indicates a misfire. These require diagnosis, not a simple reset.
- Ignoring other service items: The light primarily tracks oil changes, but your 2011 Corolla’s full maintenance schedule includes other items at specific mile intervals (e.g., air filter, cabin filter, spark plugs, coolant flush). Use the reset as a reminder to check your owner’s manual and address any other due services at the same time.
If you’ve tried both methods correctly and the light remains on after a proper service, your next step is to disconnect the battery for about 10 minutes. This can sometimes clear a stuck processor. Reconnect, and the light may be off. If it returns, you need professional diagnosis. For those interested in the broader system, understanding how to reset the maintenance required light on a Toyota across different models can be helpful, as the principles are similar but button locations and sequences can vary slightly between years and models.
Conclusion: A Simple Act of Ownership
Resetting the maintenance required light on your 2011 Toyota Corolla is more than just making a dashboard icon disappear. It’s the final, satisfying step in a fundamental act of car ownership: providing essential care. That little wrench is your car’s memory, reminding you of its needs. By performing the actual service—changing the oil and filter—and then executing this quick reset, you complete the loop. You’ve honored the reminder, protected your engine, and restored your dashboard to a clean, worry-free state. The process is empowering in its simplicity, saving you a trip to the dealer for something you can confidently handle yourself. Keep this guide handy, perform your service diligently, and enjoy many more thousands of reliable miles in your Corolla. A well-maintained car is a happy car, and a happy car makes for a happy driver.
Frequently Asked Questions
Why does the maintenance required light come back on so quickly after I reset it?
If the light returns immediately or after just a short drive, it means the reset procedure was not followed correctly. You likely started with the wrong display (e.g., Trip B instead of Trip A or total odometer) or did not hold the button long enough through the entire sequence. Double-check you began with the correct display and hold the button until you see the dash display cycle and return to normal. If it persists, the system may not have registered the service, or there could be an electrical fault.
Can I reset the maintenance light without changing the oil?
Technically, yes, you can follow the button sequence to turn it off without doing the work. However, you should never do this. The light is a critical reminder that your engine needs fresh oil. Resetting it without performing the service means you are driving with potentially degraded oil, which leads to increased engine wear, sludge buildup, and can drastically shorten your engine’s life. Always perform the required maintenance first.
My 2011 Corolla has a different light on—a red oil can icon. What does that mean?
A red, flashing or steady oil can icon is the oil pressure warning light. This is an urgent warning, completely different from the yellow “MAINTENANCE REQUIRED” wrench. It indicates that engine oil pressure is dangerously low, which can cause severe engine damage within minutes. If this light comes on, pull over safely as soon as possible, turn off the engine, and check your oil level. Do not reset this light; it requires immediate diagnosis and repair.
What oil should I use for the oil change before resetting the light?
For a 2011 Toyota Corolla, Toyota recommends using 0W-20 synthetic oil. This specific viscosity is crucial for the engine’s fuel efficiency and performance. Using the wrong oil weight can affect engine lubrication and may even cause the maintenance reminder system to calculate incorrectly. Always consult your owner’s manual for the exact specification and capacity.
How often should I expect to reset this light on my Corolla?
Under normal driving conditions, you will need to reset the maintenance light approximately every 5,000 miles or 6 months, whichever comes first. This coincides with the standard oil change interval. If your driving is considered “severe” (many short trips, extreme temperatures, dusty roads), the system may trigger the light sooner, perhaps around 3,750 miles. The system’s algorithm adapts to your driving style.
Is it safe to drive with the maintenance required light on?
Yes, but only for a limited time and distance. The light means service is due, not that the car is unsafe to drive immediately. You should plan to perform the required service (an oil change) within the next 1,000 miles or so. Driving for an extended period with the light on means you are likely running on oil that has exceeded its service life, which increases engine wear. It’s a reminder, not an emergency, but it should be addressed promptly. For other electrical issues, like a persistent battery warning, the situation may be more urgent, and you’d need to learn how to reset the battery light on a Toyota Corolla after fixing the underlying cause.


