
How to Remove Maintenance Required on a 2019 Toyota Corolla
The “Maintenance Required” light on your 2019 Toyota Corolla is a helpful service reminder, not an emergency. Resetting it is a simple, tool-free process you can do yourself in under a minute after completing the scheduled maintenance, like an oil change. It’s crucial to only reset the light after the actual service is performed to keep your car running reliably and avoid potential damage. This guide walks you through the exact steps, preparation, and important considerations for your specific model year.
That little amber wrench icon glowing on your dashboard can be a real nuisance. You know your 2019 Toyota Corolla is a reliable machine, but that persistent “Maintenance Required” light seems to follow you everywhere. Before you let it stress you out, take a deep breath. This light is simply your car’s friendly (if sometimes pushy) nudge, reminding you it’s due for its scheduled service. The good news? Once you’ve actually done the work—like an oil change or tire rotation—you can turn that light off yourself in less time than it takes to grab a coffee. It’s a straightforward process designed for owners, not just dealership technicians. Let’s walk through exactly how to do it, why it’s important, and what to keep in mind to keep your Corolla running smoothly for years to come.
Key Takeaways
- The light is a reminder, not a malfunction: The “Maintenance Required” indicator is a mileage-based timer from your car’s computer, signaling it’s time for routine service like an oil change or tire rotation.
- Always perform the service first: You must complete the necessary maintenance (e.g., change the oil and filter) before resetting the light. Resetting without service is unsafe and defeats the system’s purpose.
- No special tools are needed: The reset procedure for a 2019 Corolla is performed using only the vehicle’s own buttons and ignition switch—no diagnostic tools or mechanic skills are required.
- The process is quick and universal: The steps are nearly identical across most 2018-2020 Toyota Corolla models and many other Toyota vehicles, making this a valuable skill for any Toyota owner.
- Resetting clears the reminder, not problems: This action only turns off the light; it does not diagnose or fix any underlying mechanical issues that might have triggered other warning lights.
- Consult your owner’s manual: While this guide is accurate, your specific vehicle’s manual provides the definitive procedure and service interval details for your Corolla.
📑 Table of Contents
- Understanding the “Maintenance Required” Light: More Than Just an Oil Change Reminder
- Essential Preparation Before You Begin: The “Do This First” Checklist
- Step-by-Step: Resetting the Maintenance Required Light on a 2019 Toyota Corolla
- What to Do Immediately After a Successful Reset
- Common Pitfalls and Troubleshooting: When the Light Won’t Budge
- When to Seek Professional Help: Knowing Your Limits
- The Bigger Picture: Maintenance is More Than Just a Light
Understanding the “Maintenance Required” Light: More Than Just an Oil Change Reminder
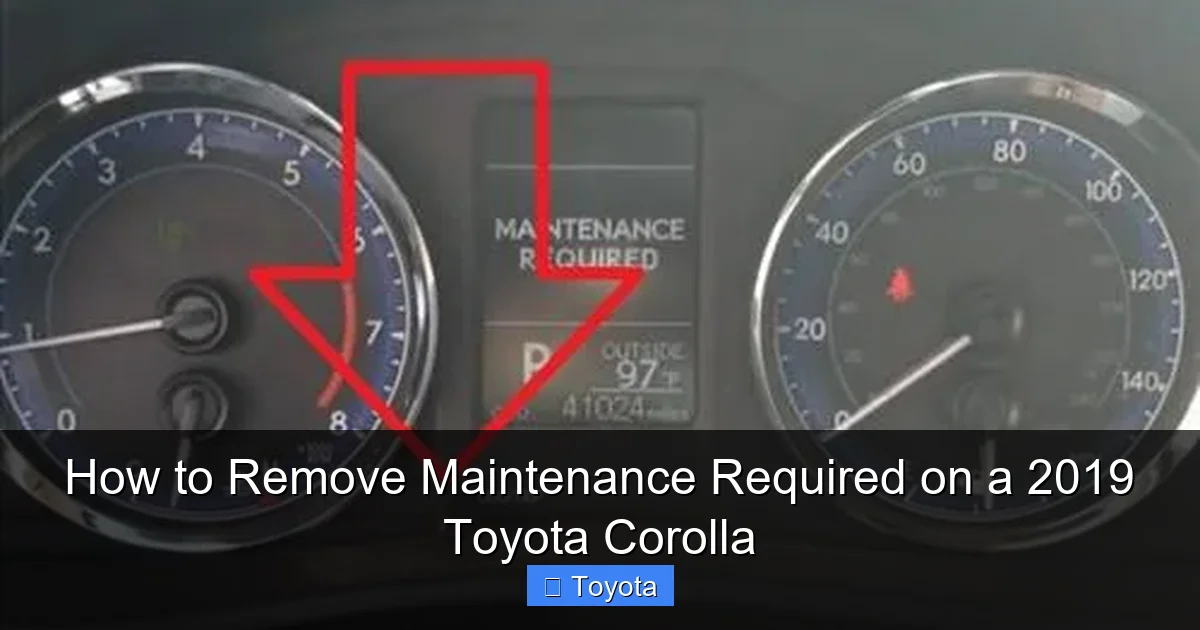
First, let’s demystify what that wrench icon really means. It’s part of Toyota’s Maintenance Required System, a simple but effective mileage-based reminder. When your Corolla was built, the engineers programmed the car’s computer (the ECU) with a service interval. For most 2019 Corolla models, this interval is typically every 5,000 miles or 6 months, whichever comes first, following the severe service schedule. This interval often aligns with a standard oil and filter change but can also encompass other scheduled maintenance items like tire rotation, fluid checks, and brake inspection as outlined in your owner’s manual.
It’s critical to understand this is not an oil pressure light or a check engine light. Those are urgent warnings of a current problem. The Maintenance Required light is a predictive reminder. It illuminates based on a pre-set mileage or time counter. The system doesn’t “know” if you changed your oil; it only knows that 5,000 miles have passed since the last reset. This is why the very first step is always to perform the necessary service. Driving with this light on for an extended period after the due date means you’re likely operating outside Toyota’s recommended maintenance schedule, which can lead to premature wear, reduced fuel efficiency, and potentially void certain aspects of your warranty.
What Triggers the Light?
The trigger is purely mathematical. After you (or a technician) reset the system following a service, the computer starts counting down from your set interval (e.g., 5,000 miles). When the odometer reading matches that preset mileage, the wrench icon illuminates. It’s a countdown timer, not a sensor-based alert. This means if you had your oil changed at 3,000 miles but forgot to reset the light, it will still come on at 5,000 miles from the last reset point, not from the actual oil change mileage. This is why the reset is the final, crucial step after any maintenance.
Essential Preparation Before You Begin: The “Do This First” Checklist
Rushing into the reset procedure without preparation is a common mistake. Taking five minutes to get organized ensures the process is smooth and, more importantly, that you’ve actually completed the required service. Here’s your pre-reset checklist.
Visual guide about How to Remove Maintenance Required on a 2019 Toyota Corolla
Image source: backyardmechanic.org
1. Complete the Scheduled Maintenance: This is non-negotiable. At a minimum, for a 5,000-mile interval, this means:
- Changing the engine oil and oil filter.
- Rotating the tires (if due based on your manual’s schedule).
- Inspecting all fluid levels (coolant, brake, washer).
- Checking the battery and charging system.
- Inspecting wiper blades, lights, and belts.
2. Gather Your Information: Have your owner’s manual handy. It contains the exact service interval for your specific Corolla trim (LE, SE, XLE, etc.) and driving conditions. Also, note your current odometer reading. This helps you confirm the reset worked and plan for the next service.
3. Park Safely and Securely: Ensure your Corolla is parked on a level surface, the parking brake is set, and the transmission is in “Park” (for automatic) or neutral (for manual). Turn off all accessories like the radio, headlights, and climate control to avoid any electrical drain during the process.
4. Understand Your Dashboard Layout: The 2019 Corolla’s instrument cluster is digital in most trims. You’ll be using the buttons on the steering wheel or the dash-mounted odometer/trip meter reset button. Locate these before you turn the key. Typically, you’ll use the “DISP” or “MODE” button on the steering wheel and the “ODO/TRIP” or reset button on the dash. If you’re unsure, a quick look at how to open the hood on a Toyota Corolla to find your owner’s manual stored in the glove box can be helpful.
Step-by-Step: Resetting the Maintenance Required Light on a 2019 Toyota Corolla
Now for the main event. The process for a 2019 Corolla is consistent and uses the vehicle’s multi-information display. There are two primary methods, depending on whether your Corolla has steering wheel controls or primarily uses a dash button. Both achieve the same result.
Visual guide about How to Remove Maintenance Required on a 2019 Toyota Corolla
Image source: backyardmechanic.org
Method 1: Using the Steering Wheel Buttons (Most Common for 2019)
This is the standard method for Corollas equipped with the multi-information display controlled via the steering wheel.
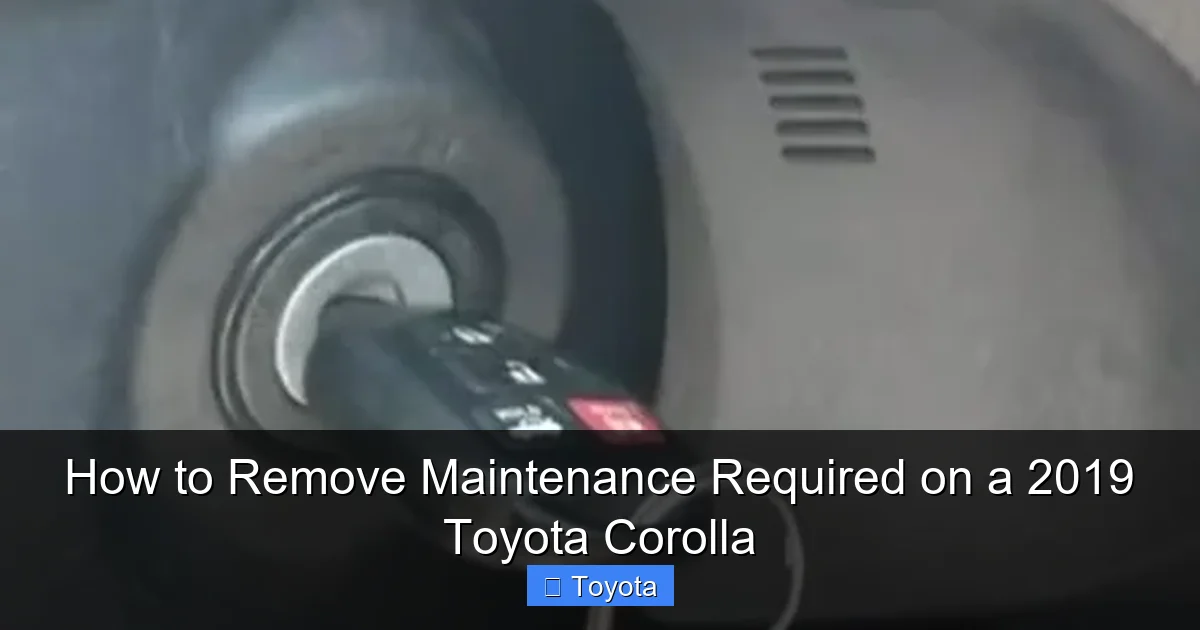
- Turn the ignition to the “ON” position: Press the engine start/stop button twice without touching the brake pedal (for push-start models) or turn the key to the “ON” position (for key models). All dashboard lights will illuminate, but do not start the engine.
- Navigate to the “Settings” Menu: Use the arrow buttons (▲/▼) on the left side of the steering wheel to scroll through the display on the instrument cluster. Keep pressing the down arrow until you see “Settings” or a gear icon appear. Press the “Enter” button (usually the center button on the left steering wheel stalk) to select it.
- Access “Vehicle Settings”: Inside the Settings menu, scroll down to find “Vehicle Settings” and press Enter.
- Find “Maintenance”: In the Vehicle Settings submenu, scroll until you see “Maintenance” or “Maintenance Required.” Select it.
- Reset the System: You will see an option that says “Yes” or “Reset” when you select Maintenance. Use the arrows to highlight “Yes” or “Reset” and press Enter. The display may ask for confirmation; select “Yes” again.
- Confirm the Reset: The display should show a confirmation message like “Maintenance Reset Completed” or simply return to the previous menu. The wrench icon on your dashboard should now be extinguished.
- Turn the ignition off and on: To be absolutely certain, turn the car off completely, wait a few seconds, and turn it back on. The light should remain off.
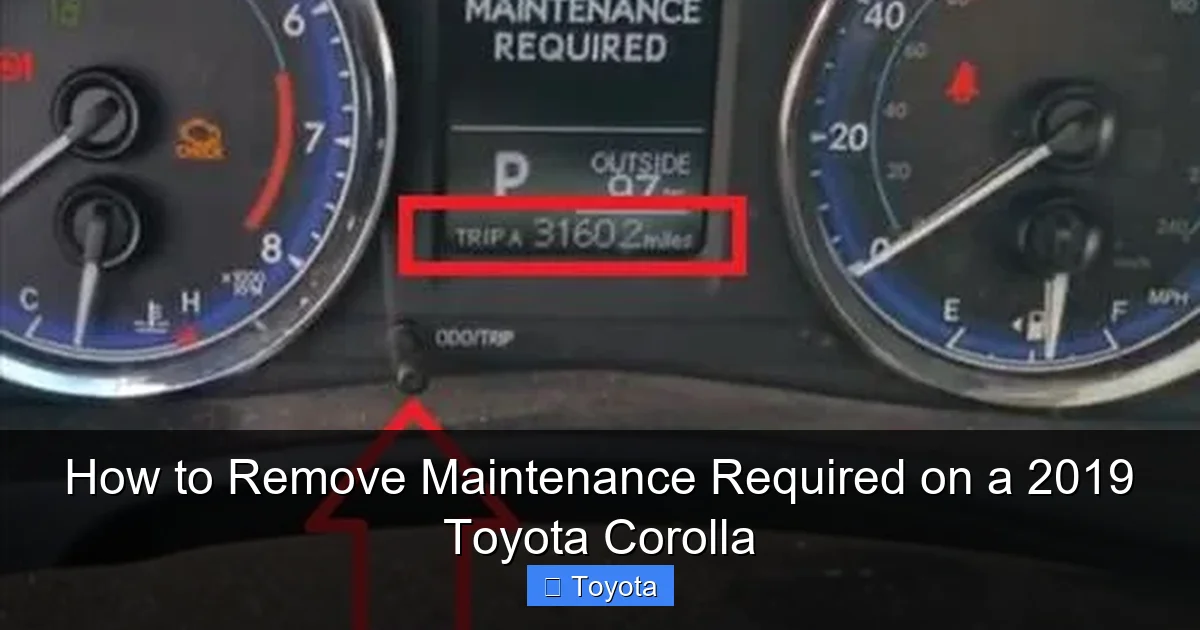
Method 2: Using the Odometer/Trip Meter Button (Alternative)
If your Corolla lacks the full steering wheel menu system, this classic method works on many base models.
- Turn the ignition to “ON”: Same as above—power on the dash without starting the engine.
- Display the Odometer: Press the “ODO/TRIP” button on the dash (near the speedometer) until the display shows the total odometer reading, not a trip meter.
- Turn the ignition “OFF”: Now, press and hold the “ODO/TRIP” button.
- While holding, turn the ignition back to “ON”: Keep the button held down. The display will change, showing a series of dashes or the word “SET.” Continue holding for about 5-10 seconds until you see the Maintenance Required light blink a few times and go out, or the display shows “000000” or “SET 0.”
- Release the button: The light should be off. Turn the ignition off and back on to verify.
Pro Tip: If the light comes back on immediately after a reset, it means the system didn’t accept the reset. Double-check that you held the button long enough in Method 2 or that you navigated correctly and confirmed “Yes” in Method 1. Also, ensure the ignition was in the correct “ON” state (all dash lights on, not just accessory mode).
What to Do Immediately After a Successful Reset
Flicking the switch and seeing the light go out is satisfying, but your job isn’t quite done. Here’s what to do next to maximize the benefit of your maintenance and reset.
Visual guide about How to Remove Maintenance Required on a 2019 Toyota Corolla
Image source: backyardmechanic.org
Record the Service: The moment the light goes out, note the current odometer reading in your service logbook or a personal maintenance tracker app. This is your new baseline for the next 5,000 miles/6 months. If you had a professional service, ensure they gave you a receipt or work order detailing what was done—this is vital for warranty records.
Perform a Quick Visual Check: Before you drive away, do a walk-around. Check your tire pressure (a great habit to get into), look for any new leaks under the car, and ensure all lights are functioning. This ties the mental act of resetting the reminder to a physical check of your vehicle’s health.
Reset Your Mental Timer: The car’s computer is now reset, but so should your own expectations. Mark your calendar for the next service interval based on your driving habits. If you frequently drive in severe conditions (extreme temps, stop-and-go traffic, dusty roads), you may need service more often than the standard interval—your owner’s manual defines “severe service.”
Understand the Light’s Behavior: After a reset, the Maintenance Required light will not come back on until you’ve driven approximately the full service interval again (e.g., another 5,000 miles). It will not give you a “300 miles remaining” warning. It simply turns on when the mileage counter expires. This is different from some other vehicles that have a more gradual warning system.
Common Pitfalls and Troubleshooting: When the Light Won’t Budge
Even with the right steps, things can go wrong. Here’s how to diagnose the most common issues.
“I followed the steps, but the light is still on!”
First, don’t panic. The most likely culprits are:
- Incorrect ignition state: Ensure you are in the full “ON” position (dashboard cluster fully illuminated). The “ACC” (accessory) position will not work for the reset sequence.
- Button held too short/long: In Method 2, timing is key. Hold the “ODO/TRIP” button for a solid 5-10 seconds while turning the key to “ON.” You should see the light blink or the display change before releasing.
- Wrong menu path: In Method 1, you must get to “Settings” > “Vehicle Settings” > “Maintenance.” If you see “Scheduled Maintenance” or a similar option, that’s the right path. If you end up in “Display” or “Sound” settings, you’ve gone astray.
- The system needs a full cycle: After attempting the reset, turn the car completely off (remove key or press start button to off), open and close the driver’s door (this fully powers down the car’s systems in many Toyotas), wait 30 seconds, and try again.
“The light came back on after just 100 miles!”
This indicates the reset was successful but the underlying reminder condition was still met. This usually means one of two things:
- The service wasn’t actually performed: The most common reason. The computer stores the mileage at reset. If you reset without changing the oil, the oil is still old. The light is a reminder of elapsed time/mileage since the last service, not since the last reset. You must do the work first.
- A different issue is present: While rare for this specific light, a severe electrical glitch or a faulty instrument cluster could cause spurious illumination. If you are 100% certain the service was done correctly and the light returns immediately, it may require a dealer scan to diagnose an electrical fault.
My Corolla has a different display; what now?
Some 2019 Corolla trims may have a slightly different menu structure. The core principle remains: ignition ON > navigate via steering wheel/dash buttons to a “Settings” or “Maintenance” menu > find the reset option. If you cannot find it, your owner’s manual is the ultimate authority. If the manual is lost, you can often find a PDF version on the Toyota owners website by entering your VIN. Alternatively, the process is nearly identical to resetting the light on a Toyota Highlander or Tacoma from the same era, so those guides can provide visual clues.
When to Seek Professional Help: Knowing Your Limits
Resetting the light is a DIY task for most owners. However, there are clear times when you should consult a professional.
The Light is On, But You’re Unsure of the Service History: If you bought the car used and don’t know when the last oil change or major service was performed, do not just reset the light. Take it to a trusted mechanic for a full inspection and scheduled maintenance first. They can also reset the light for you after performing the work.
Other Warning Lights Are Present: The Maintenance Required light is standalone. If you see a red oil pressure light, check engine light, or any other warning symbol along with the maintenance light, do not reset anything. Drive carefully (if safe) to a mechanic. These are urgent alerts of a current problem that needs diagnosis.
The Reset Procedure Fails Repeatedly: If you’ve followed the steps correctly multiple times and the light refuses to go out after a confirmed service, there may be a deeper issue with the vehicle’s computer system or the maintenance interval was not properly updated during a previous service. A dealership or independent shop with a proper OBD2 scan tool can access the maintenance system directly and force a reset if all parameters are correct.
You’re Approaching a Major Service Interval: The 5,000-mile service is often minor. However, at 30,000, 60,000, or 90,000 miles, the service is much more extensive (spark plugs, coolant, transmission fluid, etc.). While you can still reset the light yourself after this work, it’s an excellent opportunity to have a professional do the job and ensure everything is up to spec. They will also reset any other related service reminders in the car’s computer that you might not be aware of, similar to how you’d reset the maintenance light on a 2019 Toyota Highlander after its major service.
The Bigger Picture: Maintenance is More Than Just a Light
Let’s circle back to the core philosophy. That Maintenance Required light is a tool—a very useful one—but it’s only a tool. Its sole purpose is to get your attention. The real value lies in the maintenance itself. A 2019 Toyota Corolla is designed for longevity, but it achieves that through consistent, timely care. An oil change is the most common trigger, but think about the other items on your service schedule.
Regular tire rotations (often due at the same 5,000-mile interval) promote even tire wear, saving you money on premature replacement. Brake inspections catch wear before it becomes a dangerous braking issue. Fluid checks keep your cooling system from overheating and your transmission shifting smoothly. Cabin air filter changes maintain your HVAC system’s efficiency and air quality. Each item on that schedule plays a role in your car’s reliability, fuel economy, and resale value. Resetting the light without doing the work is like erasing a todo list without doing the tasks—the work still needs to be done, and the consequences of neglect only get worse.
By embracing the maintenance schedule, you’re not just appeasing a dashboard light; you’re investing in a reliable, safe, and enjoyable driving experience for the long haul. That 2019 Corolla has the potential to easily surpass 200,000 miles with proper care. The maintenance reminder is your roadmap to get there. So, the next time that wrench glows, see it as a positive prompt from your car, thanking you for the attention you’re about to give it. Perform the service, follow the simple reset steps, and get back on the road with confidence.
Frequently Asked Questions
Can I reset the Maintenance Required light without changing the oil?
Technically yes, the reset procedure works without any service done. However, you should never do this. The light is a critical reminder that your engine oil is likely degraded and needs replacement. Resetting it without changing the oil risks engine damage, poor performance, and voiding your warranty. Always complete the required service first.
What if the Maintenance Required light comes back on right after I reset it?
If the light returns immediately or after just a few miles, it usually means the reset wasn’t accepted by the computer. Double-check that you followed the exact steps for your trim (using the steering wheel controls or dash button) and held buttons for the correct duration. If it persists after several attempts, the service may not have been completed properly, or there could be an electrical issue requiring a professional scan.
Does resetting the Maintenance Required light affect my car’s warranty?
No, resetting the light itself does not affect your warranty. However, failing to perform the scheduled maintenance as outlined in your owner’s manual can void coverage for related components. The reset is simply the final step in acknowledging that the maintenance was performed. Keeping detailed service records is what protects your warranty.
Is the Maintenance Required light the same as the Check Engine light?
No, they are completely different. The Maintenance Required light (a wrench icon) is a pre-programmed reminder for scheduled service. The Check Engine light (an engine-shaped icon) indicates a detected problem with the emissions system or engine performance, often requiring immediate diagnostic attention. Never ignore a Check Engine light.
My 2019 Corolla has a digital gauge cluster. Is the reset process different from an analog one?
The core process is the same, but the button locations differ. Digital clusters (common on 2019 Corollas) are controlled via steering wheel buttons to navigate menus. Analog clusters with a small trip screen typically use the dash-mounted “ODO/TRIP” button. The method using the steering wheel (Method 1 in our guide) is most common for your model year.
How often should I expect to see the Maintenance Required light come on?
For a 2019 Toyota Corolla under normal driving conditions, the light is programmed to illuminate every 5,000 miles or 6 months. If you primarily drive in “severe” conditions (extreme temperatures, heavy traffic, dusty roads, short trips), Toyota recommends servicing every 3,750 miles or 3 months, so the light would come on more frequently. Always refer to your owner’s manual for your specific schedule.


