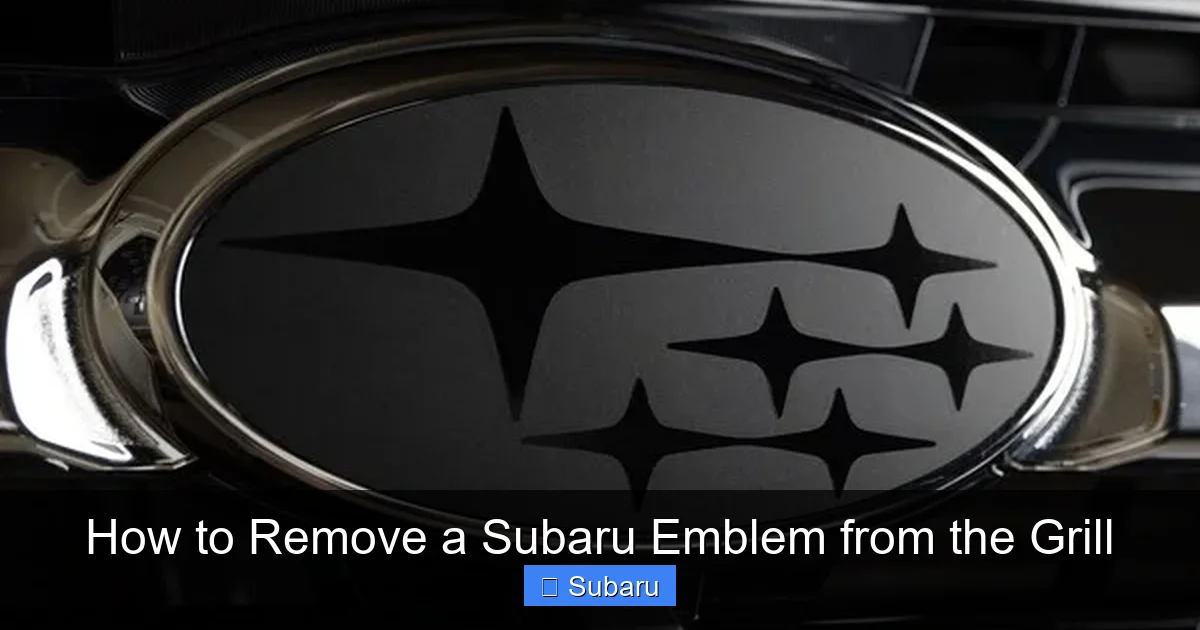
How to Remove a Subaru Emblem from the Grill
Contents
- 1 Key Takeaways
- 2 📑 Table of Contents
- 3 Why Remove a Subaru Emblem from the Grill?
- 4 Tools and Materials You’ll Need
- 5 Step-by-Step Guide to Removing the Emblem
- 6 Common Mistakes to Avoid
- 7 Reinstalling or Replacing the Emblem
- 8 Tips for Different Subaru Models
- 9 Final Thoughts and Maintenance Tips
- 10 Frequently Asked Questions
Removing a Subaru emblem from the grill is a straightforward process if done carefully. With the right tools and patience, you can achieve a clean look or prep for customization without harming your vehicle’s finish.
Key Takeaways
- Use heat to loosen adhesive: A heat gun or hairdryer softens the emblem’s adhesive, making removal easier and safer.
- Thread or fishing line works best: Slide it behind the emblem to cut through the adhesive without scratching the paint.
- Clean residue with isopropyl alcohol: After removal, wipe the area with 70% isopropyl alcohol to dissolve leftover glue.
- Protect surrounding paint: Apply painter’s tape around the emblem to prevent accidental scratches during the process.
- Reinstall or replace carefully: If reattaching, use automotive-grade double-sided tape; for a new emblem, ensure proper alignment.
- Work in warm conditions: Cold weather makes adhesive harder and more likely to damage paint when removed.
- Take your time: Rushing increases the risk of paint damage—patience ensures a clean, professional result.
📑 Table of Contents
Why Remove a Subaru Emblem from the Grill?
Whether you’re going for a sleek, minimalist look or planning to customize your Subaru with a new emblem, removing the factory badge from the front grille is a common modification. Many Subaru owners choose to take off the emblem to give their vehicle a cleaner, more aggressive appearance—especially popular among WRX, Outback, and Forester enthusiasts. Others may want to replace the stock emblem with a blacked-out version, a custom design, or even a rally-inspired badge.
Beyond aesthetics, some drivers remove the emblem to reduce glare from sunlight reflecting off the shiny badge, which can be distracting while driving. Additionally, if you’re installing a front license plate bracket or a grille guard, removing the emblem might be necessary for proper fitment. Whatever your reason, it’s important to know that removing a Subaru emblem isn’t as simple as prying it off with a screwdriver—doing so can scratch your paint, crack the grille, or leave behind unsightly adhesive residue.
Fortunately, with the right approach, tools, and a bit of patience, you can remove the emblem safely and cleanly. This guide walks you through every step, from preparation to cleanup, so you can achieve a professional-looking result without damaging your Subaru. Whether you’re a seasoned DIYer or a first-time modifier, these tips will help you get the job done right.
Tools and Materials You’ll Need
Before you begin, gather all the necessary tools and materials. Having everything ready beforehand prevents interruptions and reduces the risk of mistakes. Most of these items are inexpensive and can be found at your local auto parts store, hardware store, or online.
Visual guide about How to Remove a Subaru Emblem from the Grill
Image source: i.etsystatic.com
Essential Tools
- Heat gun or hairdryer: Used to warm the adhesive behind the emblem. A heat gun offers more control, but a hairdryer on high heat works well too.
- Fishing line or dental floss: A strong, thin material that slides behind the emblem to cut through the adhesive. Avoid metal wires or rough strings that could scratch the paint.
- Plastic trim removal tool or credit card: Helps gently pry the emblem once the adhesive is softened. Metal tools can damage paint, so plastic is safer.
- Microfiber cloths: For cleaning the area before and after removal.
- Isopropyl alcohol (70% or higher): Effectively dissolves leftover adhesive without harming paint.
- Painter’s tape: Protects the surrounding paint from accidental scratches.
- Gloves: Optional, but recommended to protect your hands from heat and chemicals.
Optional but Helpful Items
- Goo Gone or adhesive remover: Can be used if isopropyl alcohol isn’t strong enough, but test on a small area first.
- Automotive-grade double-sided tape: Needed if you plan to reattach the emblem or install a new one.
- Small flashlight or work light: Helps you see the edges of the emblem clearly, especially in low light.
- Rubbing compound or polish: For final touch-up if the paint looks dull after residue removal.
Having these tools on hand ensures a smooth process. Avoid using sharp metal tools like screwdrivers or putty knives—they’re too harsh and can easily scratch or gouge the paint. The goal is to remove the emblem with minimal disruption to the surrounding surface.
Step-by-Step Guide to Removing the Emblem
Now that you’re prepared, it’s time to remove the Subaru emblem. Follow these steps carefully to avoid damage and achieve a clean result. The process typically takes 15–30 minutes, depending on your experience and the condition of the adhesive.
Step 1: Prepare the Work Area
Start by parking your Subaru in a shaded, dry area—preferably indoors or under a carport. Direct sunlight can cause the adhesive to harden, making removal more difficult. If you’re working outside, choose a cool, overcast day. Clean the front grille and emblem area with soap and water to remove dirt, bugs, and grime. Dry thoroughly with a microfiber cloth. This ensures no debris interferes with the removal process.
Step 2: Apply Painter’s Tape
Use painter’s tape to protect the paint around the emblem. Carefully tape off the edges of the grille, leaving only the emblem exposed. This creates a buffer zone that prevents accidental scratches if your tools slip. Be generous with the tape—better safe than sorry. The tape should extend at least 1–2 inches beyond the emblem on all sides.
Step 3: Apply Heat to the Emblem
Turn on your heat gun or set your hairdryer to high heat. Hold it about 6–8 inches away from the emblem and move it slowly in a circular motion. Heat the emblem for 30–60 seconds, focusing on the center and edges. The goal is to soften the adhesive behind the badge without overheating the plastic grille or paint. You’ll know it’s ready when the emblem feels slightly warm to the touch and appears more flexible.
Pro Tip: Don’t overheat! Excessive heat can warp the grille or damage the paint’s clear coat. If you notice bubbling or discoloration, stop immediately and let the area cool.
Step 4: Slide the Fishing Line Behind the Emblem
Once the adhesive is softened, take your fishing line or dental floss and slide it behind the emblem. Start at one corner and work your way across, using a gentle sawing motion. The heat will have loosened the bond, so the line should cut through the adhesive with minimal resistance. Keep the line taut and avoid pulling too hard—this could scratch the paint.
If the emblem is large (like on an Outback or Ascent), work in sections. Remove one side first, then the other. For smaller emblems (like on a Crosstrek), you may be able to remove it in one pass. Be patient—rushing can cause the emblem to snap or leave chunks of adhesive behind.
Step 5: Gently Pry the Emblem Off
Once the adhesive is cut, use a plastic trim tool or the edge of a credit card to gently lift the emblem away from the grille. Start at one corner and work your way around. If resistance is felt, apply more heat and try again. Never force it—this is the most common cause of paint damage.
As the emblem lifts, you may notice bits of adhesive still attached. That’s normal. Just continue working the line or tool underneath until the entire emblem is free. Set the emblem aside on a clean surface if you plan to reuse it.
Step 6: Remove Adhesive Residue
With the emblem removed, you’ll likely see a sticky, translucent residue on the grille. This is the leftover adhesive. To remove it, soak a microfiber cloth with isopropyl alcohol and gently rub the area. The alcohol will dissolve the glue without harming the paint or plastic.
For stubborn spots, let the alcohol sit for 30–60 seconds before wiping. Avoid using abrasive pads or harsh chemicals like acetone—they can damage the finish. If alcohol isn’t enough, a small amount of Goo Gone can be used, but always test it on a hidden area first.
Step 7: Clean and Polish the Area
Once all residue is gone, wipe the area with a clean, dry microfiber cloth. Inspect the surface under good lighting to ensure no glue remains. If the paint looks dull or hazy, apply a small amount of rubbing compound or automotive polish with a soft cloth. Buff gently in circular motions, then wipe clean. This restores shine and blends the treated area with the surrounding paint.
Finally, remove the painter’s tape and give the entire front end a quick wash to remove any dust or fingerprints. Your Subaru should now have a clean, emblem-free grille ready for customization or a minimalist look.
Common Mistakes to Avoid
Even with the best intentions, mistakes can happen. Knowing what to avoid can save you time, money, and frustration. Here are the most common errors people make when removing a Subaru emblem—and how to prevent them.
Using Metal Tools
One of the biggest mistakes is using a screwdriver, putty knife, or other metal tool to pry off the emblem. These tools are too sharp and can easily scratch or gouge the paint, especially on modern Subarus with delicate clear coats. Even a small scratch can lead to rust or require professional touch-up. Always use plastic tools or soft materials like fishing line.
Skipping the Heat Step
Trying to remove the emblem cold is a recipe for disaster. The adhesive is strong and brittle when cool, so forcing it off can crack the emblem or pull off paint. Heating softens the glue, making it pliable and easier to cut through. Never skip this step—even if the emblem seems loose.
Overheating the Grille
While heat is essential, too much can damage the plastic grille or warp the emblem. Subaru grilles are made of durable but heat-sensitive materials. If you see melting, bubbling, or discoloration, stop immediately. Use short bursts of heat and keep the tool moving.
Rushing the Process
Patience is key. Many people try to yank the emblem off quickly, only to damage the paint or leave behind chunks of adhesive. Take your time—work slowly and methodically. If a section won’t budge, apply more heat and try again. Rushing increases the risk of costly mistakes.
Ignoring Residue Cleanup
Leaving adhesive residue not only looks bad but can also attract dirt and moisture, leading to long-term damage. Always clean the area thoroughly with isopropyl alcohol or a dedicated adhesive remover. Don’t assume it will wear off over time—it won’t.
Not Protecting the Paint
Failing to use painter’s tape is a common oversight. Even careful hands can slip, and a single scratch can ruin the finish. Always tape off the surrounding area before starting. It takes just a minute but can save hours of repair work.
By avoiding these mistakes, you’ll ensure a smooth, damage-free removal process. Remember: slow and steady wins the race.
Reinstalling or Replacing the Emblem
After removing the original emblem, you may want to reinstall it, replace it with a new one, or leave the grille bare. Each option has its own considerations.
Reinstalling the Original Emblem
If you’re putting the same emblem back—perhaps after cleaning or painting it—you’ll need new adhesive. The old glue is usually spent and won’t hold securely. Use automotive-grade double-sided tape, such as 3M VHB tape, which is designed for exterior use and withstands heat, cold, and moisture.
Cut the tape to fit the back of the emblem, leaving a small border. Remove the backing and press the emblem firmly into place. Hold it for 30–60 seconds to ensure a strong bond. Let it cure for at least 24 hours before washing the car or driving in heavy rain.
Installing a New Emblem
Many Subaru owners upgrade to a blacked-out emblem for a stealthier look. These are widely available online and often come with pre-applied adhesive. Before installing, clean the grille surface with isopropyl alcohol to ensure proper adhesion. Align the new emblem carefully—once it’s stuck, it’s hard to reposition.
Use a ruler or measuring tape to center the emblem horizontally and vertically. Some aftermarket emblems include alignment guides or templates. Press firmly and hold for a minute, then let it set for a full day.
Going Emblem-Free
If you prefer a clean, minimalist grille, simply leave the emblem off. This look is popular in the Subaru community, especially among rally and off-road enthusiasts. Just be aware that some drivers find the empty space looks incomplete. You can fill it with a subtle decal or leave it as-is for a bold statement.
Keep in mind that removing the emblem may affect resale value slightly, as some buyers expect a complete, factory-look vehicle. However, for most enthusiasts, the aesthetic benefit outweighs this concern.
Tips for Different Subaru Models
While the removal process is similar across Subaru models, there are slight variations depending on the vehicle. Here’s what to expect for popular models.
Subaru WRX and STI
The WRX and STI have a prominent hexagonal grille with a large emblem. The badge is typically held by strong adhesive and may require extra heat. Be extra careful around the aggressive grille lines—scratches are more noticeable here. Many WRX owners replace the emblem with a carbon fiber or blacked-out version for a sportier look.
Subaru Outback and Legacy
These models feature a wider, horizontal grille with a centered emblem. The badge is often larger and may have additional clips or fasteners underneath. Check for hidden screws before pulling—some older models use both adhesive and mechanical fasteners. If you find screws, remove them first with a Phillips head screwdriver.
Subaru Forester and Crosstrek
The Forester and Crosstrek have smaller, more rounded emblems. The adhesive is usually thinner, so less heat is needed. However, the plastic grille is more flexible, so avoid prying too hard. These models are great for first-time emblem removers due to their simpler design.
Subaru Ascent
The Ascent has a massive grille with a large, bold emblem. Due to its size, it may take longer to heat evenly. Work in sections and use a longer piece of fishing line. The adhesive is strong, so patience is key. Some Ascent owners choose to remove the emblem entirely for a cleaner SUV look.
Always consult your owner’s manual or online forums for model-specific tips. Subaru communities like SubaruOutback.org or Reddit’s r/subaru are great resources for real-world advice.
Final Thoughts and Maintenance Tips
Removing a Subaru emblem from the grill is a simple yet rewarding modification that can transform your vehicle’s appearance. Whether you’re going for a stealthy blackout look, prepping for a custom badge, or just simplifying the front end, doing it right ensures a professional result.
Remember: the key to success is patience, the right tools, and careful execution. Heat the emblem, use fishing line to cut the adhesive, protect the paint, and clean thoroughly. Avoid common mistakes like using metal tools or rushing the process. And if you’re reinstalling or replacing the emblem, use quality adhesive and take your time with alignment.
After removal, keep an eye on the area during washes and waxing. If you’ve left the grille bare, consider applying a protective wax or sealant to prevent UV damage and maintain shine. If you’ve installed a new emblem, check the bond periodically—especially after car washes or long drives.
Ultimately, this is a beginner-friendly project that requires no special skills or expensive equipment. With this guide, you can confidently remove your Subaru emblem and enjoy a fresh, customized look. So grab your tools, take your time, and give your Subaru the upgrade it deserves.
Frequently Asked Questions
Will removing the emblem damage my paint?
No, if done correctly. Using heat and fishing line minimizes the risk of paint damage. Avoid metal tools and rushing the process to keep your finish intact.
Can I reuse the original emblem after removal?
Yes, as long as it’s not cracked or damaged. Clean off old adhesive and use new double-sided tape when reinstalling.
What if the emblem won’t come off even after heating?
Apply more heat and try again. If it’s still stuck, the adhesive may be particularly strong—work slowly and avoid forcing it.
Is it legal to drive without a manufacturer emblem?
Yes, in most places. Emblems are not required by law, though some buyers may expect them when reselling.
Can I use WD-40 to remove adhesive residue?
It’s not recommended. WD-40 can leave an oily film and may damage paint over time. Use isopropyl alcohol or a dedicated adhesive remover instead.
How long does the adhesive take to cure if I reinstall the emblem?
Most automotive tapes require 24 hours to fully cure. Avoid washing the car or driving in rain during this time for the best bond.