How to Remove a Nissan Transmission Dipstick
Removing a Nissan transmission dipstick may seem simple, but it requires care to avoid damage or fluid leaks. This guide walks you through the process safely, whether you’re checking fluid levels, performing maintenance, or replacing the dipstick tube.
If you’ve ever popped the hood of your Nissan and stared at a confusing maze of hoses, wires, and metal parts, you’re not alone. One component that often causes confusion—especially for first-time DIYers—is the transmission dipstick. While it might look like just a metal rod stuck in a tube, the transmission dipstick plays a vital role in monitoring your vehicle’s automatic transmission fluid (ATF). Over time, you may need to remove it for inspection, cleaning, or replacement. But how do you do it safely and correctly?
Removing a Nissan transmission dipstick isn’t rocket science, but it does require attention to detail. Unlike engine oil dipsticks, which are usually easy to pull out, transmission dipsticks can be tighter, harder to reach, or even partially sealed. Some models have dipsticks that are nearly flush with the tube, making them tricky to grip. Others may have a locking mechanism or be located in tight engine bays, especially in compact models like the Nissan Sentra or Altima. The good news? With the right approach, anyone can remove the dipstick without damaging their transmission or making a mess.
This guide will walk you through the entire process—from identifying the correct dipstick to safely pulling it out and reinserting it. Whether you’re checking fluid levels, replacing a worn dipstick, or troubleshooting a leak, we’ve got you covered. We’ll also share practical tips, common mistakes to avoid, and model-specific advice to ensure your Nissan stays in top shape. Let’s get started.
Key Takeaways
- Locate the dipstick correctly: It’s usually near the engine, marked with a yellow or red handle labeled “ATF” or “Transmission.”
- Ensure the engine is cool: Removing the dipstick when the transmission is hot can cause burns or inaccurate readings.
- Use proper tools: A clean rag, gloves, and sometimes pliers help grip and clean stubborn dipsticks.
- Pull straight out gently: Avoid twisting or forcing the dipstick to prevent breaking the tube seal.
- Inspect for damage: Check the dipstick and tube for cracks, leaks, or wear that could affect performance.
- Replace securely: Always reinsert the dipstick fully and ensure it clicks into place to prevent leaks.
- Check fluid levels properly: Follow Nissan’s recommended procedure—often requiring the engine to be running and in park or neutral.
📑 Table of Contents
Understanding the Nissan Transmission Dipstick
Before you even think about pulling out that metal rod, it’s important to understand what the transmission dipstick actually does. In most Nissan vehicles with automatic transmissions, the dipstick allows you to check the level and condition of the automatic transmission fluid (ATF). This fluid is essential—it lubricates moving parts, cools the transmission, and helps transfer power from the engine to the wheels. Without proper fluid levels, your transmission can overheat, wear out prematurely, or even fail.
The dipstick itself is a thin metal rod with measurement markings (usually in inches or millimeters) and often color-coded zones—like “Full,” “Add,” or “Low.” It’s inserted into a metal tube that leads directly into the transmission pan. On most Nissans, the dipstick handle is bright yellow or red and labeled “ATF” or “Transmission.” You’ll typically find it on the passenger side of the engine bay, near the firewall, though exact locations vary by model and year.
It’s worth noting that not all Nissans have a traditional dipstick. Some newer models, especially those with continuously variable transmissions (CVTs) like the Nissan Rogue or Murano, use sealed systems with no user-accessible dipstick. In these cases, fluid checks must be done by a professional using specialized tools. But if your Nissan has a visible dipstick, you’re in luck—you can monitor and maintain your transmission fluid at home.
Why You Might Need to Remove the Dipstick
There are several reasons you might need to remove the transmission dipstick. The most common is to check the fluid level. But you might also remove it to:
– Inspect the fluid’s color and smell (healthy ATF is bright red and smells slightly sweet; dark or burnt fluid indicates a problem).
– Clean a dirty or gummed-up dipstick.
– Replace a cracked, bent, or missing dipstick.
– Access the transmission pan for fluid changes or filter replacement.
– Diagnose leaks or transmission issues.
Removing the dipstick also gives you a chance to inspect the tube and surrounding area for signs of wear, corrosion, or fluid seepage. Catching these issues early can save you from costly repairs down the road.
Preparing to Remove the Dipstick

Visual guide about How to Remove a Nissan Transmission Dipstick
Image source: transmissioncar.com
Safety and preparation are key when working under the hood of your Nissan. Rushing into the job without the right tools or knowledge can lead to mistakes—like spilling fluid, damaging the tube, or getting burned by hot components.
Gather the Right Tools
You don’t need a full mechanic’s toolbox, but having a few essentials on hand makes the job easier:
– Clean rags or paper towels (for wiping the dipstick and cleaning spills).
– Nitrile gloves (to protect your hands from hot fluid and dirt).
– Flashlight (to see into tight spaces).
– Pliers or needle-nose pliers (optional, for gripping stubborn dipsticks).
– Funnel (if you plan to add fluid afterward).
– Transmission fluid (if topping off is needed).
Avoid using metal tools like screwdrivers to pry the dipstick out—this can scratch or damage the tube.
Ensure the Engine Is Cool
Never remove the dipstick immediately after driving. Transmission fluid can reach temperatures over 200°F (93°C), and the dipstick tube may be hot. Wait at least 30 minutes after turning off the engine before attempting removal. This prevents burns and ensures an accurate fluid reading.
Park on a Level Surface
For accurate fluid level checks, your Nissan should be parked on a flat, level surface. If the car is tilted, the fluid may pool to one side of the transmission pan, giving a false reading. This is especially important if you’re checking fluid levels after removal.
Turn Off the Engine and Engage the Parking Brake
Always turn off the engine and set the parking brake before working under the hood. This prevents accidental movement and reduces the risk of injury.
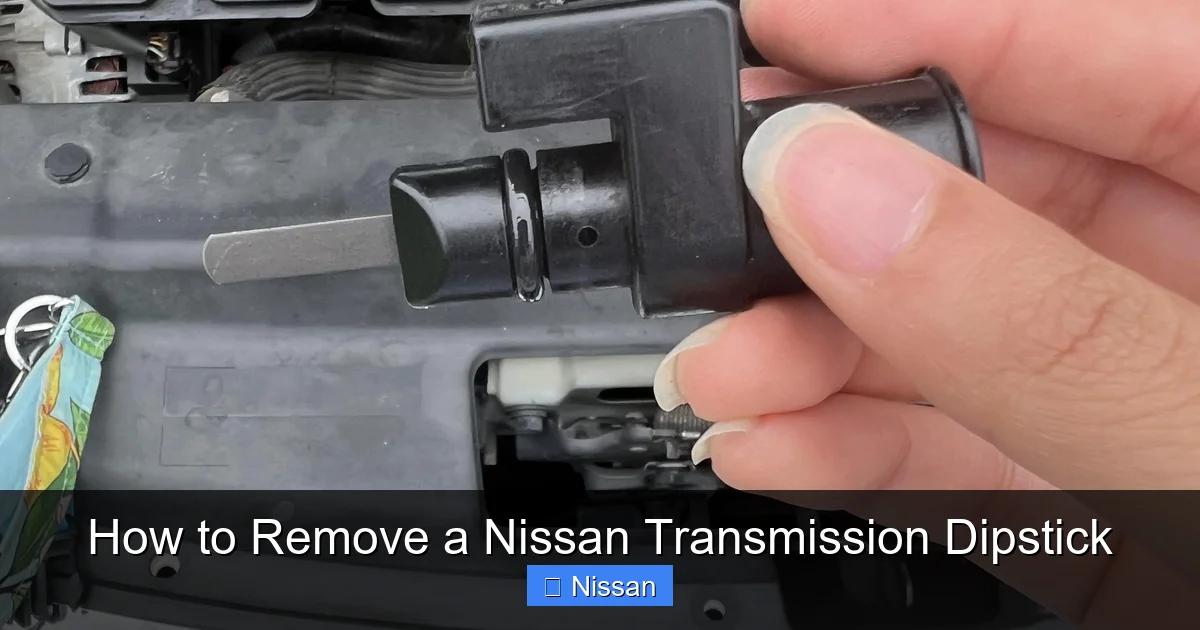
Step-by-Step Guide to Removing the Dipstick
Visual guide about How to Remove a Nissan Transmission Dipstick
Image source: 2040-parts.com
Now that you’re prepared, let’s walk through the actual removal process. These steps apply to most Nissan models with a traditional dipstick, including the Altima, Maxima, Sentra, and Pathfinder.
Step 1: Open the Hood and Locate the Dipstick
Pop the hood and secure it with the prop rod. Look for the transmission dipstick on the passenger side of the engine bay. It’s usually near the back, close to the firewall. The handle is often yellow or red and labeled “ATF” or “Transmission.” If you’re unsure, consult your owner’s manual—Nissan provides diagrams for each model.
Tip: If you can’t find it, look for a metal tube with a cap or handle that’s separate from the engine oil dipstick (which is usually on the driver’s side and labeled “Engine Oil”).
Step 2: Clean the Area Around the Dipstick
Before removing the dipstick, wipe the handle and surrounding area with a clean rag. Dirt, grease, or debris can fall into the transmission tube when the dipstick is pulled out, contaminating the fluid. This is a simple step, but it’s crucial for maintaining transmission health.
Step 3: Grip the Handle Firmly
Grasp the dipstick handle with your dominant hand. Use a firm but gentle grip. If the handle is small or slippery, wrap a rag around it for better traction. Avoid using excessive force—yanking or twisting can damage the seal or bend the dipstick.
Step 4: Pull Straight Up
Pull the dipstick straight up and out of the tube. Do not twist, rock, or angle it. The fit is usually snug, so it may take a bit of steady pressure. If it feels stuck, wiggle it slightly side to side while pulling—but never force it.
Note: Some dipsticks have a small retaining clip or O-ring that holds them in place. If yours does, you may feel a slight “pop” when it releases.
Step 5: Inspect the Dipstick and Fluid
Once removed, examine the dipstick. Wipe it clean with a rag, then reinsert it fully and pull it out again to check the fluid level. The markings will show whether the fluid is at the correct level.
Also, inspect the fluid itself:
– Color: Should be bright red or pink. Dark brown or black fluid indicates overheating or contamination.
– Smell: A burnt odor suggests internal wear or overheating.
– Consistency: It should be smooth, not gritty or foamy.
If the fluid looks or smells bad, it’s time for a transmission service.
Step 6: Clean or Replace if Necessary
If the dipstick is dirty, clean it with a solvent like brake cleaner or mild detergent. Avoid using water, as it can cause rust. If the dipstick is cracked, bent, or missing, replace it with a genuine Nissan part or high-quality aftermarket equivalent.
Common Challenges and How to Overcome Them
Visual guide about How to Remove a Nissan Transmission Dipstick
Image source: i.redd.it
Even with careful preparation, you might run into issues when removing the dipstick. Here are some common problems and solutions.
The Dipstick Is Stuck or Hard to Remove
Over time, heat and fluid exposure can cause the dipstick to stick in the tube. If it won’t budge:
– Let the engine cool completely—thermal expansion can make it tighter when hot.
– Apply a small amount of silicone-based lubricant (not oil) to the handle and gently wiggle it.
– Use needle-nose pliers wrapped in a rag for better grip—but avoid scratching the tube.
Never use a hammer or pry bar. This can damage the transmission housing.
The Handle Breaks Off
In rare cases, the plastic or rubber handle may snap off, leaving the metal rod stuck in the tube. If this happens:
– Try to grip the exposed metal with pliers.
– If it’s flush with the tube, use a small screwdriver to gently pry it up.
– As a last resort, consult a mechanic—forcing it could damage the tube.
Fluid Leaks After Removal
If fluid drips from the tube after removing the dipstick, the seal may be worn. This is more common in high-mileage vehicles. To fix it:
– Replace the O-ring or seal on the dipstick (available at auto parts stores).
– Ensure the dipstick is fully seated when reinserted.
– If the tube itself is cracked, professional repair may be needed.
Reinserting the Dipstick Safely
Putting the dipstick back in is just as important as removing it. A loose or improperly seated dipstick can cause leaks, false readings, or even damage the transmission.
Align and Insert Straight
Line up the dipstick with the tube and push it in straight. Don’t angle it or force it. It should slide in smoothly until it seats fully.
Listen for a Click or Feel for Resistance
On some models, the dipstick will click or stop when fully inserted. If it feels loose, it may not be seated properly. Remove and reinsert it carefully.
Double-Check the Position
After reinserting, tug gently on the handle. It should not come out easily. If it does, it’s not fully seated.
Model-Specific Tips for Nissan Vehicles
While the general process is similar across models, some Nissans have unique features.
Nissan Altima (2007–2012)
The dipstick is located on the passenger side, near the firewall. It’s yellow and labeled “ATF.” Be careful not to confuse it with the coolant reservoir nearby.
Nissan Sentra (2013–2019)
The dipstick is tucked behind the engine, making it harder to reach. Use a flashlight and consider removing the air intake duct for better access.
Nissan Pathfinder (2013–2020)
The dipstick is easy to find but may have a locking clip. Press the clip while pulling to release.
Nissan Maxima (2009–2015)
The dipstick is bright red and located near the transmission cooler lines. Avoid touching hot exhaust components.
When to Seek Professional Help
While removing the dipstick is a simple task, some situations require a mechanic:
– If the dipstick breaks off inside the tube.
– If you notice fluid leaks, burning smells, or shifting problems.
– If your Nissan has a CVT with no dipstick—fluid checks require special tools.
– If you’re unsure about the fluid condition or level.
Regular maintenance is key to transmission longevity. If you’re not comfortable performing this task, don’t hesitate to visit a trusted Nissan service center.
Conclusion
Removing a Nissan transmission dipstick is a straightforward task that every car owner should know. With the right preparation, tools, and technique, you can safely inspect your transmission fluid, catch problems early, and keep your Nissan running smoothly. Remember to work on a cool engine, pull the dipstick straight out, and always reinsert it securely. By following this guide, you’ll save money on unnecessary repairs and gain confidence in your DIY car maintenance skills. Your transmission—and your wallet—will thank you.
Frequently Asked Questions
Can I remove the transmission dipstick while the engine is running?
No, you should never remove the dipstick while the engine is running. This can cause injury from moving parts and may damage the transmission. Always turn off the engine and let it cool first.
How often should I check my Nissan’s transmission fluid?
Check the fluid every 30,000 to 60,000 miles, or as recommended in your owner’s manual. Also inspect it if you notice slipping gears, delayed shifting, or a burning smell.
What if my Nissan doesn’t have a transmission dipstick?
Many newer Nissans with CVTs have sealed transmissions. In these cases, fluid checks must be done by a professional using a scan tool and inspection port.
Can I use engine oil instead of transmission fluid?
No, never use engine oil in the transmission. ATF is specifically formulated for transmission components and has different viscosity and additive packages.
Is it normal for the dipstick to be hard to pull out?
A snug fit is normal, but it shouldn’t require excessive force. If it’s very tight, let the engine cool or gently wiggle it while pulling.
What should I do if transmission fluid is low?
Add the correct type of ATF (check your owner’s manual) using a funnel. Add slowly and recheck the level frequently to avoid overfilling.