How to Remove a Jeep Antenna Base
Contents


Removing your Jeep’s antenna base is a manageable DIY task that prevents costly mechanic visits. Whether the base is damaged, corroded, or you’re upgrading your antenna, this guide provides clear, safe instructions. You’ll learn about the necessary tools, how to disconnect the coaxial cable properly, and techniques for tackling rusted components. By following these steps, you can complete the job in under an hour, ensuring a clean removal and a solid foundation for your new antenna. Always prioritize safety by disconnecting the battery first and working patiently to avoid paint damage.
So, you’re staring at your Jeep, and that antenna base just isn’t cutting it anymore. Maybe it’s bent from a low-hanging branch on your last trail run, corroded from years of exposure, or you’re just ready for a cleaner look with a shorter antenna. Whatever the reason, knowing how to remove a Jeep antenna base is a handy skill for any Jeep owner. It’s one of those straightforward modifications that feels incredibly satisfying to do yourself. You save money, you learn more about your vehicle, and you avoid that annoying dealership appointment. But let’s be honest—the thought of fiddling with electrical components and stubborn bolts can be daunting if you’ve never done it before. That’s exactly why we’re here. This guide will walk you through every single step, from gathering your tools to gently coaxing loose a base that’s been glued on by rust. We’ll talk about the differences between older Jeep models and newer ones, share pro tips to avoid common pitfalls, and make sure you finish the job with a smile on your face and a perfectly functional (or aesthetically pleasing) antenna setup. Think of it as a friendly chat over the hood of your rig.
Key Takeaways
- Safety First: Always disconnect the vehicle’s battery before starting to avoid any risk of electrical shock or short circuits.
- Correct Tools are Crucial: Using the proper socket size and ratchet prevents stripping the retaining nut and makes the job smoother.
- Gentle Techniques for Trim: When prying off any interior trim pieces to access the base, use plastic pry tools to avoid scratching your Jeep’s paint or dashboard.
- Combat Rust with Patience: For a seized base, apply penetrating oil and let it soak; avoid excessive force that could break the antenna stud.
- Clean the Mounting Surface: After removal, thoroughly clean the mounting area of dirt and old sealant to ensure a proper seal with the new base.
- Reconnection Matters: When installing a new base, ensure the coaxial cable is securely plugged in to prevent poor radio reception or static.
- Know When to Seek Help: If the base is severely rusted or the mounting hole is damaged, consulting a professional can save you from costly mistakes.
📑 Table of Contents
Why Remove Your Jeep Antenna Base?
Before we dive into the “how,” let’s quickly cover the “why.” Understanding your motivation helps set the stage for the right approach. The antenna base is the threaded sleeve, usually mounted on the fender or roof, that the actual antenna mast screws into. It’s the connection point between your external antenna and the internal coaxial cable.
Common Reasons for Removal
The most frequent reason is physical damage. Jeep owners love adventure, and that sometimes means brushing against tree branches or garage door frames. A bent base not only looks rough but can also affect signal quality. Corrosion is another big one, especially in regions that use road salt in winter. The base, often made of steel or aluminum, can seize to the mounting stud or develop unsightly rust stains on your paint.第三个常见原因是升级。你可能想要一个更短、更时尚的鞭状天线,或者一个完全不同的天线类型,比如用于业余无线电的菱形天线。新的天线通常需要不同的底座,或者你只是想把旧的、生锈的底座换成新的,以获得更好的接地和外观。最后,有时底座本身会失效,内部的电气连接可能会中断,导致收音机完全接收不到信号。在这种情况下,更换底座是必要的修复。
Jeep Model Variations
It’s important to note that the exact process can vary slightly between Jeep models and years. A Jeep Wrangler (JK/JL) will have a different setup than a Grand Cherokee or a older CJ. The location (fender vs. roof), the type of retaining nut (standard hex vs. special tool), and the routing of the coaxial cable all differ. For this guide, we’ll focus on the most common configuration found on Jeep Wranglers and many other models: a base mounted on the passenger-side fender well, secured by a large nut from underneath the fender, with a coaxial cable that plugs into the bottom of the base. However, the core principles of access, disconnection, and removal apply universally. Always consult your specific Jeep’s service manual if you have it for any model-specific quirks.
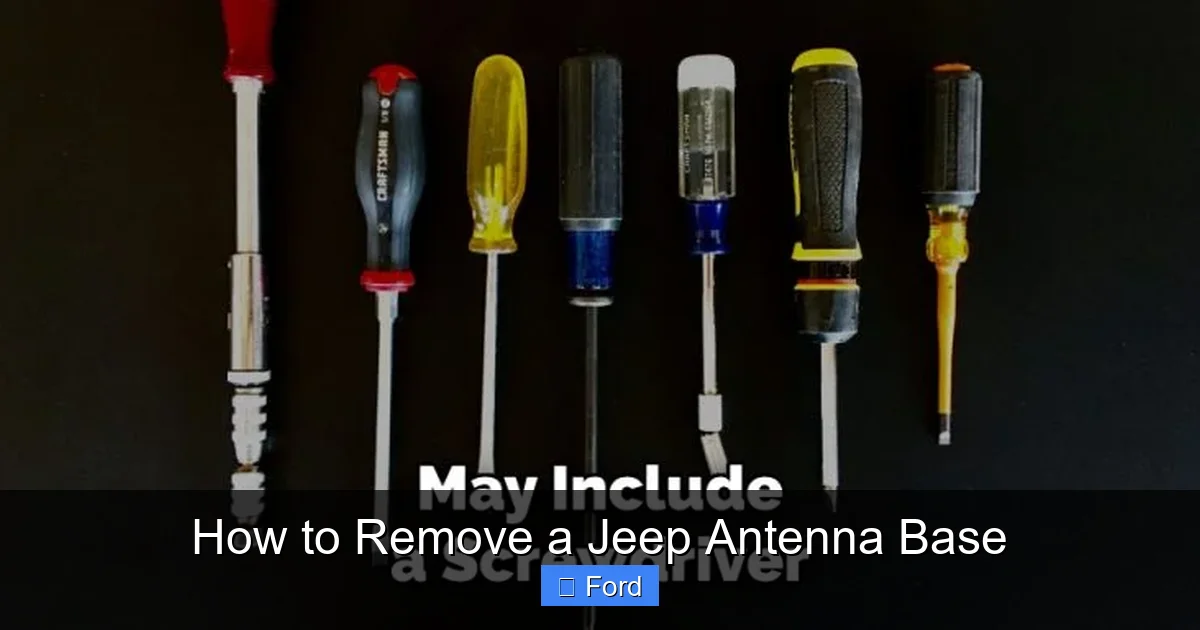
Tools and Safety Gear You’ll Need
Gathering your tools before you start is half the battle. You don’t want to be halfway through, with the fender liner dangling, only to realize you’re missing a critical socket. Here’s your checklist. Having everything laid out on a clean rag will make the process smooth and efficient.
Visual guide about How to Remove a Jeep Antenna Base
Image source: jeepfixes.com
Essential Tools
- Socket Set & Ratchet: This is your primary tool. You’ll need a deep-well socket, typically in the 13mm to 17mm range, depending on your Jeep model. A 6-point socket is ideal as it grips the nut better and reduces the risk of rounding it off. A longer ratchet handle can provide more leverage if the nut is tight.
- Combination Wrench or Adjustable Wrench: As a backup to hold the antenna stud from the top while you loosen the nut from below, or for other fittings.
- Screwdrivers (Flathead & Phillips): For prying off any plastic trim pieces or fender liner clips that might be covering the base or the nut access point.
- Pliers: Needle-nose pliers are useful for retrieving dropped nuts or bending back lock tabs.
- Penetrating Oil (e.g., PB Blaster, WD-40 Specialist Penetrant): Absolutely critical if there’s any sign of rust. Spray it on the base’s threads and the retaining nut at least 15-30 minutes before you start, or even the night before for severe cases.
- Trim Removal Tools (Plastic Pry Tools): A set of plastic pry bars is invaluable for safely removing inner fender liners or plastic covers without scratching paint or cracking plastic. You can find inexpensive sets at any auto parts store.
Safety Gear & Preparation
This isn’t a high-risk job, but basic safety is non-negotiable.
- Safety Glasses: Always protect your eyes from debris, especially when using penetrating oil or prying.
- Gloves: Mechanic gloves protect your hands from sharp metal edges and dirt.
- Work Light or Headlamp: The area under the fender is notoriously dark and shadowy. A bright, hands-free light source is essential for seeing what you’re doing.
Before touching a single tool, disconnect the negative terminal of your Jeep’s battery. This is the single most important safety step. It prevents any accidental short circuits if your tool touches the vehicle’s body while connected to the antenna’s coaxial cable. Locate the battery (usually in the engine bay), identify the black (-) negative cable clamp, and loosen it with a wrench. Tuck the cable safely away from the battery post. This simple step protects your Jeep’s sensitive electronics and you. While you’re under the vehicle, remember to use jack stands if you need to lift it. Never rely on the jack alone. If you’re uncomfortable working under the vehicle, many antenna bases are accessible from the engine bay or wheel well without lifting.
Step-by-Step Removal Process
Now for the main event. We’ll break this down into logical phases. Take your time, especially on the first attempt. Rushing leads to stripped nuts or damaged paint.
Visual guide about How to Remove a Jeep Antenna Base
Image source: jeepfixes.com
Phase 1: Accessing the Antenna Base and Nut
Your first goal is to see the base and the retaining nut. On most Jeeps, the antenna base is visible on the fender. The large nut that holds it on is typically located on the underside of the fender, inside the fender liner. This means you’ll likely need to remove part of the plastic inner fender liner to get a socket on the nut.
Start by opening the hood. Locate the antenna base on the passenger-side fender (driver side on some older models). You’ll see the mast screwed into the base. The base itself is usually a chrome or black cylindrical piece. Now, look into the wheel well. You’ll likely see a large plastic fender liner that covers the inner wheel arch. This liner is held in place by a combination of plastic push clips (speed clips) and sometimes a few bolts or screws around the wheel opening.
Using your plastic pry tools and screwdrivers, carefully pry away the fender liner. Start at the top or bottom edge. The push clips have a central pin; pry the pin up to release the clip. Work your way around until you have enough of an opening to see the back of the antenna base and the large nut holding it. You don’t necessarily need to remove the entire liner; creating a large enough access hole is sufficient and saves time on reinstallation. Be mindful of any wiring or hoses that might be routed behind the liner; gently move them aside if needed.
Phase 2: Disconnecting the Coaxial Cable
Before you even touch the nut, you must disconnect the antenna’s coaxial cable. This is the single wire (usually black or grey) that runs from the base into the cabin, connecting to your radio. If you try to remove the base while it’s still connected, you’ll put stress on the cable and its connector, potentially damaging it or the radio’s input jack.
Look at the bottom of the antenna base, where it meets the fender. You should see a coaxial cable connector. It’s typically a push-on or twist-lock type. For a push-on connector: simply pull the connector straight off. You might need to wiggle it gently. For a twist-lock (less common): twist the connector counter-clockwise about a quarter turn and then pull. If it’s stuck, don’t use pliers on the connector itself; instead, try to get your fingers underneath the plastic collar and pry upward evenly. If there’s a locking tab, depress it with a small screwdriver while pulling. Once disconnected, carefully tuck the cable end out of the way so it doesn’t dangle and get snagged or contaminated with dirt.
Phase 3: Removing the Retaining Nut
With the cable free, you can now focus on the mechanical fastening. From your access point in the wheel well, locate the large hex nut on the stud protruding from the back of the base. This is the piece that sandwiches the base to the fender. Place your correct-size deep-well socket onto the nut. Use your ratchet to turn it counter-clockwise. If the nut is tight or rusty, do not use excessive force. Stop immediately if you feel it start to slip. Instead, re-apply a generous amount of penetrating oil directly onto the nut’s threads and the base’s mounting stud. Let it soak. You can also try tapping the nut lightly with a hammer—the vibration can help the oil work. For particularly stubborn nuts on Jeep models with a long stud, you can sometimes use two wrenches: one on the nut from below, and another holding the antenna stud itself from the top (using a combination wrench). This prevents the stud from spinning. If the nut is truly seized and you round it off, you may need to resort to a nut splitter or, as a last resort, a drill and extractor bit, which is a much bigger job.
Phase 4: Extracting the Antenna Base
Once the nut is off, the base should be loose. However, it’s often seated tightly in the fender’s hole, and there might be a rubber or foam gasket creating a seal. Gently try to twist the base counter-clockwise by hand. It should unscrew from the mounting stud. If it doesn’t twist, it might be a press-fit design. In that case, grip the base firmly (use a rag to protect the chrome if it’s nice) and pull it straight out with steady, even pressure. You may need to wiggle it slightly. Be prepared for it to come out suddenly. If it’s stuck due to corrosion or old sealant, don’t yank. Apply more penetrating oil around the base’s outer edge where it meets the fender. Let it sit. You can also gently pry between the base and the fender with a plastic pry tool, working your way around the circumference to break the seal. Patience is key here to avoid cracking the fender plastic or bending the base.
Once free, carefully pull the base away from the vehicle. You’ll see the mounting stud (a threaded bolt) protruding from the fender. Note the condition of the threads and any remaining old gasket material. This is your cue for the next steps.
Handling Stuck or Rusted Antenna Bases
This is the scenario that makes most Jeep owners sweat. You’ve followed the steps, but the base or nut won’t budge. Don’t panic. This is a common issue, especially on vehicles that have seen winters or live near the coast. Here’s your escalation ladder for dealing with stubborn components.
Visual guide about How to Remove a Jeep Antenna Base
Image source: jeepfixes.com
Method 1: The Penetrating Oil Soak
We mentioned this earlier, but it bears repeating and expanding. Penetrating oil is your best friend. It’s designed to seep into the tiny gaps between metal threads and displace moisture. For maximum effect, clean the area around the nut and base with a wire brush first. This removes loose rust and paint flakes, giving the oil a direct path. Apply the oil liberally to all seams—the nut’s threads, the base’s outer rim, and the stud itself. Let it soak for several hours, preferably overnight. Reapply every few hours. The oil needs time to work its way in. After a good soak, try the wrench again. The combination of lubrication and the oil’s ability to slightly expand metal can often break the bond.
Method 2: Controlled Heat Application
Heat causes metal to expand. By heating the nut, you can make it expand slightly more than the cooler stud, potentially breaking the rust bond. This method requires extreme caution to avoid fire or paint damage. Use a propane torch, not an open flame. Wrap a wet rag around the fender plastic near the nut to protect it. Heat the nut directly, moving the flame constantly for about 30-60 seconds. Do not overheat. Immediately try to turn the nut. The expansion is temporary, so you have a small window. If it doesn’t budge, let it cool completely (it will contract), reapply penetrating oil, and try again. Never use heat near the fuel tank, brake lines, or wiring harnesses. If you’re uncomfortable with this, skip it.
Method 3: The Impact Technique
Sometimes, a sharp impact can shock the rust loose. With the socket firmly on the nut, give the handle of the ratchet a solid, sharp tap with a hammer. The sudden rotational force can break the bond. Be sure the socket is fully seated, or you’ll just round the nut. You can also use an impact wrench (air or electric) if you have one. The rapid hammering action is very effective. Start at a low torque setting to avoid shearing the stud. If you don’t have an impact tool, a manual “impact driver” socket set (where you hit the driver with a hammer to turn the socket) can also work wonders on stubborn fasteners.
When to Call It Quits and Seek Help
If you’ve tried all of the above and the nut is rounding off or the stud itself is spinning, it’s time to stop. Forcing it further will only make the problem worse, potentially requiring replacement of the entire fender or a complex drill-out procedure. At this point, the cost of a professional mechanic or body shop is justified. They have specialty tools like nut splitters, weld-on studs, and drilling guides that can salvage the situation. It’s better to spend a little on professional help than to create a much larger, more expensive problem. You can find more general advice on tackling seized automotive fasteners in guides like how to remove a Nissan transmission dipstick, which covers similar principles of dealing with stuck threaded components.
Installing a New Antenna Base (Optional)
Assuming your goal was removal for replacement, let’s quickly cover installation. The process is essentially the reverse, but with a few critical additions for a long-lasting, leak-free job.
Preparing the Mounting Surface
Before anything else, clean the mounting hole in the fender meticulously. Use a plastic scraper or a wire brush to remove all old adhesive, sealant, and corrosion. The surface must be bare metal or clean plastic for the new seal to work. Wipe it down with a degreaser like isopropyl alcohol. Inspect the mounting stud threads. Clean them with a wire brush and apply a thin layer of anti-seize compound. This is a must—it will make future removal infinitely easier and prevent the new base from galling or seizing to the stud.
Sealing and Securing
Most new antenna bases come with a rubber gasket or foam washer. If yours didn’t, you’ll need to purchase one or use a high-quality automotive RTV silicone sealant. Place the gasket on the base’s mounting flange, or apply a continuous bead of silicone to the fender’s mounting surface. Carefully position the new base into the hole, feeding the coaxial cable connector through first. Press it in evenly until it’s flush against the fender. From underneath, thread the retaining nut onto the stud by hand first to avoid cross-threading. Tighten it firmly with your socket, but do not over-tighten. Overtightning can crack the fender plastic or deform the base’s gasket, causing leaks. Tighten until the base is snug and doesn’t wobble, then give it maybe another quarter-turn. The gasket or silicone will provide the seal; the nut’s job is to hold it in place.
Reconnecting and Testing
Push the coaxial cable connector firmly onto the mating plug on the back of the new base until it clicks. Reconnect your Jeep’s battery. Before reassembling the fender liner, turn the ignition on and test the radio. Tune to a strong station. You should have clear reception. If you get static or no signal, double-check the coaxial connection—it’s the most common point of failure. Once confirmed working, carefully reinstall the fender liner, snapping all the push clips back into place. Your job is done!
Final Checks and Test
You’ve got the new base on, the fender liner is (mostly) back together, and you’re eager to hit the road. But take five more minutes for these final checks. They can save you a future headache.
- Visual Inspection: Look at the base from the outside. Is it sitting flush? Is the gasket/sealant evenly compressed? Are there any gaps where water could enter?
- Wiggle Test: Grab the antenna mast (if you kept it on) or just the base itself and try to wiggle it. There should be absolutely no movement. Any play means the nut isn’t tight enough or the gasket is misaligned.
- Radio Reception: This is your functional test. Drive around, tune to different stations (AM and FM), and listen for any dropouts, static, or whining noises that could indicate a poor connection. A properly installed base should provide reception identical to or better than the original.
- Water Check: If you have a hose, give the fender area a good spray. Then, after a few minutes, check inside the fender well (you can peek without removing the liner fully) for any signs of water dripping around the base. A good seal should be completely dry.
If all these checks pass, congratulations! You’ve successfully removed and replaced your Jeep antenna base. This skill translates to many other DIY automotive tasks. For instance, the careful prying techniques you used on the fender liner are directly applicable to tasks like how to remove a Subaru emblem from the grill, where preserving paint finish is equally important. Similarly, the disciplined approach of disconnecting electrical components first is a fundamental rule you’d learn when following a guide on how to remove a car battery. Each project builds your confidence and toolkit for the next one.
Frequently Asked Questions
Do I need to disconnect the battery to remove the antenna base?
Yes, you should always disconnect the negative battery terminal first. This prevents any accidental short circuit if your tool touches the metal fender while in contact with the antenna’s coaxial cable or its connector, protecting your Jeep’s radio and computer systems.
What if the antenna retaining nut is stripped and won’t turn?
If the nut begins to round off, stop immediately. Try a 6-point socket for better grip. Apply more penetrating oil and let it soak. You can also try gently tapping the socket with a hammer to seat it deeper. As a last resort, you may need a nut splitter or to carefully drill it out, which is complex and often requires professional help to avoid damaging the stud.
Can I remove the antenna base without taking off the fender liner?
It depends on your Jeep model. On some, the nut is accessible from a small access panel in the liner or from the engine bay. On most, however, you need to create an access hole in the inner fender liner to reach the nut. Removing or prying back a section of the liner is the standard and safest method to get proper tool engagement.
How do I prevent the new antenna base from rusting and seizing in the future?
The key is anti-seize compound. Before installing the new base, thoroughly clean the mounting stud threads and apply a thin, even coat of high-quality anti-seize lubricant. This creates a barrier against corrosion and makes future removal much easier. Also, ensure the base’s gasket seals properly to keep moisture out from behind.
My antenna base is painted on, not threaded. How do I remove it?
Some newer Jeeps, particularly certain Grand Cherokee or Compass models, may have a base that is adhesive-backed or uses a locking ring instead of a nut. If there’s no visible nut, you likely have a twist-off or pull-off base. Look for a seam. Try twisting the base counter-clockwise by hand. If it doesn’t budge, carefully pry around the edge with a plastic trim tool to break the adhesive bond. If it’s a locking ring, you may need a special spanner wrench to release it.
Can I drive my Jeep without the antenna base installed?
Technically, yes, you can drive without it. The coaxial cable will be dangling, which is a minor safety hazard (it could get caught on something) and an entry point for water and dirt into the cabin and radio system. You’ll also have no radio reception. It’s fine for a very short test drive after removal to check for rattles, but you should install a new base or at least plug the hole temporarily before regular driving.