
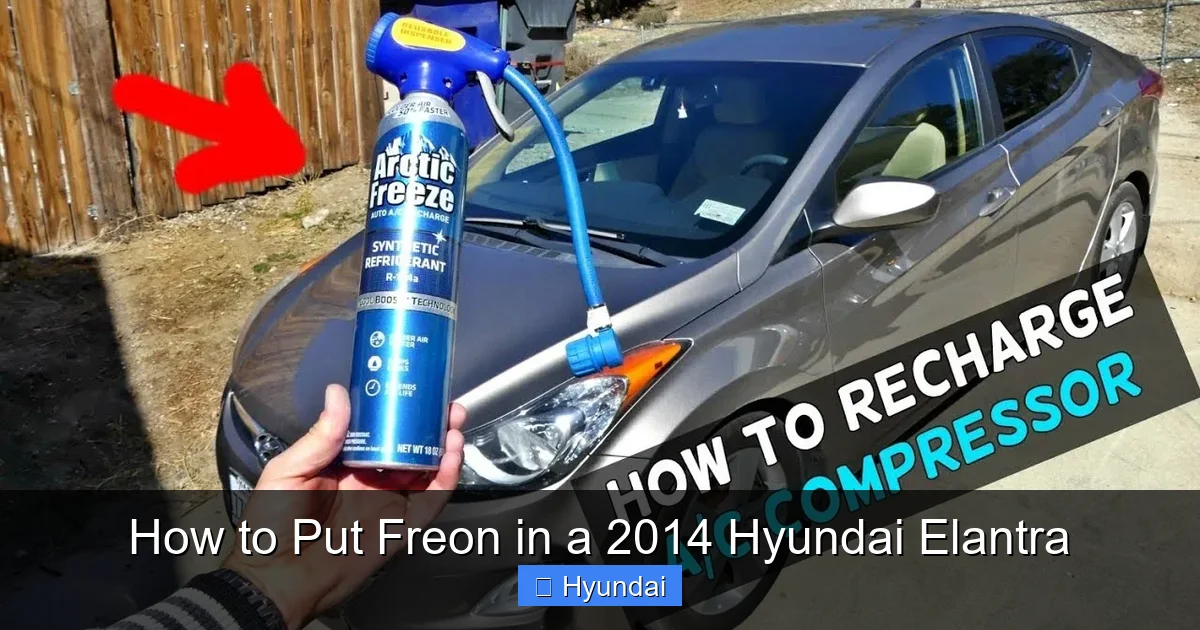
How to Put Freon in a 2014 Hyundai Elantra
Contents
- 1 Key Takeaways
- 2 📑 Table of Contents
- 3 Understanding Your 2014 Hyundai Elantra’s Air Conditioning System
- 4 Essential Tools and Safety Gear: Your DIY Checklist
- 5 Step-by-Step: Locating Ports and Connecting Your Manifold Gauges
- 6 Performing the Recharge: Adding Refrigerant Safely and Accurately
- 7 After the Recharge: Verifying Success and Final Steps
- 8 When a DIY Recharge Isn’t Enough: Signs of Bigger Problems
- 9 Conclusion: Empowerment Through Understanding
- 10 Frequently Asked Questions

Car Windshield Wiper Blades
Side Window Sunshade

Phone Mount for Bike

Emergency First Aid Kit
Recharging the air conditioner in your 2014 Hyundai Elantra is a straightforward DIY task if you have the right tools and follow safety protocols. You’ll need a specific R-134a refrigerant, a manifold gauge set, and a clear understanding of your system’s low-pressure port. This guide walks you through locating components, connecting gauges, and adding refrigerant correctly while warning against common mistakes like overcharging. Always check for leaks first, as a simple recharge won’t fix a major system leak.
Key Takeaways
- Correct Refrigerant: Your 2014 Elantra uses R-134a refrigerant, NOT the older R-12. Using the wrong type will damage the system.
- Safety First: Always wear safety glasses and gloves. Never open a pressurized can near a running engine or expose refrigerant to open flames.
- Locate the Low-Pressure Port: It’s on the larger diameter aluminum line in the engine bay, near the firewall. The service port cap is usually black or blue.
- Gauges are Essential: Using a manifold gauge set is non-negotiable for a safe, accurate recharge. “Can-tapping” without gauges risks overcharging.
- Check for Leaks First: If the system was empty, you must find and repair the leak before recharging. A simple recharge will only provide temporary cooling.
- Follow Pressure Specs: With the AC on max and engine at idle, low-side pressure should be 25-40 psi. High-side will be 150-250 psi. Do not exceed these.
- Know When to Stop: Add refrigerant slowly while watching the low-side gauge. Stop when you reach 35-40 psi and feel cold air from the vents.
📑 Table of Contents
- Understanding Your 2014 Hyundai Elantra’s Air Conditioning System
- Essential Tools and Safety Gear: Your DIY Checklist
- Step-by-Step: Locating Ports and Connecting Your Manifold Gauges
- Performing the Recharge: Adding Refrigerant Safely and Accurately
- After the Recharge: Verifying Success and Final Steps
- When a DIY Recharge Isn’t Enough: Signs of Bigger Problems
- Conclusion: Empowerment Through Understanding
Understanding Your 2014 Hyundai Elantra’s Air Conditioning System
Before you touch a wrench or a can of refrigerant, it helps to understand what you’re working with. Your 2014 Hyundai Elantra’s air conditioning system is a closed-loop cycle designed to move heat from inside your car to the outside air. It’s not a simple fan; it’s a dance of a compressor, condenser, expansion valve, and evaporator, all powered by a special chemical called refrigerant—in your case, R-134a.
Think of refrigerant as the system’s blood. It starts as a low-pressure gas in the compressor. The compressor squeezes it into a high-pressure, hot gas, which then travels to the condenser (in front of your radiator) to cool and become a high-pressure liquid. This liquid zips through an expansion valve, where it explodes into a cold, low-pressure mist. This cold mist travels through the evaporator inside your dashboard. A blower fan pushes cabin air across these cold coils, and boom—cool air! The refrigerant, now a warm gas again, heads back to the compressor to start over. When we talk about “putting Freon in,” we’re simply restoring the correct amount of this refrigerant in the loop. “Freon” is a brand name, like Kleenex for tissues, but we use it to mean refrigerant. Your Elantra uses the modern, ozone-safe R-134a.
Why Did the Refrigerant Escape?
Refrigerant doesn’t get “used up” like gasoline. It circulates forever in a sealed system. If your AC is blowing warm air, it means refrigerant has leaked out. Common leak points include the compressor seals, O-rings on service ports, the condenser (from road debris), or the evaporator (inside the dash). A very slow leak might just need a top-off, but a fast leak requires a repair. This is the most critical concept: adding refrigerant is a temporary fix for a leaky system. For a permanent solution, the leak must be found and sealed. Many DIYers use UV dye and a blacklight to hunt for leaks after a recharge.
Essential Tools and Safety Gear: Your DIY Checklist
You cannot safely or accurately recharge your Elantra’s AC with just a can from the auto parts store. That method, often called “charging by the can,” is a guess. You need data. Here is your mandatory toolkit:

Visual guide about How to Put Freon in a 2014 Hyundai Elantra
Image source: tawfiqia.com
- A Manifold Gauge Set: This is the heart of the operation. It has three hoses (blue for low-pressure, red for high-pressure, yellow for refrigerant) and two gauges. Get a set with a sight glass in the yellow hose to see refrigerant flow. They range from $40 for a basic set to $200+ for professional brands. For a one-time job, a budget set is fine.
- R-134a Refrigerant: Buy a 12oz or 20oz can of pure R-134a. Some come with a built-in gauge and hose, but these are notoriously inaccurate. It’s better to buy a separate can and use your manifold gauges. Consider a can with UV dye mixed in to help find leaks later.
- Safety Glasses and Nitrile Gloves: Refrigerant under pressure can cause frostbite instantly if it contacts skin. It can also shoot out of a punctured can. Protect your eyes and hands.
- Mechanic’s Rags: For cleaning ports and wiping away any oily residue (a sign of a leak).
- Socket Set and Ratchet: You’ll likely need a 10mm or 13mm socket to remove any covers blocking the service ports.
- Funnel: For adding precise amounts if your gauge set requires it.
- Your Elantra’s Service Manual (or a reliable online source): To confirm exact port locations and pressure specifications for your specific model year and engine (2.0L or 1.8L).
Now, a stern warning: NEVER mix refrigerants. NEVER attempt to recover refrigerant yourself (it’s illegal to vent). NEVER connect a gauge hose to the high-pressure port by mistake—it’s smaller and can be dangerous. And ALWAYS work with the engine OFF when connecting hoses to prevent the compressor from kicking on and spraying refrigerant.
Step-by-Step: Locating Ports and Connecting Your Manifold Gauges
This is where precision matters. A wrong connection can damage your AC system or cause injury.

Visual guide about How to Put Freon in a 2014 Hyundai Elantra
Image source: jeepzine.com
Finding the Service Ports in Your Elantra
Open the hood and secure it. You are looking for two aluminum pipes running from the engine bay toward the firewall (the wall between the engine and cabin). The larger diameter pipe is the low-pressure line (suction side). The smaller diameter pipe is the high-pressure line (discharge side).
- Low-Pressure Port: Located on this larger line, usually near the firewall on the driver’s side. It has a black or blue plastic cap with an “L” on it. The port fitting itself is larger. This is your ONLY connection point for adding refrigerant. This is the one you want.
- High-Pressure Port: Located on the smaller line, often closer to the front of the engine bay. Its cap is usually red and has an “H” on it. DO NOT CONNECT TO THIS PORT. It is for diagnosing high-side pressure and is not for adding refrigerant.
If the caps are missing, look for a larger Schrader valve (like a tire valve) on the big pipe. That’s it. On some models, there might be a plastic cover you need to pry off. Use your socket to remove any obstructive bolts. Wipe the area around the port clean with a rag to keep debris out of the system.
Connecting the Manifold Gauge Set Correctly
With the engine OFF and the key out of the ignition:
- Remove the cap from the low-pressure port.
- Take the BLUE hose from your manifold gauge set. Push its quick-connect fitting firmly onto the low-pressure port until you hear/feel a click. Give it a tug to ensure it’s locked. This hose goes to the LEFT gauge (low-pressure).
- Take the RED hose. Its fitting is for the high-pressure port. You will NOT connect this to the car yet. Leave it capped. Its gauge is on the RIGHT. We use it only for monitoring.
- Take the YELLOW hose. This is your refrigerant feed line. One end connects to the center port on your manifold gauges. The other end will pierce the top of your R-134a can. Do not connect it to the can yet.
Your gauge set is now plumbed to the car’s low-pressure side only. The system is ready to be pressurized with refrigerant. Before starting the car, do a final check for any loose connections.
Performing the Recharge: Adding Refrigerant Safely and Accurately
Now the critical phase. Patience is your best tool here. Rushing causes overcharging, which is the #1 DIY mistake and can destroy your compressor.

Visual guide about How to Put Freon in a 2014 Hyundai Elantra
Image source: i.ytimg.com
Initial System Check and Starting the Car
Before adding any refrigerant, let’s see what’s already in there:
- With all hoses connected (blue to car, yellow capped, red capped), start your Elantra’s engine.
- Set the HVAC controls to: MAX A/C, highest fan speed, and recirculation mode ON. This is the system’s maximum load.
- Let it run for 2-3 minutes. Observe the LOW-PRESSURE (blue) gauge. What does it read?
Possible Readings & What They Mean:
- 0 psi or vacuum: The system is almost completely empty. This confirms a significant leak. You may add a can, but it will leak out quickly. You need a leak search.
- 10-20 psi: The system is low. This is a typical scenario for a slow leak. You can proceed with a recharge to the proper level.
- 50+ psi: This is dangerously high. Your system is overcharged or the compressor isn’t engaging properly. DO NOT ADD REFRIGERANT. Stop and diagnose. An overcharged system can cause the high-pressure safety switch to cut the compressor off.
If your reading is in the safe “low” range (0-25 psi), you can proceed. Also, feel the evaporator case under the dash on the passenger side. Is it cold? If it’s ice-cold, your system might be full already! If it’s room temperature or warm, it needs refrigerant.
The Actual Recharge Process
This is the moment.
- Hold an R-134a can upright. Screw the yellow hose’s piercing valve onto the can’s nozzle. Tighten it until you hear a hiss (the can is being punctured).
- Hold the can upside down (valve at the bottom). The liquid refrigerant will flow, not gas. For accuracy, you want to add liquid refrigerant slowly.
- With the engine running and AC on MAX, slowly open the valve on the yellow hose (usually a knob or lever). You’ll see bubbles in the sight glass and hear refrigerant flowing.
- WATCH THE LOW-PRESSURE GAUGE. This is your bible. Add refrigerant in short bursts: open for 5-10 seconds, close, wait 30 seconds for the pressure to stabilize. The goal is to bring the low-side pressure up to 35-40 psi.
- As you add refrigerant, also feel the air from your vents. It should transition from warm to cool. The air temperature should drop noticeably.
- STOP ADDING when low-side pressure reaches 35-40 psi AND the vent air is cold. Do not chase a specific number if the air is already cold. A slightly low charge (30 psi) with good cooling is better than an overcharge (50+ psi) that kills the compressor.
- Once satisfied, close the valve on the refrigerant can and disconnect the yellow hose from the can. The can will have some refrigerant left—that’s normal.
Important: The high-pressure (red) gauge should read between 150-250 psi during this process. If it spikes above 300 psi, stop immediately. This indicates a blockage (like a clogged condenser) or overcharging. Let the system run and watch the pressures stabilize.
After the Recharge: Verifying Success and Final Steps
Your gauge readings look good, and the air is cold. Now, let’s make sure everything is secure and document what you did.
System Verification and Leak Check
With the refrigerant can removed, let the engine and AC run for another 5-10 minutes. Re-check your low-side pressure. It should hold steady at 35-40 psi. Listen for any hissing sounds near the compressor, condenser, or service ports—a sign of a major leak. Visually inspect the area around the components you worked on for any oily residue. Refrigerant oil leaves a tell-tale film. If you used UV dye, now is the time to shut off the engine, turn off the lights, and use a blacklight to inspect all AC components for glowing green/yellow traces.
Disconnecting and Capping Up
Before anything else, turn off the engine and remove the key. This prevents the compressor from suddenly engaging while you’re disconnecting hoses.
- Slowly unscrew the blue hose quick-connect from the low-pressure service port. You might hear a slight hiss as pressure releases—this is normal.
- Immediately screw the black/blue cap back onto the service port tightly. This keeps contaminants and moisture out.
- Disconnect the red hose from the manifold gauge set (it should still be capped).
- Finally, disconnect the yellow hose from the manifold’s center port.
- Store your manifold gauges in their case, away from moisture.
- Close the hood. You’re done with the technical part!
Take your old refrigerant can to a hazardous waste facility. Do not puncture or dispose of it in regular trash. It’s illegal and dangerous.
When a DIY Recharge Isn’t Enough: Signs of Bigger Problems
Let’s be realistic. A simple refrigerant recharge fixes about 30% of “no cold air” problems. The other 70% are mechanical or electrical failures. Here are signs that your issue goes beyond a low charge, and you need a professional:
- The refrigerant can empties in a day or two. This means you have a significant, active leak. A pro will use an electronic leak detector, UV dye, or nitrogen pressure test to find it.
- You add refrigerant, but the pressure doesn’t rise. This suggests a complete blockage, possibly a clogged expansion valve or orifice tube, or a failed compressor that isn’t pulling refrigerant.
- The AC blows cold for 10 minutes, then goes warm. This classic symptom often points to an internal compressor leak (worn seals), a failing clutch, or a system full of air and moisture from a previous bad repair.
- You see no pressure on the gauges at all, even with refrigerant in the can. This could mean a severely plugged system or a completely failed compressor that has locked up.
- Strange noises (grinding, squealing) from the engine bay when AC is on. This is likely the compressor clutch or bearings failing. Running it in this state can cause catastrophic damage.
- The system was completely empty (0 psi) and you added a full can with no change. The refrigerant is immediately leaking out into the atmosphere. You have a major breach.
If any of these apply, stop. Continuing to add refrigerant is wasteful and could make the eventual repair more expensive by contaminating the system with non-condensable gases. For complex issues like these, a certified technician with recovery equipment is necessary. They can also perform a full system evacuation and vacuum pull to remove all air and moisture before recharging—something you cannot do at home.
Conclusion: Empowerment Through Understanding
Congratulations! You now possess the knowledge to diagnose and potentially fix a common comfort issue in your 2014 Hyundai Elantra. The process—locate, connect, monitor, add—is logical when broken down. The key takeaway is that you are not just “putting Freon in.” You are restoring a precise chemical balance to a complex machine. By using manifold gauges, you treat your AC system with the respect it deserves, avoiding the guesswork that leads to overcharging and compressor death.
Remember the golden rules: use only R-134a, connect only to the low-pressure port, watch the gauges constantly, and stop at 35-40 psi. This disciplined approach separates a successful DIY recharge from a costly mistake. Should you encounter any of the red flags mentioned in the previous section, have the humility to hand it over to a pro. Your Elantra’s AC system is robust but not indestructible. Treated correctly, it will keep you cool for years to come. Now, go enjoy that cold air—you’ve earned it.
Frequently Asked Questions
What type of Freon does a 2014 Hyundai Elantra use?
Your 2014 Elantra uses R-134a refrigerant. It is important to never use the older R-12 or the new R-1234yf, as they are incompatible and will damage the system. Always check the label under the hood for confirmation.
How do I know if my Elantra’s AC is low on Freon?
The primary sign is warm or lukewarm air blowing from the vents despite the AC being on max. Other clues include the AC clutch not engaging (the compressor pulley doesn’t spin) or seeing frost/ice on the refrigerant lines. A manifold gauge test is the only definitive way to confirm low charge.
Can I just add a can of Freon without gauges?
While possible, it is strongly discouraged. Adding refrigerant without monitoring pressure is a guess. You risk severe overcharging, which can destroy the compressor and create dangerously high pressures. The manifold gauge set is a relatively inexpensive tool that prevents these costly mistakes.
How often should I need to add Freon to my Elantra?
In a healthy, sealed system, you should never need to add refrigerant. A properly functioning AC system is a closed loop. If you find yourself recharging more than once a year, you have a leak that needs to be diagnosed and repaired by a professional.
What is the correct low-side pressure for a 2014 Hyundai Elantra?
With the engine running, AC on max, and fan on high, the low-side (suction) pressure should be between 25 and 40 psi. The high-side (discharge) pressure will typically be between 150 and 250 psi. Always consult your specific service manual for your engine size (1.8L or 2.0L).
What happens if I overcharge my Elantra’s AC system?
Overcharging is very dangerous. It causes excessively high pressure, which can rupture hoses or damage the compressor. It also reduces cooling efficiency because the system can’t properly evaporate the refrigerant. The high-pressure safety switch will often shut the compressor off, leaving you with no AC at all. Recovery by a professional is then required.


