
How to Put Freon in a 2009 Toyota Camry
Recharging the AC system in your 2009 Toyota Camry with Freon (R-134a) can restore cool air and improve comfort during hot weather. While it’s a manageable DIY task with the right tools and precautions, it’s important to follow proper procedures to avoid damage or injury.
If your 2009 Toyota Camry’s air conditioning isn’t blowing cold air like it used to, you’re not alone. Over time, refrigerant levels can drop due to minor leaks or natural evaporation, leading to reduced cooling performance. The good news? Recharging your AC system with Freon—more accurately called R-134a refrigerant—is a task many car owners can handle themselves with the right tools and a bit of know-how.
But before you grab a can of refrigerant and start spraying, it’s important to understand what you’re doing. This isn’t just about topping off a fluid like oil or coolant. Refrigerant is a pressurized gas that plays a critical role in your car’s cooling cycle. Adding it incorrectly can lead to poor performance, system damage, or even personal injury. That’s why this guide walks you through every step—from identifying the problem to safely recharging your system and knowing when to call a pro.
In this detailed article, we’ll cover everything you need to know about how to put Freon in a 2009 Toyota Camry. We’ll explain the basics of how your AC system works, help you diagnose low refrigerant levels, walk you through the tools and materials needed, and provide a step-by-step recharge procedure. We’ll also share safety tips, common mistakes to avoid, and troubleshooting advice if your AC still isn’t working after recharging. By the end, you’ll have the confidence and knowledge to tackle this job like a seasoned DIYer.
Key Takeaways
- Use R-134a refrigerant: The 2009 Toyota Camry uses R-134a, not older Freon types like R-12, so always confirm the correct refrigerant before starting.
- Check for leaks first: Adding refrigerant to a leaking system is unsafe and ineffective—inspect hoses, seals, and connections before recharging.
- Use a recharge kit with a gauge: A DIY recharge kit with a built-in pressure gauge helps you monitor levels and avoid overcharging.
- Wear safety gear: Always wear safety goggles and gloves—refrigerant can cause frostbite or eye injury if it contacts skin.
- Run the engine and AC on max: To properly charge the system, the engine must be running, and the AC should be set to maximum cool with fans on high.
- Avoid overcharging: Too much refrigerant can damage the compressor and reduce cooling efficiency—follow manufacturer pressure guidelines.
- Consider professional help if unsure: If you’re uncomfortable or the system still doesn’t cool after recharging, consult a certified technician.
📑 Table of Contents
Understanding Your 2009 Toyota Camry’s AC System
Before diving into the recharge process, it helps to understand how your Camry’s air conditioning system works. The AC system is a closed loop that circulates refrigerant to absorb heat from inside the cabin and release it outside. This process relies on several key components working together: the compressor, condenser, expansion valve, evaporator, and refrigerant lines.
The compressor is the heart of the system—it pressurizes the refrigerant and pumps it through the system. The condenser, located in front of the radiator, cools the hot, high-pressure gas and turns it into a liquid. This liquid then flows to the expansion valve, which regulates its flow into the evaporator. Inside the evaporator, the refrigerant expands, cools down, and absorbs heat from the air passing over it. That cooled air is then blown into the cabin by the blower fan.
The refrigerant used in your 2009 Camry is R-134a, a hydrofluorocarbon (HFC) that replaced the older R-12 (commonly called “Freon”) due to environmental concerns. While people still refer to R-134a as “Freon,” that’s technically a brand name and not the correct chemical term. Still, the slang persists—so when we say “put Freon in your Camry,” we really mean adding R-134a refrigerant.
Over time, refrigerant levels can drop for several reasons. Small leaks can develop in hoses, seals, or the compressor shaft seal. Even a tiny crack or worn O-ring can allow refrigerant to escape slowly. Additionally, the system isn’t perfectly sealed forever—some minor leakage is normal over many years of use. When refrigerant levels fall too low, the AC system can’t create enough pressure differential to cool the air effectively. You might notice weak airflow, warm air blowing from the vents, or the compressor clutch not engaging.
It’s also worth noting that low refrigerant isn’t the only cause of AC problems. A faulty compressor, clogged condenser, electrical issue, or blown fuse can also prevent cooling. That’s why it’s important to rule out other causes before assuming you just need more refrigerant.
Signs You Need to Recharge the AC System

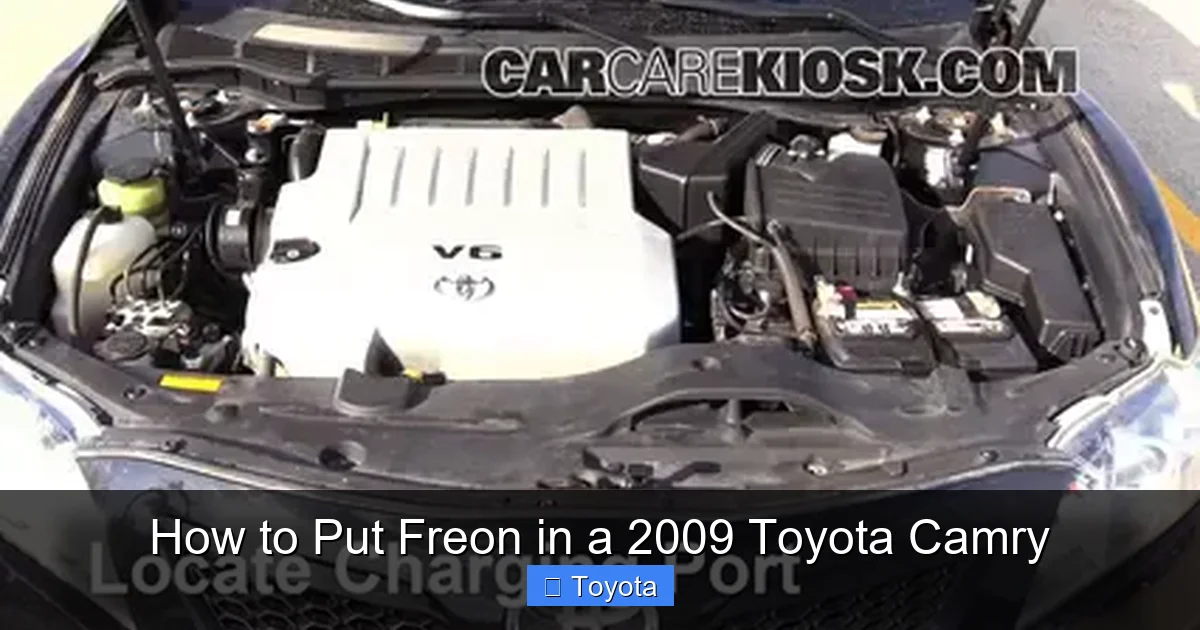
Visual guide about How to Put Freon in a 2009 Toyota Camry
Image source: i.ytimg.com
So how do you know if your 2009 Camry needs a refrigerant recharge? There are several telltale signs to watch for. The most obvious is warm or lukewarm air coming from the vents, even when the AC is set to the coldest setting. If you’ve recently noticed that your AC isn’t cooling as well as it used to—especially on hot days—it could be due to low refrigerant.
Another clue is the compressor clutch not engaging. You can check this by popping the hood and looking at the front of the AC compressor (usually belt-driven and located near the engine). When you turn on the AC, the clutch should click and the center pulley should start spinning. If it doesn’t engage, it could be due to low pressure—your car’s safety system prevents the compressor from running if refrigerant levels are too low.
You might also hear unusual noises, like hissing or bubbling, coming from under the dashboard or near the firewall. These sounds can indicate a refrigerant leak. Additionally, if you notice oily residue around AC lines, fittings, or the compressor, that’s a strong sign of a leak—refrigerant often carries a small amount of compressor oil with it, leaving behind a greasy stain.
It’s also helpful to use a UV dye test if you suspect a leak. Some recharge kits include UV dye that you add to the system. After running the AC, you can use a UV flashlight to inspect for glowing leaks. This method is especially useful for finding small, hard-to-detect leaks.
Keep in mind that simply adding refrigerant without fixing a leak is only a temporary fix. The refrigerant will eventually escape again, and you’ll be back to square one. That’s why it’s crucial to inspect the system for leaks before recharging. If you find a leak, it’s best to have it repaired by a professional before adding new refrigerant.
Tools and Materials You’ll Need
Visual guide about How to Put Freon in a 2009 Toyota Camry
Image source: d2n97g4vasjwsk.cloudfront.net
Before you begin, make sure you have all the necessary tools and materials on hand. Having everything ready will make the process smoother and safer. Here’s a list of what you’ll need:
– R-134a refrigerant can with a recharge hose and pressure gauge (available at auto parts stores)
– Safety goggles and gloves (refrigerant can cause frostbite)
– A UV flashlight (optional, for leak detection if using dye)
– A rag or shop towels
– A tire pressure gauge (optional, for double-checking readings)
– A can of AC system leak sealer (optional, for minor leaks)
Most recharge kits come with a hose that connects to the low-pressure service port and a gauge that shows system pressure. These kits are designed for DIY use and typically include a trigger-style dispenser for easy control. Make sure the kit is labeled for R-134a—do not use R-12 or other refrigerants.
When choosing a refrigerant can, look for one that contains only R-134a and no additives unless you’re certain they’re safe. Some products claim to “seal leaks” or “boost performance,” but many mechanics advise against using additives unless recommended by a professional. Stick to pure refrigerant for the best results.
Safety gear is non-negotiable. Refrigerant is stored under high pressure and can cause severe cold burns if it contacts your skin or eyes. Always wear safety goggles and gloves when handling the can and hose. Work in a well-ventilated area, preferably outdoors or in a garage with the door open.
If you’re planning to check for leaks, consider purchasing a UV dye kit or a can of refrigerant with built-in dye. These products mix a fluorescent tracer into the refrigerant, making leaks visible under UV light. This can save you time and help ensure you’re not just masking a problem.
Step-by-Step Guide to Recharging Your AC System
Visual guide about How to Put Freon in a 2009 Toyota Camry
Image source: justanswer.com
Now that you’re prepared, let’s walk through the actual process of how to put Freon in a 2009 Toyota Camry. Follow these steps carefully to ensure a safe and effective recharge.
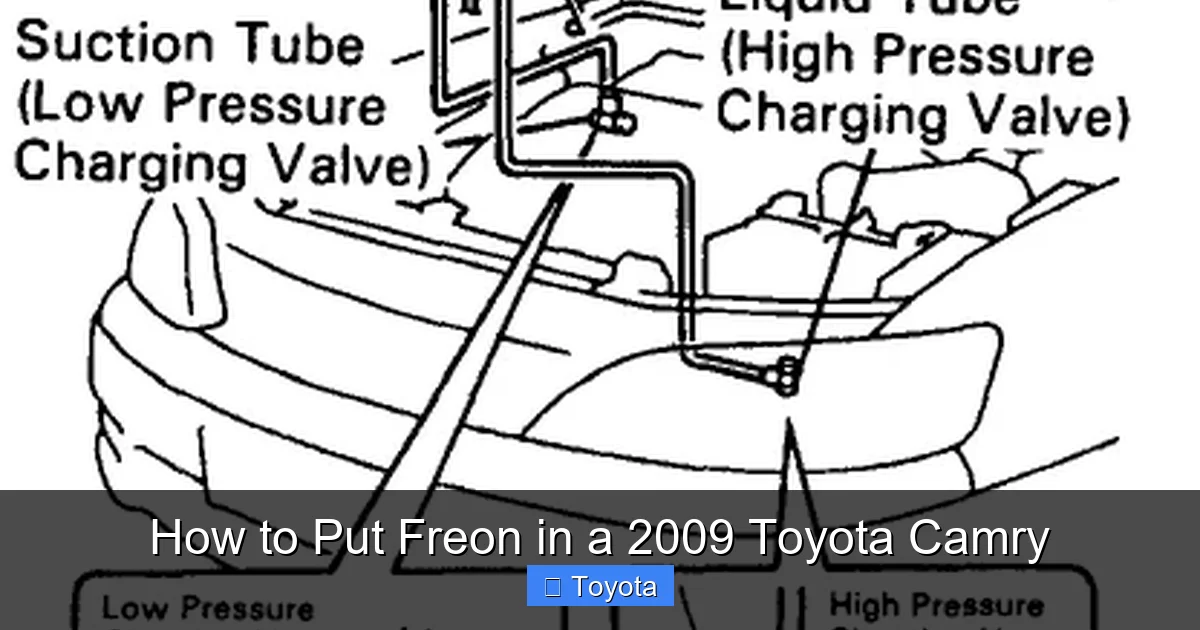
Step 1: Locate the Low-Pressure Service Port
Start by opening the hood and locating the low-pressure service port. This is where you’ll connect the recharge hose. On the 2009 Camry, the low-pressure port is usually located on the passenger side of the engine bay, near the firewall. It’s connected to a large aluminum or rubber hose that leads to the compressor.
The port is typically covered by a black or blue cap labeled “L” or “LOW.” The high-pressure port, which you should never open, is smaller and labeled “H” or “HIGH.” Always double-check the labels to avoid connecting to the wrong port.
Remove the cap and set it aside. Wipe the port clean with a rag to remove any dirt or debris. Dirt can contaminate the system and cause damage.
Step 2: Prepare the Recharge Kit
Shake the refrigerant can well before use. This ensures the refrigerant is properly mixed. Attach the hose from the recharge kit to the can according to the manufacturer’s instructions. Most kits have a threaded connector that screws onto the can.
Next, connect the other end of the hose to the low-pressure service port. Make sure it clicks or threads on securely. Do not over-tighten—hand-tight is usually sufficient.
Step 3: Start the Engine and Turn On the AC
Start your Camry’s engine and turn the AC to the maximum cooling setting. Set the fan to high and make sure the recirculation mode is on (this helps the system cool faster). Let the engine run for a few minutes to allow the AC system to stabilize.
With the engine running and AC on, the compressor should engage. You’ll hear a click and see the compressor clutch spin. If it doesn’t engage, the system may be too low on refrigerant to activate—this is normal and expected if the system is nearly empty.
Step 4: Monitor the Pressure Gauge
Look at the pressure gauge on your recharge kit. The ideal pressure for a properly charged system is typically between 25 and 45 psi, depending on ambient temperature. On a hot day (80–90°F), expect the low-side pressure to be around 30–40 psi.
If the pressure is very low (below 20 psi), the system is likely undercharged. Begin slowly adding refrigerant by squeezing the trigger on the hose. Add in short bursts—don’t spray continuously. After each burst, wait a few seconds and check the gauge.
As you add refrigerant, you should notice the pressure rise and the air from the vents getting cooler. Continue adding until the pressure reaches the recommended range. Do not exceed 45 psi on the low side—overcharging can damage the compressor.
Step 5: Disconnect and Recap
Once the system is properly charged, release the trigger and disconnect the hose from the service port. Replace the cap on the port to prevent contamination.
Turn off the AC and shut off the engine. Store the recharge kit and any leftover refrigerant in a cool, dry place. Never leave refrigerant cans in a hot car—they can become dangerously pressurized.
Step 6: Test the AC Performance
After recharging, take your Camry for a short drive to test the AC. The air should now blow cold—typically 35–45°F at the vents. If it’s still not cooling well, there may be another issue, such as a clogged condenser, faulty blower motor, or electrical problem.
Safety Tips and Common Mistakes to Avoid
While recharging your AC system is relatively straightforward, there are several safety precautions and common pitfalls to be aware of.
First and foremost, never open the high-pressure service port. It’s under much greater pressure than the low-side port, and opening it can cause refrigerant to spray out violently. Always work only with the low-pressure port.
Avoid overcharging the system. Too much refrigerant increases pressure, which can strain the compressor and reduce cooling efficiency. Follow the pressure guidelines and stop when the gauge reads in the safe range.
Never attempt to recharge the system if you suspect a major leak. Adding refrigerant to a leaking system is wasteful and potentially hazardous. Small leaks can sometimes be sealed with a leak sealer additive, but larger leaks require professional repair.
Also, don’t use refrigerant cans that are damaged, dented, or frozen. These can rupture or malfunction during use. Always store refrigerant in a cool, upright position.
Finally, never try to recharge the system without a pressure gauge. Guessing how much refrigerant to add is risky and can lead to overcharging or undercharging.
When to Call a Professional
While many Camry owners successfully recharge their AC systems at home, there are times when it’s best to leave it to the experts. If you’re uncomfortable working with pressurized systems, or if you don’t have the right tools, don’t hesitate to visit a certified technician.
Additionally, if your AC still doesn’t cool after recharging, there may be a deeper issue. A failing compressor, clogged expansion valve, or electrical fault may require specialized tools and expertise to diagnose and repair.
Professional technicians also have access to recovery machines that safely remove old refrigerant and vacuum the system before recharging—this ensures a cleaner, more effective charge.
Conclusion
Recharging the AC system in your 2009 Toyota Camry with R-134a refrigerant is a practical DIY task that can restore cool, comfortable air during hot weather. By understanding how your AC system works, recognizing the signs of low refrigerant, and following a careful step-by-step process, you can safely and effectively complete the job.
Remember to always prioritize safety—wear protective gear, use the correct refrigerant, and avoid overcharging. And if you encounter leaks or persistent cooling issues, don’t hesitate to seek professional help.
With the right approach, you can keep your Camry’s AC running smoothly for years to come.
Frequently Asked Questions
Can I use any type of refrigerant in my 2009 Toyota Camry?
No, your 2009 Camry requires R-134a refrigerant. Using the wrong type, such as R-12 or aftermarket substitutes, can damage the system and is illegal in many areas.
How often should I recharge the AC system?
There’s no set schedule—recharge only when cooling performance declines. Most systems hold refrigerant for years, so frequent recharging may indicate a leak.
Is it safe to recharge AC at home?
Yes, with proper tools and precautions. Always wear safety gear, work in a ventilated area, and follow instructions carefully to avoid injury or damage.
What if my AC still doesn’t work after recharging?
This could indicate a mechanical issue like a faulty compressor, clogged condenser, or electrical problem. Have a professional diagnose the system.
Can I drive with low refrigerant?
Yes, but the AC won’t cool effectively. Driving with very low refrigerant can also damage the compressor over time due to lack of lubrication.
Do I need to vacuum the system before recharging?
For a simple top-off, vacuuming isn’t necessary. However, if the system has been opened or is completely empty, a professional vacuum and recharge is recommended to remove moisture and air.


