How to Open a Subaru Outback Hood
Contents
- 1 Key Takeaways
- 2 📑 Table of Contents
- 3 Understanding the Subaru Outback Hood System
- 4 Step-by-Step Guide: How to Open a Subaru Outback Hood
- 5 Troubleshooting Common Hood Opening Issues
- 6 Model Year Differences: What You Need to Know
- 7 Safety Tips and Best Practices
- 8 Why This Matters: Routine Maintenance Made Easy
- 9 Final Thoughts
- 10 Frequently Asked Questions


Opening the hood of your Subaru Outback is simple once you know the steps—but it’s not always intuitive for first-time owners. This guide walks you through the process clearly, safely, and efficiently, whether you’re checking fluids, replacing parts, or performing routine maintenance.
So, you’ve just bought a shiny new (or new-to-you) Subaru Outback—congrats! You’re probably excited to pop the hood and take a peek at that reliable 2.5L or 3.6L boxer engine. But wait… where’s the hood release? If you’re scratching your head, you’re not alone. Many first-time Subaru owners are surprised by how different the hood-opening process is compared to other vehicles. Unlike some cars with external handles or push-button releases, the Outback uses a two-step internal system designed for safety and reliability.
Don’t worry—this guide will walk you through everything you need to know about how to open a Subaru Outback hood, from locating the hidden release lever to safely propping it open. Whether you’re checking your oil, topping off coolant, or installing an aftermarket air filter, knowing how to access the engine bay properly is essential. We’ll cover all model years, common pitfalls, and even what to do if your hood gets stuck. By the end, you’ll feel confident popping that hood like a seasoned Subaru enthusiast.
Key Takeaways
- Locate the interior hood release lever: Found under the dashboard on the driver’s side, usually marked with a hood icon.
- Pull the lever firmly: A single, steady pull disengages the primary latch—listen for a soft “click.”
- Find the secondary safety latch: Located at the front center of the hood, just below the grille; push it to the side while lifting the hood.
- Use the hood prop rod: All Outback models come with a manual prop rod—never rely on gas struts alone for support.
- Check for obstructions: Ensure nothing blocks the hood path before lifting, especially in cold or icy conditions.
- Close the hood gently: Lower it to about 6 inches above the latch and let it drop—don’t slam it shut.
- Know your model year: Procedures vary slightly between older (pre-2010) and newer (2010+) Outbacks—always double-check your owner’s manual.
📑 Table of Contents
Understanding the Subaru Outback Hood System
Before diving into the step-by-step process, it helps to understand why Subaru designed the hood release the way it did. The Outback, like most modern Subarus, uses a dual-latch system: one inside the cabin and one under the hood. This design prevents accidental opening while driving and ensures the hood stays securely closed during high-speed travel or off-road adventures.
The interior release lever is your first point of contact. It’s typically located on the lower left side of the dashboard, near the driver’s door. You’ll recognize it by a small icon that looks like a raised hood or car front. When you pull this lever, it disengages the primary latch mechanism located at the front of the hood. However, this only partially releases the hood—there’s still a secondary safety latch that must be manually released by hand. This extra step might seem inconvenient, but it’s a critical safety feature that’s saved countless hoods from flying open unexpectedly.
Subaru has kept this basic design consistent across generations, though minor details have changed over time. For example, early 2000s Outbacks may have a slightly different lever placement or require a bit more force to activate. Newer models (2015 and later) often feature smoother mechanisms and better ergonomics. Regardless of your model year, the core principle remains the same: pull inside, then release the safety latch outside.
Step-by-Step Guide: How to Open a Subaru Outback Hood

Visual guide about How to Open a Subaru Outback Hood
Image source: upgradedvehicle.com
Now that you know the basics, let’s get practical. Follow these steps carefully to open your Outback’s hood without any hassle.
Step 1: Locate the Interior Hood Release Lever
Start by sitting in the driver’s seat and looking down along the left side of the dashboard, just above the footwell. You should see a small, recessed lever—usually black or gray—with a pictogram of a car hood. On some models, it’s tucked behind a plastic panel or slightly angled toward the center console. If you can’t find it immediately, don’t panic. Try running your hand along the lower edge of the dash; the lever often blends in with the surrounding trim.
Once located, grip the lever firmly with your fingers. It shouldn’t require excessive force, but it does need a deliberate pull. Avoid yanking it violently—this won’t help and could damage the cable over time.
Step 2: Pull the Lever and Listen for the Click
With the lever in hand, pull it toward you in a smooth, steady motion. You should hear a soft but distinct “click” as the primary latch releases. This sound confirms that the first stage of the process is complete. If you don’t hear anything, try pulling again—sometimes dirt or debris can interfere with the mechanism. Also, ensure the vehicle is in Park (for automatics) or Neutral (for manuals) and the parking brake is engaged. While not always required, this minimizes unexpected movement.
Note: In extremely cold weather, the latch may freeze slightly. If the lever feels stiff or unresponsive, avoid forcing it. Instead, try warming the area with a hairdryer or wait until temperatures rise.
Step 3: Go to the Front of the Vehicle
After pulling the interior lever, walk to the front of your Outback. Stand directly in front of the grille, facing the hood. You’ll notice a small gap between the hood and the grille—this is where the secondary latch is hidden.
Step 4: Find and Release the Secondary Safety Latch
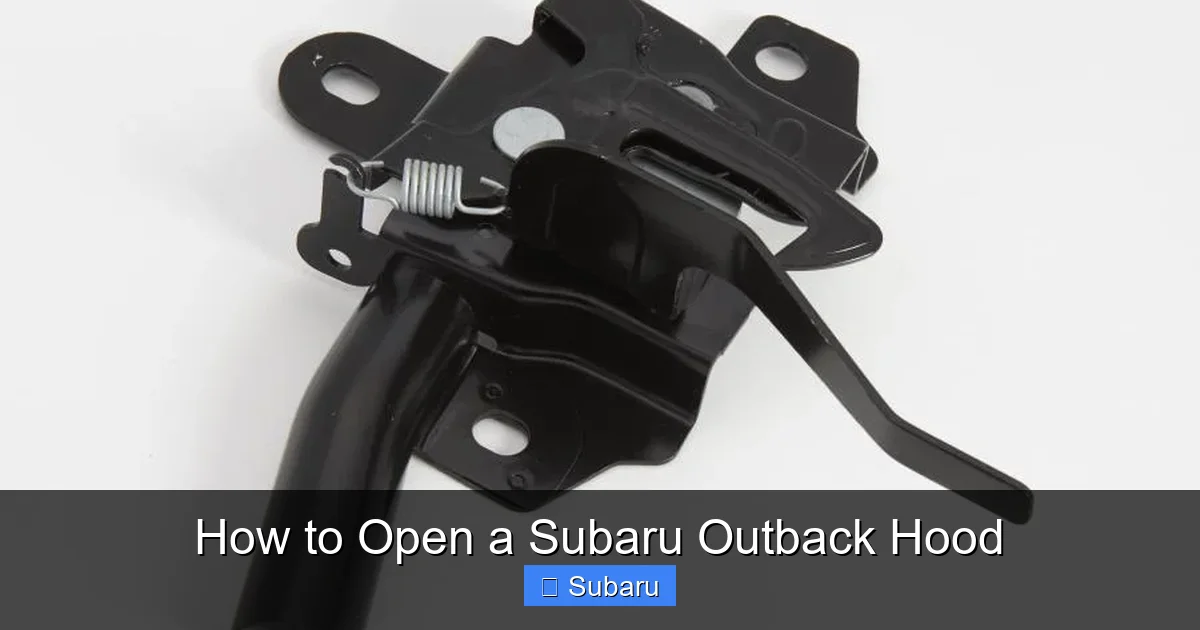
Look for a small, spring-loaded lever or tab positioned right in the center of the hood’s leading edge. It’s usually black or silver and may be recessed slightly. To release it, place your fingers underneath the hood and slide them toward the center. You’ll feel the latch move sideways—push it to the left or right (direction varies by model) while gently lifting the hood upward.
Important: Never try to lift the hood without releasing this secondary latch. Doing so can damage the latch mechanism or scratch your paint.
Step 5: Lift the Hood and Secure It with the Prop Rod
Once the secondary latch is disengaged, the hood will lift freely. Raise it slowly until it’s fully open. Now, locate the hood prop rod—it’s a metal rod stored in a clip on the underside of the hood. Pull it out and insert the hooked end into the designated slot on the radiator support or frame (the exact location varies by year). Make sure it’s seated securely before letting go.
⚠️ Warning: Never rely on the hood’s gas struts to hold it open alone. While newer Outbacks have hydraulic supports, they can fail unexpectedly. Always use the prop rod for safety.
Troubleshooting Common Hood Opening Issues

Visual guide about How to Open a Subaru Outback Hood
Image source: upgradedvehicle.com
Even with clear instructions, things don’t always go smoothly. Here are some common problems and how to fix them.
The Interior Lever Won’t Move
If the lever feels stuck or won’t budge, check for obstructions like ice, dirt, or a kinked cable. In winter, frozen latches are common. Use a de-icer spray or warm water (not boiling!) to thaw the area. Avoid using excessive force—this can snap the cable inside the dashboard, requiring professional repair.
You Pulled the Lever But the Hood Won’t Lift
This usually means the secondary latch wasn’t fully released. Return to the front of the vehicle and double-check that you pushed the safety latch completely to the side. Sometimes it only moves a few millimeters—but that’s enough to prevent lifting. Also, inspect for physical blockages like snow, leaves, or aftermarket accessories (e.g., bull bars) that might interfere.
The Hood Lifts Partway But Won’t Stay Open
If the hood rises but then falls when you let go, the prop rod isn’t engaged properly. Lower the hood, remove the rod, and reinsert it firmly into the correct slot. On some older models, the prop rod clip may be worn—replace it if loose.
Aftermarket Modifications Causing Issues
Many Outback owners install hood scoops, vents, or protective films. While these look great, they can sometimes obstruct the latch mechanism. If you’ve recently added accessories and now struggle to open the hood, inspect the latch area for interference. You may need to adjust or modify the part.
Model Year Differences: What You Need to Know
Visual guide about How to Open a Subaru Outback Hood
Image source: images.simplepart.com
Subaru has made subtle changes to the hood release system over the years. Knowing your model year helps avoid confusion.
Pre-2010 Outbacks (2000–2009)
These models feature a more mechanical system. The interior lever is often stiffer, and the secondary latch requires a firmer push. Some owners report needing to “wiggle” the hood slightly while lifting. Also, the prop rod is always manual—no gas struts.
2010–2014 Outbacks
Subaru introduced smoother cables and better ergonomics. The lever is easier to pull, and the secondary latch is more responsive. However, the prop rod remains standard.
2015–Present Outbacks
Newer models may include hydraulic hood supports (gas struts) in addition to the prop rod. While convenient, always use the prop rod anyway—it’s a backup safety measure. The interior lever is now often integrated into the dashboard trim for a cleaner look.
Regardless of year, always consult your owner’s manual. Subaru provides model-specific diagrams and instructions that can clarify any uncertainties.
Safety Tips and Best Practices
Opening the hood seems simple, but safety should always come first.
Never Work Under an Unsupported Hood
Even if the gas struts seem strong, they can fail without warning. Always use the prop rod—even if it feels unnecessary. A falling hood can cause serious injury.
Check for Leaks or Debris Before Opening
Inspect the engine bay area for signs of coolant leaks, oil spills, or animal nests. Opening a contaminated hood can spread mess or expose you to harmful substances.
Use Proper Lighting
If you’re working at night or in a dim garage, bring a flashlight. Poor visibility increases the risk of missing the latch or misplacing tools.
Close the Hood Correctly
To close the hood, lift it slightly to remove the prop rod, then lower it gently until it’s about 6 inches above the latch. Release it—it should snap shut with a firm but not loud sound. Never slam it, as this can damage the hinges or latch.
Regular Maintenance Helps
Lubricate the latch mechanisms annually with a silicone-based spray (not WD-40, which attracts dirt). This keeps everything moving smoothly and prevents rust.
Why This Matters: Routine Maintenance Made Easy
Knowing how to open your Subaru Outback hood isn’t just about curiosity—it’s essential for regular maintenance. Subaru recommends checking engine oil, coolant, brake fluid, and windshield washer fluid at least once a month. Without easy access to the engine bay, these simple tasks become frustrating or neglected.
For example, low coolant levels can lead to overheating, especially on long drives or during summer heatwaves. Similarly, dirty air filters reduce fuel efficiency and strain the engine. By mastering the hood-opening process, you empower yourself to stay on top of these checks, extending your Outback’s lifespan and performance.
Plus, if you’re into DIY upgrades—like installing a cold air intake, LED headlights, or a skid plate—you’ll need reliable access to the engine compartment. The more comfortable you are with basic procedures, the more confident you’ll feel tackling bigger projects.
Final Thoughts
Opening the hood of your Subaru Outback might seem like a small task, but it’s the gateway to understanding and caring for your vehicle. With its dual-latch system, the Outback prioritizes safety without sacrificing simplicity. Once you’ve done it a few times, the process becomes second nature.
Remember: pull the interior lever, release the secondary latch, and always use the prop rod. Keep your latches clean and lubricated, and don’t hesitate to consult your owner’s manual if something feels off. Whether you’re a weekend warrior or a daily commuter, knowing how to open a Subaru Outback hood correctly ensures you’re always ready for whatever the road throws your way.
Frequently Asked Questions
Where is the hood release on a Subaru Outback?
The hood release lever is located under the dashboard on the driver’s side, near the footwell. Look for a small lever with a hood icon—it’s usually recessed and blends into the trim.
Why won’t my Subaru Outback hood open after pulling the lever?
This usually means the secondary safety latch wasn’t released. Go to the front of the vehicle, locate the center latch under the hood, and push it to the side while lifting gently.
Do I need to use the prop rod every time I open the hood?
Yes! Even if your Outback has gas struts, always use the manual prop rod for safety. Gas struts can fail unexpectedly, causing the hood to fall.
Can I open the hood if the car is off?
Absolutely. The hood release is mechanical and doesn’t require the engine or ignition to be on. Just ensure the vehicle is in Park or Neutral with the parking brake engaged.
What if my hood latch is frozen in winter?
Use a de-icer spray or gently warm the area with a hairdryer. Never force the lever—this can break the cable. Once thawed, lubricate the latch to prevent future freezing.
Are there differences between opening the hood on older vs. newer Outbacks?
Yes, but the core steps remain the same. Older models may have stiffer levers, while newer ones might include gas struts. Always check your owner’s manual for model-specific guidance.