
How to Fix a Car Side Mirror
Contents
- 1 Key Takeaways
- 2 📑 Table of Contents
- 3 How to Fix a Car Side Mirror: A Complete DIY Guide
- 4 Understanding Your Car’s Side Mirror
- 5 Tools and Materials You’ll Need
- 6 Step-by-Step Guide: How to Fix a Car Side Mirror
- 7 Common Problems and How to Fix Them
- 8 Tips for a Successful Repair
- 9 When to Call a Professional
- 10 Conclusion
- 11 Frequently Asked Questions
Knowing how to fix a car side mirror can save you time, money, and stress. Whether it’s a loose mirror, broken glass, or a damaged housing, most issues are fixable at home with basic tools and a little patience.
Key Takeaways
- Identify the problem first: Determine if the issue is with the glass, housing, motor, or wiring before starting repairs.
- Use the right tools: A trim removal tool, screwdrivers, socket set, and electrical tape are essential for most side mirror fixes.
- Work safely: Disconnect the car battery when dealing with electrical components to avoid shocks or short circuits.
- Replace only what’s broken: You don’t always need a full mirror assembly—sometimes just the glass or motor needs replacing.
- Test before finalizing: Always test the mirror’s movement and heating (if applicable) before reassembling everything.
- Consider OEM vs. aftermarket parts: OEM parts offer better fit and quality, while aftermarket options are often more affordable.
- Know when to call a pro: If wiring is complex or the mirror is deeply integrated with safety systems, professional help may be best.
📑 Table of Contents
How to Fix a Car Side Mirror: A Complete DIY Guide
Ever been backing out of a parking spot only to hear that dreaded crunch? Or maybe you’ve noticed your side mirror is hanging by a wire, or worse—completely missing? Don’t panic. Learning how to fix a car side mirror is easier than you might think, and it’s one of those automotive repairs that can save you hundreds of dollars if done right.
Side mirrors are more than just convenience features—they’re critical for safe driving. They help you monitor blind spots, change lanes confidently, and park with precision. When they’re damaged, your visibility drops, and so does your safety. The good news? Most side mirror problems are fixable at home with basic tools and a little know-how. Whether it’s a cracked glass, a wobbly housing, or a non-functioning power adjustment, this guide will walk you through the entire process step by step.
In this comprehensive article, we’ll cover everything from diagnosing the issue to replacing parts and testing your repair. We’ll also share practical tips, safety precautions, and advice on choosing the right replacement components. By the end, you’ll not only know how to fix a car side mirror—you’ll feel confident doing it yourself.
Understanding Your Car’s Side Mirror
Before diving into repairs, it’s important to understand what makes up a car side mirror. Most modern vehicles come with power-adjustable, heated side mirrors that are connected to the car’s electrical system. These mirrors consist of several key components: the mirror glass, the motor (for power adjustment), the housing (the outer shell), the mounting bracket, and the wiring harness.
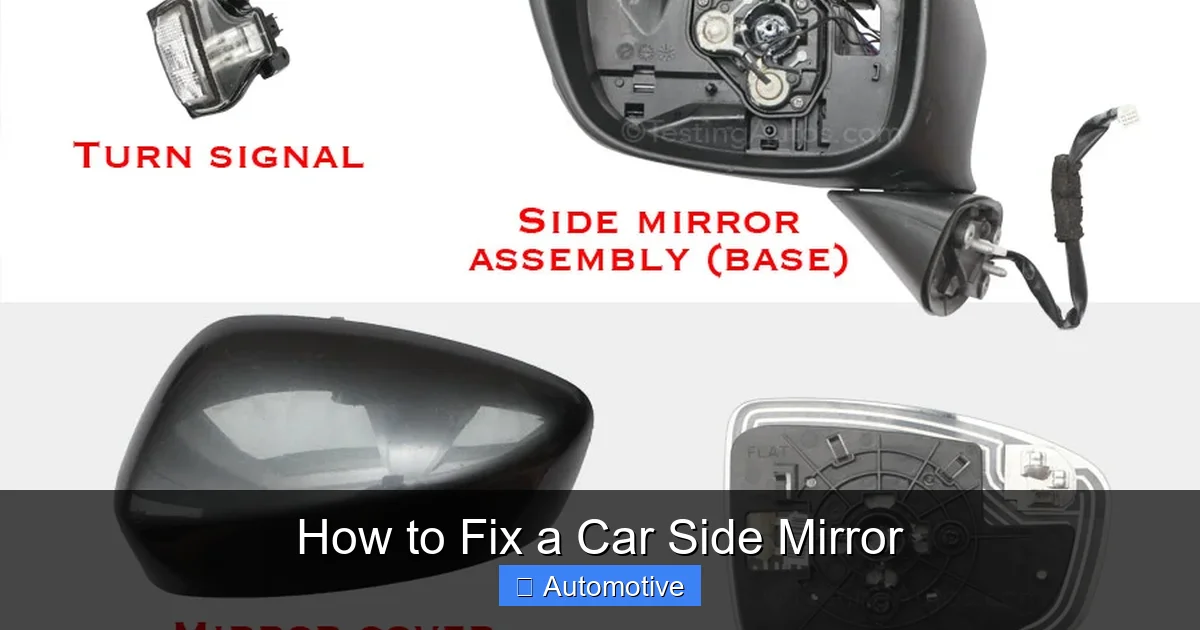
Visual guide about How to Fix a Car Side Mirror
Image source: testingautos.com
Types of Side Mirrors
There are two main types of side mirrors: manual and power. Manual mirrors are adjusted by hand and are less common on newer vehicles. Power mirrors, on the other hand, use electric motors to tilt the glass up, down, left, or right—controlled by a switch inside the car. Some high-end models even include features like auto-dimming, turn signal indicators, and blind-spot monitoring sensors built into the mirror housing.
Common Mirror Features
- Power adjustment: Allows you to move the mirror electronically from inside the car.
- Heated glass: Prevents fogging and ice buildup in cold weather.
- Auto-dimming: Reduces glare from headlights behind you.
- Turn signal indicators: Flashing lights integrated into the mirror for better visibility.
- Blind-spot monitoring: Sensors that alert you when a vehicle is in your blind spot.
Knowing which features your mirror has will help you determine the complexity of the repair. For example, if your mirror has heating or blind-spot sensors, you’ll need to be extra careful with the wiring during disassembly.
Tools and Materials You’ll Need
Having the right tools on hand makes all the difference when learning how to fix a car side mirror. You don’t need a full garage setup, but a few essentials will make the job smoother and safer.
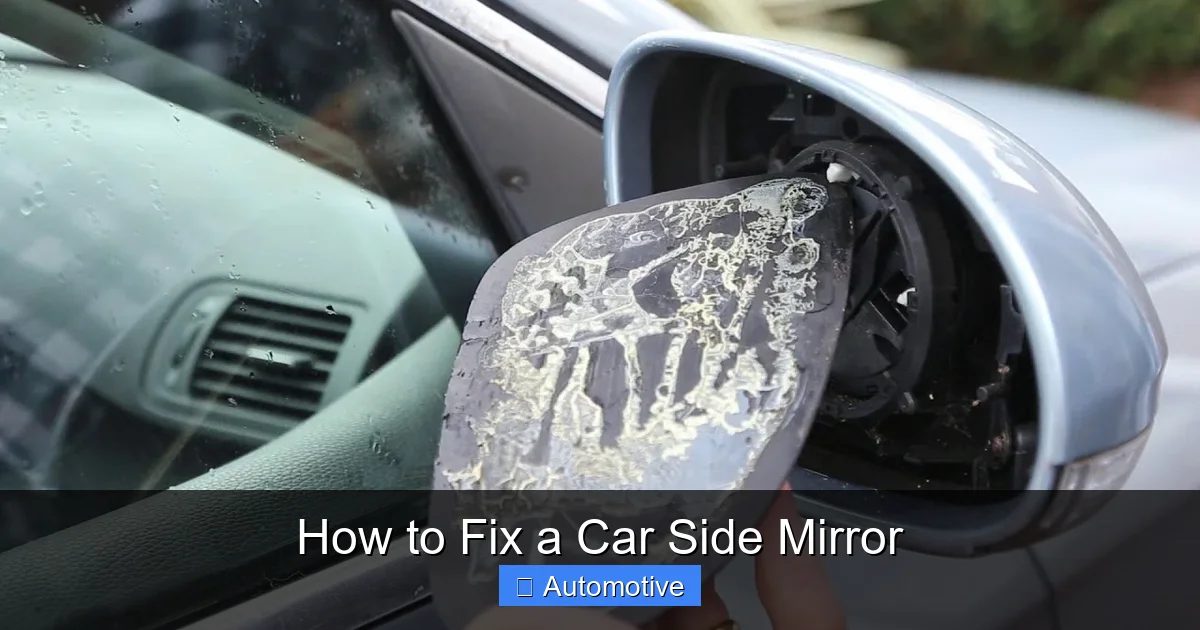
Visual guide about How to Fix a Car Side Mirror
Image source: i.ytimg.com
Basic Tools
- Trim removal tool: Prevents damage to interior panels when prying them off.
- Screwdrivers (Phillips and flathead): For removing screws in the door panel and mirror housing.
- Socket wrench set: Useful for loosening bolts behind the mirror or door.
- Needle-nose pliers: Helps grip small wires or clips.
- Electrical tape: For securing wires and preventing shorts.
- Multimeter: Optional, but helpful for testing electrical connections.
Safety Gear
- Gloves: Protect your hands from sharp edges and broken glass.
- Safety glasses: Prevent eye injuries from flying debris.
- Work light: Improves visibility, especially when working inside the door panel.
Replacement Parts
Depending on the issue, you may need one or more of the following:
- Replacement mirror glass (with or without heating element)
- New motor assembly
- Mirror housing or cover
- Wiring harness connector
- Adhesive or double-sided tape (for glass replacement)
Always check your vehicle’s make, model, and year before ordering parts. Many online retailers allow you to search by VIN to ensure compatibility.
Step-by-Step Guide: How to Fix a Car Side Mirror
Now that you’re prepared, let’s walk through the actual repair process. We’ll cover the most common scenarios: replacing broken glass, fixing a loose or damaged housing, and repairing electrical issues.
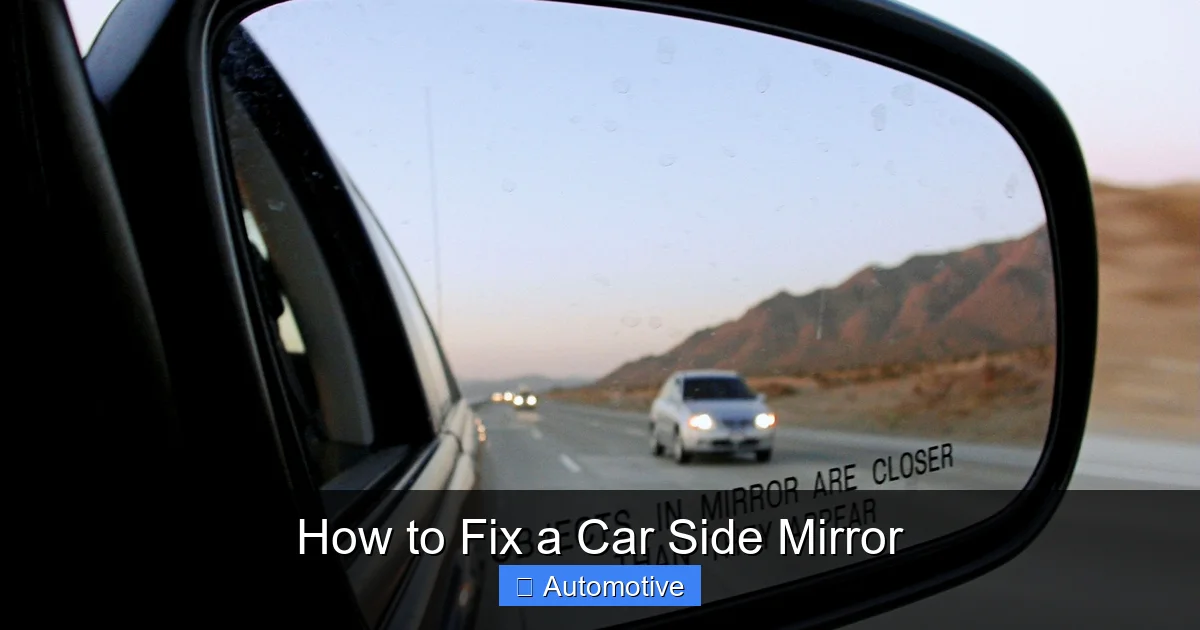
Visual guide about How to Fix a Car Side Mirror
Image source: liveabout.com
Step 1: Disconnect the Battery
Safety first! Before touching any electrical components, disconnect the negative terminal of your car battery. This prevents accidental short circuits or electrical shocks. Use a wrench to loosen the clamp and carefully remove the cable. Wrap the end with electrical tape to keep it from touching metal.
Step 2: Remove the Door Panel
Most side mirrors are accessed through the interior door panel. Start by removing any visible screws—these are often hidden behind plastic covers or armrests. Use a trim removal tool to gently pry off the panel, starting from the bottom and working your way around. Be careful not to break the plastic clips.
Once the panel is loose, disconnect any electrical connectors for power windows, locks, or mirrors. Set the panel aside in a safe place.
Step 3: Access the Mirror Assembly
With the door panel off, you’ll see the back of the mirror mounting bracket. There are usually two or three bolts holding the mirror in place. Use a socket wrench to remove them. Some mirrors may also have clips or screws inside the housing—check carefully.
Once the bolts are out, gently pull the mirror away from the door. You’ll see the wiring harness connected to the back. Carefully disconnect it by pressing the release tab and pulling it apart.
Step 4: Diagnose the Problem
Now that the mirror is out, inspect it closely. Ask yourself:
- Is the glass cracked or shattered?
- Is the housing cracked or bent?
- Does the mirror move when you press the adjustment switch?
- Is there visible damage to the wiring or motor?
This step is crucial. You don’t want to replace the entire mirror if only the glass is broken. Conversely, if the motor is fried, replacing just the glass won’t solve the problem.
Step 5: Replace the Mirror Glass
If the glass is the only issue, you can often replace it without removing the entire mirror. Many modern mirrors use a clip-on or adhesive-backed glass panel.
To remove the old glass, gently press from behind (if accessible) or use a flat tool to pry it off. Be careful—broken glass can be sharp. Once it’s off, clean the mounting surface thoroughly.
Apply new adhesive or use the clips provided with the replacement glass. Align it carefully and press firmly. Let the adhesive cure if required (usually 10–15 minutes).
For heated mirrors, ensure the new glass has the heating element and that the wires are properly connected.
Step 6: Replace the Motor or Housing
If the motor is faulty, you’ll need to replace it. Most motors are held in place by screws or clips inside the housing. Remove the old motor, install the new one, and reconnect the wiring.
If the housing is cracked or damaged, you may need to replace the entire mirror assembly. This is more involved but still doable. Simply install the new housing using the same bolts and wiring connections.
Step 7: Reassemble and Test
Once the repair is complete, reconnect the wiring harness and bolt the mirror back into place. Reattach the door panel, making sure all clips and screws are secure.
Reconnect the battery and test the mirror. Use the adjustment switch to move it in all directions. If it’s a heated mirror, turn on the defroster and check for warmth. If everything works, you’re done!
Common Problems and How to Fix Them
Even with careful driving, side mirrors take a beating. Here are some of the most common issues and how to address them.
Broken or Cracked Mirror Glass
This is the most frequent problem. Whether from a parking lot scrape or a rogue shopping cart, cracked glass reduces visibility and can be dangerous if shards fall off.
Solution: Replace the glass using a compatible replacement. Look for OEM or high-quality aftermarket glass with the same features (heated, auto-dimming, etc.). Use adhesive or clips as recommended by the manufacturer.
Loose or Wobbly Mirror
If your mirror shakes or moves on its own, the mounting bolts may be loose or the bracket damaged.
Solution: Tighten the mounting bolts. If the bracket is bent, you may need to replace it or the entire mirror assembly. Avoid over-tightening, as this can crack the housing.
Mirror Won’t Adjust
If the power adjustment doesn’t work, the motor may be dead or the wiring faulty.
Solution: Test the motor with a multimeter or try swapping it with the working mirror on the other side (if applicable). If the motor is fine, check the fuse and wiring harness for damage.
Heated Mirror Not Working
In cold weather, a non-heated mirror can fog up or ice over, making driving unsafe.
Solution: Check the fuse first—many heated mirrors share a fuse with the rear defroster. If the fuse is good, test the heating element in the glass. If it’s broken, replace the glass.
Mirror Housing Cracked or Missing
Impact damage can crack or break the plastic housing, exposing internal components.
Solution: Replace the housing or entire mirror assembly. A cracked housing can allow water to enter, leading to electrical issues or motor failure.
Tips for a Successful Repair
Even with the right steps, repairs can go sideways. Here are some pro tips to ensure your fix goes smoothly.
Take Photos Before Disassembly
Snap pictures of the mirror, wiring, and door panel before you start. This makes reassembly much easier, especially if you’re new to car repairs.
Label Wires and Screws
Use tape and a marker to label wires and screws as you remove them. This prevents confusion later, especially if you’re working on both sides.
Work in a Clean, Well-Lit Area
Dirt and poor lighting can lead to mistakes. Clear a space in your garage or driveway, and use a work light if needed.
Don’t Force Anything
If a part won’t come off, double-check for hidden screws or clips. Forcing it can cause more damage.
Use OEM Parts When Possible
While aftermarket parts are cheaper, OEM (Original Equipment Manufacturer) parts are designed specifically for your vehicle and often fit better and last longer.
Test Early and Often
After reconnecting the battery, test the mirror before fully reassembling the door. This way, if something’s wrong, you won’t have to take everything apart again.
When to Call a Professional
While many side mirror repairs are DIY-friendly, some situations call for a professional.
If your mirror is part of an advanced safety system—like blind-spot monitoring or lane departure warning—the calibration may require specialized tools. Attempting to fix it yourself could disable these features or cause false alerts.
Similarly, if the wiring is complex or the mirror is deeply integrated with the car’s computer system, a technician with diagnostic equipment may be needed.
Finally, if you’re not comfortable working with electrical systems or don’t have the right tools, it’s better to pay for professional help than risk damaging your vehicle.
That said, for most common issues—broken glass, loose mounts, or dead motors—you can confidently tackle the repair yourself and save a significant amount of money.
Conclusion
Learning how to fix a car side mirror is a valuable skill that every car owner should have. Not only does it save money, but it also gives you peace of mind knowing you can handle unexpected damage. From diagnosing the problem to replacing parts and testing the repair, the process is straightforward with the right tools and preparation.
Remember to work safely, take your time, and don’t hesitate to consult your vehicle’s manual or online forums for model-specific advice. With practice, you’ll be able to fix not just side mirrors, but other automotive components too.
So the next time you hear that crunch or notice your mirror dangling, don’t panic—grab your tools and get to work. You’ve got this.
Frequently Asked Questions
Can I drive with a broken side mirror?
It’s not recommended. Most states require at least one functional side mirror, and driving without one increases your blind spot and risk of accidents. Fix it as soon as possible.
How much does it cost to replace a car side mirror?
Costs vary widely. A replacement glass can be $20–$50, while a full mirror assembly ranges from $100 to $500 or more, depending on features and whether it’s OEM or aftermarket.
Can I fix a side mirror without removing the door panel?
Sometimes. If only the glass is broken and accessible from the outside, you may be able to replace it without removing the panel. However, for motor or wiring issues, panel removal is usually necessary.
How long does it take to fix a side mirror?
A simple glass replacement can take 15–30 minutes. A full motor or housing replacement may take 1–2 hours, especially if you’re doing it for the first time.
Do I need special tools to fix a power side mirror?
Basic tools like screwdrivers and a trim removal tool are usually enough. A multimeter can help diagnose electrical issues, but it’s not always required.
Will fixing my side mirror void my car’s warranty?
Generally, no—DIY repairs on side mirrors don’t affect your vehicle’s warranty unless they cause damage to other systems. Always check your warranty terms if unsure.


