How to Easily Replace Brakes on Ford F150: Step-by-Step Guide
Maintaining your Ford F150 goes beyond just oil changes and tire rotations. One of the most critical safety tasks is knowing how to replace brakes on Ford F150 effectively. Brakes are the heart of your vehicle’s stopping power, and neglecting them can lead to dangerous situations. Whether you’re a DIY enthusiast or just looking to save on repair costs, this guide will walk you through each step in a friendly, easy-to-follow way. By the end, you’ll have the confidence to replace your brakes safely and efficiently, keeping your truck in top condition.
Why Brake Maintenance on Your F150 Matters
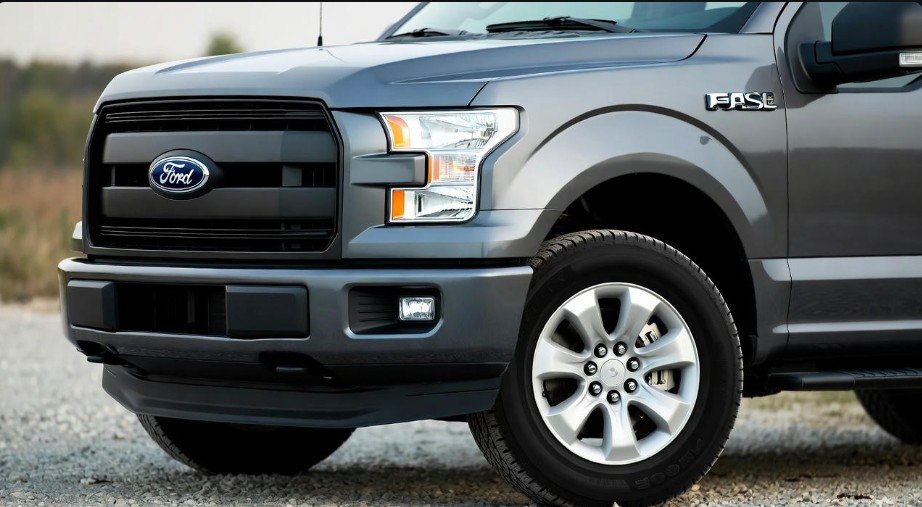
Imagine driving down a busy highway and realizing your brakes aren’t responding as they should. Scary, right? That’s why regular brake maintenance is non-negotiable for your Ford F150. Brakes wear down over time due to friction, heat, and daily use. Ignoring worn pads or corroded rotors can lead to longer stopping distances, uneven wear, and, worst-case scenario, accidents.
Regular brake maintenance not only ensures your safety but also protects your investment. A well-maintained braking system improves control, responsiveness, and overall driving experience. By staying on top of brake inspections and replacements, you prevent costly repairs down the line and keep your truck performing like new. Think of it as giving your F150 the gift of longevity—your brakes are its unsung heroes on the road.
Tools and Materials You’ll Need
Before diving under your truck, it’s crucial to have the right tools and materials. Skipping this step can lead to frustration and delays. Here’s a handy table of essentials:
| Tools | Materials |
|---|---|
| Jack and jack stands | New brake pads |
| Lug wrench | New brake rotors |
| Socket wrench set | Brake cleaner |
| C-clamp | Brake lubricant |
| Wire brush | Brake hardware kit |
| Flathead screwdriver | Brake fluid |
| Brake piston tool | Shop towels |
Having these ready ensures a smoother workflow and keeps you focused on the task without running back and forth. Pro tip: always consult your Ford F150 manual for model-specific guidance. The right tools make all the difference, turning a complicated process into a manageable and even enjoyable task.
Step 1: Preparing for Brake Replacement
Preparation is half the battle. Start by parking your F150 on a flat, secure surface and turning off the engine. Using a hydraulic floor jack, lift the truck and place it securely on jack stands. This ensures stability and prevents accidents while you work.
Next, remove the wheels to expose the brake assembly. Take a moment to inspect the current brake pads, rotors, and calipers. Look for signs of wear like grooves, cracks, or thinning pads. Check the brake pad’s wear indicator—this small metal tab will alert you if the pad is near its end of life. Cleaning and lubricating the caliper slides at this stage ensures smoother operation later. Preparing properly sets the stage for an efficient and safe brake replacement, saving you time and potential headaches down the road.
Step 2: Removing the Brake Caliper Assembly
Once you’re set, it’s time to remove the brake caliper. Start by loosening and removing the caliper bolts using a socket wrench. Keep track of these bolts—they’ll need to be reinstalled precisely.
Carefully lift the caliper away from the rotor. Avoid letting it hang by the brake line, which could cause damage. A caliper hanger or strong wire works perfectly to suspend it safely. With the caliper removed, you now have clear access to the brake pads and rotors. Taking this step slowly and methodically prevents accidents and ensures no components get damaged.
Step 3: Removing the Brake Pads and Hardware
With the caliper safely out of the way, the old brake pads can be removed. Inspect them for uneven wear, cracking, or thinning—any of these signs means replacement is urgent. Release the clips or retaining pins holding the pads in place carefully to avoid damaging other components.
Don’t forget the brake hardware. Clips, shims, and springs wear over time, affecting performance and causing noise or vibrations. Replacing these with a compatible brake hardware kit ensures your new pads function optimally and last longer. Think of it as giving your brake system a fresh start, ready to deliver smooth, reliable stopping power.
Step 4: Preparing the New Brake Pads
Before installing your new pads, preparation is key. Lubricate the caliper slide pins with a high-temperature brake grease to allow smooth movement. This prevents sticking and uneven pad wear.
Check for any shims or clips required for proper fitment. These small pieces might seem insignificant, but they help prevent noise, vibration, and premature wear. Correct installation at this stage ensures the brake pads perform at their best and extend their lifespan. Taking the time to properly prep the pads now will save effort and potential frustration later.
Step 5: Installing the New Brake Pads
Now comes the exciting part: installing the new brake pads. Position them carefully inside the caliper bracket, ensuring they fit snugly and correctly on both sides. Proper alignment is crucial; misaligned pads can reduce braking efficiency and create noise.
Once fitted, double-check everything is secure. At this stage, small mistakes can cause major problems, so patience is your best friend. With the pads installed, your F150 is one step closer to having a refreshed, reliable braking system.
Step 6: Reinstalling the Brake Caliper Assembly
After installing the new brake pads, it’s time to reattach the caliper. Carefully position the caliper over the pads and rotor. Make sure the pads are properly aligned to avoid rubbing or uneven braking.
Once positioned, reinsert the caliper bolts and tighten them according to the manufacturer’s torque specifications. Over-tightening can damage the caliper, while under-tightening could compromise safety. Always double-check the alignment and ensure the caliper moves freely on its slides. This step is critical because the caliper holds the pads in place and ensures even pressure is applied to the rotor every time you brake. Proper reinstallation restores your F150’s stopping power to its full potential.
Step 7: Testing and Bedding the Brakes
Now that everything is assembled, testing is essential. Start by pumping the brake pedal several times to build pressure in the system. You should feel a firm pedal—if it feels spongy, check for air in the lines and bleed if necessary.
Next, take your F150 for a slow, controlled test drive in a safe area. Perform gradual stops to test the brakes. This is also the perfect time to bed the brakes. Bedding involves moderate stops from around 30 mph, allowing the pad material to transfer to the rotor gradually. This ensures maximum contact and smoother braking. Proper bedding prevents uneven wear, noise, and reduced performance in the future.
Tips and Precautions for Replacing Brakes on Ford F150
Replacing brakes on your Ford F150 is rewarding but requires caution. Follow these tips for safety and efficiency:
-
Always wear gloves and safety goggles to protect your hands and eyes.
-
Ensure the vehicle is on a level surface and securely supported with jack stands.
-
Loosen lug nuts before lifting the truck; it’s safer than trying to loosen them while suspended.
-
Use correct torque settings when tightening caliper bolts and wheel lug nuts.
-
Do not let the caliper hang by the brake line—use a hanger or strong wire.
-
Bleed the brakes properly to remove any trapped air for optimal pedal feel.
-
Avoid rushing: take your time to ensure every step is done correctly.
These precautions protect both you and your F150, ensuring a smooth, safe brake replacement process.
Benefits of DIY Brake Replacement
Learning to replace brakes on Ford F150 yourself comes with several perks:
-
Cost Savings: You avoid expensive labor fees at repair shops.
-
Knowledge Gain: Understanding your truck’s braking system improves confidence and troubleshooting skills.
-
Prevention of Future Issues: Regular inspection and replacement prevent bigger, costlier repairs.
-
Enhanced Safety: Fresh brakes mean reliable stopping power, reducing accident risk.
Taking on this DIY project allows you to build a stronger connection with your vehicle while saving money—a win-win for every truck owner.
FAQs About Replacing Brakes on Ford F150
1. How often should I replace my F150 brakes?
Brake pads typically last 30,000–70,000 miles, depending on driving habits. Inspect regularly for wear.
2. Can I replace just the front or rear brakes?
Yes, but it’s recommended to replace brakes in pairs (front or rear) to maintain balanced braking.
3. Do I need to bleed the brakes after replacement?
If you opened the hydraulic system or notice a soft pedal, yes. Proper bleeding ensures brake responsiveness.
4. Can I do this without professional help?
Absolutely! With the right tools, precautions, and step-by-step guidance, DIY brake replacement is manageable.
5. How do I know if my brake rotors need replacing?
Look for grooves, cracks, or warping. Excessive vibration during braking is also a sign.
6. What is bedding brakes, and why is it important?
Bedding transfers pad material to the rotor for even contact, ensuring smooth and efficient braking.
7. Are there any special tools required for my Ford F150?
A standard jack, jack stands, socket set, C-clamp, and brake piston tool are usually sufficient.
8. Can I reuse old hardware?
Not recommended. Worn clips or springs can lead to noise and uneven pad wear. Always use a new hardware kit.
Wrapping Up
Replacing the brakes on your Ford F150 might seem intimidating, but with the right guidance, it’s entirely doable. Following proper procedures, safety precautions, and manufacturer recommendations ensures your truck stops reliably every time.
Regular brake maintenance not only guarantees safety but also extends the life of your brake system. By performing DIY brake replacement, you save money, gain confidence, and prevent major issues before they become costly. Your F150 deserves attention, and taking care of the brakes is one of the most important ways to protect both yourself and your vehicle.
Remember, a truck with well-maintained brakes is not just safer—it’s more enjoyable to drive. So grab your tools, follow these steps carefully, and give your Ford F150 the braking performance it deserves. Happy wrenching!


