How to Clean Tinted Car Windows
Cleaning tinted car windows requires special care to avoid peeling, bubbling, or discoloration. Using the right tools and techniques ensures your tint stays clear, durable, and looking new for years.
Key Takeaways
- Use ammonia-free cleaners: Ammonia can degrade tint film over time, causing it to peel or fade.
- Choose soft, lint-free cloths: Microfiber towels prevent scratches and leave a streak-free finish.
- Avoid abrasive tools: Scrubbing pads or rough sponges can scratch the delicate tint surface.
- Clean in the shade: Direct sunlight dries cleaners too quickly, leading to streaks and residue.
- Spray cleaner on the cloth, not the window: This prevents liquid from seeping under the edges of the tint.
- Be gentle around edges: Tint film is most vulnerable at the borders—press lightly to avoid lifting.
- Maintain regularly: Weekly light cleaning prevents buildup and extends the life of your tint.
📑 Table of Contents
Why Tinted Windows Need Special Care
If you’ve invested in window tinting for your car, you already know the benefits: reduced glare, improved privacy, UV protection, and a sleek, modern look. But what many drivers don’t realize is that tinted windows aren’t just regular glass—they’re layered with a thin film that requires gentle, consistent care. Unlike standard car windows, tinted surfaces are sensitive to harsh chemicals, abrasive tools, and improper cleaning methods. Neglecting proper maintenance can lead to bubbling, peeling, discoloration, or even complete failure of the tint film.
Think of your tinted windows like a smartphone screen protector. It does a great job protecting the surface underneath, but it’s not indestructible. Scratches, chemical damage, or moisture trapped underneath can ruin its appearance and function. The same principle applies to car window tint. Whether you have factory-installed tint or aftermarket film, the cleaning process must be approached with care. Using the wrong cleaner or technique might save you a few minutes today but could cost you hundreds in replacement tomorrow.
That’s why learning how to clean tinted car windows properly is essential. It’s not just about making your car look good—it’s about preserving your investment and ensuring your tint continues to perform as intended. In this guide, we’ll walk you through everything you need to know, from choosing the right products to mastering the best techniques. By the end, you’ll have a clear, confident routine that keeps your tinted windows spotless and protected.
Understanding Car Window Tint: Types and Vulnerabilities
Visual guide about How to Clean Tinted Car Windows
Image source: wikihow.com
Before diving into cleaning methods, it’s important to understand what window tint actually is and why it’s so delicate. Car window tint is a thin, multi-layered film applied to the interior side of your vehicle’s glass. It’s designed to block heat, reduce UV rays, minimize glare, and enhance privacy. But not all tints are created equal—different types vary in material, durability, and sensitivity.
The most common types include dyed, metalized, carbon, and ceramic films. Dyed tint is the most affordable and offers good heat rejection, but it’s also the most prone to fading over time. Metalized tint contains tiny metallic particles that reflect heat, making it more durable but potentially interfering with GPS or cell signals. Carbon tint provides a matte finish and excellent heat resistance without signal interference. Ceramic tint is the premium option—highly durable, fade-resistant, and top-performing in heat rejection.
Despite their differences, all tint films share one critical vulnerability: they’re applied directly to the glass and held in place by adhesive. This means that excessive moisture, harsh chemicals, or physical abrasion can compromise the bond between the film and the glass. Over time, this can cause the edges to lift, bubbles to form, or the film to crack. Additionally, many tints are dyed or coated with materials that can react poorly to certain cleaners—especially those containing ammonia.
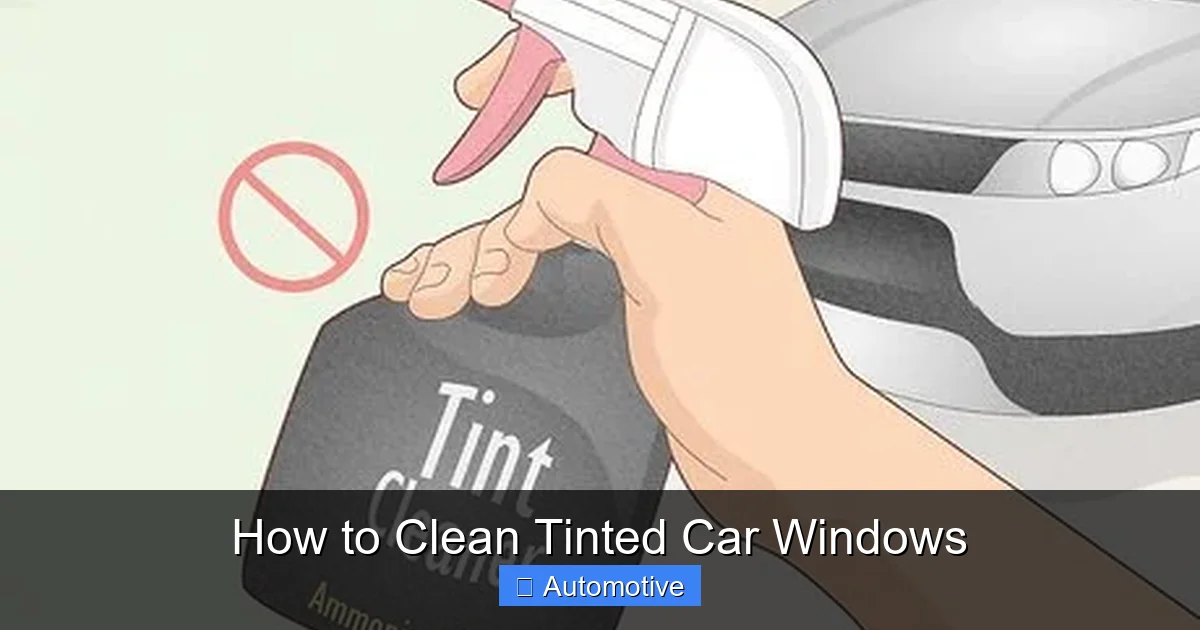
Ammonia is a common ingredient in household glass cleaners like Windex, but it’s a known enemy of window tint. It breaks down the dyes and adhesives in the film, leading to discoloration, cloudiness, or peeling. Even if you don’t see immediate damage, repeated exposure weakens the tint over time. That’s why using ammonia-free cleaners is non-negotiable when learning how to clean tinted car windows.
Another factor to consider is the age of your tint. Older films are more fragile and may already be showing signs of wear. If your tint is more than five years old, you’ll need to be extra cautious—gentle pressure, minimal moisture, and frequent inspections are key. Newer tints, especially high-quality ceramic or carbon films, are more resilient but still require proper care to maintain their performance and appearance.
Essential Tools and Products for Safe Cleaning
Visual guide about How to Clean Tinted Car Windows
Image source: wikihow.com
Now that you understand why tinted windows need special attention, let’s talk about the tools and products that will help you clean them safely and effectively. The right supplies make all the difference—they prevent damage, save time, and deliver a streak-free shine every time.
First and foremost, choose a cleaner specifically formulated for tinted windows. Look for labels that say “ammonia-free” or “safe for tinted glass.” Many automotive brands offer tint-safe cleaners, such as Invisible Glass Tint-Safe Formula, Stoner Car Care Invisible Glass, or Meguiar’s Perfect Clarity Glass Cleaner. These products are designed to cut through dirt and grime without harming the film. Avoid generic glass cleaners, even if they claim to be “safe for all surfaces”—many still contain ammonia or other harsh solvents.
Next, invest in high-quality microfiber cloths. These are soft, absorbent, and lint-free, making them ideal for cleaning delicate surfaces. Avoid paper towels, rags, or old T-shirts—they can leave behind fibers or scratch the tint. For best results, use two separate microfiber cloths: one for applying the cleaner and one for drying and buffing. This prevents cross-contamination and ensures a flawless finish.
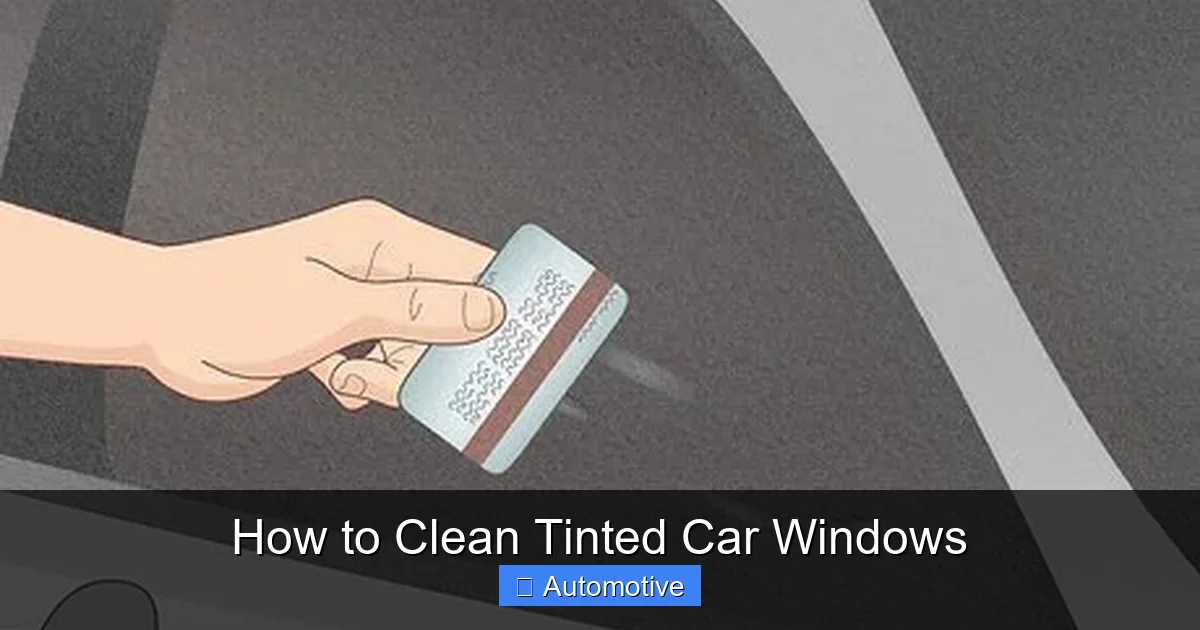
You’ll also want a soft-bristle brush or a dedicated window cleaning tool with a microfiber pad. These are great for gently loosening dirt around the edges of the window, where grime tends to accumulate. Just remember to use light pressure—scrubbing too hard can lift the tint at the seams.
Spray bottles are another helpful tool. Instead of spraying cleaner directly onto the window (which can allow liquid to seep under the tint), spray it onto your microfiber cloth first. This gives you better control and reduces the risk of moisture intrusion. If you prefer a ready-to-use spray, make sure it’s applied lightly and wiped off quickly.
For those hard-to-reach spots—like the corners of rear windows or between the glass and the trim—a soft toothbrush can be a lifesaver. Use it to gently dislodge dirt without scratching the surface. And if you’re dealing with stubborn residue, like tree sap or bug splatter, let the cleaner sit for a minute before wiping. Never scrape or pick at the tint—patience is key.
Finally, consider using a glass sealant or protectant after cleaning. These products create a hydrophobic layer that repels water, dirt, and UV rays, making future cleanings easier and extending the life of your tint. Just make sure the product is tint-safe and applied according to the manufacturer’s instructions.
Step-by-Step Guide to Cleaning Tinted Windows

Visual guide about How to Clean Tinted Car Windows
Image source: wikihow.com
Now that you have the right tools, it’s time to put them to work. Follow this step-by-step guide to clean your tinted car windows like a pro—safely, efficiently, and without damaging the film.
Step 1: Park in the Shade
Start by parking your car in a shaded area, away from direct sunlight. Cleaning in the sun causes cleaners to dry too quickly, leaving behind streaks and residue. It also makes the tint more susceptible to heat damage. If you can’t find shade, wait until the evening or early morning when temperatures are cooler.
Step 2: Rinse the Windows
Use a hose or a bucket of clean water to rinse the exterior of the windows. This removes loose dirt, dust, and debris that could scratch the surface during cleaning. Don’t use high-pressure washers—they can force water under the tint edges. A gentle spray is all you need.
Step 3: Prepare Your Cleaning Solution
Spray your ammonia-free cleaner onto a microfiber cloth—not directly onto the window. This prevents excess liquid from pooling at the edges of the tint. Use a light mist; you don’t need a lot of product to get the job done.
Step 4: Wipe the Interior Surface
Starting at the top of the window, gently wipe the interior surface in a circular motion. Work your way down, applying light pressure. Pay special attention to the edges, where dirt and moisture often collect. Use a soft toothbrush for tight corners, but avoid pressing too hard.
Step 5: Dry and Buff
Immediately after wiping, use a clean, dry microfiber cloth to buff the window. This removes any remaining cleaner and prevents streaks. Continue buffing until the surface is completely clear and shiny.
Step 6: Repeat for Exterior (Optional)
If the exterior of your windows is also tinted (less common but possible), repeat the process using the same ammonia-free cleaner. Be extra cautious around door seals and trim, where water can seep in.
Step 7: Inspect and Maintain
Once you’re done, inspect each window for streaks, smudges, or lifted edges. If you notice any issues, address them gently. For ongoing maintenance, clean your tinted windows once a week to prevent buildup.
Common Mistakes to Avoid
Even with the best intentions, it’s easy to make mistakes when cleaning tinted windows. Here are some of the most common errors—and how to avoid them.
One of the biggest mistakes is using ammonia-based cleaners. As mentioned earlier, ammonia breaks down tint film over time. Always check the label and opt for ammonia-free alternatives. Another frequent error is spraying cleaner directly onto the window. This can cause liquid to seep under the edges, leading to peeling or bubbling. Always spray onto the cloth first.
Using abrasive tools is another common pitfall. Steel wool, scrub pads, or rough sponges may seem effective for tough grime, but they scratch the delicate tint surface. Stick to soft microfiber cloths and gentle motions.
Cleaning in direct sunlight is also problematic. The heat causes cleaners to evaporate too quickly, leaving behind streaks and residue. It can also make the tint more brittle and prone to damage. Always clean in the shade or during cooler parts of the day.
Over-wetting the window is another issue. Too much moisture can penetrate the edges of the tint, especially if the adhesive is already weakened. Use minimal cleaner and wipe it off quickly.
Finally, many people neglect regular maintenance. Tinted windows don’t need deep cleaning every day, but weekly light wiping prevents dirt buildup and keeps the film in good condition. Skipping routine care can lead to harder-to-remove grime and potential damage over time.
Maintaining Your Tint for Long-Term Performance
Cleaning is just one part of tint care—ongoing maintenance is what keeps your windows looking great and performing well for years. Here are some tips to extend the life of your tint and protect your investment.
First, establish a regular cleaning schedule. Once a week is ideal for most drivers. This prevents dirt, oils, and environmental contaminants from building up. If you live in a dusty area or drive frequently, you may need to clean more often.
Second, inspect your tint regularly. Look for signs of damage like peeling edges, bubbles, discoloration, or cracks. Early detection allows you to address issues before they worsen. If you notice lifting at the corners, avoid pulling or pressing on it—this can cause further separation.
Third, avoid placing stickers, decals, or adhesives on tinted windows. The glue can react with the film or leave behind residue that’s difficult to remove. If you must use a sticker, place it on untinted glass or remove it carefully after use.
Fourth, be mindful of what you place on your dashboard. Items like phones, sunglasses, or loose objects can scratch the interior of your windshield if they slide around. Use dashboard mats or holders to keep things secure.
Fifth, consider applying a tint protectant. These products create a barrier against UV rays, dirt, and moisture. They’re especially useful in hot climates or for older tints. Just make sure the product is compatible with your type of film.
Finally, if your tint starts to fail—peeling, bubbling, or fading—consult a professional. Attempting DIY repairs can cause more harm than good. A certified installer can assess the damage and recommend replacement if needed.
Conclusion
Learning how to clean tinted car windows doesn’t have to be complicated—it just requires the right knowledge, tools, and habits. By avoiding harsh chemicals, using soft cloths, and following a gentle cleaning routine, you can keep your tint looking clear, smooth, and professional for years to come. Remember, your tint is more than just a cosmetic upgrade—it’s a functional layer that protects you from heat, glare, and UV damage. Treat it with care, and it will continue to serve you well.
Regular maintenance, proper products, and a little patience go a long way. Whether you’re cleaning your daily driver or a classic car with vintage tint, these tips will help you preserve the beauty and performance of your windows. So the next time you grab a cleaner and a cloth, do it with confidence—you’ve got this.
Frequently Asked Questions
Can I use Windex on tinted windows?
No, Windex contains ammonia, which can damage tinted film over time. Always use an ammonia-free cleaner specifically designed for tinted glass.
How often should I clean my tinted windows?
Aim to clean them once a week to prevent dirt buildup. In dusty or high-traffic areas, you may need to clean more frequently.
What should I do if my tint starts peeling?
Avoid pulling or pressing on the peeling area. Contact a professional tint installer to assess the damage and recommend repair or replacement.
Can I clean tinted windows in the sun?
It’s best to avoid direct sunlight. Heat causes cleaners to dry too quickly, leading to streaks and potential damage to the film.
Are all microfiber cloths safe for tinted windows?
Yes, as long as they’re clean, lint-free, and soft. Avoid cloths with rough textures or those that have been used with harsh chemicals.
Can I use vinegar to clean tinted windows?
Diluted vinegar can be safe if rinsed off quickly, but it’s better to use a dedicated tint-safe cleaner to avoid any risk of damage.