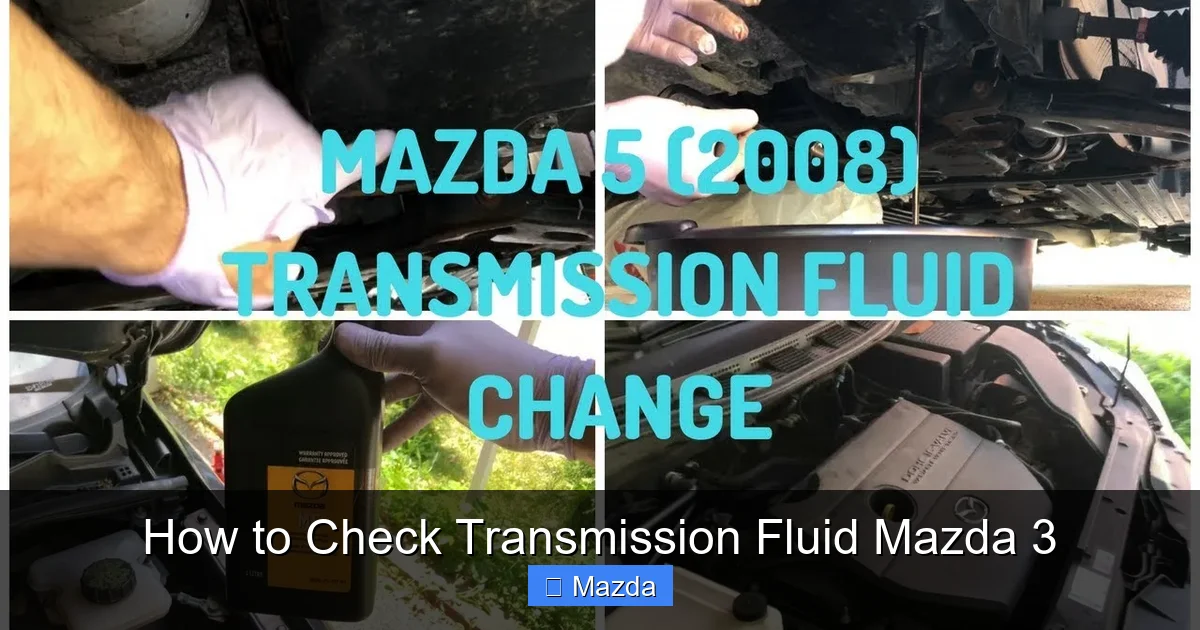
How to Check Transmission Fluid Mazda 3
Contents
- 1 Key Takeaways
- 2 📑 Table of Contents
- 3 Why Checking Your Mazda 3’s Transmission Fluid is Non-Negotiable
- 4 Understanding Your Mazda 3’s Transmission: Automatic vs. CVT
- 5 Getting Ready: Tools, Safety, and the Golden Rules
- 6 Step-by-Step: How to Check Transmission Fluid on a Mazda 3
- 7 Interpreting Your Results: From “All Good” to “Emergency”
- 8 When and How to Add or Change Transmission Fluid
- 9 Pro Tips for Long-Term Mazda 3 Transmission Health
- 10 Conclusion: Your Simple Act of Prevention
- 11 Frequently Asked Questions


Keeping your Mazda 3’s transmission healthy starts with regular fluid checks. This simple, 10-minute task ensures smooth shifting and prevents expensive damage. You’ll need the engine warm, the car parked level, and a clean cloth. Locate the dipstick, wipe it, reinsert, and read the level and condition. If the fluid is low, dirty, or smells burnt, it’s time for service.
Key Takeaways
- Check monthly or before long trips: A quick visual check can catch low levels or contamination early, saving you from major transmission repairs.
- Use only Mazda-approved ATF: Using the wrong fluid, like generic dexron or martin fluids, can cause slippage and wear. Consult your owner’s manual for the exact specification (e.g., Mazda ATF FZ).
- Engine must be warm and car level: The fluid expands when hot. Check with the engine idling in park on a flat surface for an accurate reading.
- Wipe and read both sides of the dipstick: Fluid can cling to one side. The “Full” mark is often a cross-hatched area or two separate lines.
- Fluid color and smell tell a story: Healthy fluid is bright red and smells slightly sweet. Brown, dark red, or a burnt odor means it’s oxidized and needs immediate change.
- Low fluid usually means a leak: If you’re consistently adding fluid, have a mechanic inspect for leaks at seals, pans, or lines. Don’t ignore it.
- Some modern models lack a dipstick: While most Mazda 3s have one, certain trims or future designs may use a sealed system requiring a professional scan tool. Always verify in your manual.
📑 Table of Contents
- Why Checking Your Mazda 3’s Transmission Fluid is Non-Negotiable
- Understanding Your Mazda 3’s Transmission: Automatic vs. CVT
- Getting Ready: Tools, Safety, and the Golden Rules
- Step-by-Step: How to Check Transmission Fluid on a Mazda 3
- Interpreting Your Results: From “All Good” to “Emergency”
- When and How to Add or Change Transmission Fluid
- Pro Tips for Long-Term Mazda 3 Transmission Health
- Conclusion: Your Simple Act of Prevention
Why Checking Your Mazda 3’s Transmission Fluid is Non-Negotiable
Let’s be real: when you think about car maintenance, your mind probably jumps to oil changes and tire rotations. Transmission fluid? That’s the stuff you forget about until something goes wrong. But here’s the truth—staying on top of your Mazda 3 transmission fluid is one of the absolute best things you can do for your car’s longevity and your wallet. This special liquid does three critical jobs: it lubricates hundreds of moving parts inside the gearbox, it acts as a hydraulic fluid to engage gears, and it helps cool the entire system. Without enough clean fluid, metal grinds on metal, heat soars, and your transmission can fail prematurely. A new transmission for a Mazda 3 can easily cost $3,000 to $5,000 or more. In contrast, a fluid check and potential top-up or change costs pennies on the dollar. Taking ten minutes to learn how to check transmission fluid on a Mazda 3 is a tiny investment for massive peace of mind.
For the 2024 through 2026 model years, the Mazda 3 continues to be a beloved, fun-to-drive compact sedan and hatchback. Most of these models come with either a traditional 6-speed automatic transmission (for the 2.5L engine) or a very smooth 6-speed automatic for the 2.0L (in some markets). You might also encounter a manual transmission in certain trims. The process for checking fluid is largely the same across these, but with a key difference: manuals typically don’t have a dipstick and require a different procedure. This guide focuses on the automatic transmission, which is the most common. If you own a manual, your maintenance will involve checking the fluid via a plug on the transmission case itself, a job often best left to a professional unless you’re very experienced. For the vast majority of Mazda 3 owners, the dipstick method applies.
Understanding Your Mazda 3’s Transmission: Automatic vs. CVT
Before we grab the dipstick, it’s helpful to know what you’re looking at. A common point of confusion is the term “CVT” (Continuously Variable Transmission). Many manufacturers, like Nissan and some Honda models, use CVTs which have a completely different internal design and often do not have a traditional dipstick. Instead, they have a sealed system with a check/fill plug accessed from underneath the car or via a special procedure. The good news for Mazda 3 owners is that Mazda has largely stuck with proven, conventional automatic transmissions for this model, not CVTs. This means your Mazda 3 almost certainly has a simple, accessible dipstick in the engine bay—a major advantage for DIY maintenance.

Visual guide about How to Check Transmission Fluid Mazda 3
Image source: i.ytimg.com
The Dipstick: Your Transmission’s Window to the World
That long, T-handled wand poking out of your engine bay is your best friend. It’s usually colored red or yellow to differentiate it from the oil dipstick (which is often yellow or orange). On the Mazda 3, you’ll find it on the passenger side (right side) of the engine compartment, near the firewall (the wall between the engine and the cabin). It’s often tucked behind some wiring or hoses, so you might need to peer around a bit. The handle should be clearly marked with a transmission symbol—a simple gear icon—or the words “ATF” (Automatic Transmission Fluid). If you’re having trouble, your owner’s manual will have a labeled diagram of the engine bay. Never confuse the oil dipstick with the transmission dipstick. They are in different locations and checking the wrong one can cause serious damage.
For comparison, if you were to look under the hood of a Honda Civic or a Nissan Sentra, the setup is similar. However, as noted, many modern Nissans with CVT transmissions have eliminated the dipstick entirely, requiring a more complex procedure at a dealership or shop. Your Mazda 3’s traditional dipstick system is a breath of fresh air for the home mechanic.
Getting Ready: Tools, Safety, and the Golden Rules
You don’t need a garage full of tools for this job. In fact, you probably have everything you need already. But before you pop the hood, let’s go over the absolute essentials and the non-negotiable safety rules. Skipping these steps can lead to a misread, a burned hand, or a damaged transmission.

Visual guide about How to Check Transmission Fluid Mazda 3
Image source: i.ytimg.com
The Minimalist Toolkit
- A clean, lint-free cloth or paper towels: You’ll use this to wipe the dipstick clean. Grease or dirt on the cloth can contaminate the fluid.
- A funnel (optional but helpful): If you need to add fluid, a funnel with a long, thin spout prevents spills. Some Mazda 3 fill tubes are a bit awkward.
- Your Mazda 3 Owner’s Manual: This is your ultimate reference. It specifies the exact fluid type (usually Mazda ATF FZ or a specific equivalent), the correct capacity, and the precise checking procedure for your exact model year and trim.
- Gloves (recommended): The fluid can be hot if the engine has been running. Disposable nitrile gloves are great.
- Safety glasses: A good habit when working under the hood.
The Three Golden Rules of Transmission Fluid Checking
Rule #1: The Car Must Be on Level Ground. This is critical. If your car is parked on a slope, the fluid will pool to one side, and your dipstick reading will be wrong—usually showing low when it’s not. Find a flat parking spot or your garage floor.
Rule #2: The Engine and Transmission Must Be at Operating Temperature. Transmission fluid expands as it heats up. Mazda’s specifications call for checking the fluid when it’s between 70-80°C (158-176°F). This means you need to drive the car for at least 15-20 minutes to get everything warmed up properly. Do not check it when the engine is stone cold. However, also note Rule #3.
Rule #3: Exercise Extreme Caution with a Hot Engine. A warm transmission is ideal, but a scorching-hot one is dangerous. The fluid and the exhaust manifold can be hot enough to cause severe burns. After your drive, let the engine idle in Park for 2-3 minutes. This allows fluid to settle but keeps it warm. If you’re unsure, use an infrared thermometer. The ideal fluid temp for checking is around 170°F. If it’s much hotter, wait a few more minutes. Never try to check the fluid immediately after hard driving, towing, or climbing a long hill.
Step-by-Step: How to Check Transmission Fluid on a Mazda 3
Alright, the car is warmed up, parked flat, and the hood is up. Let’s get into the nitty-gritty. This process takes about 5 minutes if you’re methodical.

Visual guide about How to Check Transmission Fluid Mazda 3
Image source: i.ytimg.com
Step 1: Locate and Identify the Dipstick
On your Mazda 3, look on the passenger side of the engine bay. You’re searching for a long, slender metal or plastic tube with a red or yellow T-handle. It will have the transmission symbol or “ATF” printed on it. It’s often positioned near the back of the engine, closer to the firewall than the front. It might be behind a bundle of wiring or a vacuum hose—just gently move those aside if needed. Once you’ve found it, give it a gentle tug. It should pull straight out with little resistance. If it’s stuck, twist it slightly. Do not force it. If you’re looking at the oil dipstick (usually on the driver’s side), you’ve got the wrong one. Put it back and search again.
Step 2: Wipe, Reinsert, and Pull for the True Reading
This is the most important step to get an accurate reading. Pull the dipstick all the way out. Take your clean cloth and wipe the entire length of the dipstick blade (the flat metal part at the end) until it’s spotless. You want to remove all old fluid and debris. Now, fully reinsert the dipstick all the way back into its tube until it seats completely. This ensures the fluid coats the full length of the stick. Then, pull it out again, but this time, hold it vertically and look at both sides of the blade. You’ll see two sets of markings: one for “COLD” (if your manual specifies a cold check, which is rare) and one for “HOT” or “Operating Temperature.” Since we’re following the warm/hot procedure, look at the “HOT” marks.
The marks are typically two lines, a cross-hatched area, or a “Full” and “Low” indicator. The fluid level should be between these marks, ideally right in the middle. It’s not a “fill to the brim” situation. If the fluid is below the “Low” or “Add” mark, you need to add fluid. If it’s above the “Full” mark, you have overfilled it, which can also be damaging (it can cause aeration, foaming, and pressure issues).
Step 3: Assess the Fluid’s Condition
While the dipstick is out, take a moment to look at and smell the fluid on the cloth. This tells you almost as much as the level.
- Color: Brand new, healthy Mazda ATF is a translucent, bright red color—think cherry red or ruby. Over time and with use, it will darken to a deeper red or maroon, which can be normal. However, if it’s brown, dark brown, or black, it’s severely oxidized and burnt. This indicates the fluid has broken down from excessive heat and needs immediate replacement.
- Clarity: It should be clear, not cloudy or milky. A milky appearance is a huge red flag—it means coolant is mixing with the transmission fluid, likely from a failed internal radiator seal or a cracked transmission case. This is a catastrophic failure in the making.
- Smell: It should have a faint, slightly sweet or petroleum-like smell. A sharp, acrid, or burnt smell means the fluid has overheated and lost its lubricating properties.
- Texture: Rub a bit between your fingers (wear gloves). It should feel slick and oily, like new motor oil. If it feels gritty or has visible metal particles, internal wear is occurring.
Step 4: Topping Up (If Necessary)
If your level is low, you’ll need to add the correct fluid. Never overfill. Add a little at a time. Here’s how:
- Locate the fill tube. It’s the same tube the dipstick came out of. There’s often a cap or plug on the tube itself. On the Mazda 3, you usually pour directly down the dipstick tube.
- Place your funnel securely in the tube.
- Pour in the specified Mazda ATF (usually Mazda FZ or a genuine equivalent). Add about 1/2 to 1 pint at a time.
- After each small addition, repeat Steps 2 and 3: wipe, reinsert fully, pull out, and check the level. This prevents overfilling.
- Once the level is at the “Full” mark on the HOT side when warm, you’re done. Wipe up any spills immediately. Transmission fluid can damage paint and engine components.
Critical Note: If you find yourself adding more than a pint or so of fluid, you have a leak. The transmission is a sealed system. Common leak points include the pan gasket, input/output shaft seals, and cooler lines. Have this inspected by a professional immediately. Low fluid will cause harsh shifting, slipping, and eventually, total failure.
Interpreting Your Results: From “All Good” to “Emergency”
Now you have your level and condition assessment. Let’s decode what it all means for your Mazda 3’s future.
The Ideal Scenario: Level in the “Hot” Zone, Fluid Bright Red
Congratulations! Your transmission is well-maintained. The fluid is doing its job. Simply note the level and condition in your maintenance log and check again in a month or before your next long trip. This is the outcome we strive for with regular checks.
The “Slightly Low” Scenario: Level Just Below “Full”
This is common, especially in older vehicles with minor seepage past seals. If the fluid is still bright red and clean, simply top it up to the “Full” mark as described. Monitor it closely over the next few weeks. If the level drops again, start looking for a leak. Check your parking spot for fresh red fluid spots.
The “Dirty, Dark, or Smelly” Scenario
This is your transmission’s distress signal. Do not just top it up and forget it. Dark brown or black fluid with a burnt smell means the fluid’s chemical structure has broken down. It has lost its ability to lubricate and cool. Continuing to drive with this fluid is like running an engine with no oil—it will destroy itself. The only fix is a complete transmission fluid and filter change (if your filter is serviceable). This is not a simple drain-and-fill; it often requires a professional flush or multiple drain-and-fill cycles to fully replace the old, degraded fluid. If your fluid looks or smells this bad, plan for a transmission service immediately. For context, a Nissan CVT without a dipstick might not show you this condition until it’s too late, making your Mazda 3’s dipstick a valuable diagnostic tool.
The “Milky or Foamy” Scenario
This is an emergency. Milky fluid means coolant contamination. Foamy fluid can mean overfilling or aeration from a failing pump. Both conditions can cause immediate and severe damage. Do not drive the car. Have it towed to a trusted transmission specialist for diagnosis.
When and How to Add or Change Transmission Fluid
Checking is one thing; knowing when to take action is another. Let’s talk about the maintenance schedule and the difference between a simple top-up and a full service.
How Often Should You Check?
Make it a habit. Check your transmission fluid at least once a month and before any long road trip (like a vacation or visiting family). It’s also smart to check it whenever you have the oil changed—it takes two seconds and gives you a regular data point. Since the fluid level is checked with the engine warm, you might do it right after you get home from a drive, before the car cools completely.
How Often Should You Change It?
This is where your owner’s manual is gospel. Mazda’s official recommendation for the 3’s automatic transmission (for model years in this context) is typically every 60,000 to 100,000 miles, depending on driving conditions. “Severe” driving (lots of stop-and-go, extreme temperatures, towing) may require changes at the lower end of that range. Do not go by mileage alone. The condition of the fluid is more important. If your fluid is dark and smelly at 50,000 miles, change it. If it’s still bright red at 90,000 miles, you might be okay to wait, but be vigilant. For comparison, the recommended interval for a Honda Civic’s transmission fluid is often around 60,000 miles under normal conditions, showing that brands have similar philosophies.
What a “Change” Entails: A simple drain-and-fill (draining the pan and refilling) only replaces about 40-50% of the total fluid, as much remains in the torque converter and valve body. A proper “flush” or multiple drain-and-fill procedures are needed to get 90%+ new fluid. This is typically a professional job due to the complexity and need for the correct procedure to avoid air locks. A pan drop and filter replacement (if equipped) is also recommended every other change or as per manual.
Pro Tips for Long-Term Mazda 3 Transmission Health
You’ve mastered the check. Now, let’s lock in that health with some expert habits.
- Warm Up Gently: Especially in very cold weather, let your Mazda 3 idle for 30-60 seconds after a cold start before driving off. This allows fluid to circulate and lubricate properly before being put under load.
- Avoid Excessive Heat: Heat is the number one killer of transmission fluid. If you frequently tow a trailer, drive in mountainous terrain, or sit in stop-and-go traffic with the AC on max, consider shortening your fluid change interval. You might also look into an auxiliary transmission cooler.
- Shift Only When Stopped (for automatics): Always come to a complete stop before shifting from Drive to Reverse or vice-versa. “Rocking” the car by shifting while moving puts extreme shock loads on the transmission and fluid.
- Address Issues Immediately: Notice a delayed shift, a harsh “clunk,” slipping (engine revs but car doesn’t accelerate), or a new whining sound? Check the fluid level and condition first. These are classic early signs of low fluid or internal wear. Catching it early can mean the difference between a $300 fluid change and a $4,000 rebuild.
- Don’t Forget Other Mazda 3 Maintenance: Your transmission works in harmony with the engine. A clogged cabin air filter makes your AC work harder, increasing engine load and, indirectly, transmission heat. Keep up with all scheduled maintenance for optimal overall health.
Conclusion: Your Simple Act of Prevention
Learning how to check transmission fluid on a Mazda 3 isn’t just a chore—it’s an act of automotive self-defense. In a 2026 Mazda 3, this straightforward check remains one of the most powerful tools in your owner’s toolkit. The dipstick is a direct line to your transmission’s vital signs. By committing to a monthly ritual of locating it, wiping it, reinserting it, and reading it, you transform from a passive driver into an informed caretaker. You’ll catch small problems—like a minor leak or fluid degradation—before they metastasize into a terminal diagnosis for your gearbox. The cost? Ten minutes and a rag. The potential reward? Thousands of dollars saved and the confidence that your Mazda 3 will deliver its characteristic Zoom-Zoom driving pleasure for many more years and miles. Now, go pop that hood, get familiar with that red-handled dipstick, and take control of your car’s health.
Frequently Asked Questions
What type of transmission fluid does a Mazda 3 use?
Most Mazda 3 models from recent years require genuine Mazda ATF FZ or a fluid meeting the Mazda specification. Using the wrong fluid, like generic dexron or martin, can cause shifting problems and damage. Always confirm the exact type in your owner’s manual.
Can I check transmission fluid when the engine is cold?
No, for an accurate reading, the Mazda 3’s transmission fluid must be at operating temperature (70-80°C / 158-176°F). The fluid expands when hot, and the “Hot” marks on the dipstick are calibrated for this state. Checking when cold will show a falsely low level.
What are the signs of low transmission fluid?
Common signs include delayed or harsh shifting, a whining or clunking noise from the transmission, transmission slippage (engine revs but vehicle doesn’t accelerate properly), and in severe cases, overheating. A low fluid level on the dipstick is the first and most obvious indicator.
My dipstick shows no fluid at all—what should I do?
If the dipstick is completely dry after wiping and reinserting, your transmission is critically low, likely due to a major leak. Do not drive the car. Adding fluid may allow you to move it a short distance to a repair shop, but you must have the leak diagnosed and repaired immediately. Driving with no fluid will destroy the transmission in minutes.
How often should I change the transmission fluid in my Mazda 3?
Mazda typically recommends changing the automatic transmission fluid every 60,000 to 100,000 miles, depending on your driving conditions. “Severe” driving (frequent short trips, extreme temperatures, towing) may require changes at the lower end of the range. Always prioritize the schedule in your owner’s manual and adjust based on fluid condition checks.
Is it normal for transmission fluid to smell burnt?
No, a burnt smell is a serious warning sign. Healthy fluid has a faint, sweet, or petroleum-like odor. A sharp, acrid, burnt smell indicates the fluid has severely overheated and broken down. This means the transmission has been operating at excessive temperatures, either from low fluid, a failing pump, or excessive load. It requires immediate fluid replacement and diagnosis of the cause.