

How Often Should I Change the Engine Air Filter on My Toyota Corolla?
Contents
- 1 Key Takeaways
- 2 📑 Table of Contents
- 3 Why Your Toyota Corolla’s Engine Air Filter is Non-Negotiable
- 4 Decoding the “Every 15,000-30,000 Miles” Rule
- 5 How to Tell Your Air Filter is Begging for Replacement
- 6 Your Complete Guide to Changing the Engine Air Filter on a Toyota Corolla
- 7 The High Price of Ignorance: What Happens When You Skip Filter Changes
- 8 Pro Tips, Best Practices, and Common Questions
- 9 Frequently Asked Questions

Car Glass Cleaner

Portable Work Light

Car MP3 Player

Car Wash Mitt
Your Toyota Corolla’s engine air filter typically needs replacement every 15,000 to 30,000 miles, but this varies based on driving conditions. A clogged filter reduces fuel economy, power, and can damage your engine. The good news? Checking and changing it is one of the easiest DIY maintenance tasks you can do. Regular inspections during oil changes are the best practice. Ignoring a dirty filter leads to poor performance and costly repairs down the road.
Key Takeaways
- Standard Interval: Toyota recommends changing the engine air filter every 15,000-30,000 miles, but severe conditions like dusty roads or heavy traffic may require more frequent changes.
- DIY Simplicity: Replacing the air filter on a Corolla is a straightforward 10-15 minute job requiring no special tools, making it a perfect first DIY automotive task.
- Visual Inspection is Key: Always remove and inspect the filter. If it’s covered in dirt, dust, or debris, or if you can’t see light through it, it’s time for a replacement.
- Performance Warning Signs: A significantly clogged filter causes reduced acceleration, lower fuel economy, rough idling, and may even trigger a “Check Engine” light.
- Neglect Has Consequences: Running with a severely dirty filter allows abrasive particles into the engine, causing accelerated cylinder wear, piston ring damage, and potentially catastrophic failure.
- Don’t Confuse It with the Cabin Filter: The engine air filter cleans air entering the engine. The cabin air filter cleans air entering your car’s interior—a separate maintenance item with a different schedule.
- Use Genuine or Quality Filters: Always install a filter that meets Toyota specifications. Cheap, poorly fitting filters can allow unfiltered air to bypass the media, defeating the entire purpose.
📑 Table of Contents
- Why Your Toyota Corolla’s Engine Air Filter is Non-Negotiable
- Decoding the “Every 15,000-30,000 Miles” Rule
- How to Tell Your Air Filter is Begging for Replacement
- Your Complete Guide to Changing the Engine Air Filter on a Toyota Corolla
- The High Price of Ignorance: What Happens When You Skip Filter Changes
- Pro Tips, Best Practices, and Common Questions
Why Your Toyota Corolla’s Engine Air Filter is Non-Negotiable
Let’s start with a simple truth: your Toyota Corolla’s engine is a finely tuned air pump. It needs a precise mixture of clean air and fuel to run efficiently, powerfully, and cleanly. That’s where the humble engine air filter comes in. Sitting quietly in your engine bay, often in a black plastic box, it’s the first line of defense for your entire powerplant. Its only job is to trap dirt, dust, pollen, road grit, and other airborne contaminants before they can enter the combustion chambers.
Think of it like the lungs of your car. You wouldn’t breathe in polluted air without a mask, right? Your engine feels the same way. Every combustion cycle pulls in hundreds of cubic feet of air. Without a filter, that air would carry a abrasive sandblasting media that would score cylinder walls, pit piston tops, and gum up valves in no time. The filter’s fibrous media (usually a blend of cotton and synthetic fibers) is designed to capture these particles while allowing maximum airflow.
The Cost of a “Free” Breath
When the filter gets clogged, your engine has to work harder to “breathe.” It’s like trying to run a marathon while breathing through a straw. The result is a richer fuel mixture (more gas, less air) to compensate, which directly hurts your fuel economy. You might notice a 10-15% drop in MPG before other symptoms appear. Power takes a hit too—that familiar peppy feel of your Corolla becomes sluggish, especially when accelerating onto the highway or climbing hills. The engine’s computer (ECU) constantly monitors airflow and will adjust fuel delivery, but it can only compensate so much before performance suffers.
Beyond performance, a neglected filter is a direct path to expensive internal engine damage. Modern engines operate with incredibly tight tolerances. A single grain of sand can act like a grinding compound between a piston ring and cylinder wall. Over time, this wear increases oil consumption, reduces compression, and leads to a loss of power that an engine rebuild can only fix. Prevention via a simple filter change is exponentially cheaper.
Decoding the “Every 15,000-30,000 Miles” Rule
Your Toyota Corolla’s owner’s manual is the ultimate authority. For most recent model years, Toyota lists a replacement interval of every 15,000 miles under “normal” driving conditions and every 30,000 miles under “severe” conditions. This might seem backwards—why would severe conditions mean *longer* intervals? The answer lies in how Toyota defines these terms.

Visual guide about How Often Should I Change the Engine Air Filter on My Toyota Corolla?
Image source: diycarexpert.com
Normal vs. Severe: What It Really Means
“Normal” driving, in Toyota’s engineering parlance, means mostly highway miles, in areas with low dust and pollution, and with consistent speeds. “Severe” is actually what most drivers do: frequent short trips (where the engine never fully warms up and moisture can accumulate in the filter), driving in heavy stop-and-go traffic, operating in extremely dusty or sandy environments (like construction zones or rural dirt roads), or driving in areas with high air pollution or pollen counts.
This counterintuitive schedule exists because a filter on a car doing mostly highway travel sees a steady, high-volume flow of air that helps keep the media cleaner. A filter on a car doing constant city driving experiences more turbulent, lower-speed airflow and may collect more moisture and fine particulates that can cake onto the media. The 30,000-mile interval for “severe” is a maximum cap—it’s a “don’t go past this” number, not a “change exactly at this” recommendation.
- Dusty/Sandy Roads: If you regularly drive on unpaved roads, in desert areas, or follow trucks on gravel highways, check your filter every 5,000-10,000 miles. Change it immediately if it looks dirty.
- High Pollution/Pollen: Urban areas with smog or regions with high pollen counts (like the American Southwest in spring) can load up a filter much faster. Seasonal changes are a good reminder to inspect it.
- Heavy Traffic & Short Trips: The combination of low-speed, dirty air from stop-and-go traffic and incomplete engine warm-up cycles is brutal on filters. Lean towards the 15,000-mile mark or sooner.
For a real-world benchmark, many experienced mechanics and Toyota technicians will tell you: inspect the filter at every oil change. An oil change is a perfect time to pop the hood, open the airbox, and take a look. It takes 30 seconds. This habit alone will save you from guesswork and potential engine damage.
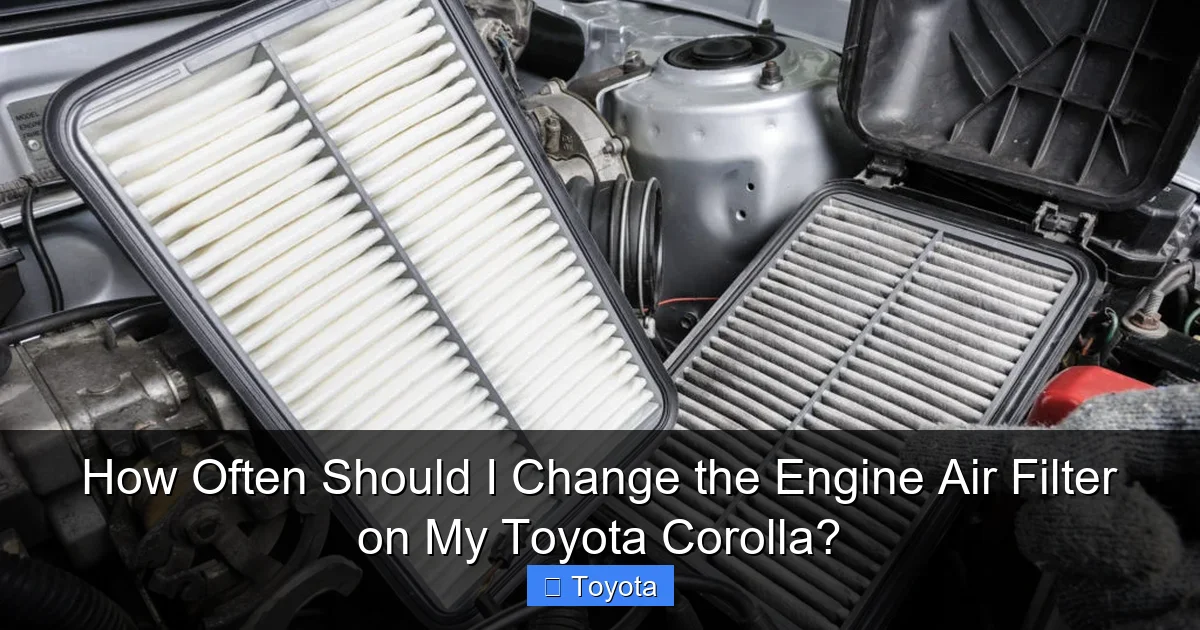
How to Tell Your Air Filter is Begging for Replacement
While mileage intervals are a useful guide, your Corolla’s air filter will give you telltale signs when it’s nearing the end of its life. Learning to recognize these symptoms is the mark of a car-savvy owner.
Visual guide about How Often Should I Change the Engine Air Filter on My Toyota Corolla?
Image source: mycarmakesnoise.com
The Visual Check: The Gold Standard
There is no substitute for looking at the filter itself. Here’s the simple procedure: Open the hood (if you’re unsure how, this guide on how to open the hood on a Toyota Corolla can help). Locate the air filter box—it’s usually a large, rectangular black plastic container on the driver’s side (left side) of the engine bay, connected to a large-diameter intake hose running from the throttle body. Release the clips or clamps holding the box together. Lift out the filter.
Now, examine it against a bright light. A clean filter will be a pale off-white or tan color, and you should be able to see light clearly through the pleated media. A filter that is dark gray, black, or caked with a visible layer of dust and grit is overdue. Try to gently tap it over a trash can; if a large cloud of dust comes out, it’s done. A useful trick: if you can’t see light through any part of the filter, it’s 100% clogged and must be replaced immediately.
Performance Symptoms You Can Feel
Before the filter is completely packed, your engine’s computer will try to compensate, and you’ll feel it:
- Reduced Acceleration & Power: The most common sign. When you press the gas pedal, the car feels hesitant, sluggish, or like it’s “suffocating.” The lack of power is most noticeable when trying to pass or merge onto a highway.
- Poor Fuel Economy: If you’re suddenly making more trips to the gas pump without changing your driving habits, a clogged air filter is a prime suspect. The engine’s inefficient combustion burns more fuel for the same power.
- Rough Idle or Misfires: An extremely dirty filter can cause the air-fuel mixture to be so far off that the engine idles roughly, shakes, or even stumbles. In severe cases, it can cause a misfire (the engine skipping a beat), which will illuminate the Check Engine light.
- Unusual Engine Sound: You might hear a sucking or whistling noise from the engine bay, indicating the engine is struggling to pull air through the restricted filter.
Remember, these symptoms can also be caused by other issues (spark plugs, fuel system, sensors). But checking the air filter is the cheapest, fastest, and easiest first diagnostic step.
Your Complete Guide to Changing the Engine Air Filter on a Toyota Corolla
Now for the fun part. Changing the engine air filter on any Toyota Corolla, from a 1990s model to a 2024, is one of the simplest maintenance procedures you can perform. It requires no tools on most models, takes less than 15 minutes, and costs less than $20 for a quality filter. Here’s a step-by-step walkthrough.

Visual guide about How Often Should I Change the Engine Air Filter on My Toyota Corolla?
Image source: i.ytimg.com
Step 1: Gather Your Materials & Ensure Safety
You’ll need: a new engine air filter (ensure it’s the correct part number for your specific Corolla year and engine—1ZZ-FE, 2ZR-FE, M20A-FKS, etc. Your local auto parts store can look it up), and possibly a flat-head screwdriver if your airbox uses screw-down clamps instead of clips. Safety first: make sure the engine is cool. Never attempt this on a recently run engine, as components can be hot. Also, ensure the parking brake is set and the car is in Park (automatic) or Neutral (manual).
Step 2: Access the Air Filter Housing
Open the hood and secure it with the prop rod. The air filter housing is the large black box on the left side of the engine. You’ll see a large, flexible intake hose (the “cold air intake” hose) running from the housing to the throttle body on the engine. This hose is usually secured with a spring clamp or a band clamp. You’ll need to loosen this clamp just enough to slip the hose off the housing. Have a rag handy to catch any minor drips, though there shouldn’t be any fluid here.
Next, locate the clips or fasteners holding the two halves of the airbox together. Most modern Corollas use 2-4 metal or plastic clips that you squeeze and lift. Some older models or certain trims might have two or four small screws (usually 10mm) holding the top on. If you encounter screws, you’ll need a socket or screwdriver.
Step 3: Remove the Old Filter
Once the box is open, simply lift out the old filter. It’s usually a rectangular or oval-shaped pleated element sitting in the lower half of the box. Take a moment to look at it—this is your baseline for future inspections. Note the direction of the airflow arrow printed on the filter’s edge (it should point toward the engine/throttle body). This is crucial for installing the new one correctly.
Step 4: Clean the Housing and Install the New Filter
Before putting the new filter in, use a clean rag to wipe out any loose debris, leaves, or dust from inside the lower airbox. Don’t use compressed air or liquid cleaners—just a dry wipe. Now, place the new filter in the box, ensuring it seats properly and sits flat. The rubber gasket/seal on the filter’s rim should make contact with the housing all around. Double-check that the airflow arrow is pointing toward the engine.
Step 5: Reassemble
Place the top of the airbox back on, aligning it with the bottom. Press down firmly on all the clips until they lock securely. If it uses screws, tighten them hand-tight plus a quarter turn—don’t overtighten and crack the plastic. Finally, reattach the intake hose to the housing’s outlet tube and secure the clamp tightly. Give the hose a gentle tug to ensure it’s not loose.
Start the engine. It might idle a bit roughly for a second as the computer adjusts to the new, unrestricted airflow. This is normal. Listen for any sucking sounds from the airbox—if you hear one, the hose or box may not be sealed properly. Shut off the engine and recheck your work if you hear this.
The High Price of Ignorance: What Happens When You Skip Filter Changes
We’ve touched on this, but let’s drive the point home. The engine air filter is an consumable item, not a “lifetime” part. Treating it as such is a gamble with one of your car’s most expensive components. The consequences of prolonged neglect are progressive but inevitable.
Phase 1: Efficiency Loss (The Silent Drain)
This is where you are right now if your filter is just moderately dirty. Your Corolla’s 1.8L or 2.0L engine is designed for a specific air-to-fuel ratio (around 14.7:1). A clogged filter restricts airflow, causing the engine control unit (ECU) to add more fuel to compensate. This “rich” mixture burns less completely. The direct results are lower miles per gallon and increased emissions. You’re literally dumping money out the tailpipe in the form of unburned gasoline. You might also notice a slight loss of throttle response—that instant “kick” when you press the pedal is muted.
Phase 2: Performance Degradation & Strain
As the filter becomes heavily loaded, the restriction becomes severe. The engine now has to work significantly harder to draw air, creating a vacuum effect that can sometimes cause the airbox to slightly deform. You’ll feel this as pronounced sluggishness. The car will feel underpowered, struggling on inclines and during passing maneuvers. The ECU may detect the airflow discrepancy and trigger a diagnostic trouble code (like P0101 for Mass Air Flow Sensor), illuminating your Check Engine light. At this stage, you might also experience a rough, uneven idle as the combustion process becomes unstable.
Phase 3: Mechanical Damage (The Expensive Reality)
This is the catastrophic phase. A filter so clogged that it starts to collapse or allows bypass of debris. Fine dust particles, now no longer being caught, are sucked past the filter media and into the intake manifold. From there, they enter the combustion chamber. These particles are harder than the aluminum alloy of your pistons and the cast iron or Nikasil-coated cylinder walls. They act as an abrasive, sandpaper-like material. The result is:
- Cylinder Wall Scoring: Linear scratches in the cylinder bore, destroying the perfect seal needed for compression.
- Piston Ring Wear: The rings that seal the piston to the wall get worn down, leading to oil consumption (burning oil) and further loss of compression.
- Valve Damage: Particles can pit valve faces and seats, leading to poor sealing and loss of power.
The fix for this is not a new filter—it’s a major engine rebuild or replacement. The cost of a new engine, or even a quality remanufactured short block, runs into thousands of dollars, plus hundreds of hours of labor. This is the ultimate “penny-wise, pound-foolish” scenario. A $15 filter changed on time saves you from a $5,000+ repair.
Pro Tips, Best Practices, and Common Questions
Now that you’re an expert on the “why” and “how,” let’s cover some advanced tips and clear up common points of confusion to keep your Corolla running like new.
Aftermarket vs. OEM: What Filter to Buy
You’ll find engine air filters from brands like Fram, Wix, K&N, Purolator, and Toyota’s own Genuine parts. For most drivers, a high-quality standard paper/media filter from a reputable brand (Fram’s “Extra Guard,” Wix, Purolator) is perfect. They offer excellent filtration and are inexpensive. Performance cotton gauze filters (like K&N) are reusable and claim to increase airflow. While they can be washed and re-oiled, their filtration efficiency for the smallest particles can be slightly lower than paper, and they require proper maintenance. For a daily-driven Corolla focused on reliability and longevity, a quality disposable filter is the simplest, most foolproof choice. Always ensure the filter fits your exact year, make, model, and engine size.
Cabin Air Filter vs. Engine Air Filter: Don’t Confuse Them!
This is a critical distinction. The engine air filter we’ve been discussing lives in the engine bay and protects the engine. The cabin air filter (also called a pollen filter) lives inside the car, usually behind the glovebox, and filters the air you breathe through the HVAC system. They are completely different parts with different replacement schedules. The cabin filter is more about your health and comfort (trapping pollen, dust, odors) and typically needs changing every 15,000-30,000 miles as well, but it’s not related to engine performance. If you’re interested in that task, here’s a guide for a Toyota RAV4, which shares similar HVAC design principles with the Corolla.
Integrating Filter Changes into Your Maintenance Routine
The easiest way to never forget is to tie it to another maintenance event. As mentioned, inspect it at every oil change. If you change your own oil, just make it part of the process. If you go to a shop, ask the technician to show you the filter and its condition. This builds a habit. You can also set a calendar reminder for 15,000 miles if you do mostly city driving. Another smart tip: when you buy your new filter, write the date and mileage on the outside of the new filter’s box with a Sharpie. When you open it to install, you’ll see that note, confirming it’s the right time.
What About “Lifetime” Filters?
Some newer vehicles (not typically Corollas) come with “lifetime” air filters that are meant to last the life of the car. This is a marketing term meaning they are designed to be cleaned and reused, not replaced. They are almost always the washable cotton gauze type (like K&N). If your Corolla has one, the maintenance involves carefully removing it, washing it with specific soap, drying it, and re-applying the special oil. It’s more involved than a simple swap. For the vast majority of Corollas on the road, they use a standard disposable filter.
Environmental Disposal
Old engine air filters are considered hazardous waste due to the concentrated contaminants they hold. Do not just throw them in the regular trash. Most auto parts stores (like AutoZone, O’Reilly, Advance Auto Parts) have free recycling programs for used oil filters and air filters. Simply bring your old filter in when you buy the new one. It’s the responsible thing to do.
Frequently Asked Questions
Can I clean and reuse a standard paper Toyota Corolla air filter?
No. Standard disposable paper or fiber filters are not designed to be cleaned. Attempting to blow them out with compressed air or wash them will damage the media’s structure, reducing its filtration efficiency and allowing dirt to pass through. They are inexpensive and meant to be replaced.
My Corolla’s air filter looks slightly dirty but not black. Should I still change it?
Yes, if it’s significantly discolored (dark gray) or you can barely see light through it, change it. A slightly tan filter with good airflow is fine. The key is airflow restriction, not just color. When in doubt during an inspection, replacing it is a cheap insurance policy.
Will changing my air filter really improve my gas mileage?
Absolutely, but only if the old filter was significantly clogged. A severely restricted filter can reduce fuel economy by 10-15%. Replacing it restores proper airflow, allowing the engine’s computer to run the optimal air-fuel mixture. On a moderately clogged filter, the improvement might be smaller (1-3%), but it’s still a free gain.
How much does a Toyota Corolla engine air filter cost to replace professionally?
If you have a shop do it, expect to pay $30-$60 for the filter plus about 0.3 to 0.5 hours of labor. With typical labor rates, that’s a $50-$100 total job. This is why DIY is so popular—the part is $10-$25, and you can do it yourself in 10 minutes with no tools.
My Check Engine light came on. Could it be the air filter?
It’s possible, but not the most common cause. A severely clogged filter can cause a lean or rich condition or trigger a Mass Air Flow (MAF) sensor code. However, many other issues are more likely. Resetting the light without fixing the underlying problem is not advised. Always have the codes read first, but checking/replacing the air filter is a great first step in the diagnostic process.
Is the engine air filter the same as the fuel filter?
No, they are completely different. The engine air filter cleans the air entering the engine. The fuel filter cleans the gasoline entering the fuel injectors. They have different locations, replacement intervals, and procedures. You can learn about fuel filter maintenance here.


