
How Do You Reset the Check Engine Light on a 2013 Toyota Rav4
Resetting the check engine light on a 2013 Toyota RAV4 is a simple process, but it requires understanding first. The light is a warning, not a reminder, so you must diagnose and fix the underlying issue before resetting. Methods include using an OBD2 scanner (the preferred professional way) or temporarily disconnecting the battery. Never ignore the light, as driving with an active fault can cause serious damage.
Key Takeaways
- The check engine light is a serious warning: It indicates an emissions-related or engine management fault. Resetting it without repairing the problem is temporary and dangerous.
- Always diagnose first: Use an OBD2 scanner to read the trouble code(s) before any reset. This tells you what system failed and guides the repair.
- Two primary reset methods: The standard method is using an OBD2 scanner to clear codes. The manual method involves disconnecting the negative battery terminal for a few minutes.
- A “drive cycle” may be needed: After a reset, the vehicle’s computer must complete a specific drive cycle to verify the repair. The light will return if the problem persists.
- Distinguish from the maintenance light: The “check engine” light is usually yellow/amber. The “maintenance required” light is a separate reminder for oil/service and resets differently.
- Professional help is often wise: If you’re uncomfortable diagnosing the code or if it returns after a reset, consult a mechanic. Some issues require expert diagnosis.
- Disconnecting the battery has side effects: It may reset radio presets, clock, and other electronic settings, and can affect the vehicle’s adaptive learning data temporarily.
📑 Table of Contents
- Introduction: That Glowing Yellow Light Means Business
- Understanding Your 2013 RAV4’s Check Engine Light
- The Golden Rule: Diagnose Before You Reset
- Method 1: The Correct Way – Using an OBD2 Scanner to Reset
- Method 2: The Manual Reset – Disconnecting the Battery
- What Happens After the Reset? The Drive Cycle
- When to Seek Professional Help: Don’t Gamble
- Conclusion: Safety First, Reset Last
Introduction: That Glowing Yellow Light Means Business
You’re driving your trusty 2013 Toyota RAV4, and suddenly, a small yellow light shaped like an engine illuminates on your dashboard. Your heart sinks a little. That’s the infamous check engine light—or more formally, the Malfunction Indicator Lamp (MIL). Your first instinct might be to figure out how to turn it off, to make that annoying warning disappear. But here’s the most critical piece of advice: the reset is the very last step in the process, not the first.
The check engine light is your RAV4’s way of saying, “Hey, something under the hood or in the emissions system isn’t working right!” It’s triggered by the Engine Control Module (ECM) when it detects a parameter outside its normal range. This could be anything from a loose gas cap (seriously, that’s common) to a failing catalytic converter (much more serious). Simply resetting the light without addressing the root cause is like turning off a fire alarm while a fire is still burning—it doesn’t solve the problem and can lead to catastrophic, expensive damage down the road.
This comprehensive guide will walk you through everything you need to know about the check engine light on your 2013 RAV4. We’ll cover what it means, why it came on, how to properly diagnose the issue, and finally, the safe and correct methods to reset the light once the problem is fixed. We’ll also clarify the common confusion between the check engine light and the separate maintenance required light, which resets differently. By the end, you’ll be equipped with the knowledge to handle this situation confidently and safely.
Understanding Your 2013 RAV4’s Check Engine Light
Before we dive into the “how-to,” let’s establish a solid foundation of what this light is and isn’t. Knowledge is power, and understanding your vehicle’s warning systems prevents costly mistakes.
Visual guide about How Do You Reset the Check Engine Light on a 2013 Toyota Rav4
Image source: dodgecheckenginelight.com
What Triggers the Check Engine Light?
The ECM constantly monitors dozens of sensors and actuators throughout your RAV4’s engine and emissions systems. These include oxygen sensors (O2 sensors), the mass airflow sensor (MAF), the evaporative emissions (EVAP) system, ignition coils, spark plugs, and the catalytic converter. When a sensor sends a signal that is implausible, or an actuator fails to respond, the ECM stores a Diagnostic Trouble Code (DTC) and illuminates the check engine light to alert you.
Common triggers for a 2013 RAV4 include:
- A loose or faulty gas cap: The EVAP system is sealed. A cap that doesn’t seal properly allows fuel vapors to escape, triggering a small leak code (like P0455, P0456). This is the easiest and cheapest fix.
- Faulty oxygen sensors: O2 sensors monitor exhaust oxygen levels to optimize fuel mixture. A failing sensor reduces fuel economy and increases emissions.
- Catalytic converter efficiency: A failing cat (codes P0420, P0430) is a serious, expensive issue often caused by neglecting other problems like misfires.
- Ignition system issues: Worn spark plugs, bad ignition coils (common on some 4-cylinder engines), or damaged wires can cause misfires (codes P0300-P0304), which are destructive if left unchecked.
- Mass Airflow Sensor (MAF) contamination: A dirty MAF sensor can cause poor performance, rough idle, and incorrect fuel calculations.
- Exhaust leaks: A leak before the front O2 sensor can introduce extra oxygen, skewing sensor readings.
Check Engine Light vs. Maintenance Required Light
This is a crucial distinction. On your 2013 RAV4, these are two separate lights with completely different purposes.
- Check Engine Light (MIL): Usually yellow/amber and shaped like an engine. It’s an emissions-related warning that can come on at any time, for any reason. It requires immediate diagnostic attention. Resetting it requires clearing the stored trouble codes.
- Maintenance Required Light: Usually says “MAINTENANCE REQUIRED” or is a wrench icon. It’s a simple mileage/timer-based reminder that it’s time for routine service (oil change, tire rotation, etc.). It does not indicate a fault. You reset this light via a specific button sequence on the odometer display after performing the service. If you’re looking for instructions on this, we have a dedicated guide for resetting the maintenance light on a Toyota RAV4, which covers the process for various model years.
Do not confuse the two. Trying to reset the check engine light using the maintenance light procedure will not work and will leave the underlying problem unaddressed.
The Golden Rule: Diagnose Before You Reset
Let’s be perfectly clear: hitting the reset button or disconnecting the battery without knowing why the light came on is a recipe for disaster. You are merely erasing the symptom, not curing the disease. The problem will likely return, and in the meantime, you could be driving your RAV4 in a limp-home mode or causing additional damage.
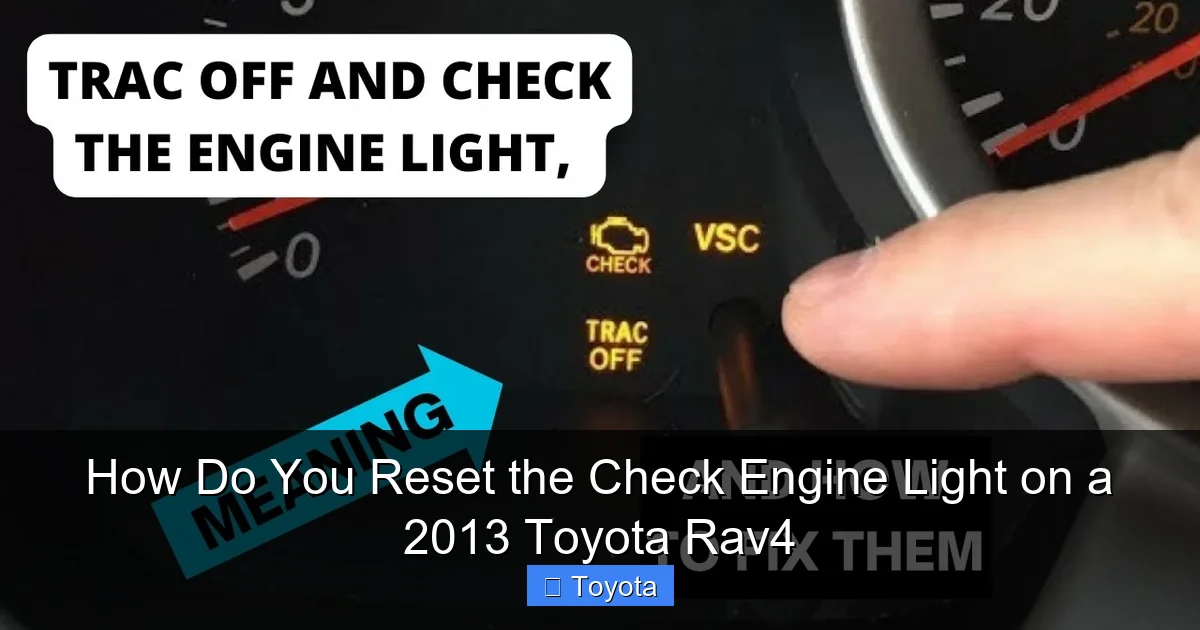
Visual guide about How Do You Reset the Check Engine Light on a 2013 Toyota Rav4
Image source: i.ytimg.com
The proper sequence is always:
- Retrieve the Trouble Code(s): This tells you which system or component the ECM has flagged.
- Diagnose the Root Cause: The code is a starting point, not a final verdict. For example, a P0301 code means “Cylinder 1 Misfire Detected.” The cause could be a spark plug, ignition coil, fuel injector, or even a vacuum leak. You must troubleshoot to find the actual failed part.
- Perform the Repair: Fix or replace the faulty component.
- Verify the Repair: Ensure the repair was successful and no new codes are set.
- Reset the Light: Clear the codes with a scanner. The light should stay off if the repair was successful.
How to Read the Code: Your Essential Tool
To start, you need an OBD2 (On-Board Diagnostics) scanner. All 1996 and newer vehicles, including your 2013 RAV4, have a standardized OBD2 port located under the dashboard, usually to the left of the steering column.
- Basic Code Readers ($20-$50): These inexpensive devices plug in, read the code (like “P0171”), and often have a simple “Erase Codes” button. They are sufficient for reading and clearing codes on most vehicles.
- Advanced Scan Tools ($100+): These offer live data streaming, more detailed diagnostics, and access to manufacturer-specific codes and systems. They are used by professionals and serious DIYers.
- Smartphone Adapters ($15-$30): Devices like the OBDLink or BAFX connect to your phone via Bluetooth/WiFi and use a free app (like Torque) to read and clear codes. A very cost-effective and convenient option.
Process: Plug the scanner into the OBD2 port with the ignition in the “ON” position (engine off). Follow the device prompts to “Read Codes” or “Scan for DTCs.” Write down all codes (e.g., P0455, P0302). Do not clear them yet! Use these codes to research the likely causes. A quick online search for “2013 Toyota RAV4 P0455” will give you a world of information and common fixes.
Method 1: The Correct Way – Using an OBD2 Scanner to Reset
Once you have diagnosed the problem, repaired it, and confirmed it’s fixed (e.g., the engine runs smoothly, no new codes appear after a short drive), you are ready to reset the light. This is the cleanest, most reliable method and is what professional technicians use.
Visual guide about How Do You Reset the Check Engine Light on a 2013 Toyota Rav4
Image source: i.ytimg.com
Step-by-Step:
- Ensure the ignition is in the “ON” position (key in RUN/ACC, engine off). The scanner needs power.
- Connect your OBD2 scanner to the port under the dash.
- Navigate the scanner’s menu to find the “Erase Codes,” “Clear DTCs,” or ” MIL Reset” function. The exact wording varies by brand.
- Select “Erase” or “Clear.” You may be prompted to confirm. The scanner will communicate with the ECM and clear all stored diagnostic trouble codes.
- The check engine light should extinguish immediately. If it does not, try cycling the ignition key off and back on. If it still remains on, the code may not have cleared, or a new, more critical fault is present.
- Disconnect the scanner.
Why this is best: It only clears the codes. It doesn’t mess with other vehicle systems. It’s quick, easy, and doesn’t require any tools beyond the scanner itself. It’s the method you should always use if you have a scanner available.
Method 2: The Manual Reset – Disconnecting the Battery
If you do not have an OBD2 scanner, you can perform a manual reset by disconnecting the vehicle’s battery. This method works because it removes power from the ECM, forcing it to forget all stored data, including trouble codes. However, it is a blunt instrument with significant downsides and should be considered a last resort.
Warning: Disconnecting the battery on your 2013 RAV4 will also reset:
- All radio presets and clock settings.
- Power window and sunroof “memory” (they may need to be re-initialized).
- Steering angle sensor calibration (the steering wheel may not be straight when driving straight; it will need to be recalibrated by making several full left/right turns).
- Transmission adaptive learning data (shifts may feel different for a short drive cycle).
- Any other learned parameters in other modules.
Step-by-Step (SAFETY FIRST):
- Park your RAV4 safely on a level surface, engage the parking brake, and turn off the engine. Remove the key.
- Gather tools: You’ll typically need a 10mm socket/wrench for the negative battery terminal. Wear safety glasses and gloves.
- Locate the battery. In the 2013 RAV4, it’s in the engine bay on the driver’s side.
- Identify the terminals: Negative (-) is usually marked with a black cap and a minus (-) symbol. Positive (+) is red with a plus (+) symbol.
- Loosen the negative terminal clamp with your wrench. You only need to loosen it enough to slide it off the battery post. Do not remove the positive terminal first.
- Carefully lift the negative cable and tuck it away so it cannot accidentally touch the negative battery post. A cable tie or moving it to the side is good.
- Wait. This is the critical part. You must leave the battery disconnected for at least 10-15 minutes. This ensures the ECM’s capacitors fully discharge and memory is wiped. Some sources recommend 15-30 minutes.
- Reconnect the negative terminal. Slide the clamp back onto the post and tighten it securely. Do not overtighten and crack the post.
- Start your RAV4. The check engine light should be off. However, it will likely come back on if the underlying problem isn’t fixed, as the ECM will quickly detect the fault again once running.
- Re-initialize systems: You will need to reset your clock, radio, and possibly perform a steering angle sensor calibration (drive in a large, empty parking lot making several slow, full turns from lock to lock in both directions).
When to use this method: Only when you have no access to a scanner and you are absolutely certain the problem is fixed (e.g., you just tightened a gas cap after a P0456 code, or replaced a spark plug after a P0302 code). Never use this to “turn off the light” and continue driving with an unresolved issue.
What Happens After the Reset? The Drive Cycle
Clearing the codes turns off the light, but your RAV4’s ECM isn’t done yet. After a reset, all emission system monitors (readiness monitors) are set to “Not Complete” or “Incomplete.” The ECM needs to verify that all systems are functioning properly under specific driving conditions. This is called a drive cycle or readiness drive.
During this drive, the ECM runs internal tests. If everything passes, the monitor status changes to “Complete.” If a problem exists, the ECM will detect it, store a new code, and turn the check engine light back on. This is why a light might stay off for a few days after a reset and then return—the drive cycle wasn’t completed, or the fault persisted.
Typical 2013 RAV4 Drive Cycle (General Guidelines):
- Start with a cold engine (soaked for several hours).
- Drive at steady speeds between 40-60 mph for 10-15 minutes.
- Include gentle deceleration (coasting) and a few steady-speed cruises.
- Include a period of stop-and-go driving.
- Avoid heavy acceleration and high engine RPMs.
- Let the engine idle for a few minutes at the end.
To check monitor status, you need an OBD2 scanner that displays readiness monitors (not all basic readers do). A professional scan tool or a good advanced DIY scanner will show you which systems (EVAP, Catalytic, O2 Sensors, etc.) are complete. You cannot pass a state emissions inspection (smog test) until all required monitors are “Complete.” If your light comes back on during this cycle, the repair was not successful.
When to Seek Professional Help: Don’t Gamble
While resetting the light is a DIY task, the diagnosis and repair are where things get serious. Here are clear signs it’s time to call a professional mechanic or Toyota specialist:
- The light is flashing: A flashing check engine light indicates a severe misfire that can damage the catalytic converter. Stop driving immediately and have it towed. This is an emergency.
- The codes are complex or multiple: If you get several codes pointing to different systems (e.g., an O2 sensor code and a misfire code), the issue might be interconnected or confusing.
- The light returns immediately after reset: If you fix a suspected issue, clear the code, and the light comes back on within a day or even a single drive, the repair was incorrect or there’s a deeper, underlying problem.
- You cannot determine the root cause from the code: A code like P0171 (System Too Lean) has dozens of potential causes (vacuum leak, bad MAF, weak fuel pump, clogged filter). Diagnosing this requires experience and tools.
- You lack the tools or confidence: There’s no shame in paying for expertise. A proper diagnosis can save you hundreds in misdiagnosed parts and prevent engine damage.
For Toyota-specific expertise, a dealership or an independent shop that specializes in Japanese vehicles will have the most advanced diagnostic software (like Techstream) to access all of your RAV4’s systems. They can also perform complex tests like a smoke test for EVAP leaks or a fuel pressure test.
Conclusion: Safety First, Reset Last
Resetting the check engine light on your 2013 Toyota RAV4 is a straightforward final step in a much more important process. The core message cannot be overstated: the light is a messenger, not the problem. Your primary goal is always to listen to that messenger, diagnose its message (the trouble code), and fix the actual mechanical or electronic issue it’s reporting.
Once the repair is confidently made, you have two reset options. The preferred, modern method is using an OBD2 scanner—it’s clean, fast, and doesn’t disrupt other vehicle systems. The manual battery disconnect method works but comes with the hassle of resetting all your electronic memory and should be used cautiously. After any reset, be prepared for a drive cycle to confirm the repair’s success. If the light returns, or if the diagnosis feels beyond your skill level, do not hesitate to seek professional help. Your RAV4’s longevity, your safety, and the environment depend on a properly functioning emissions system. Treat that check engine light not as an annoyance to be silenced, but as a valuable early warning system that, when heeded, can save you from far greater trouble and expense down the road.
Frequently Asked Questions
Can I drive my RAV4 with the check engine light on?
It depends on the severity. If the light is steady and the car runs normally, a short drive to a repair shop is usually okay, but get it diagnosed promptly. If the light is flashing, stop driving immediately, as this indicates a severe misfire that can destroy the catalytic converter.
Will disconnecting the battery reset the check engine light?
Yes, disconnecting the negative battery terminal for 10-15 minutes will clear the codes and turn off the light. However, this is a crude method that also resets all other vehicle memory (radio, steering angle sensor, etc.) and does not fix the underlying problem. The light will return if the fault persists.
How much does it cost to diagnose a check engine light?
Many auto parts stores (like AutoZone, Advance Auto) offer free code scanning. A professional diagnostic fee at a repair shop typically ranges from $75 to $150, which is often credited toward the repair if you use the same shop. This fee covers the technician’s time and advanced diagnostic tools.
Do I need a special scanner for a Toyota?
For simply reading and clearing generic OBD2 codes, any standard OBD2 scanner will work. For accessing Toyota-specific systems, modules, or performing advanced functions like steering angle sensor calibration, you would need a professional-level scan tool with manufacturer software (like Techstream).
Why did my check engine light come on after I reset it?
This almost always means the underlying problem was not properly fixed. The ECM ran its monitors during the drive cycle, detected the same fault again, stored a new code, and illuminated the light. You must re-diagnose the issue.
Is the check engine light the same as the service engine soon light?
Yes, on your 2013 RAV4, the “Check Engine” light and “Service Engine Soon” light are the same warning. It’s the Malfunction Indicator Lamp (MIL). It is different from the “MAINTENANCE REQUIRED” light, which is a separate service interval reminder.


