
How Do You Install Bearing Buddies
Contents
Installing Bearing Buddies is a simple yet effective way to protect your trailer’s wheel bearings from moisture, dirt, and premature wear. This easy-to-follow guide walks you through the entire process—from gathering tools to final testing—ensuring your trailer stays road-ready and safe for years to come.
Key Takeaways
- Protects Bearings from Water: Bearing Buddies create a pressurized barrier that prevents water and contaminants from entering the hub, drastically reducing the risk of bearing failure.
- Easy DIY Installation: With basic tools and about 30–60 minutes per wheel, most trailer owners can install Bearing Buddies without professional help.
- Extends Bearing Life: By keeping grease fresh and contaminants out, Bearing Buddies help your bearings last longer and perform better.
- Works on Most Trailers: Compatible with a wide range of boat, utility, and RV trailers with standard 4- or 6-bolt hubs.
- Requires Regular Maintenance: Check the grease level and buddy condition every 3,000 miles or before long trips to ensure optimal performance.
- Improves Safety: Prevents sudden bearing failure while towing, reducing the risk of accidents or breakdowns on the road.
- Cost-Effective Solution: A small upfront investment can save hundreds in repairs and replacements down the line.
📑 Table of Contents
What Are Bearing Buddies and Why Should You Install Them?
If you own a trailer—whether it’s for your boat, camper, or utility hauling—you know how important it is to keep it in good working order. One of the most common causes of trailer breakdowns isn’t the tires, lights, or brakes. It’s the wheel bearings. These small but critical components allow your wheels to spin smoothly, and when they fail, it can lead to serious safety hazards, costly repairs, and unexpected downtime.
Enter Bearing Buddies. These nifty devices are designed to protect your trailer’s wheel bearings from the elements, especially water and dirt. They work by replacing your standard grease cap with a spring-loaded, pressurized system that keeps fresh grease in and contaminants out. Think of them as a shield for your bearings—simple, effective, and affordable.
Bearing Buddies are especially popular among boat trailer owners. Why? Because every time you launch or retrieve your boat, your trailer’s wheels are submerged in water. Even if you rinse them off afterward, moisture can still seep into the hub and wash away the protective grease. Over time, this leads to corrosion, pitting, and eventual bearing failure. Bearing Buddies solve this problem by maintaining a slight positive pressure inside the hub, which pushes out any water that tries to enter.
But it’s not just boat trailers that benefit. Any trailer that sees frequent use—especially in wet or dirty conditions—can gain from this upgrade. Whether you’re hauling a camper through muddy campgrounds or towing a utility trailer across dusty job sites, Bearing Buddies help keep your bearings clean and well-lubricated.
The best part? Installing Bearing Buddies is a straightforward DIY project. You don’t need to be a mechanic or have a full garage setup. With a few basic tools and a little patience, you can complete the job in under an hour per wheel. And once they’re in, you’ll enjoy peace of mind knowing your trailer is better protected against one of the most common causes of failure.
In this guide, we’ll walk you through everything you need to know about how to install Bearing Buddies—from understanding how they work to step-by-step installation and maintenance tips. By the end, you’ll be ready to upgrade your trailer and keep it running smoothly for years to come.
Tools and Materials You’ll Need
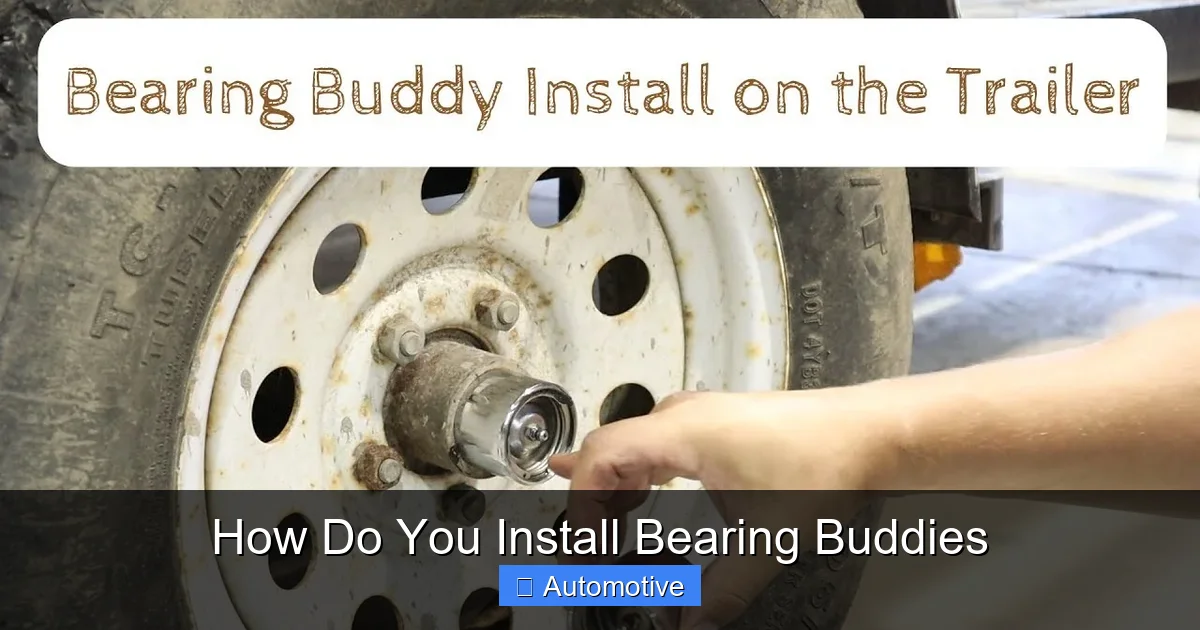
Visual guide about How Do You Install Bearing Buddies
Image source: i.ytimg.com
Before you start the installation, it’s important to gather all the necessary tools and materials. Having everything ready will make the process smoother and help you avoid frustrating delays. Don’t worry—most of these items are common and easy to find at your local hardware or auto parts store.
Here’s what you’ll need:
- Bearing Buddy Kit: This includes the Bearing Buddy unit, a rubber O-ring, and sometimes a grease fitting. Make sure you get the correct size for your trailer’s hub. Most trailers use either the standard 1.98-inch or 2.25-inch model, but double-check your hub diameter before buying.
- Grease Gun: A standard hand-operated grease gun will work fine. Make sure it’s loaded with high-quality marine or trailer-specific grease. Avoid using general-purpose grease, as it may not hold up under wet conditions.
- Jack and Jack Stands: You’ll need to lift the trailer off the ground to remove the wheels. Always use jack stands for safety—never rely solely on the jack.
- Lug Wrench or Tire Iron: To remove the lug nuts and take off the wheel.
- Socket Set or Wrench: Depending on your trailer’s lug nuts, you may need a socket or wrench to loosen them.
- Clean Rags: For wiping down the hub and removing old grease.
- Brake Cleaner or Degreaser: Helps clean the hub area thoroughly before installation.
- Safety Gear: Gloves and safety glasses are recommended to protect your hands and eyes from grease and debris.
- Torque Wrench (Optional but Recommended): To ensure lug nuts are tightened to the correct specification when reassembling.
It’s also a good idea to have a flat, level surface to work on—like a driveway or garage floor. This will make it easier to lift the trailer and keep everything stable during the process.
One common mistake people make is assuming all Bearing Buddies are the same. They’re not. The size must match your hub. If you’re unsure, measure the outer diameter of your existing grease cap or check your trailer’s manual. Installing the wrong size can lead to leaks, improper fit, or even damage to the hub.
Another tip: While you’re at it, consider replacing your wheel bearings and seals if they’re old or worn. Installing Bearing Buddies is the perfect time to do a full bearing service. It’s like killing two birds with one stone—you’re upgrading protection and refreshing the lubrication at the same time.
Step-by-Step Installation Guide
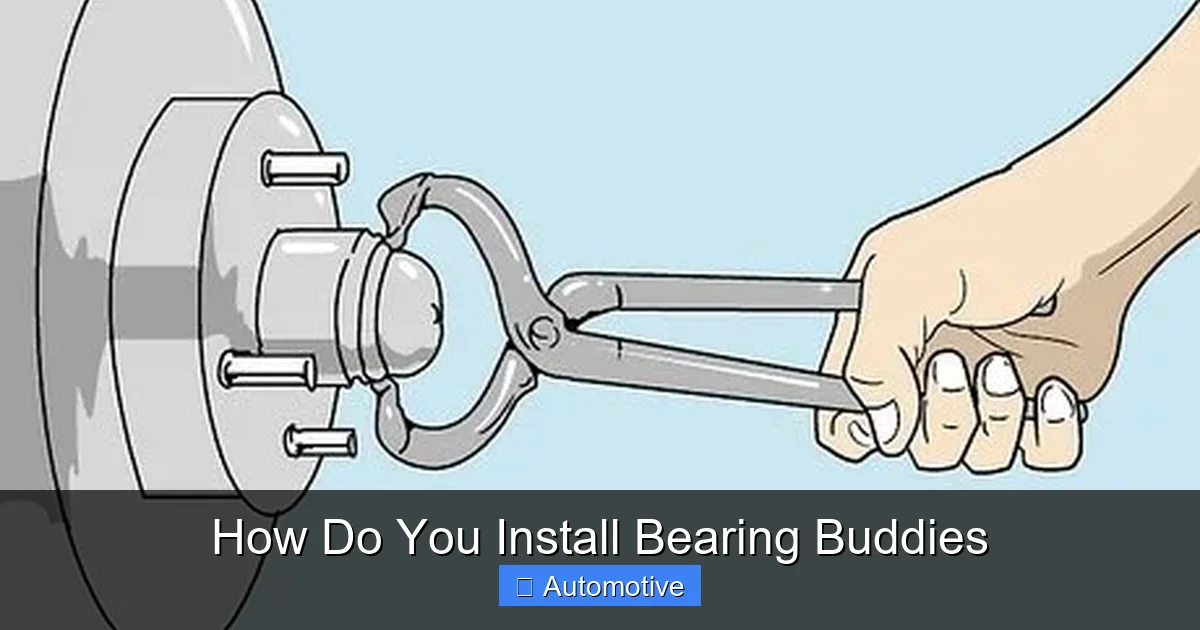
Visual guide about How Do You Install Bearing Buddies
Image source: wikihow.com
Now that you have your tools and materials ready, it’s time to install your Bearing Buddies. The process is straightforward, but it’s important to follow each step carefully to ensure a proper seal and long-lasting protection.
Step 1: Prepare the Trailer
Start by parking your trailer on a flat, level surface. Engage the parking brake and, if possible, chock the wheels that will remain on the ground. This prevents the trailer from rolling while you’re working.
Next, use your jack to lift the side of the trailer where you’ll be working. Place the jack under the axle or frame—never under the suspension or brake components. Once the wheel is off the ground, secure the trailer with jack stands. Safety first!
Remove the wheel by loosening the lug nuts with your wrench or socket. Turn them counterclockwise until they’re loose, then remove them completely. Set them aside in a safe place so you don’t lose them.
Step 2: Remove the Old Grease Cap
With the wheel off, you’ll see the grease cap in the center of the hub. This is what the Bearing Buddy will replace. Use a flathead screwdriver or a small pry bar to gently tap around the edge of the cap until it pops off. Be careful not to damage the hub or the cap—you might want to reuse it if you ever remove the Bearing Buddy.
Once the cap is off, you’ll see the inner bearing and seal. If you’re doing a full bearing service, now is the time to remove the seal and bearings for inspection and repacking. But if you’re just installing the Bearing Buddy, you can skip that step and move on.
Step 3: Clean the Hub Area
Before installing the new Bearing Buddy, clean the hub thoroughly. Use brake cleaner or degreaser and a rag to wipe away old grease, dirt, and debris. Pay special attention to the area where the Bearing Buddy will seat. Any leftover grime can prevent a proper seal and reduce effectiveness.
Let the hub dry completely before moving to the next step. Moisture or cleaner residue can interfere with the grease and cause issues down the line.
Step 4: Install the Bearing Buddy
Take your new Bearing Buddy and inspect it. Make sure the O-ring is in place and undamaged. The O-ring creates a watertight seal between the buddy and the hub.
Apply a small amount of grease to the O-ring and the inside of the hub where the buddy will sit. This helps with installation and improves the seal.
Now, press the Bearing Buddy into the hub. It should fit snugly. Use a rubber mallet or a block of wood and a hammer to gently tap it into place. Don’t force it—if it’s the right size, it should go in smoothly.
Once it’s seated, check that it’s flush with the edge of the hub. If it’s sticking out or sunk in too far, double-check the size or try reseating it.
Step 5: Add Grease
Now it’s time to fill the Bearing Buddy with grease. Attach your grease gun to the zerk fitting on the side of the buddy. Pump grease slowly until you see fresh grease coming out of the front of the hub (near the wheel). This means the old grease has been pushed out and the system is full.
Stop pumping when you see clean grease. Overfilling can cause pressure buildup and damage the seal.
Step 6: Reassemble the Wheel
Slide the wheel back onto the hub and hand-tighten the lug nuts. Lower the trailer slightly so the wheel touches the ground but doesn’t bear full weight. This makes it easier to tighten the lug nuts evenly.
Use your wrench or torque wrench to tighten the lug nuts in a star pattern. This ensures even pressure. If you have a torque wrench, tighten to the manufacturer’s recommended specification—usually between 70 and 90 ft-lbs for most trailers.
Once the lug nuts are secure, lower the trailer completely and remove the jack and jack stands.
Step 7: Repeat for Other Wheels
Repeat the process for each wheel you want to equip with Bearing Buddies. Most trailers have two wheels per side, so plan for about 30–60 minutes per wheel, depending on your experience.
Maintenance and Best Practices
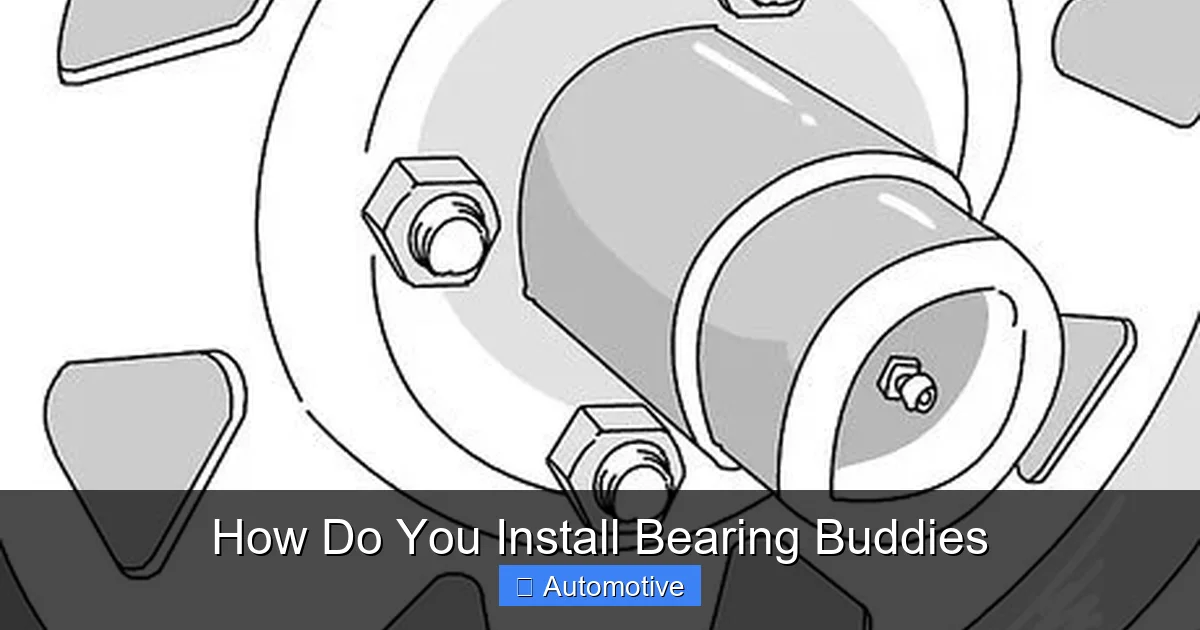
Visual guide about How Do You Install Bearing Buddies
Image source: wikihow.com
Installing Bearing Buddies is just the first step. To get the most out of them, you need to maintain them properly. Think of them like any other part of your trailer—they need regular check-ups to keep performing at their best.
Check Grease Levels Regularly
The Bearing Buddy has a clear window or a spring-loaded plunger that lets you see the grease level. Check this every 3,000 miles or before long trips. If the grease looks low or dirty, top it off with fresh grease using your grease gun.
Don’t wait until the grease is completely gone. Running low on grease can lead to bearing overheating and failure, even with the protection of the Bearing Buddy.
Inspect for Leaks or Damage
After towing, especially through water or rough terrain, inspect the Bearing Buddy for signs of leaks, cracks, or damage. If you notice grease leaking from the front or back, it could mean the seal is compromised or the buddy is overfilled.
Also, check the O-ring periodically. If it’s cracked, brittle, or missing, replace it immediately. A damaged O-ring can allow water to enter the hub, defeating the purpose of the Bearing Buddy.
Clean the Exterior
Dirt and grime can build up on the outside of the Bearing Buddy, especially if you’re towing in muddy or dusty conditions. Wipe it down with a clean rag and mild cleaner to keep it in good condition. This also makes it easier to see the grease level.
Avoid Overfilling
While it’s important to keep the buddy filled with grease, overfilling can cause problems. Too much grease creates excess pressure, which can blow out the seal or damage the bearings. Only fill until fresh grease appears at the front—don’t force more in.
Winter Storage Tips
If you store your trailer over the winter, especially in cold or wet climates, take extra care. Drain any water from the hub (if possible) and add fresh grease before storing. This prevents corrosion and keeps the bearings in good shape until spring.
Common Mistakes to Avoid
Even with the best intentions, it’s easy to make mistakes during installation or maintenance. Here are some common pitfalls and how to avoid them:
- Using the Wrong Size: Always measure your hub before buying a Bearing Buddy. Installing the wrong size can lead to leaks or improper fit.
- Skipping the O-Ring: The O-ring is essential for a watertight seal. Never install a Bearing Buddy without it.
- Overfilling with Grease: More grease isn’t always better. Overfilling can damage seals and bearings.
- Ignoring Regular Checks: Bearing Buddies aren’t “set it and forget it.” Regular inspections are key to long-term performance.
- Using the Wrong Grease: Use marine or trailer-specific grease. General-purpose grease may not withstand wet conditions.
- Not Tightening Lug Nuts Properly: Loose lug nuts can cause wheel wobble or even detachment. Always tighten in a star pattern and use a torque wrench if possible.
Conclusion
Installing Bearing Buddies is one of the smartest upgrades you can make for your trailer. It’s a simple, affordable way to protect your wheel bearings from water, dirt, and wear—extending their life and improving your safety on the road.
The process is DIY-friendly, requiring only basic tools and a little time. Once installed, regular maintenance ensures they keep working effectively for years. Whether you’re a weekend boater, a full-time RVer, or just someone who tows occasionally, Bearing Buddies offer peace of mind and long-term savings.
So don’t wait until your bearings fail. Take the time to install Bearing Buddies today and enjoy smoother, safer tows for miles to come.
Frequently Asked Questions
How often should I check my Bearing Buddies?
Check your Bearing Buddies every 3,000 miles or before long trips. Look at the grease level and inspect for leaks or damage. Regular checks help prevent bearing failure.
Can I install Bearing Buddies myself?
Yes! Most trailer owners can install Bearing Buddies with basic tools. The process takes about 30–60 minutes per wheel and doesn’t require professional help.
Do Bearing Buddies work on all trailers?
Bearing Buddies work on most trailers with standard 4- or 6-bolt hubs. Make sure to get the correct size for your hub diameter—common sizes are 1.98″ and 2.25″.
What happens if I overfill the Bearing Buddy?
Overfilling can create excess pressure, which may blow out the seal or damage the bearings. Only fill until fresh grease appears at the front of the hub.
Do I still need to repack my bearings if I have Bearing Buddies?
Yes. Bearing Buddies protect against water but don’t eliminate the need for regular bearing maintenance. Repack your bearings every 12 months or 12,000 miles.
Can Bearing Buddies prevent all bearing failures?
While they greatly reduce the risk, they can’t prevent all failures. Regular inspection, proper grease, and timely maintenance are still essential for long-term reliability.


