
How Do I Reset My Toyota Maintenance Required Light?
Contents
- 1 Key Takeaways
- 2 📑 Table of Contents
- 3 Understanding Your Toyota’s Maintenance Required Light
- 4 Essential Preparation Before You Reset
- 5 Step-by-Step Reset Procedures for Different Toyota Eras
- 6 Troubleshooting: What to Do If the Light Won’t Reset
- 7 The Critical Importance of Actual Maintenance Over Just Resetting
- 8 Conclusion: Your Partner in Toyota Ownership
- 9 Frequently Asked Questions
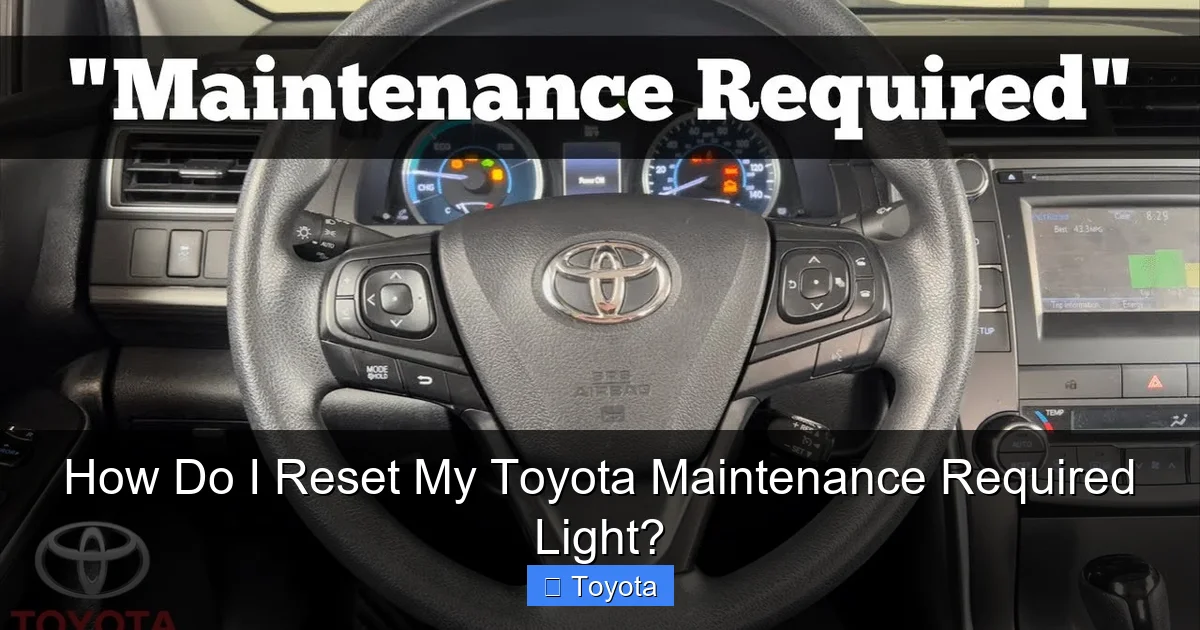
The “Maintenance Required” light on your Toyota is not a malfunction indicator; it’s a friendly reminder that scheduled service is due based on your driving mileage or time. Resetting it is a simple process you can do yourself after the required maintenance is performed, typically an oil and filter change. This guide provides clear, model-specific instructions to turn off that light safely and correctly, ensuring your vehicle’s service tracker is accurately reset for your next interval.
That little wrench icon or “MAINT REQD” text on your Toyota’s dashboard is trying to tell you something important. It’s not a warning of an immediate crisis, but it is your vehicle’s polite but firm way of saying, “Hey, it’s time for our date with the service department!” Understanding how to reset the Toyota maintenance required light is a key part of being a proactive car owner. It’s the final step in a cycle of care that keeps your Toyota running smoothly, reliably, and efficiently for years to come. This comprehensive guide will walk you through everything you need to know, from what that light truly means to the exact button presses for your specific model.
Key Takeaways
- The light is a service reminder, not an error: It illuminates based on pre-programmed mileage/time intervals to notify you of routine maintenance like oil changes, tire rotations, and inspections.
- Always perform the required maintenance first: The reset procedure only clears the reminder; it does not complete the actual service work. Never reset the light without doing the maintenance.
- Methods vary by model year and trim: The reset process differs between older models with a dedicated button and newer models with multi-information display menus. Consult your owner’s manual for your specific vehicle.
- The process is simple and tool-free: Most resets involve a sequence of button presses on your steering wheel or dashboard. No special tools or technical knowledge is typically required.
- Incorrect resetting can cause confusion: If the light comes back on immediately or the interval seems wrong, you likely didn’t complete the reset sequence correctly or the system needs a professional scan tool.
- This is different from the “Check Engine” light: The Maintenance Required light is for scheduled service. A Check Engine light indicates a potential emissions or engine problem that requires diagnosis.
📑 Table of Contents
- Understanding Your Toyota’s Maintenance Required Light
- Essential Preparation Before You Reset
- Step-by-Step Reset Procedures for Different Toyota Eras
- Troubleshooting: What to Do If the Light Won’t Reset
- The Critical Importance of Actual Maintenance Over Just Resetting
- Conclusion: Your Partner in Toyota Ownership
Understanding Your Toyota’s Maintenance Required Light
Before we dive into the “how,” let’s clear up the “why.” Many drivers mistake this light for the more ominous “Check Engine” light. They are not the same. The Check Engine light (MIL—Malfunction Indicator Lamp) illuminates when the engine computer detects a problem that could affect emissions. It requires professional diagnosis. The Maintenance Required light, on the other hand, is a simple countdown timer. It’s programmed at the factory to illuminate after a certain number of miles or months, whichever comes first, based on your vehicle’s recommended service schedule.
What Triggers the Light?
Toyota’s maintenance system is primarily oil-life based for modern models. It uses a complex algorithm that factors in not just mileage, but also engine run time, operating temperature, and driving conditions (like frequent short trips vs. long highway drives). Harsh conditions—extreme temperatures, dusty environments, towing, or mostly stop-and-go traffic—can degrade oil faster, and the system accounts for this. When the calculated oil life reaches a predetermined threshold (usually around 15% remaining), the light will illuminate steadily. After you have the oil changed, the technician (or you) must reset this counter to 100% to start the new interval. For older models, it might be a simpler mileage-based reminder.
Why You Should Never Ignore It
Ignoring this light is like ignoring the “change oil” sticker on your windshield, only smarter. The system knows more about your engine’s actual condition than a generic mileage interval. Driving significantly past your maintenance interval with degraded oil can lead to increased engine wear, sludge buildup, reduced fuel economy, and potentially costly repairs. The light is your first line of defense against preventable damage. Furthermore, a well-maintained Toyota retains its value better and is more reliable. For specific model insights, you can explore our detailed guides, such as the one on how to reset the maintenance light on a Toyota Tacoma, which highlights the process for a popular model.
Essential Preparation Before You Reset
Resetting the light is the last step. The first steps involve the actual maintenance. Here’s your pre-reset checklist to ensure you’re doing this the right way.
Visual guide about How Do I Reset My Toyota Maintenance Required Light?
Image source: i.ytimg.com
1. Identify the Required Service
Your owner’s manual is your bible. It contains the exact maintenance schedule for your model year and engine. The light itself doesn’t specify *what* is due—it could be an oil change, a tire rotation, a cabin air filter, or a major service. If you’re unsure, a quick call to your dealer’s service department with your VIN can tell you exactly what code or service is associated with the light. Common services that trigger the reset include:
- Oil and filter change
- Tire rotation and pressure check
- Brake inspection
- Cabin air filter replacement
- Engine air filter replacement
- Comprehensive multi-point inspection
2. Complete the Service Work
This is non-negotiable. Whether you do it yourself or take it to a trusted mechanic, ensure all the recommended services for that interval are completed. If you only change the oil but ignore a severely worn cabin filter, you’re not fully addressing the reminder. The light is a holistic reminder for the entire service interval.
3. Gather Your Tools (You Probably Don’t Need Any!)
The beauty of resetting a Toyota maintenance light is that it requires no tools—just you, your fingers, and a basic understanding of your dashboard controls. You will need:
- Your vehicle’s ignition key or key fob (to power on the vehicle).
- Patience and attention to detail to follow the sequence correctly.
- Your owner’s manual (the ultimate reference, as sequences can vary slightly).
Some older models might require you to turn the ignition to the “ON” position without starting the engine. Newer models with push-button start often require you to press the start button twice without touching the brake pedal to enter accessory/ignition-on mode.
Step-by-Step Reset Procedures for Different Toyota Eras
This is where we get specific. The method depends heavily on your vehicle’s model year and its dashboard technology. We’ll break it down into two main categories.
Visual guide about How Do I Reset My Toyota Maintenance Required Light?
Image source: i.ytimg.com
For Models with a Dedicated “Reset” or “S” Button (Typically 2004-2012)
Many Toyotas from the mid-2000s to early 2010s, like the Camry, Corolla, and RAV4 of that era, have a simple mechanical process. Look for a small, black button near the speedometer or on the instrument cluster itself, often labeled “Reset,” “S,” or “Set.”
- Turn the ignition ON. Insert your key and turn it to the “ON” position (all dash lights on) or press the start button twice without your foot on the brake.
- Locate the odometer display. You need to see the total mileage or trip meter on the digital display.
- Turn the key OFF. Turn the ignition back to the “OFF” position.
- Press and hold the reset button. While holding the button, turn the ignition back to the “ON” position. Keep holding the button.
- Watch the display. After a few seconds, you should see the odometer display change. It might show “SET” or start counting down (e.g., “00000”).
- Release the button. Once the display shows “SET” or resets to zero, release the button. The maintenance required light should blink a few times and then go out.
- Start the engine. Turn the key to start the car. The light should remain off. If it comes back on immediately, repeat the process, ensuring you hold the button long enough.
Pro Tip: If your car has multiple trip meters (A, B, etc.), make sure the display is showing the main odometer (total miles) and not a trip meter when you start this process. The reset button often cycles through trip meters when pressed briefly; hold it down for the reset function.
For Models with a Multi-Information Display (MID) and Steering Wheel Controls (Typically 2013-Present)
Modern Toyotas use the color screen in the gauge cluster (MID) and buttons on the steering wheel to navigate menus. The process is logical but requires precise steps. The most common sequence is as follows:
- Turn the ignition ON. Power up the car without starting the engine.
- Use the steering wheel buttons to navigate. Find the button(s) with a “Menu,” “Info,” or “Up/Down” arrow symbol. Often, there is a button to toggle between displays and a separate “Set” or “Enter” button.
- Navigate to the “Settings” or “Vehicle Settings” menu. Use the arrow buttons to scroll through the menu options on your MID. Look for “Settings,” “Vehicle Settings,” “Maintenance,” or “Service.”
- Find the “Maintenance Reset” or “Oil Reset” option. Within that menu, you should see an option to reset the maintenance system. It may say “Maintenance Reset,” “Oil & Filter Reset,” or simply “Reset.”
- Select and confirm. Highlight the reset option and press the “Enter” or “Set” button. You will likely be prompted to confirm (“Yes/No” or “Reset/Back”). Select “Yes” or “Reset.”
- Look for confirmation. The display should show a message like “Maintenance Reset Completed” or “Oil Reset Successful.” The wrench/MAINT REQD light on your dash should extinguish.
- Start the engine. Turn the car off and back on, or simply start it, to verify the light stays off.
Model-Specific Nuances: The exact menu names can vary. A 2021 RAV4 might call it “Service Reset,” while a 2018 Camry might say “Maint Reset.” For a precise walkthrough with screenshots, our article on how to reset the maintenance light on a 2021 Toyota RAV4 is an excellent resource. The principle, however, remains the same: Power ON > Navigate to Settings > Find Maintenance Reset > Confirm.
What If My Car Has a Push-Button Start?
The process is identical, but how you get to “ignition on” is different. Do not press the brake pedal. Press the start button once. The dashboard will light up, and you’ll hear the fuel pump prime. This is your “ON” position. Proceed with the menu navigation steps above. To turn the car off after resetting, you can press the start button again (still without brake) or simply open the door—many Toyotas will automatically power down.
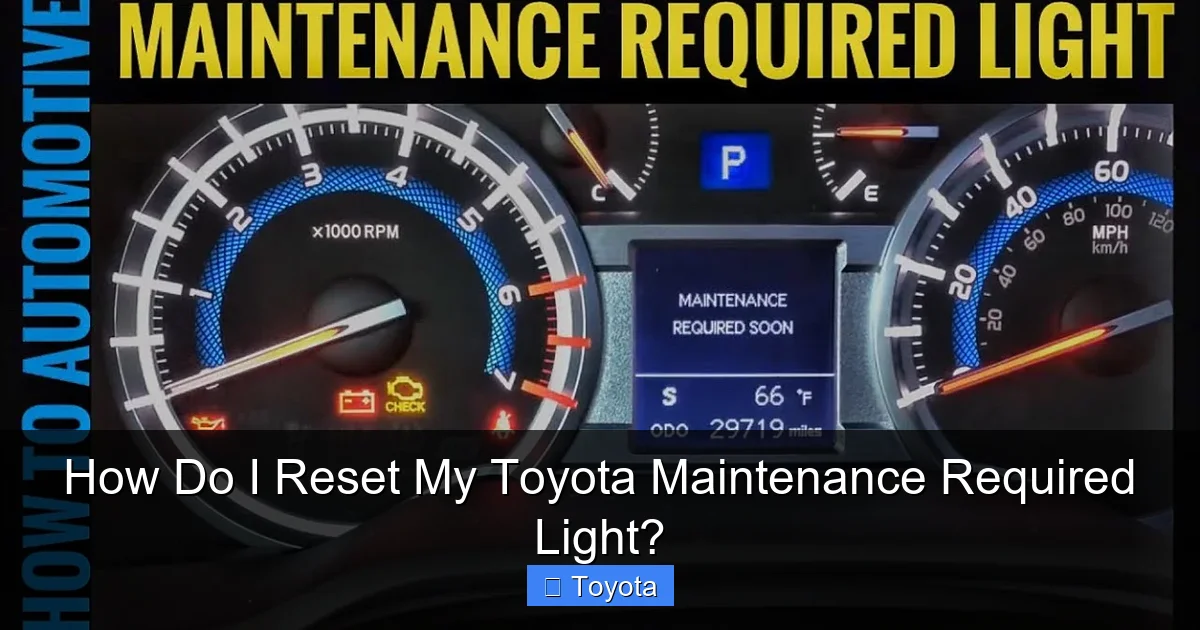
Troubleshooting: What to Do If the Light Won’t Reset
You followed all the steps perfectly, but that stubborn wrench icon is still glaring at you. Don’t panic. Here’s a systematic approach to solve the problem.
Visual guide about How Do I Reset My Toyota Maintenance Required Light?
Image source: i.ytimg.com
Double-Check Your Sequence and Timing
Human error is the most common culprit. Did you hold the button long enough? Did you accidentally turn the key to “START” instead of “ON”? Did you confirm with “YES” on the screen? Go back to your owner’s manual and walk through it again, slowly. For button-press methods, the “hold” step is critical. For menu methods, ensure you are in the correct reset menu—sometimes there are similar-looking menus for tire pressure or other systems.
Ensure Maintenance Was Actually Performed
Some systems, especially newer ones, have a safety interlock. If the system detects that the oil life is still critically low (because the sensor wasn’t reset after the oil change, or the change wasn’t done properly), it may refuse to reset. Verify that the oil level is correct and that the service was completed. If you changed the oil yourself, ensure you used the correct oil type and capacity and properly installed the new filter.
The Light Might Be a Different Indicator
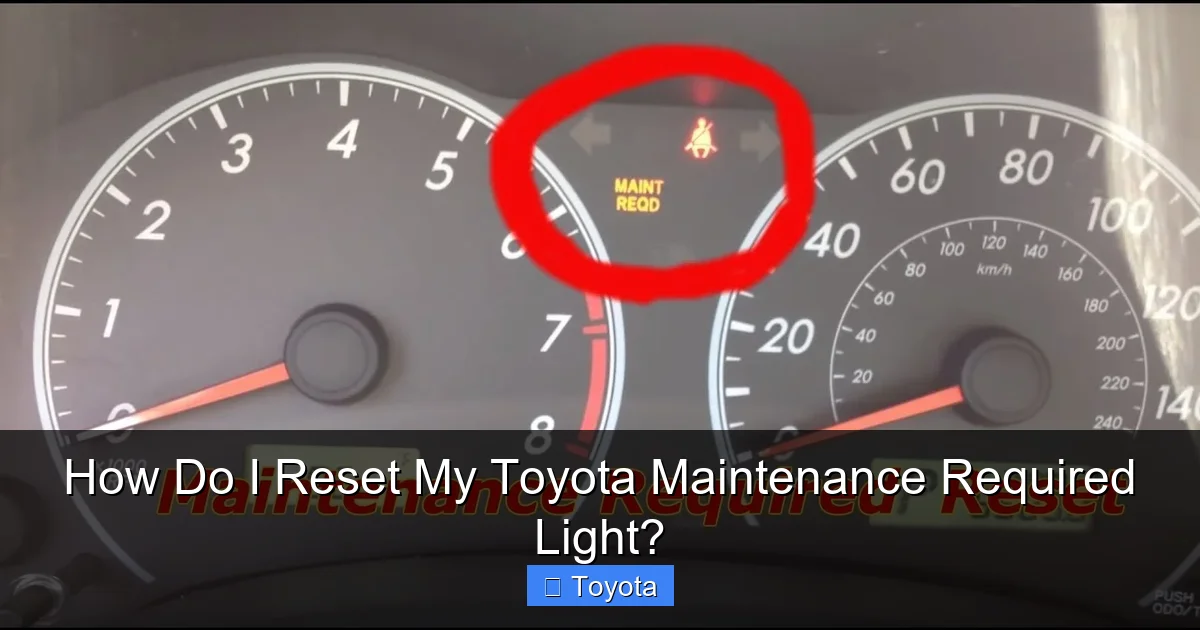
Is it definitely the “MAINT REQD” or wrench light? Could it be the “Check Engine” light, a tire pressure warning light, or an oil pressure light? These require different actions. The maintenance required light is usually a steady amber/yellow light with a wrench or the text “MAINT REQD.” A Check Engine light is often a yellow engine outline. A tire pressure light is an exclamation point in a tire cross-section. Identify the correct light first.
When to Seek Professional Help
If you’ve tried multiple times and the light persists, it may indicate a deeper issue:
- Faulty sensor or instrument cluster: Rare, but possible.
- Software glitch: A dealer can use their diagnostic computer (Techstream) to force a reset and check for system errors.
- Multiple service lights: If other warnings are on, there may be an underlying electrical or sensor problem.
In these cases, a visit to a Toyota dealer or a reputable independent shop with the proper scan tool is necessary. They can access the vehicle’s service menu directly. For other reset challenges, like how to reset check engine light on a Toyota Highlander, the process is different and often requires clearing a stored trouble code.
The Critical Importance of Actual Maintenance Over Just Resetting
This point cannot be stressed enough. Resetting the light without performing the service is dishonest to your vehicle and dangerous for your long-term ownership experience. It’s like erasing a to-do list without doing the tasks. The maintenance schedule exists for one reason: to prevent wear and tear from leading to failure.
What’s Typically Due at the First Light?
For most modern Toyotas, the first maintenance required light (often at around 5,000-7,500 miles) signifies the first oil and filter change. This is the most crucial reset because it establishes the new oil-life baseline. Skipping this can cause dirty, depleted oil to circulate through a fresh engine for thousands of miles. Subsequent intervals may include additional items like tire rotation, brake inspection, and fluid top-offs.
The Long-Term Cost of Neglect
Think of maintenance as cheap insurance. An oil change costs $50-$100. Replacing an engine due to oil starvation or sludge costs $4,000-$8,000. The math is simple. Regular maintenance keeps all systems—brakes, suspension, cooling, transmission—in optimal condition. It prevents small issues (a leaking hose, a worn belt) from becoming catastrophic failures that leave you stranded. Furthermore, a complete service history is invaluable when it comes time to sell your car. Prospective buyers will pay more for a vehicle with documented, timely maintenance.
Building a Maintenance Habit
Use the light as your trigger. When it comes on, schedule your service appointment *immediately*. Don’t just reset it and promise to get to it “next week.” Treat it as a non-negotiable calendar event. Keep all your service receipts, whether from a dealer or an independent shop. This creates a verifiable history. If you’re a DIY enthusiast, keep a notebook or digital file with dates, mileage, and parts used for every service you perform. This habit will save you money, stress, and keep your Toyota performing at its peak for the long haul.
Conclusion: Your Partner in Toyota Ownership
Resetting the maintenance required light on your Toyota is a small but empowering task. It signifies that you’ve completed the necessary work to keep your vehicle healthy and that you’re now ready to start the next cycle of reliable driving. The process is designed to be owner-friendly, a testament to Toyota’s philosophy of practicality and durability. By understanding what the light means, performing the actual required service, and then following the correct reset procedure for your model year, you take full control of your vehicle’s care schedule.
Remember, this light is your car’s way of communicating with you. It’s a partnership. Listen to it, act on it responsibly, and your Toyota will reward you with countless miles of safe, efficient, and trouble-free transportation. Keep your owner’s manual handy, develop a relationship with a trusted mechanic, and never underestimate the power of a simple oil change. Now, go forth, get that service done, and confidently reset that light!
Frequently Asked Questions
Will resetting the maintenance light turn off my check engine light?
No. The Maintenance Required light and the Check Engine light are completely separate systems. Resetting the maintenance light only clears the service interval reminder. A Check Engine light indicates a diagnosed problem with the engine or emissions system and requires a separate diagnostic process to identify and fix the issue before it can be reset.
Can I just reset the light without doing the maintenance?
Technically, yes, you can follow the reset steps and the light will go out. However, this is strongly discouraged. You are then driving with a false sense of security and likely with degraded oil or other neglected services. This will accelerate engine wear and could lead to a costly breakdown, defeating the purpose of the reminder system entirely.
Do I need any special tools or a scan tool to reset the light?
For the vast majority of Toyota models, no. The reset is designed to be performed by the owner using only the vehicle’s built-in controls (steering wheel buttons, dashboard buttons, or the odometer reset stem). A professional scan tool is only necessary if the standard reset procedure fails due to a system error or fault.
How often will the maintenance required light come on?
It depends on your driving conditions and the specific service schedule for your model. For modern Toyotas using oil-life monitoring, it typically illuminates every 5,000 to 10,000 miles, or about every 6 months, whichever comes first. Severe driving conditions (lots of short trips, extreme temps, towing) will shorten this interval. Your owner’s manual provides the exact schedule.
My light came on, I did the oil change, but the reset menu is greyed out or not there. What now?
This usually means the vehicle’s computer has not yet recognized that the service is complete. Ensure the oil level is correct. Drive the car normally for a short cycle (10-15 minutes) to allow the sensors to gather data. Sometimes the system needs a few drive cycles to update. If the option remains unavailable, there may be an underlying electrical issue or a fault code stored that needs to be cleared with a professional scan tool.
Is the reset process the same for a Toyota RAV4, Camry, and Tacoma?
The core principle is the same—navigate to a reset menu and confirm. However, the exact button names, menu paths, and locations of controls can differ between models and, more importantly, between model generations. A 2015 Camry will have a different interface than a 2022 RAV4. Always defer to your specific owner’s manual. For popular models like the Tacoma, dedicated guides, such as the one for the Tacoma, can provide the precise steps for that vehicle’s year range.


