Harley-davidson Drive Belt Replacement Cost
Contents
- 1 Key Takeaways
- 2 📑 Table of Contents
- 3 Understanding the Harley-Davidson Drive Belt System
- 4 Factors That Affect Harley-Davidson Drive Belt Replacement Cost
- 5 DIY vs. Professional Replacement: Which Is Right for You?
- 6 Step-by-Step Guide to Replacing a Harley Drive Belt
- 7 How to Extend the Life of Your Harley Drive Belt
- 8 Common Signs Your Harley Drive Belt Needs Replacement
- 9 Conclusion
- 10 Frequently Asked Questions
Replacing a Harley-Davidson drive belt typically costs between $200 and $600, depending on labor, model, and parts quality. Whether you’re a DIY enthusiast or prefer professional service, understanding the full scope of costs and maintenance needs ensures your ride stays smooth and reliable for years to come.
If you’ve ever owned or ridden a Harley-Davidson, you know that the deep rumble of the engine is just part of the experience. The smooth, quiet power delivery from the rear wheel—thanks to the drive belt—is what truly sets Harley apart from chain-driven motorcycles. But like any critical component, the drive belt doesn’t last forever. Eventually, it wears out, and when it does, you’re faced with a decision: how much will it cost to replace it, and who should do the job?
The Harley-Davidson drive belt replacement cost can vary widely depending on your bike’s model, where you live, whether you do it yourself, and the quality of parts you choose. On average, most riders spend between $200 and $600 for a full replacement. That might sound steep, but when you consider the engineering behind Harley’s belt drive system—designed for durability, low maintenance, and quiet operation—it’s a worthwhile investment. In this guide, we’ll break down every factor that affects the cost, walk you through the process, and help you decide whether to tackle it yourself or leave it to the pros.
Whether you’re a weekend warrior or a full-time rider, understanding your Harley’s drive belt is essential. It’s not just about fixing a problem—it’s about keeping your bike running safely and efficiently. A failing belt can lead to sudden loss of power, damage to other components, or even a stranded ride. So, let’s dive into the details and make sure you’re prepared when the time comes.
Key Takeaways
- Cost Range: Expect to pay $200–$600 for a Harley-Davidson drive belt replacement, including parts and labor.
- Labor Dominates Pricing: Labor costs often make up 60–70% of the total expense, especially on complex models like touring bikes.
- DIY Can Save Money: Experienced riders can save $300+ by replacing the belt themselves with basic tools and patience.
- Belt Quality Matters: OEM (Original Equipment Manufacturer) belts last longer and perform better than cheap aftermarket alternatives.
- Maintenance Extends Life: Regular cleaning, tension checks, and alignment inspections can double the lifespan of your drive belt.
- Model Impacts Difficulty: Softail and Sportster models are easier to service than touring bikes with enclosed belts.
- Watch for Warning Signs: Squealing, slipping, or visible cracks mean it’s time for a replacement—don’t wait.
📑 Table of Contents
- Understanding the Harley-Davidson Drive Belt System
- Factors That Affect Harley-Davidson Drive Belt Replacement Cost
- DIY vs. Professional Replacement: Which Is Right for You?
- Step-by-Step Guide to Replacing a Harley Drive Belt
- How to Extend the Life of Your Harley Drive Belt
- Common Signs Your Harley Drive Belt Needs Replacement
- Conclusion
Understanding the Harley-Davidson Drive Belt System
Before we talk about cost, it’s important to understand what the drive belt actually does—and why it’s such a key part of your Harley. Unlike many motorcycles that use a chain or shaft drive, Harley-Davidson has long favored the belt drive system for its Softail, Touring, and some Sportster models. The belt transfers power from the transmission to the rear wheel, providing smooth, quiet, and reliable performance.
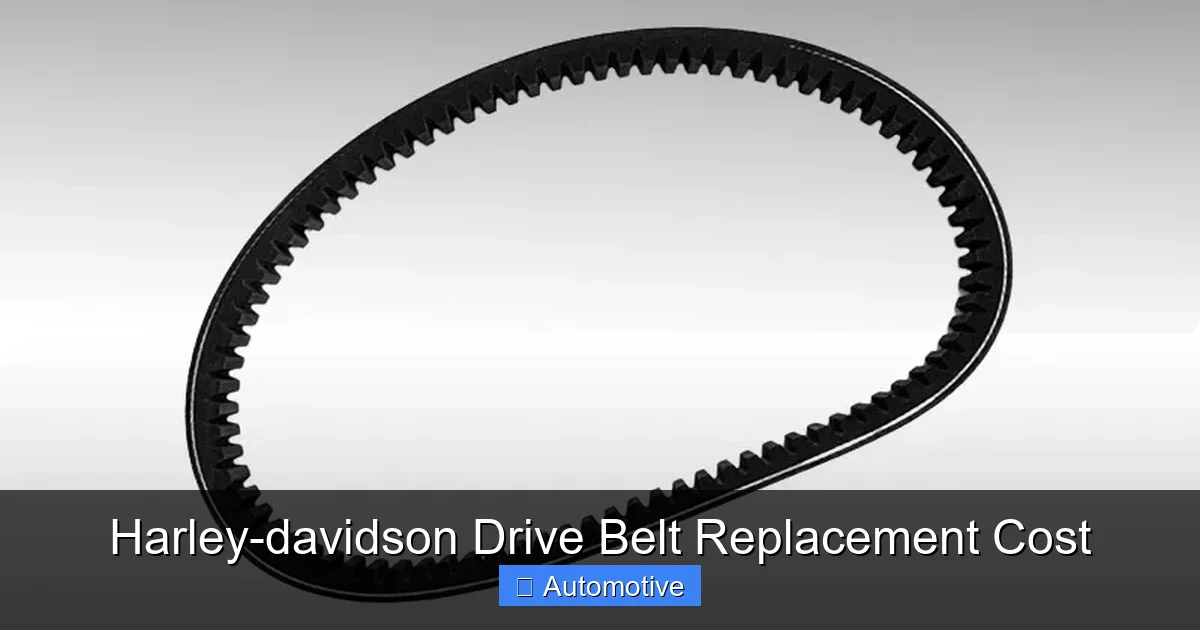
The drive belt is made of high-strength rubber reinforced with fiber cords, designed to handle thousands of miles of torque and stress. It’s enclosed in a protective cover on most models, which helps keep dirt and debris out and reduces wear. This design also means less frequent maintenance compared to chains, which need regular lubrication and adjustment.
One of the biggest advantages of a belt drive is its longevity. With proper care, a Harley drive belt can last anywhere from 50,000 to 100,000 miles. That’s significantly longer than a typical motorcycle chain, which may need replacement every 20,000 to 30,000 miles. But even the best belts don’t last forever. Over time, exposure to heat, oil, road grime, and constant tension causes the rubber to degrade. Cracks, fraying, or glazing (a shiny, hardened surface) are all signs that the belt is nearing the end of its life.
Another benefit of the belt drive is its quiet operation. If you’ve ever ridden a chain-driven bike, you know the constant whirring and clinking sound. The Harley belt, by contrast, runs almost silently, letting you enjoy the engine’s roar without added noise. This makes long rides more comfortable and enjoyable.
But the belt isn’t the only component in the system. It works in tandem with the rear pulley, tensioner, and alignment system. If any of these parts are worn or misaligned, it can cause premature belt wear or even failure. That’s why a full inspection is recommended during replacement—not just swapping the belt, but checking the entire drivetrain.
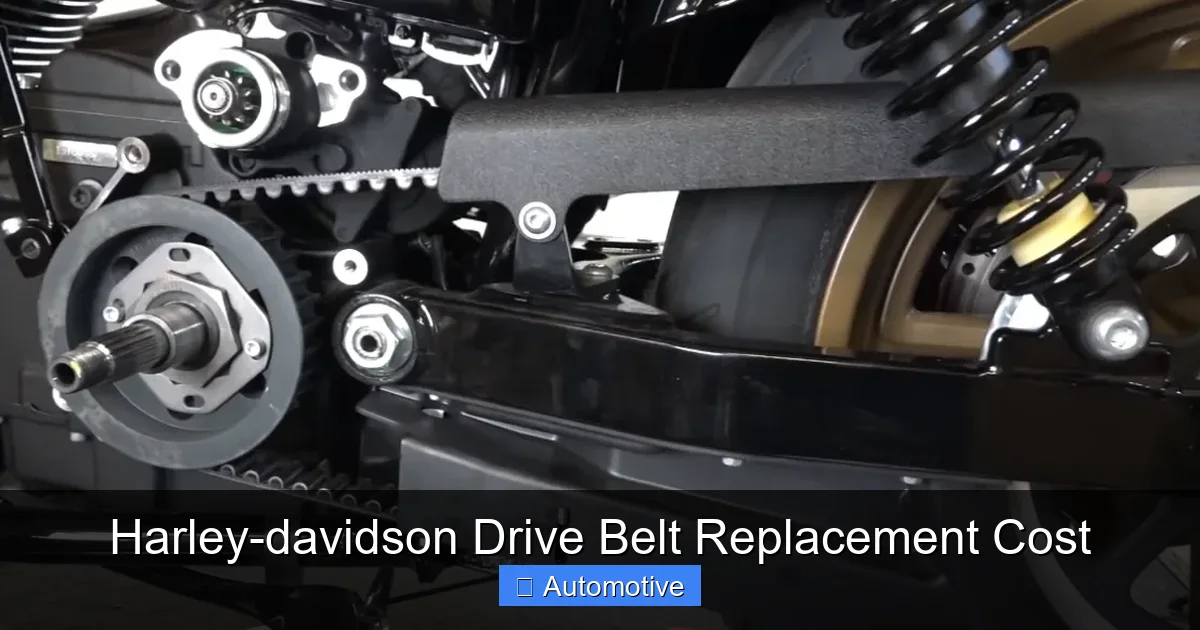
Factors That Affect Harley-Davidson Drive Belt Replacement Cost
Visual guide about Harley-davidson Drive Belt Replacement Cost
Image source: roarontheshore.com
Now that you know how the system works, let’s talk money. The cost to replace a Harley-Davidson drive belt isn’t a one-size-fits-all number. Several factors influence the final price, and understanding them can help you budget and avoid surprises.
1. Labor Costs and Shop Rates
Labor is the biggest variable in the total cost. Most Harley dealerships and independent shops charge between $100 and $150 per hour for labor. A typical belt replacement takes 2 to 4 hours, depending on the model and accessibility. On a touring bike like a Road King or Ultra Classic, where the belt is enclosed and harder to reach, labor can take closer to 4 hours. On a Softail or Sportster, it might be done in 2–3 hours.
So, if you’re paying $125/hour and the job takes 3 hours, that’s $375 just in labor. Add the cost of the belt ($80–$200), and you’re already at $455–$575. That’s why labor dominates the total expense—often making up 60–70% of the bill.
2. Bike Model and Accessibility
Not all Harleys are created equal when it comes to belt replacement. Models with enclosed belt drives—like the Electra Glide, Street Glide, or Road King—require more disassembly. You may need to remove saddlebags, exhaust components, or even the rear wheel to access the belt. This increases labor time and cost.
In contrast, Softail models like the Heritage Classic or Fat Boy have more open designs, making the belt easier to reach. Sportsters are even simpler, often requiring minimal disassembly. If you’re shopping for a used Harley and plan to do your own maintenance, consider how easy it is to service the drive belt.
3. OEM vs. Aftermarket Parts
Harley-Davidson offers OEM (Original Equipment Manufacturer) drive belts, which are designed specifically for your bike and meet strict quality standards. These belts typically cost between $120 and $200. While they’re more expensive than aftermarket options, they’re built to last and come with a warranty.
Aftermarket belts can be found for as little as $60–$80. Some are high-quality and perform just as well as OEM, but others are made with inferior materials and may fail prematurely. Cheap belts can crack, stretch, or slip, leading to poor performance and even safety issues. If you go the aftermarket route, stick with reputable brands like Gates, Dayco, or Continental.
4. Geographic Location
Where you live also affects the cost. Labor rates are higher in urban areas and regions with a high cost of living. For example, a shop in Los Angeles or New York might charge $150/hour, while a rural shop in the Midwest might charge $90/hour. Always get multiple quotes before committing to a service.
5. Additional Repairs or Upgrades
Sometimes, a belt replacement uncovers other issues. For instance, if the rear pulley is worn or the tensioner is loose, those parts may need replacement too. Some riders use the opportunity to upgrade to a wider belt (like a 20mm instead of 18mm) for better performance and longevity. These extras can add $50–$200 to the total cost.
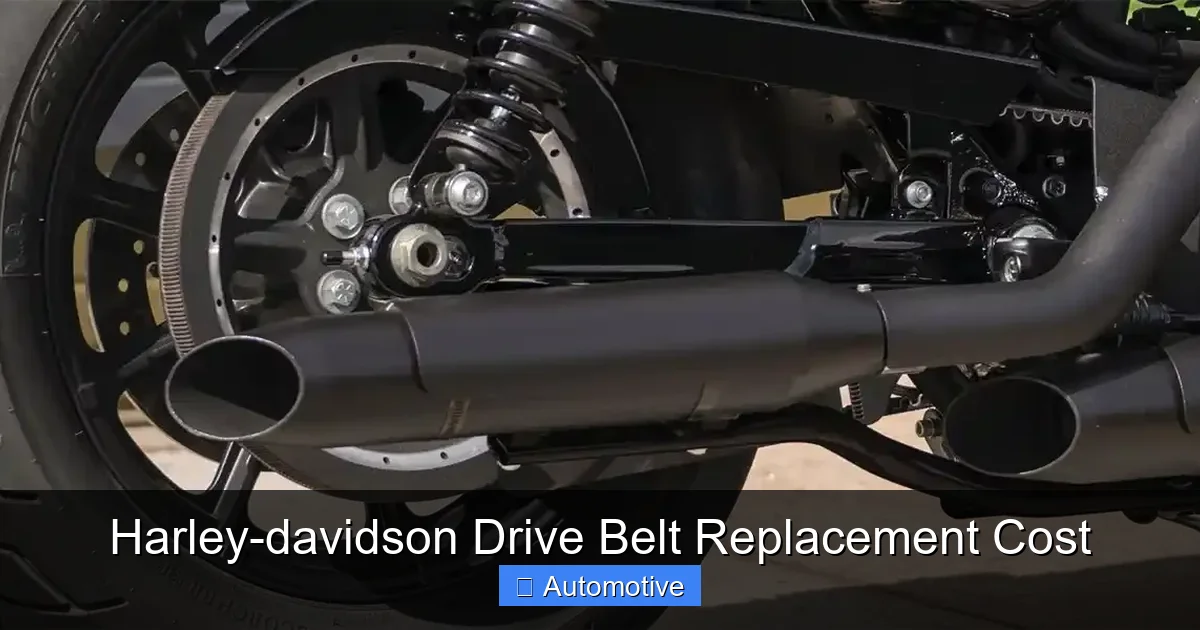
DIY vs. Professional Replacement: Which Is Right for You?
Visual guide about Harley-davidson Drive Belt Replacement Cost
Image source: harleydavidsonblog.com
One of the biggest decisions you’ll make is whether to replace the drive belt yourself or pay a professional. Both options have pros and cons, and the right choice depends on your skill level, tools, and confidence.
DIY Replacement: Save Money, Gain Skills
If you’re mechanically inclined and have basic tools, replacing the drive belt yourself can save you $300 or more. The process involves removing the rear wheel, loosening the belt tension, sliding off the old belt, and installing the new one with proper alignment and tension.
Most Harley owners find the job manageable with a service manual, a torque wrench, and a few specialty tools like a belt tension gauge. YouTube tutorials and forums like HarleyForums.com offer step-by-step guides for nearly every model.
The main advantage of DIY is cost savings. You only pay for the belt and any tools you need to buy. Plus, you gain valuable knowledge about your bike’s drivetrain, which can help with future maintenance.
However, DIY isn’t for everyone. If you’re not comfortable working on your bike or don’t have a clean, well-lit workspace, it’s easy to make mistakes. Improper tension or alignment can damage the new belt or other components. And if something goes wrong, you’re on your own.
Professional Replacement: Peace of Mind and Expertise
Taking your bike to a Harley dealership or trusted independent shop ensures the job is done correctly. Technicians have the experience, tools, and diagnostic equipment to handle the replacement efficiently. They’ll also inspect related components and make adjustments as needed.
The downside is the cost. As we’ve seen, labor can add up quickly. But for many riders, the peace of mind is worth it—especially on high-mileage bikes or complex models.
If you go the professional route, ask for a detailed estimate before work begins. Make sure it includes parts, labor, and any additional services. Also, inquire about warranties on parts and labor—most shops offer 12-month coverage.
Step-by-Step Guide to Replacing a Harley Drive Belt
Visual guide about Harley-davidson Drive Belt Replacement Cost
Image source: wheelingaway.com
Whether you’re doing it yourself or just curious about the process, here’s a general overview of how a Harley-Davidson drive belt replacement works. Note that steps may vary slightly by model, so always consult your owner’s manual or service guide.
1. Prepare Your Bike and Workspace
Start by parking your Harley on a level surface and securing it with a rear stand or lift. Remove the saddlebags if your model has them. Gather your tools: socket set, torque wrench, belt tension gauge, and a new OEM or high-quality aftermarket belt.
2. Remove the Rear Wheel
Loosen the axle nut and remove the rear wheel. This gives you access to the belt and pulley. Be careful not to damage the brake rotor or axle.
3. Loosen Belt Tension
Most Harley models use an adjustable tensioner. Loosen the tensioner bolts to release pressure on the belt. This allows you to slide the belt off the pulley.
4. Remove the Old Belt
Carefully slide the old belt off the rear pulley. Inspect it for cracks, fraying, or glazing. Take note of how it was routed—this will help when installing the new one.
5. Install the New Belt
Slide the new belt onto the pulley, ensuring it’s seated properly in the grooves. Make sure the belt is aligned with the front pulley—misalignment can cause premature wear.
6. Adjust Tension and Reassemble
Use a belt tension gauge to set the correct tension. Harley specifies a tension range (usually 10–15 lbs of force) in the service manual. Tighten the tensioner bolts to the specified torque. Reinstall the rear wheel and axle, then torque the axle nut to spec.
7. Test Ride and Final Check
Take a short test ride to ensure the belt is running smoothly. Listen for unusual noises and check for slipping. After 50–100 miles, recheck the tension and make adjustments if needed.
How to Extend the Life of Your Harley Drive Belt
Replacing a drive belt is one thing—preventing premature wear is another. With a few simple maintenance habits, you can double the lifespan of your belt and avoid costly replacements.
Keep It Clean
Dirt, oil, and road grime are the enemies of your drive belt. Regularly clean the belt and pulley with a soft brush and mild soap. Avoid using harsh chemicals or high-pressure washers, which can damage the rubber.
Check Tension Regularly
Belt tension should be checked every 5,000 miles or during routine oil changes. A loose belt can slip and wear quickly; a tight belt puts extra stress on the drivetrain. Use a tension gauge for accuracy.
Inspect for Alignment
Misaligned pulleys cause uneven wear. If you notice the belt wearing more on one side, have the alignment checked by a professional. This is especially important after rear suspension work or wheel changes.
Avoid Oil and Grease
Oil contamination is a major cause of belt failure. If your primary chain or engine leaks oil, have it repaired immediately. Even small amounts can degrade the belt over time.
Store Your Bike Properly
If you store your Harley for long periods, use a bike cover to protect the belt from UV rays and moisture. Consider using a battery tender to keep the electrical system healthy.
Common Signs Your Harley Drive Belt Needs Replacement
Don’t wait for a catastrophic failure. Watch for these warning signs that your drive belt is nearing the end of its life:
- Squealing or Squeaking: A high-pitched noise during acceleration often indicates a loose or glazed belt.
- Slipping Under Load: If the bike feels like it’s losing power or the engine revs without moving, the belt may be slipping.
- Visible Cracks or Fraying: Inspect the belt regularly. Small cracks are normal, but deep or widespread cracking means it’s time for a replacement.
- Glazing: A shiny, hardened surface on the belt indicates overheating and wear.
- Uneven Wear Patterns: If one side of the belt is more worn than the other, alignment may be off.
If you notice any of these signs, don’t delay. A failing belt can damage the pulley, tensioner, or even the transmission. Replacing it early saves money and prevents breakdowns.
Conclusion
The Harley-Davidson drive belt replacement cost is a necessary expense for any serious rider. While prices range from $200 to $600, the investment ensures your bike continues to deliver the smooth, reliable performance Harley is known for. By understanding the factors that affect cost—labor, model, parts quality, and location—you can make informed decisions and avoid overpaying.
Whether you choose to do it yourself or hire a professional, regular maintenance and early detection of wear can extend the life of your belt and save you money in the long run. Keep it clean, check the tension, and listen to your bike. With proper care, your Harley’s drive belt will keep you riding strong for tens of thousands of miles.
Remember, your Harley isn’t just a motorcycle—it’s a lifestyle. Taking care of it means more than just oil changes and tire rotations. It means understanding every component, from the engine to the drive belt, and giving it the attention it deserves. So the next time you hear that deep rumble, know that your belt is working silently in the background, keeping the ride smooth and the journey unforgettable.
Frequently Asked Questions
How often should I replace my Harley-Davidson drive belt?
Most Harley drive belts last between 50,000 and 100,000 miles, depending on riding conditions and maintenance. Check your owner’s manual for specific recommendations and inspect the belt regularly for wear.
Can I replace the drive belt myself?
Yes, if you have basic mechanical skills and tools. The job requires removing the rear wheel and adjusting tension, but many riders successfully do it at home. Always use a service manual and torque wrench for accuracy.
Is an OEM belt worth the extra cost?
OEM belts are designed specifically for your Harley and typically last longer than cheap aftermarket options. While they cost more upfront, they offer better performance and reliability, making them a smart long-term investment.
What happens if my drive belt breaks while riding?
A broken belt will cause immediate loss of power to the rear wheel, leaving you stranded. It can also damage the pulley or tensioner. Always carry a roadside assistance plan and inspect your belt regularly to prevent failure.
Can I use a wider belt for better performance?
Some riders upgrade to a 20mm belt for increased durability and torque capacity. However, this may require modifications to the pulley or tensioner. Consult a Harley specialist before making changes.
Does insurance cover drive belt replacement?
Standard motorcycle insurance does not cover wear-and-tear items like drive belts. However, mechanical breakdown insurance or extended warranties may cover the cost if the failure is due to a manufacturing defect.